
1. Introduction
The Olympus VN-900 is a compact and lightweight digital voice recorder designed for convenient audio capture and organization. It features digital recording capabilities, multiple folders for message management, and customizable alarms to assist with daily tasks and reminders.
Key features include:
- Four folders for organizing and storing notes, with up to 100 messages per folder.
- Up to 20 customizable alarms for reminders.
- LCD display showing remaining record time, date, time, voice-activation mode, play mode, microphone sensitivity, and battery status.
- Voice activation for hands-free recording, starting when sound is detected.
- External microphone and earphone jacks for expanded functionality.
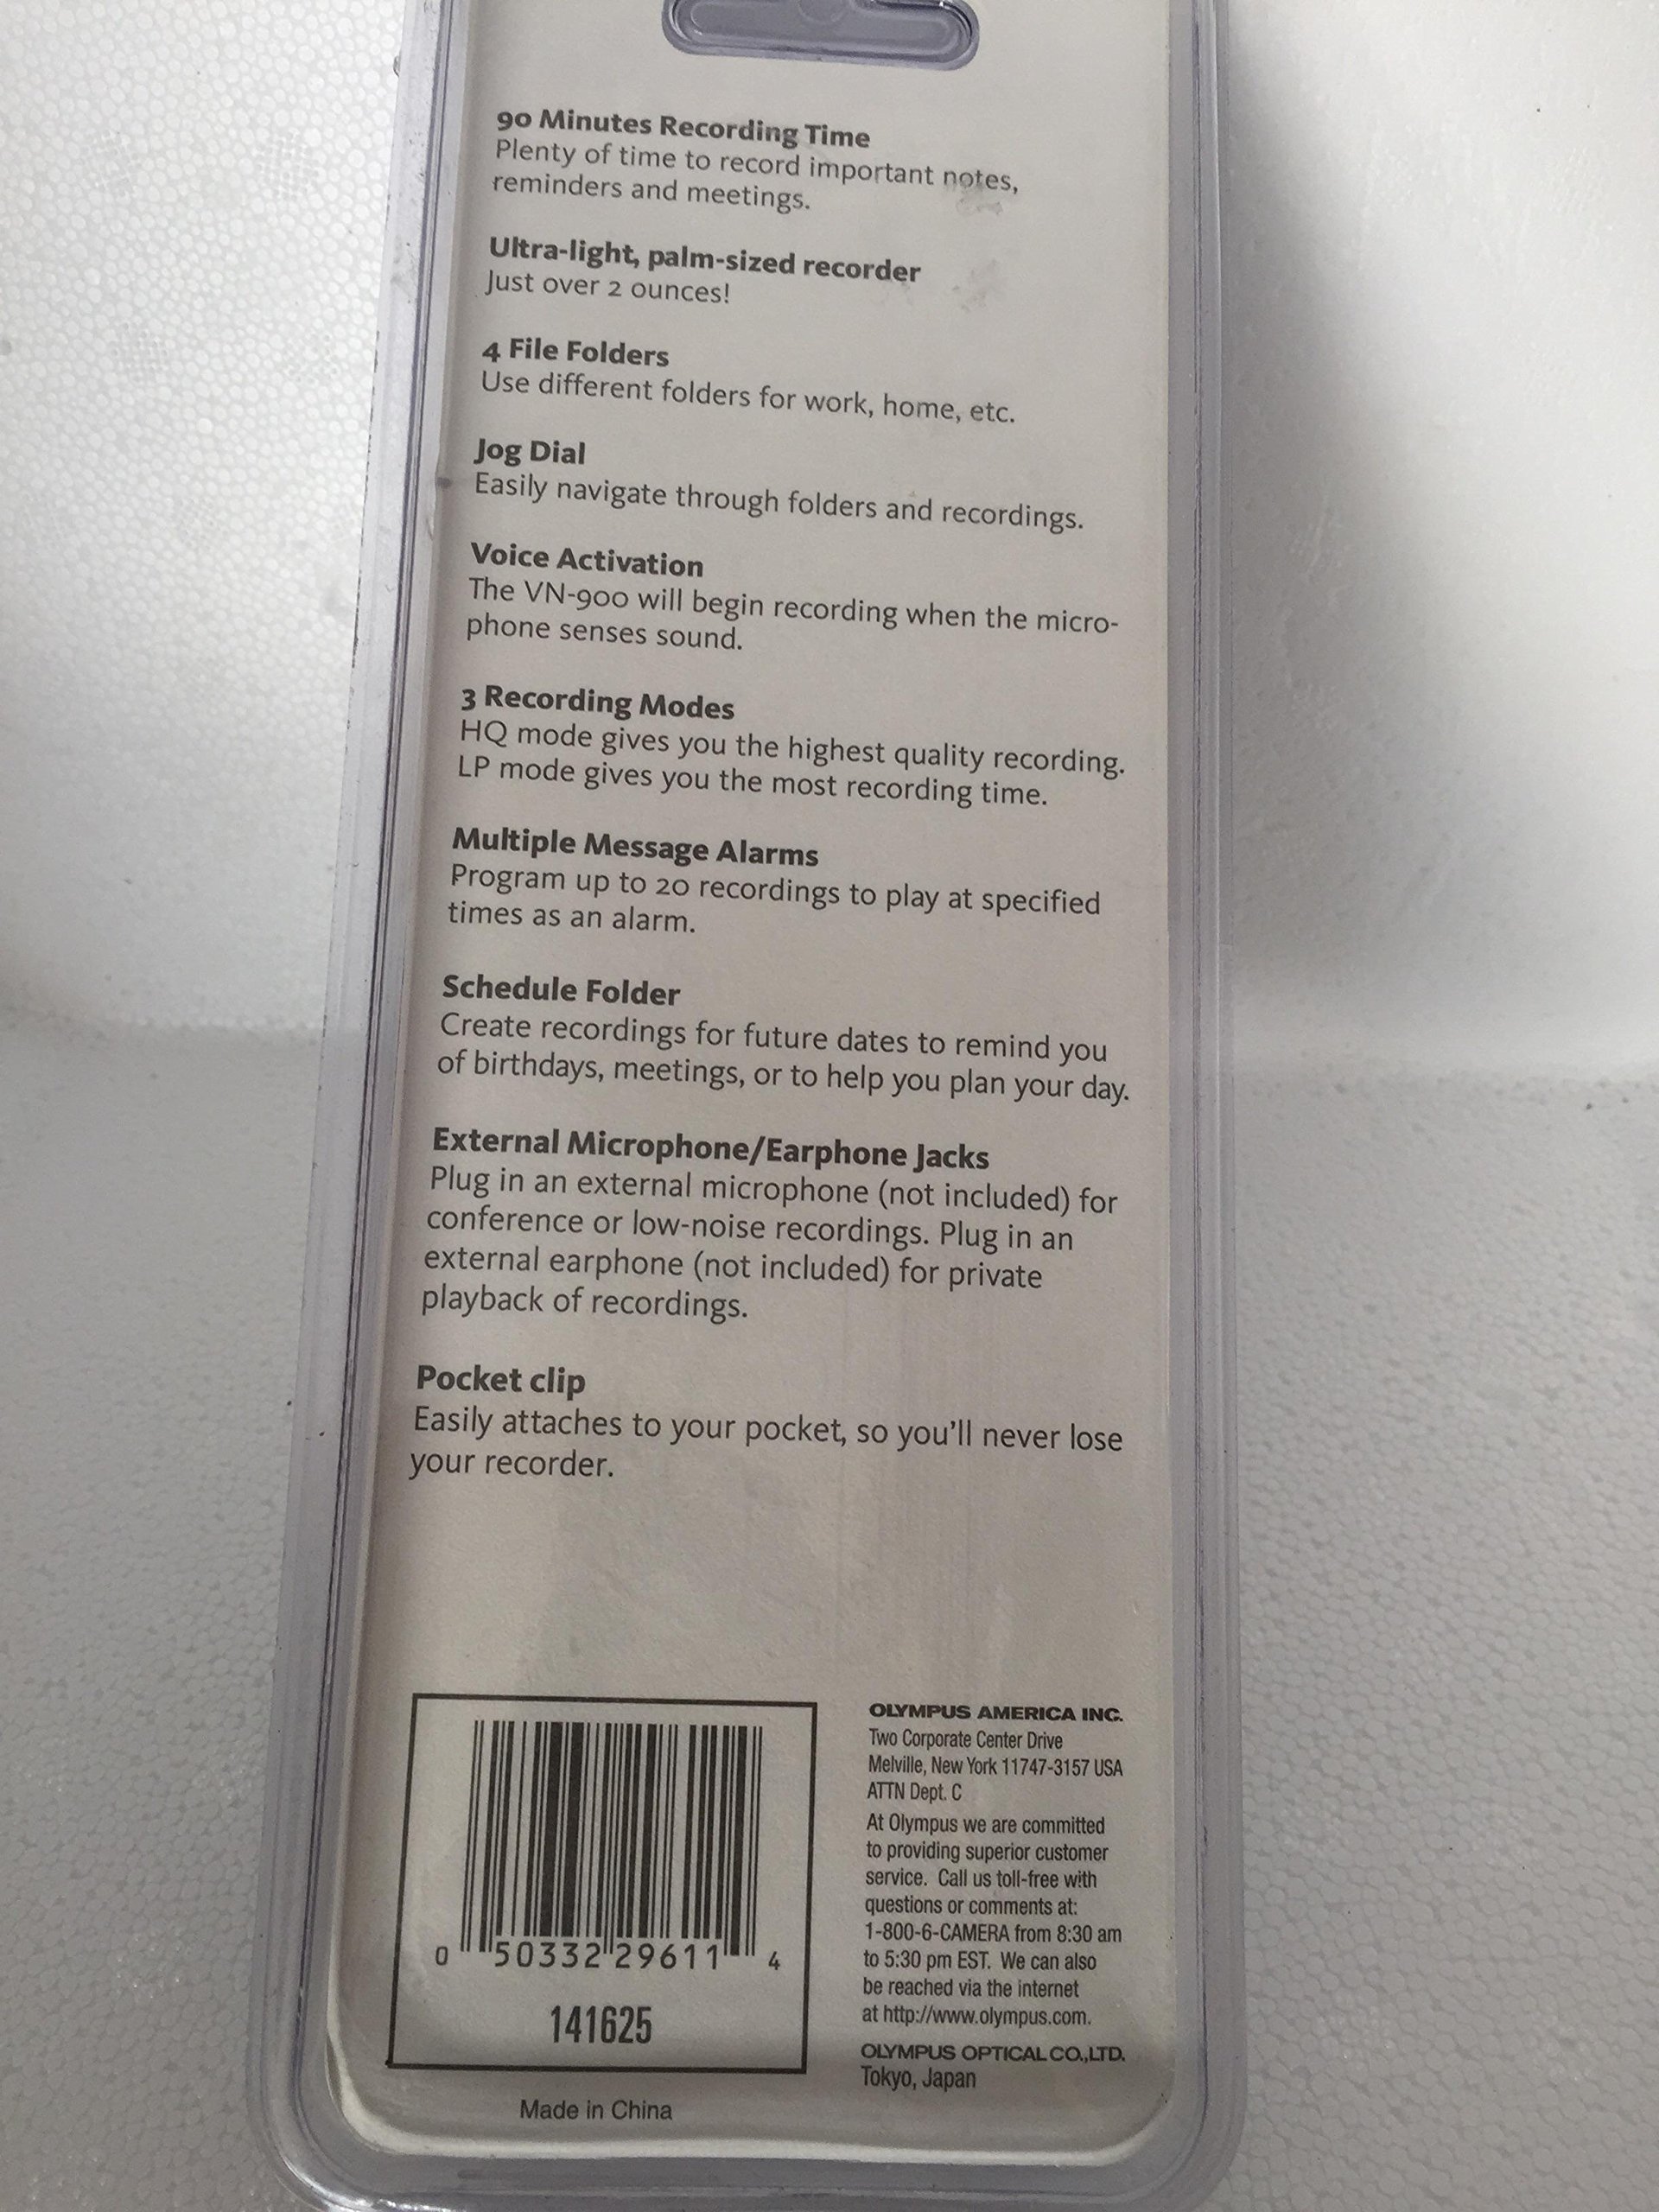
Figure 1: Olympus VN-900 Digital Voice Recorder in its retail packaging, showing the device and included AAA batteries.
2. Setup
2.1 Battery Installation
The VN-900 requires two AAA batteries for operation. Ensure correct polarity when inserting the batteries.
- Locate the battery compartment cover on the back of the device.
- Slide the cover in the direction indicated by the arrow to open it.
- Insert two AAA batteries, matching the positive (+) and negative (-) terminals as shown inside the compartment.
- Replace the battery compartment cover, ensuring it clicks securely into place.

Figure 2: Side view of the Olympus VN-900, indicating potential location for battery compartment or manufacturing details.
2.2 Initial Power On
After installing batteries, press and hold the POWER button (if available, otherwise the PLAY button) to turn on the device. The LCD display will illuminate. You may be prompted to set the date and time upon first use.
3. Operating Instructions
3.1 Recording
To begin recording:
- Select a folder (A, B, C, or D) using the MENU/FOLDER button.
- Press the REC button to start recording. The REC indicator will light up.
- Speak clearly into the built-in microphone.
- To pause recording, press the REC button again. Press it once more to resume.
- To stop recording, press the STOP button.
3.2 Voice Activated Recording (VCVA)
The Voice Control Voice Actuator (VCVA) function allows the recorder to start and stop recording automatically in response to sound, conserving memory and battery life.
- Access the menu and navigate to the VCVA setting.
- Enable VCVA and adjust the sensitivity level as needed.
- Press REC. The recorder will now enter standby mode and begin recording when sound is detected.
3.3 Playback
To play back a recorded message:
- Ensure the recorder is in stop mode.
- Use the FOLDER button and navigation controls to select the desired folder and message.
- Press the PLAY button to start playback.
- Adjust the volume using the +/- buttons.
- Press STOP to end playback.
3.4 Organizing Messages
The VN-900 features four folders (A, B, C, D) to categorize your recordings. Folder D is specifically for scheduled recordings/alarms. Each folder can store up to 100 messages.
- Use the MENU/FOLDER button to cycle through folders.
- Record messages into the appropriate folder for easy retrieval.
3.5 Setting Alarms
You can program up to 20 alarms to play specific recordings at set times.
- Navigate to the alarm settings in the menu.
- Select an alarm slot and set the desired time and date.
- Assign a specific recorded message from any folder to play as the alarm sound.
- Ensure the alarm is activated.
4. Maintenance
4.1 Battery Replacement
When the battery indicator on the LCD display shows low power, replace both AAA batteries promptly to avoid data loss or interruption of service. Refer to Section 2.1 for installation instructions.
4.2 Cleaning
To clean the device, gently wipe the exterior with a soft, dry cloth. Do not use liquid cleaners, solvents, or abrasive materials, as these can damage the surface or internal components.
4.3 Storage
Store the voice recorder in a cool, dry place away from direct sunlight, extreme temperatures, and high humidity. If storing for an extended period, remove the batteries to prevent leakage.
5. Troubleshooting
This section addresses common issues you might encounter with your Olympus VN-900.
5.1 Device Does Not Power On
- Check Batteries: Ensure batteries are correctly inserted with the proper polarity. Replace with fresh AAA batteries if they are depleted.
- Battery Compartment: Verify the battery compartment cover is securely closed.
5.2 Cannot Record
- Memory Full: Check the remaining recording time on the LCD. If memory is full, delete unnecessary messages.
- Hold Function: Ensure the hold switch (if present) is not activated, which prevents accidental operation.
- Battery Level: Recording may be disabled if battery power is too low. Replace batteries.
5.3 Poor Sound Quality During Recording or Playback
- Microphone Obstruction: Ensure the built-in microphone is not covered.
- Recording Environment: Record in a quiet environment. Excessive background noise can affect quality.
- Microphone Sensitivity: Adjust microphone sensitivity settings in the menu to suit the recording situation.
- Speaker/Earphone Connection: If using earphones, ensure they are fully plugged into the jack. Check earphone functionality with another device.
6. Specifications
| Feature | Specification |
|---|---|
| Model Number | VN-900 (141625) |
| Brand | OM SYSTEM (Olympus) |
| Recording Time (Digital) | Up to 90 minutes (LP mode) |
| Memory Storage Capacity | 4 GB |
| Folders | 4 (A, B, C, D), 100 messages per folder |
| Batteries | 2 x AAA batteries required |
| Product Dimensions | 8.89 x 2.54 x 24.13 cm (3.5 x 1.0 x 9.5 inches) |
| Weight | 90.72 g (3.2 oz) |
| Hardware Interface | USB |
| Microphone Form Factor | Built-In |
| Headphones Jack | 3.5 mm |
| Format | WAV |
Note: While specifications list USB hardware interface, some user feedback indicates this model may not directly connect to a computer for file transfer. Please refer to the manufacturer's official documentation for connectivity details.
7. Warranty and Support
For warranty information, technical support, or service inquiries, please refer to the official OM SYSTEM (Olympus) website or contact their customer service department. Keep your purchase receipt as proof of purchase.
You can typically find support resources, FAQs, and contact details on the manufacturer's website:


