ANTMAINER U3 Bitmain User Guide

1. The First Glance
AntMiner U3 is the third generation of USB miner. The U3 utilizes 4 of BITMAIN’s latest generation BM 1382 chips in high quality, domed case. Setup consists of plugging in the USB and power cables and running AntMiner Combiner.

2. Accessories and Connection
2.1 Accessories
The accessories of AntMiner U3 including: 12V AC/DC power brick of 6A, but AC power line not included * 1 USB connection cable * 1
2.2 Connection
a) Plug one side of 12V AC/DC power brick into U3, and plug the other side into AC input.
b) Connect U3 and the computer via the USB line.
Noted: Connection order must be “a)” first, and then “b)”. Order cannot be reversed.
To prevent the interruption of USB power supply, please ensure the computer is not in standby or sleep mode. Otherwise, the Cgminer wouldn’t find the miner even make it ZOMBIE.
3. Install Driver
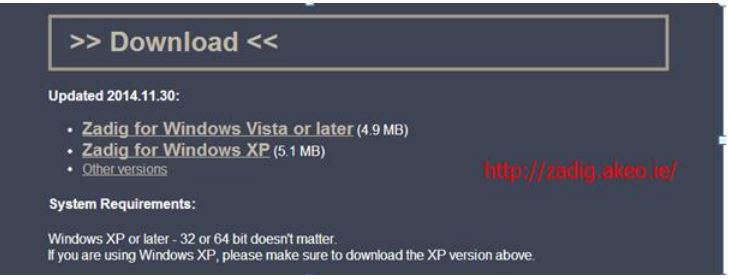
Cgminer for antminer-U3: https://www.bitmaintech.com/Support/Antminer USB/Cgminer/cgminer-run-windows-20150107.rar Open sourced code of Cgminer for antminer-U3: https://github.com/bitmaintech/cgminer CP2102 Driver: http://www.silabs.com/products/mcu/Pages/USBtoUARTBridgeVCPDrivers .aspx zadig: http://zadig.akeo.ie/
1> Install CP210x_VCP driver.
2> Plug in Antminer-U3.
3> Open Zadig and click “Options -> List All Devices”
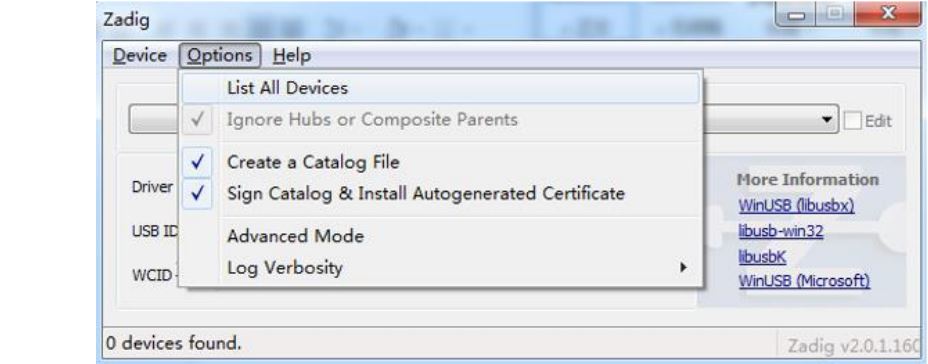
4> Select CP2102 USB to UART Bridge Controller, and then click “Replace Driver”

XP:
a. Install CP210x_VCP driver.
 b. zadig

WIN 7:
a. Install CP210x_VCP driver.
b. zadig c.
c.
Win 8:
a. Install CP210x_VCP driver
 b. zadig

5> Run cgminer following the below: cgminer.exe –bmsc-options 115200:0.54 o 50.31.149.57:3333 -u AntMiner -p 123 –bmsc-voltage 0830 –bmsc-frees 0982 –stratify 6 some pools: p2p.antpool.com:25; solo.antpool.com:3333
Noted:
- a) Please note that “115200” stands for the “Baud Rate”, and “0.65” means “timeout” .It changes with Freq you set to guarantee the speed. Details see chart 2.
- b) `–startdiff 6′ is to make the low hash rate miners getting a proper difficulty asap, which is still under developing by Antpool
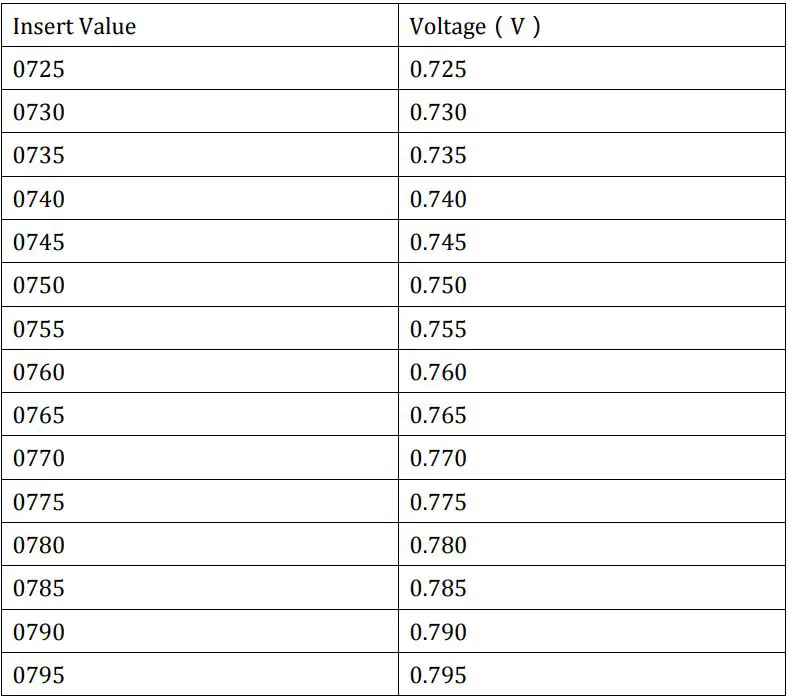
- c) Core Voltage can be changed by setting the figure “0830” Operating frequency can be changed by setting the figure “0982”
4. Core voltage & Operating Frequency Adjustments
Core voltage and operating frequency can be adjusted by software. 1> Core Voltage can be changed by setting the figure “0800”.
The voltage varieties from 0.725 to 0.85v, 0.75v by default, and min unit is 0.005v.Higher voltage supports higher Freq. As 0.75v,U3 can work not more than 225M.
Please refer below chart:
2> Operating frequency can be changed by setting the figure “0882”. Please refer below chart: Eg. bms-coptions 115200:0.57 –bmsc-freq 1286

![]()
Documents / Resources
 |
ANTMAINER U3 Bitmain [pdf] User Guide U3, Bitmain |


