1. Product Overview
The V320 OBD2 Scanner is a plug-and-play diagnostic tool designed for gasoline cars supporting OBD II/EOBD standard protocols. It allows users to quickly read vehicle fault information and parameters, perform engine fault diagnosis, clear fault codes, and conduct various performance tests.

Key Features:
- Engine Fault Diagnosis and MIL (Malfunction Indicator Lamp) turn-off.
- Performance Test Function (Acceleration, Braking, Distance, Meter data).
- I/M Ready Status for emissions-related monitor checks.
- Real-Time Curve display for car speed, load value, coolant temperature, and engine speed.
- Comprehensive Car Inspection: Data Stream, Vehicle Information, O2 Sensor, EVAP, Voltage.
- Built-in Fault Code Library for quick DTC definitions.
- Multi-language support.
2. Setup and Connection
The V320 OBD2 Scanner is designed for plug-and-play operation. It requires no batteries as it draws power directly from the vehicle's OBD2 port.
Locating the OBD2 Port:
The 16-pin OBD2 interface is typically located under the dashboard on the driver's side. Common locations include:
- Under the dashboard, to the left of the steering column.
- Under the dashboard, to the right of the steering column.
- Near the center console.
- In the glove compartment.

Connection Steps:
- Ensure the vehicle's ignition is OFF.
- Locate the 16-pin OBD2 diagnostic port in your vehicle.
- Plug the V320 scanner's connector firmly into the vehicle's OBD2 port.
- Turn the vehicle's ignition to the ON position (engine can be off or running, depending on the desired diagnostic function). The scanner will power on automatically.
3. Operating Instructions
The V320 scanner features a 2.8-inch color display and intuitive button controls for navigation.

Navigation and Controls:
- Direction Keys (Up, Down, Left, Right): Used to navigate through menus and select options.
- OK Button: Confirms selections or enters sub-menus.
- ESC Button: Returns to the previous screen or exits a function.
- DAT Button: Likely for Data Stream access.
- DTC Button: Likely for direct access to Diagnostic Trouble Codes.
Main Functions:
The main menu provides access to various diagnostic functions:
- Read DTC (Diagnostic Trouble Codes): Retrieves current, pending, and permanent diagnostic trouble codes from the vehicle's ECU.
- Clear DTC: Erases diagnostic trouble codes from the vehicle's memory and turns off the Malfunction Indicator Lamp (MIL). Use with caution after addressing the underlying issue.
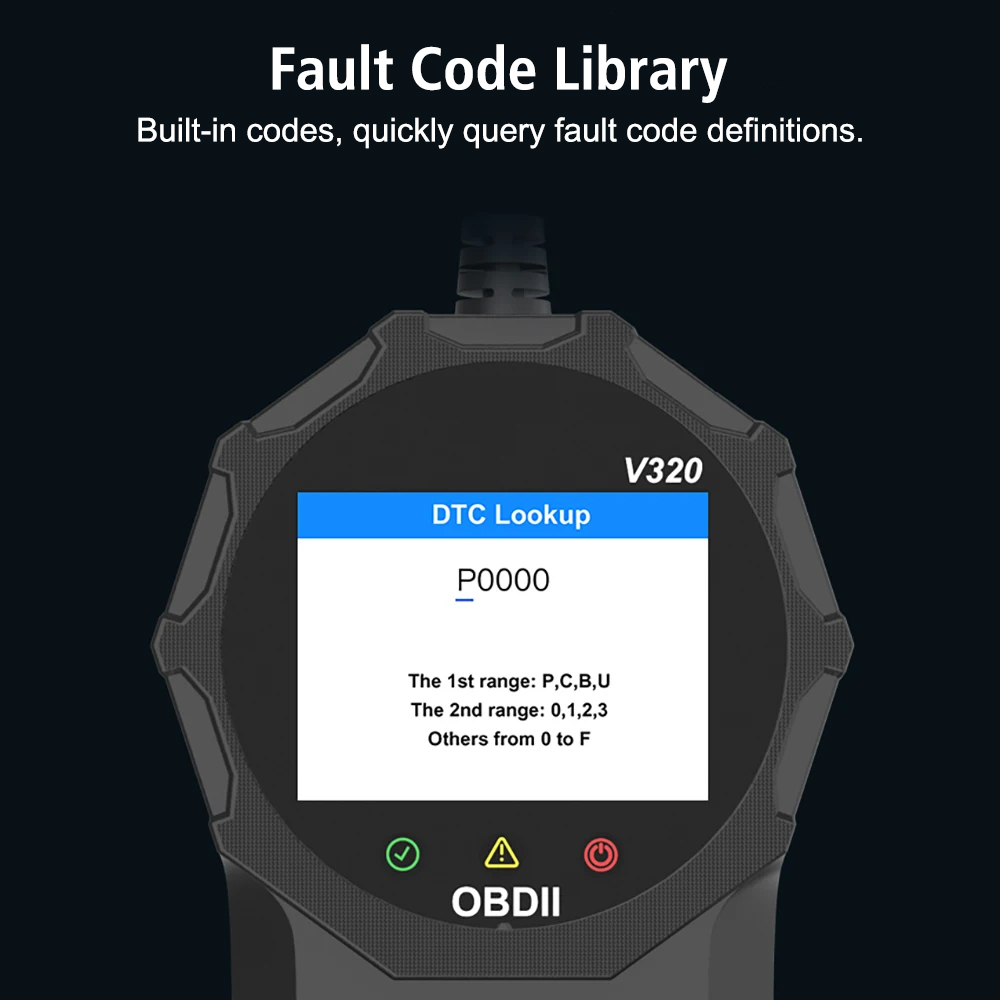
Figure 5: Visual representation of clearing a fault code. - DTC Lib (Fault Code Library): Allows you to look up definitions for specific diagnostic trouble codes.

Figure 6: DTC Lookup interface for querying fault code definitions. - Data Stream / Live Data: Displays real-time operational parameters from the vehicle's sensors and components. This can include engine RPM, vehicle speed, coolant temperature, fuel system status, and more.
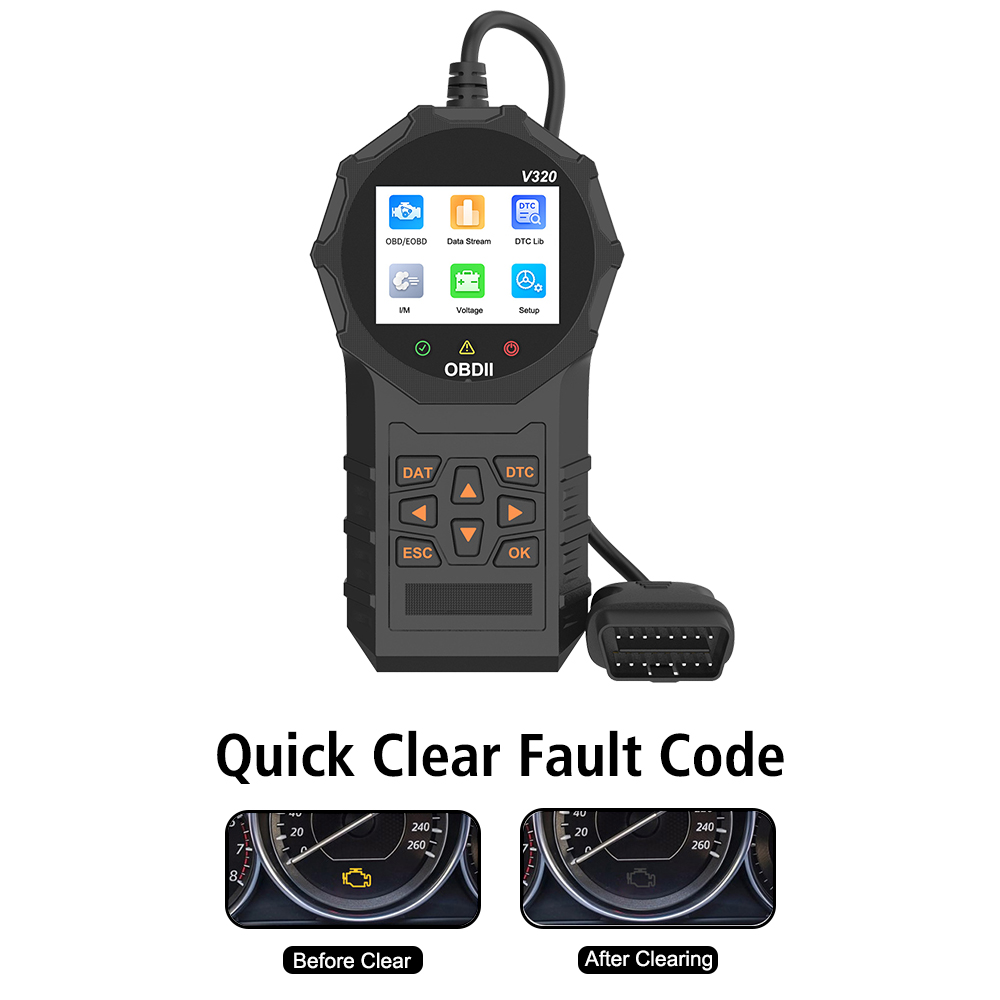
Figure 7: Comprehensive car inspection data display. - I/M Ready Status: Checks the readiness of various emissions-related monitors to determine if the vehicle is ready for an emissions test.
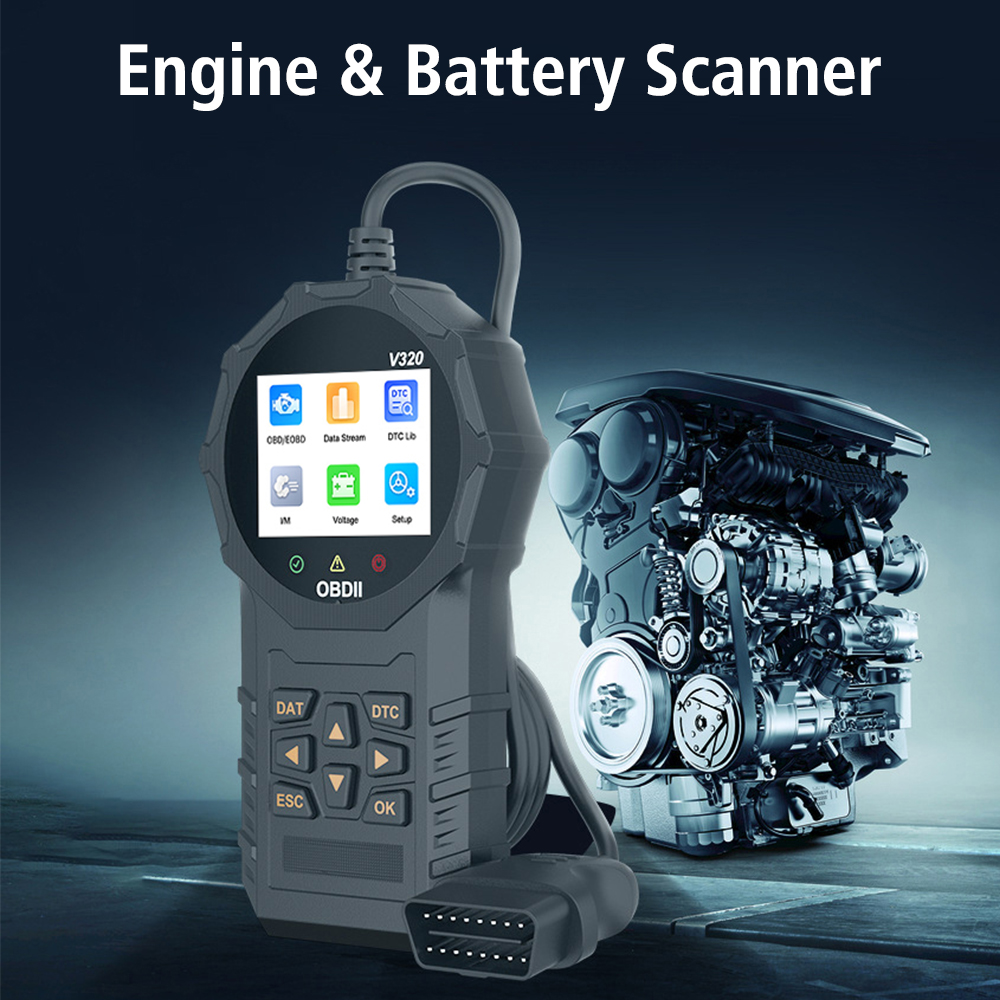
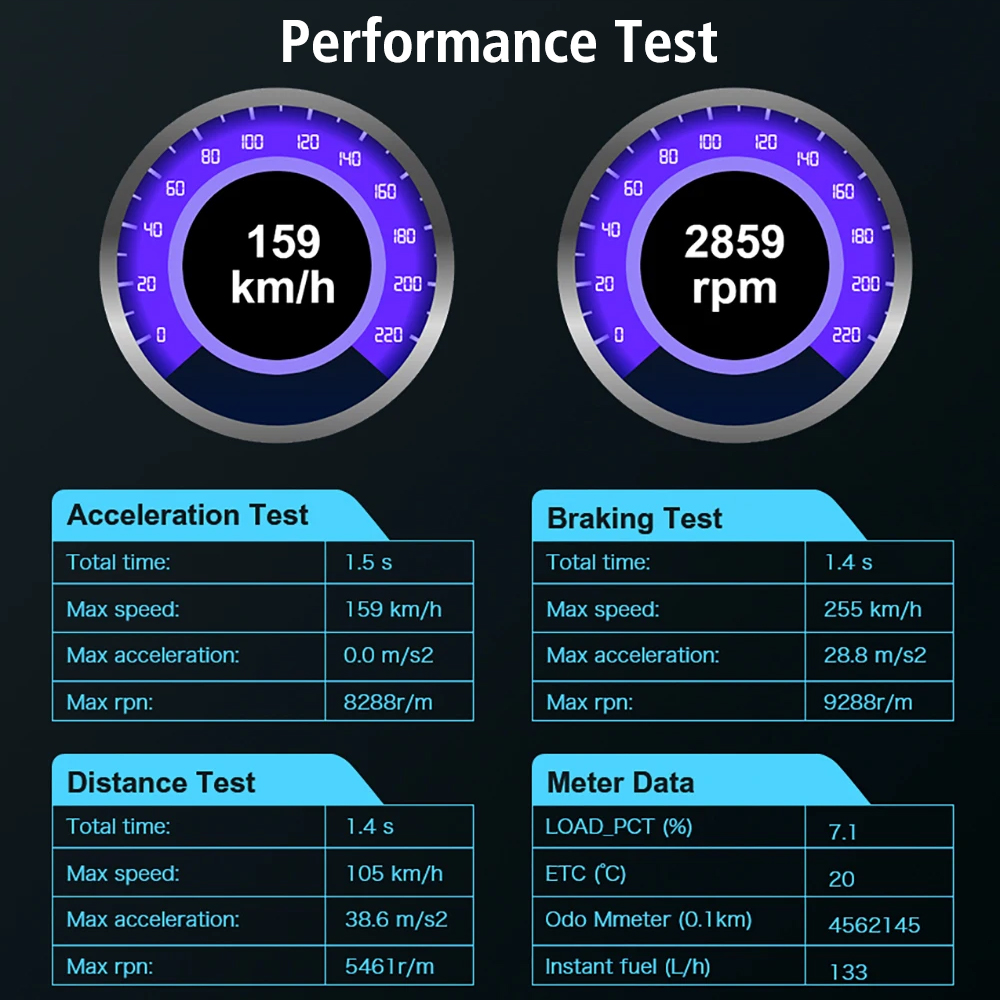
Figure 8: I/M Readiness status screen. - Performance Test: Measures vehicle performance metrics such as acceleration, braking, and distance. It also provides meter data like load percentage and odometer readings.
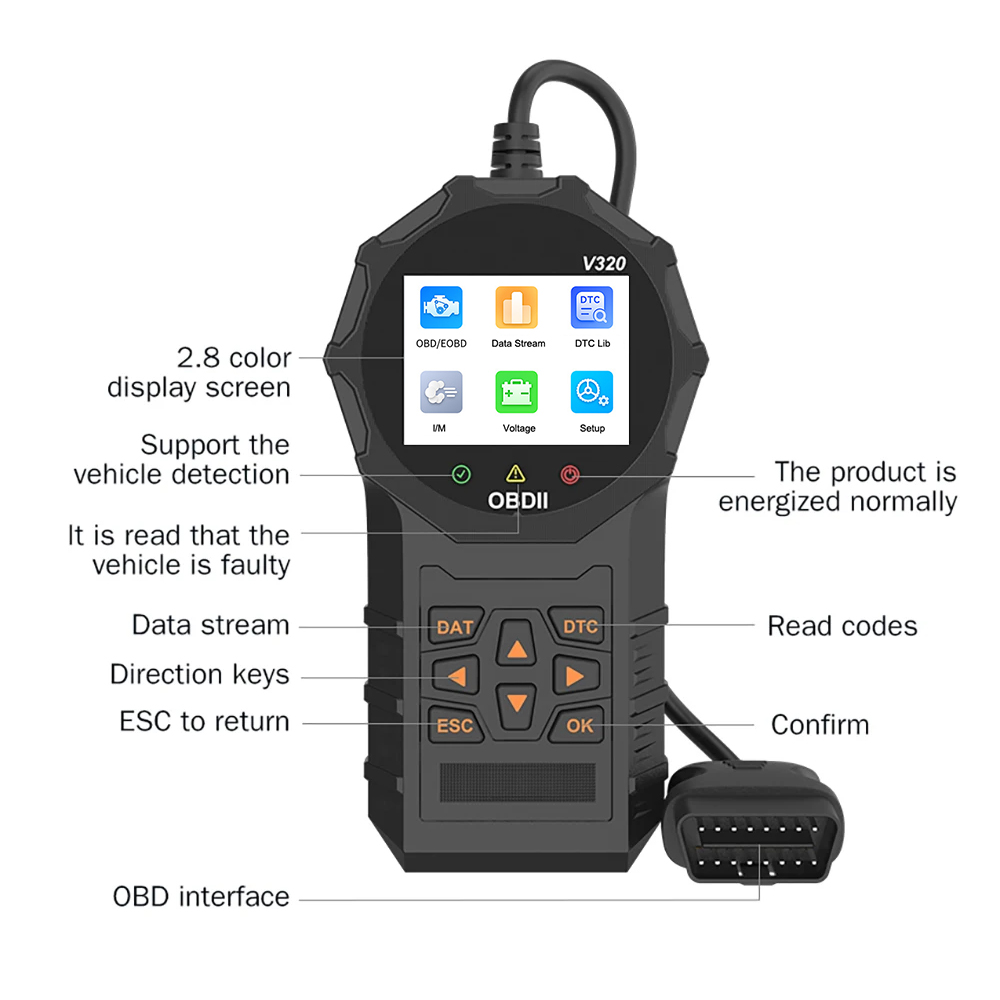
Figure 9: Performance test results display. - Real Time Curve (RT Curve): Displays live data parameters in a graphical format, such as engine load percentage over time.
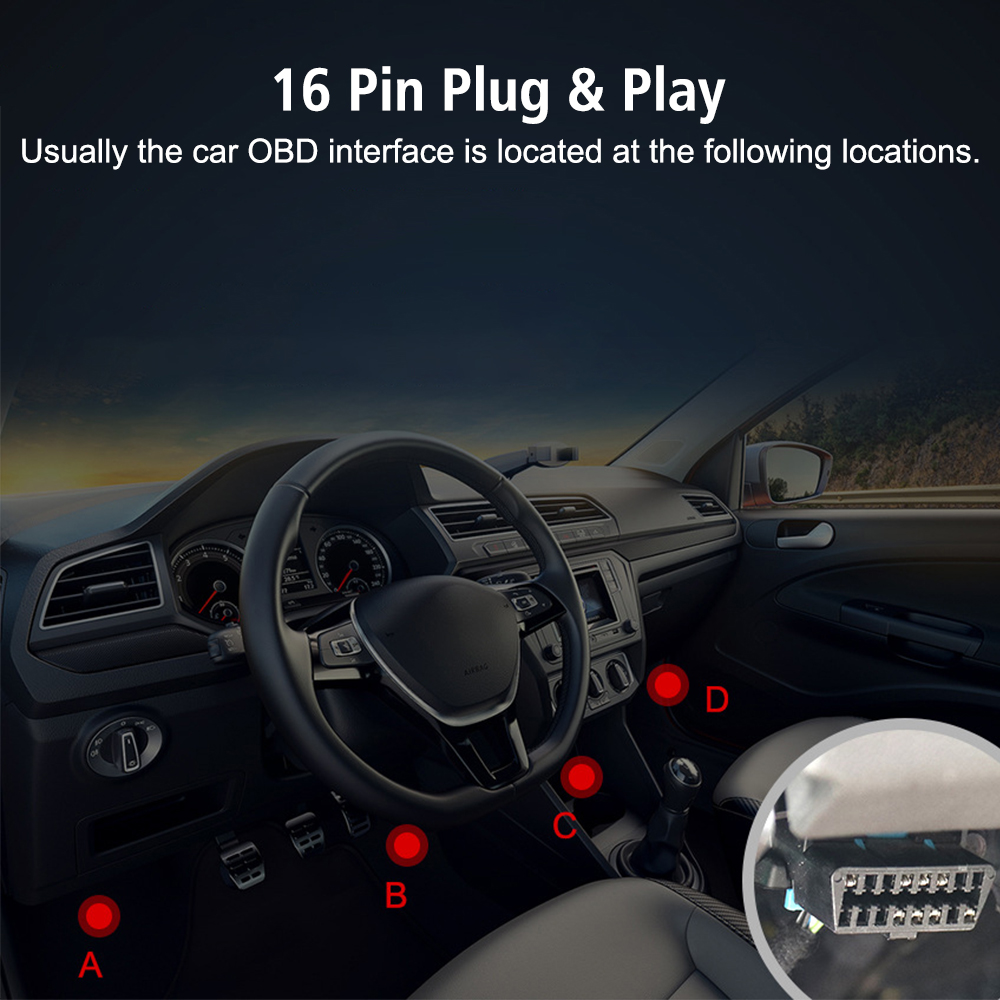
Figure 10: Real-time data displayed as a curve. - Vehicle Info: Retrieves vehicle identification number (VIN), calibration ID, and calibration verification number (CVN).
- O2 Sensor: Monitors oxygen sensor readings.
- EVAP: Monitors the Evaporative Emission Control System.
- Voltage: Displays the vehicle's battery voltage.
4. Maintenance
The V320 OBD2 Scanner requires minimal maintenance. Keep the device clean and dry. Do not expose it to extreme temperatures or direct sunlight for extended periods. Store it in a safe place when not in use to prevent physical damage to the unit or its cable.
5. Troubleshooting
Common Issues and Solutions:
- No Power/Device Not Turning On:
Ensure the OBD2 connector is securely plugged into the vehicle's port. Verify the vehicle's ignition is in the ON position. Check the vehicle's battery voltage (must be within 9-16V). - Link Error/No Communication:
Confirm the vehicle is OBD2 compliant. Ensure the ignition is ON. Check for damaged pins on the vehicle's DLC (Data Link Connector) or the scanner's connector. Try the scanner on another compatible vehicle to rule out a device issue. - Incompatible Vehicle:
The V320 scanner supports standard OBD2 protocols. However, some vehicles, especially older models, electric cars, hybrid cars, 24V trucks, or specific regional models (e.g., certain Russian, French, Japanese, or Korean cars), may not be fully compatible or may not support all OBD2 functions. This device only provides standard OBD2 functions and does not support special functions like ABS Reset or Airbag Reset.
Known Incompatibilities:
- Electric cars and Hybrid cars (e.g., Nissan Leaf).
- 24V trucks.
- Russian Cars: VAZ, UAZ, LADA.
- Ssangyong Actyon (2009-2017), Korando 2.0 TD Diesel (2013-2017), Kyron 2.0 Diesel (2010-2017), Rexton (2011-2017).
- Opel Corsa C 2004 1.3 CDTI.
- Citroen C4/C5.
- Chevrolet cars.
- Renault Clio 2/Megane/Dacia Logan.
If you encounter compatibility issues, please provide your vehicle's make, year, engine displacement, and fuel type to the seller for assistance.
6. Specifications
| Feature | Detail |
|---|---|
| Model | V320 |
| Item Type | Code Readers & Scan Tools |
| Working Voltage | DC 9~16V |
| Working Current | Approx. 46~69mA |
| Operating Environment | -20~60℃ |
| Storage Temperature | -20~60℃ |
| Language Support | English, German, Italian, Dutch, French, Spanish, Chinese, Russian |
| Dimensions (L x W x H) | 19.50 cm x 10.00 cm x 3.00 cm (7.67 in x 3.93 in x 1.18 in) |
| Weight | 0.358 kg |
| Certification | CE |
| OEM NO. | 29771 |
| Supported Protocols | SAE J1850 PWM (41.6Kbaud), SAE J1850 VPW (10.4Kbaud), ISO9141-2 (5 baud init, 10.4Kbaud), ISO14230-4 KWP (5 baud init, 10.4 Kbaud), ISO14230-4 KWP (fast init, 10.4 Kbaud), ISO15765-4 CAN (11bit ID, 500 Kbaud), ISO15765-4 CAN (29bit ID, 500 Kbaud), ISO15765-4 CAN (11bit ID, 250 Kbaud), ISO15765-4 CAN (29bit ID, 250 Kbaud) |

7. Warranty and Support
For product support, technical assistance, or warranty inquiries, please contact the seller or manufacturer directly. Keep your purchase receipt as proof of purchase.
8. User Tips
No specific user tips are available at this time. Always refer to your vehicle's service manual for specific diagnostic procedures and safety precautions.


