1. Introduction
This manual provides detailed instructions for the installation, operation, and maintenance of your DOOYA DC136N Universal Garage Door Receiver Controller. This device is designed to provide remote control functionality for roller shutters and tubular motors, enhancing convenience and security.
2. Safety Information
- Always disconnect power before performing any wiring or maintenance.
- Ensure all wiring is done by a qualified professional if you are unsure.
- Keep remote controls out of reach of children.
- Do not expose the receiver to moisture or extreme temperatures.
- Verify the motor's voltage and current requirements are compatible with the receiver.
3. Product Overview
The DOOYA DC136N is a versatile receiver controller that allows you to operate your garage door or roller shutter remotely. It comes in various configurations with different remote control options.
3.1 Components
Depending on your purchased model, your package may include:
- DC136N Receiver Controller
- Standard Remote Controls (2, 3, or 4 units)
- Thumb Remote Controls (1, 2, 3, or 4 units)
- Wireless Wall Switch (optional, included in some models)

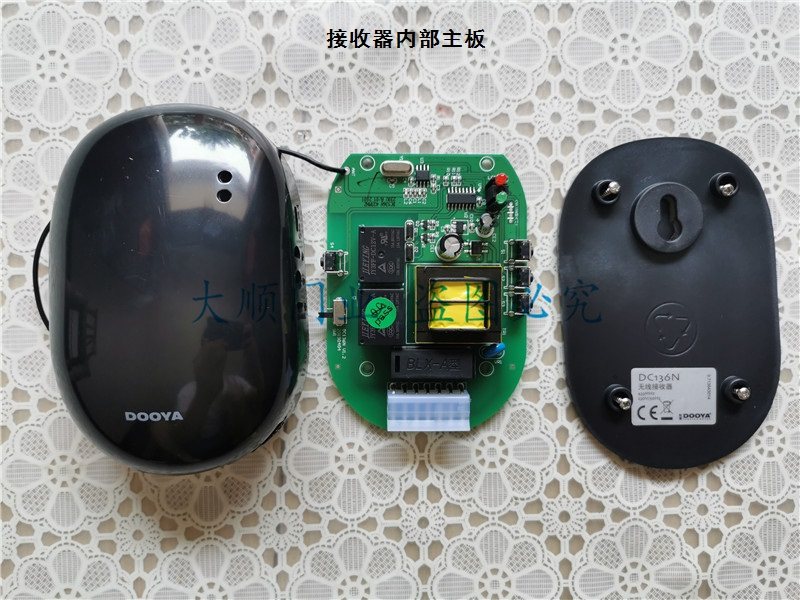
3.2 Receiver Features
- Power indicator light
- Motor and power connection ports
- Pairing button (for remote control synchronization)
- Direction reversal button
- Manual control buttons (Up, Stop, Down)
4. Specifications
| Feature | Specification |
|---|---|
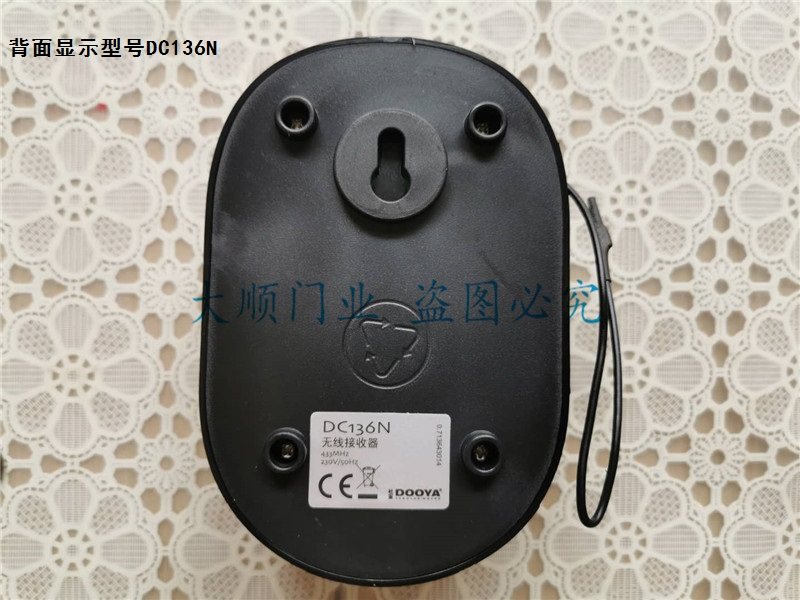
| Model Number | DC136N |
| DIY Supplies | Electrical |
| Certification | None (CE marked on device) |
| Origin | Mainland China |
| Frequency | 433.92MHz |
| Type | Receiver Controller |
| Dimensions (approx.) | 15cm (L) x 15cm (W) x 5cm (H) (Package dimensions) |
| Weight (approx.) | 0.5 kg (Package weight) |
5. Setup and Installation
5.1 Wiring Instructions
IMPORTANT: Ensure power is disconnected before proceeding with wiring. Incorrect wiring can cause damage to the device or motor, and pose a safety hazard. If you are not confident, consult a qualified electrician.
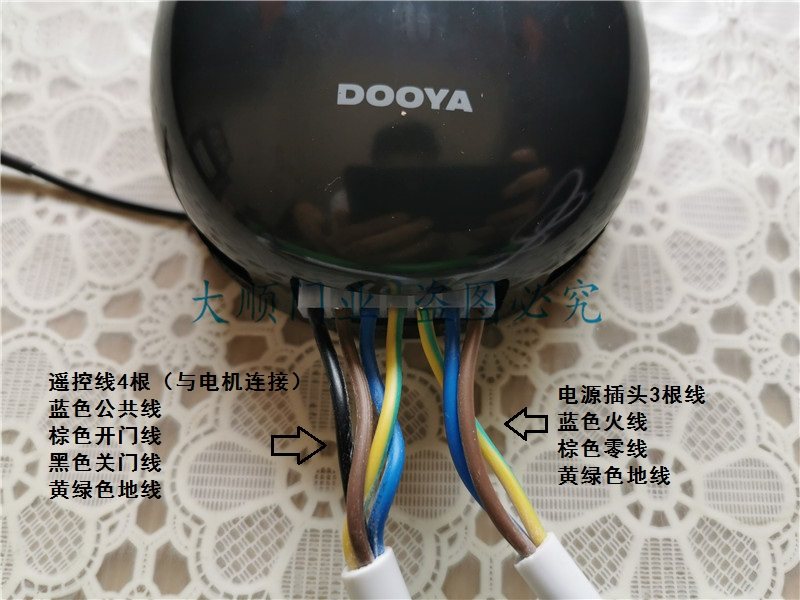
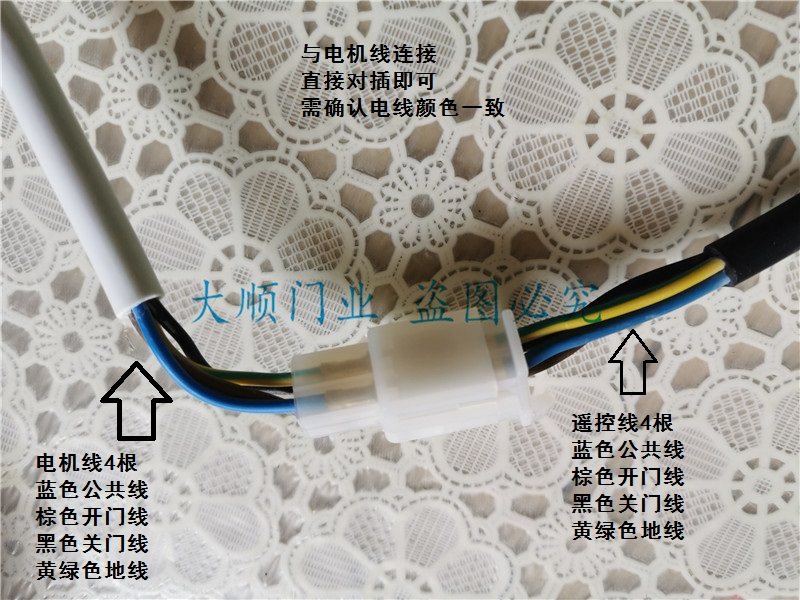
- Identify the motor cable and power supply cable.
- Connect the motor cable to the receiver's motor port. Ensure the wire colors match as follows:
- Blue wire: Common
- Brown wire: Open Door (Up)
- Black wire: Close Door (Down)
- Yellow-green wire: Ground
- Connect the power plug cable to the receiver's power port. Ensure the wire colors match as follows:
- Blue wire: Live
- Brown wire: Neutral
- Yellow-green wire: Ground
- Double-check all connections for security and correct polarity.
5.2 Pairing Remote Controls
To pair a new remote control with the DC136N receiver:
- Ensure the receiver is powered on. The red indicator light should be on.
- Locate the "Pairing Key" (对码键) on the side of the receiver (refer to Figure 2).
- Press and hold the "Pairing Key" on the receiver until the indicator light starts to flash.
- While the indicator light is flashing, press any button on the remote control you wish to pair.
- The receiver's indicator light should stop flashing and remain solid, indicating successful pairing.
- Test the remote control to ensure it operates the motor correctly.
5.3 Adjusting Motor Direction
If the motor operates in the opposite direction to the remote control commands (e.g., "Up" button makes it go down), you can reverse the direction:
- Locate the "Reversing Key" (换向键) on the side of the receiver (refer to Figure 2).
- Press and hold the "Reversing Key" for a few seconds until the motor briefly jogs or the indicator light changes.
- Test the remote control again to confirm the direction is corrected.
6. Operating Instructions
Once installed and paired, operating your roller shutter or garage door is straightforward using the remote control or the manual buttons on the receiver.
6.1 Using the Remote Control
The remote control typically features three buttons:
- Up Arrow: Moves the shutter/door upwards.
- Down Arrow: Moves the shutter/door downwards.
- Square/Stop Button: Stops the shutter/door at its current position.
Press the corresponding button to achieve the desired action. A short press is usually sufficient.
6.2 Using Manual Buttons on the Receiver
The receiver itself has three manual control buttons (Up, Stop, Down) for direct operation, useful if a remote is unavailable or for testing purposes.
- Press the top button to move the shutter/door upwards.
- Press the middle button to stop the shutter/door.
- Press the bottom button to move the shutter/door downwards.
7. Maintenance
The DOOYA DC136N receiver controller requires minimal maintenance to ensure long-lasting performance.
- Cleaning: Wipe the receiver and remote controls with a soft, dry cloth. Do not use abrasive cleaners or solvents.
- Battery Replacement (Remotes): If a remote control's range decreases or it stops responding, replace its battery. Refer to the remote's specific instructions for battery type and replacement procedure.
- Connection Check: Periodically inspect wiring connections to ensure they are secure and free from corrosion or damage.
8. Troubleshooting
If you encounter issues with your DC136N receiver, try the following troubleshooting steps:
8.1 Motor Not Responding to Remote
- Check Power: Ensure the receiver is powered on and its indicator light is illuminated.
- Check Remote Battery: Replace the remote control's battery if it's low or dead.
- Re-pair Remote: Attempt to re-pair the remote control with the receiver following the instructions in Section 5.2.
- Check Wiring: Verify all motor and power connections are secure and correctly wired.
- Test Manual Buttons: Try operating the motor using the manual buttons on the receiver. If manual operation works, the issue might be with the remote or its pairing.
8.2 Motor Operates in Wrong Direction
- Reverse Direction: Use the "Reversing Key" on the receiver to change the motor's direction (refer to Section 5.3).
- Check Motor Wiring: Ensure the brown (open) and black (close) wires from the motor are correctly connected to the receiver.
8.3 Intermittent Operation
- Signal Interference: Ensure there are no strong radio frequency sources near the receiver or remote that could cause interference.
- Remote Range: Operate the remote within its effective range.
- Loose Connections: Check all wiring connections for any looseness.
9. User Tips
- Consider mounting the receiver in a location that is easily accessible for pairing and manual operation, but protected from environmental elements.
- If using multiple remote controls, pair them one by one to avoid confusion.
- Keep a spare battery for your remote controls on hand.
10. Warranty and Support
For any questions, technical assistance, or warranty claims, please contact the seller or manufacturer directly. Keep your purchase receipt as proof of purchase.


