1. הקדמה
Thank you for choosing the COUGAR MX360 RGB Mid Tower Case. This manual provides essential information for the proper installation, operation, and maintenance of your new PC case. The MX360 RGB combines a sleek design with ARGB LED strips on the front panel, offering excellent cooling performance and support for a wide range of components, including up to a 360mm radiator, 315mm graphics cards, and 170mm CPU coolers. Its compact layout and full-length PSU shroud contribute to a clean and organized build.
2. זיכערקייַט אינפֿאָרמאַציע
- שטענדיק אָפּשטעקן די מאַכט צושטעל פון די וואַנט אַוטלעט איידער איר ינסטאַלירן אָדער אַראָפּנעמען קיין קאָמפּאָנענטן.
- באַהאַנדלט קאָמפּאָנענטן מיט וואָרענונג צו ויסמיידן שאָדן פון סטאַטישע עלעקטריע. באַטראַכט צו נוצן אַן אַנטי-סטאַטיש האַנטגעלענק רימען.
- האַלט קליינע טיילן און שרויפן אַוועק פון קינדער.
- זאָרגט פֿאַר געהעריקע ווענטילאַציע אַרום דעם קעסטל צו פֿאַרמייַדן איבערהיצונג.
- פרובירט נישט צו מאדיפיצירן דעם קעיס אדער זיינע קאמפאנענטן, ווייל דאס קען בטל מאכן אייער גאראנטיע און שאפן זיכערהייט ריזיקעס.
3. פּעקל אינהאַלט
ביטע באַשטעטיקן אַז אַלע די פאלגענדע זאכן זענען אַרייַנגערעכנט אין דיין פּעקל:
- COUGAR MX360 RGB מיטן טאַוער פאַל
- אַקסעסאָרי קעסטל (מיט שרויפן, סטאַנדאָפס, קאַבל טייז, אאז"וו)
- באַניצער מאַנואַל (דעם דאָקומענט)
4. פּראָדוקט איבערview
The COUGAR MX360 RGB case features a minimalist design with integrated ARGB lighting and a tempered glass side panel for showcasing your build.

פיגור 4.1: פראָנט-זייט view of the COUGAR MX360 RGB case, showing the interior and active RGB lighting.
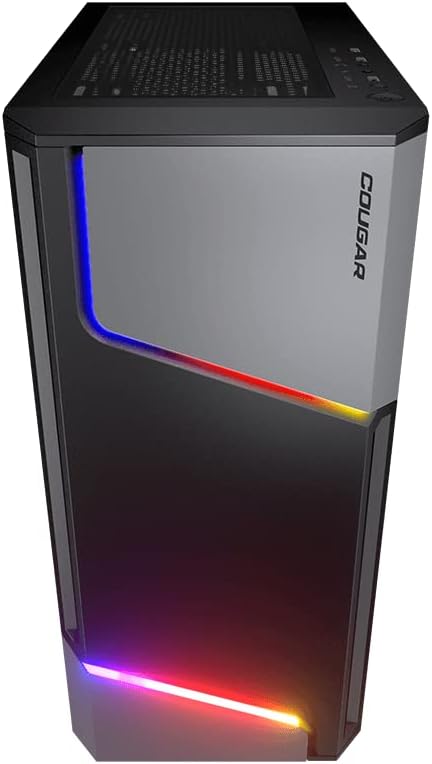
פיגורע 4.2: פראָנט view of the COUGAR MX360 RGB case, highlighting the integrated ARGB LED strips.
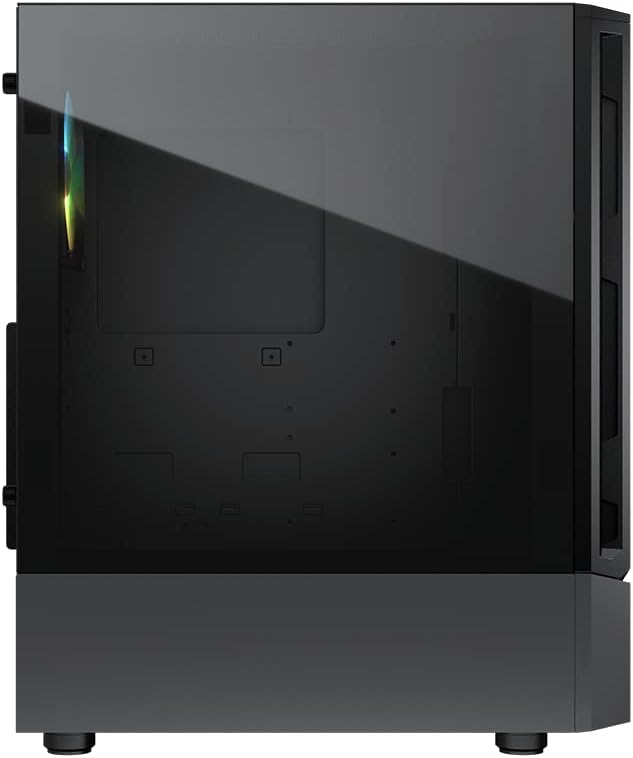
פיגורע 4.3: זייַט view of the COUGAR MX360 RGB case, featuring the tempered glass panel.

פיגור 4.4: געווינקלטע פראָנט view of the COUGAR MX360 RGB case, showcasing its design and ARGB elements.
5. סעטאַפּ און ייַנמאָנטירונג
Follow these steps to install your components into the COUGAR MX360 RGB case.
5.1 צוגרייטן דעם פאַל
- שטעלט דעם קעסטל אויף א פלאַכער, סטאַבילער ייבערפלאַך.
- Remove the tempered glass side panel by unscrewing the thumb screws at the rear of the case and carefully sliding the panel off.
- Remove the opposite metal side panel by unscrewing the thumb screws and sliding it off.
5.2 מאָטהערבאָאַרד ינסטאַללאַטיאָן
- אינסטאלירט דעם I/O שילד (אויב נישט פאר-אינסטאלירט אויף אייער מוטערבאָרד) אין דער הינטערשטער עפענונג פון דעם קעיס.
- Ensure the correct standoffs are installed for your motherboard form factor (ATX, Micro-ATX, Mini-ITX). Adjust or add standoffs as needed.
- לייגט פֿאָרזיכטיק אייער מאַדערבאָרד אויף די סטאַנדאָפס, און גלייכט אויס די שרויף לעכער.
- באַפֿעסטיקן די מאַדערבאָרד מיט די צוגעשטעלטע שרויפֿן.
5.3 מאַכט סופּפּלי יוניט (פּסו) ינסטאַלירונג
- Locate the PSU shroud at the bottom of the case.
- Slide your PSU into the designated compartment from the rear of the case.
- באַפֿעסטיקן די PSU מיט שרויפֿן פֿון דער הינטערשטער זײַט פֿון דער קעיס.
- Route necessary cables through the cutouts in the PSU shroud for cable management.
5.4 סטאָרידזש דרייוו אינסטאַלאַציע
The MX360 RGB supports various storage configurations.
- 3.5" האַרט דיסקס: אינסטאלירט אין דעם דרייוו קעידזש וואס געפינט זיך אונטערן PSU שאַרוד.
- 2.5" SSDs/HDDs: Mount onto the dedicated trays or mounting points behind the motherboard tray.
5.5 גראַפיקס קאַרטל (GPU) ינסטאַלירונג
- אַראָפּנעמען די נייטיקע PCIe סלאָט דעקל פון די הינטערשטע טייל פון די קעסטל.
- שטעל אַרײַן אײַער גראַפיקס קאַרטל אין דעם פּאַסיקן PCIe סלאָט אויף דער מוטערבאָרד.
- Secure the graphics card with screws. The case supports graphics cards up to 315mm in length.
5.6 Cooling System Installation (Fans/Radiators)
The case supports up to six fans and a 360mm water cooling radiator.
- פראָנט: Supports up to 3 x 120mm or 2 x 140mm fans, or a 240/280/360mm radiator.
- אויבן: Supports up to 2 x 120mm or 2 x 140mm fans, or a 240/280mm radiator.
- הינטן: Supports 1 x 120mm fan.
Install fans or radiators using the provided screws, ensuring proper airflow direction.
5.7 פראָנט פּאַנעל קאַנעקשאַנז
Connect the front panel cables (USB, Audio, Power, Reset, LED) to their corresponding headers on your motherboard. Refer to your motherboard manual for exact header locations.
5.8 ARGB Lighting Connection
The integrated ARGB LED strips on the front panel connect via a 5V/3Pin ARGB connector. Connect this cable to a compatible 5V/3Pin ARGB header on your motherboard to synchronize lighting effects with your system.
6. אפערירן דעם קעיס
Once all components are installed and connected, replace the side panels. Power on your system using the power button on the top I/O panel. The ARGB lighting will illuminate, controlled by your motherboard's software or a dedicated ARGB controller if you have one installed.
7. וישאַלט
רעגולערע אויפהאלטונג העלפט זיכער מאכן די בעסטע פאָרשטעלונג און לאַנגלעבעדיקייט פון אייערע פּיסי קאָמפּאָנענטן.
- שטויב פילטערס: The MX360 RGB includes removable dust filters (e.g., top, bottom). Periodically remove and clean these filters with compressed air or water (ensure they are completely dry before reinstallation).
- ינלענדיש רייניקונג: Use compressed air to remove dust from internal components like fans, heatsinks, and the motherboard.
- עקסטעריאָר רייניקונג: ווישן די יקסטיריער סערפאַסיז מיט אַ ווייך, דamp שטאָף. ויסמיידן אַברייסיוו קלינערז.
8. טראָובלעשאָאָטינג
אויב איר טרעפט פּראָבלעמען, זעט די פאלגענדע געוויינטלעכע טראָובלעשווטינג טריט:
- קיין מאַכט: Ensure all power cables (24-pin ATX, 8-pin CPU, GPU power) are securely connected. Check the PSU switch is in the 'ON' position. Verify front panel power button connection to the motherboard.
- ARGB לייטינג ארבעט נישט: Confirm the 5V/3Pin ARGB connector is correctly plugged into a compatible motherboard header. Check your motherboard's RGB software for control settings.
- איבערהייצונג: Ensure all case fans are spinning and oriented correctly for optimal airflow. Check for dust buildup on filters and components. Verify CPU cooler and GPU cooler are properly installed.
- ליסע קאַנעקשאַנז: Re-seat all components (RAM, GPU, storage drives) and check all power and data cables.
9. ספּעסאַפאַקיישאַנז
| שטריך | באַשרייַבונג |
|---|---|
| סאָרט | COUGAR |
| מאָדעל נאָמען | MX360 RGB |
| נומער מאָדעל נומער | CGR-5CC6G-RGB |
| טיפּ פון קאַסטן | מיד טאַוער |
| דימענשאַנז (LxWxH) | 14.88 X 8.27 X 18.11 אינטשעס (378 X 210 X 460 מם) |
| פּונקט וואָג | 10.56 פונט (4.8 קילאָגראַמס) |
| מאַטעריאַל | Tempered Glass, Fine Metal |
| קאָליר | שוואַרץ |
| מאָטהערבאָאַרד סופּפּאָרט | מיני יטקס / מיקראָ אַטקס / אַטקס |
| מאַקס. graphics קאָרט לענג | 315 מם |
| מאַקס. קפּו קולער הייך | 170 מם |
| PSU שטיצן | נאָרמאַל ATX PS2 |
| קאָאָלינג אופֿן | לופט / וואסער |
| ראַדיאַטאָר שטיצן | Front: 360mm / 280mm / 240mm / 140mm / 120mm Top: 280mm / 240mm / 140mm / 120mm דערציען: 120 מם |
| פאָכער סופּפּאָרט | פראָנט: 3 X 120 מם / 2 X 140 מם שפּיץ: 2 X 120 מם / 2 X 140 מם דערציען: 1 קס 120 מם |
| פאָר בייס | 3.5" HDD: 2 2.5" SSD: 2+2 (converted from 3.5" drive bays) |
| איך / אָ פּאַנעל | USB 3.0 x 2, USB 2.0 x 1, Mic x 1, Audio x 1, RGB Button |
| ספּעציעלע שטריך | ARGB LED Strips, Full-length PSU Cover for Cable Hiding and Improved Airflow |
10. וואָראַנטי און שטיצן
COUGAR products are designed and manufactured to the highest quality standards. For warranty information, please refer to the warranty card included with your product or visit the official COUGAR webזייטל. האַלט דיין קויפן באַווייַז פֿאַר וואָראַנטי קליימז.
For technical support or further assistance, please visit the official COUGAR website or contact their customer service department. You can find more information and resources on the COUGAR Store on Amazon.