 ENVIRONMENTAL SENSORS
INSTALLATION GUIDE
T SERIES
Temperature Transmitters

![]()
NOTICE
- This product is not intended for life or safety applications.
- Do not install this product in hazardous or classified locations.
- Read and understand the instructions before installing this product.
- Turn off all power supplying equipment before working on it.
- The installer is responsible for conformance to all applicable codes.
No responsibility is assumed by Veris Industries for any consequences arising out of the use of this material.
PRODUCT IDENTIFICATION

SPECIFICATIONS
| Input Power | 4-20mA version: Loop powered 12-30VDC only, 30mA max; 0-5/0-10V versions: 12-30VDC/24VAC, 15mA max |
| Temp Output | 2-wire loop powered 4-20mA or 3-wire 0-5V/0-10VDC (switch selectable in TWxA) |
| Sensor Type | Solid-state, integrated circuit (Transmitter) |
| Accuracy | ±0.5°C (±1°F) typical |
| Ranges | 0° to 50°C (32° to 122°F), -40° to 50°C (-40° to 122°F |
| Wiring (TOA and TDDA) | 22 AWG; 2-wire: 4-20mA; 3-wire: Voltage output models |
PRODUCT OVERVIEW
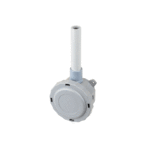
The TDDA, TOA, and TWxA temperature sensors are equipped with a highly accuracy temperature transmitter with analog output compatible with most building control systems. To maintain accurate functionality, keep all vents free of dust, debris, etc. These units are warranted for a period of five years.
INSTALLATION
TDDA
- Drill a hole in the duct.
- Insert the temperature probe until the junction box is flat against the outer surface of the duct.
- Use screws to secure the junction box to the duct.
- Wire as shown (see Wiring section).
TOA
- Locate the sensor in an outside area, out of direct sunlight (e.g. under an eave, north side of the building).
- Mount the housing.
- Wire as shown (see Wiring section).
TWxA
![]() Observe precautions for handling static sensitive devices to avoid damage to the circuitry that is not covered under the factory warranty.
Observe precautions for handling static sensitive devices to avoid damage to the circuitry that is not covered under the factory warranty.
- Mount the housing vertically on an interior wall in the area to be monitored, in a location where air circulates freely. Locate unit away from air outlets, corners, exterior walls, windows, and doors.
- Wire as shown (see Wiring section).
DIMENSIONS

WIRING – TDDA AND TOA

WIRING – TWXA

NOTE: For 24 VAC transformer powered applications, connect one side of the transformer secondary to the common. An isolation transformer or a dedicated power supply may be required.
CONFIGURATION – TWXA

Z201986-0P
©2013 Veris Industries USA 800.354.8556 or +1.503.598.4564 / support@veris.com
05131
Alta Labs, Enercept, Enspector, Hawkeye, Trustat, Aerospond, Veris, and the Veris ‘V’ logo are trademarks or registered trademarks of Veris Industries, L.L.C. in the USA and/or other countries.
Documents / Resources
 |
VERIS TOAV20 T Series Temperature Transmitters [pdf] Installation Guide TOAV20 T Series Temperature Transmitters, TOAV20, T Series Temperature Transmitters, Temperature Transmitters, Transmitters |


