UBIQISENSE UC2/UBI capture Smart Sensor

Introduction
Preparations
Please read carefully.
Prior to installation, check all components for damage, and do not use the product if damaged.
Make sure to map out which areas in your building you would like to monitor, what metrics you want to capture, and how many sensors you need for optimal results.
For further help in planning your installation refer to our planning manual and other documentation on our website.
Note: This document is subject to change for further technical development.
About
Ubiqisense smart sensor solutions are made of intelligent sensor devices, gateways and data analytics tools. At the heart of Ubiqisense systems are UBIcapture devices. Connectivity to building automation or access to sensing data through cloud services is enabled by the UBIgateway.
UBIcapture devices observe and extract information about people and objects seen by the device. All devices are equipped with intelligent motion sensing and remote configuration capabilities. By means of a visual sensor and artificial intelligence, captured images are processed by the embedded computer vision algorithm and only meta-data is transmitted from the device. Images are never stored or transmitted by any sensor.
Functions
UBIcapture is an all-in-one sensor which:
- Detects and counts people
- Locates position of people
- Tracks movement
- Detects whether people are standing or sitting
In order to properly display in your BMS or Cloud, UBIcapture must have a designated cloud gateway commissioned by Ubiqisense. From the cloud gateway, the following values can be transmitted: - RoomID
- Number of people
- X & Z coordinates/ PersonID
- Standing/Sitting
- Direction of movement
- Foot fall
Hardware
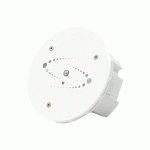
There are two versions of the UC2 sensor. The UC2-N (normal) and the UC2-W (wide angle) To recognize which version a sensor is you must look at the back side and locate the model as seen below: 
Both sensor version packages contain the same components.
Package contents
In the box you will find the following components:
- 1 UbiCapture device (N or W-type)
- 1 Plastic wall mount
- 1 Metal bracket
- 1 Power supply unit, incl. international power adapters

Not included
Screws or tape for mounting Mounting equipment
Sensor Features
Sensor and Wall Mount Dimensions
Data Sheet
| UC2-N (Normal) | UC2-W (Wide Angle) | |
| Sensor Dimensions (H x W x D) | 120 × 52 × 22,5 mm | |
| Mount Dimensions (H x W x D) | 65 × 21 × 12 mm | |
|
Sensor Connection |
2.4/5 GHz WLAN (802.11b/g/n/ac) OR PoE+ through USB-C (adapter not included) | |
|
Wi-Fi requirements |
Security: WPA2-Personal Group cipher: CCMP Pairwise ciphers: CCMP | |
| Housing color | White | |
| Housing material | Plastic, Aluminum | |
| IP rating | IP20 | |
| Temperature range | 0°C to 40°C | |
| Light level required | 20 – 10000 lux | |
| Sensor weight (including mount) | 72 g (85 g) | |
| Technology | AI optical sensor | |
| Detection speed | 0.2-10 fps | |
| Optical field of view (H x V) | 60° × 35° | 84° × 45° |
| Maximum Range | 10 m | 7m |
| Application | Indoor | |
| Mounting | Vertical wall | |
| Mounting height (optimal) | 2 – 3 m (2.1m) | |
| Power input | 12V/1A DC jack 5V/2A USB-C | |
| Power consumption | 2W(peak) | |
| Alternative power source | PoE+ (standard 802.3at) through USB-C (adapter not included) | |
| Certifications | Type approved: CE, FCC | |
LED Status
On the back of the sensor, there is an LED light, that will guide you through the provisioning process, indicating the status of the sensor. The light is visible through the bottom hole. 
Mounting
The bracket must be mounted on a vertical, non-slanting wall.
Use an appropriate fastening tech-nique depending on your wall type.
This could be either
- double-sided tape,
- a permanent adhesive such as glue,
- screws (3mm) or
- screws (3mm) and wall plugs.
The bracket can be mounted on the wall in both directions: either with the “hinge” on the right side or on the left side, as shown in the illustration on the following page.
This way the sensors will monitor either the left or right side of where it is mounted.
The sensor should be installed
on vertical walls at a height of approximately 2.1 m, depending on room size, use case and single/dual-sensor installation.
UBIcapture sensors are developed for indoor use only, and intended for mounting on vertical walls.
Before you start the checklist:
- Floorplan with locations and mounting direction of sensors indicated
- Enough sensors of each type, to complete the floor plan. See section 2 for contents of box, and make sure you have everything
- Laser measure or tape measure
- Tools for mounting (double-sided tape/screws+drill)
After you are done checklist:
- Sensor mounts in correct position as indicated on a floor plan
- Power and ethernet or wifi available at all sensor mounts

Straight view
- Fasten the plastic bracket to wall using screws or double-sided tape
- Click the sensor onto the plastic bracket

To remove the sensor from bracket- lift sensor slightly up
- pivot off bracket

Left view
- Fasten plastic bracket to wall using screws or double-sided tape
- Slide metal bracket into the right side of the plastic bracket

- Click sensor onto metal bracket

Right view
- Fasten plastic bracket to wall using screws or double-sided tape
- Slide metal bracket into left side of plastic bracket

- Click sensor onto metal bracket

Documents / Resources
 |
UBIQISENSE UC2/UBI capture Smart Sensor [pdf] User Manual UC2, UBI, capture Smart Sensor |