1. Giriş
This instruction manual provides essential information for the proper installation, operation, and maintenance of your Ulecoce Keyless Entry Door Lock Deadbolt with Handle Set, Model U18R. Please read this manual thoroughly before installation and use to ensure optimal performance and safety.
2. Güvenlik Bilgileri
- Read all instructions carefully before installing and operating the lock.
- Do not use corrosive or abrasive cleaners on the lock's finish, as this may damage the surface.
- Ensure correct battery polarity and type (4 AA batteries, not included) during installation to prevent damage to the device.
- Keep backup keys in a secure location outside the property.
- Avoid exposing the lock to extreme temperatures or direct water immersion, despite its IP54 weather resistance.
3. Paket İçeriği
Kuruluma başlamadan önce tüm bileşenlerin mevcut olduğundan emin olun:
- Deadbolt Front Lock (X1)
- Deadbolt Rear Lock (X1)
- Door Knob Front (X1)
- Door Knob Rear (X1)
- Lock Latch (X2)
- Key (X2)
- Hole Opening Diagram (X1)
- Installation Tutorial Card (X1)
- Instructions (X1)
- Mounting Plate Screws 1.46in/37mm (A) (X2)
- Mounting Plate Screws 1.19in/30mm (B) (X3)
- Mounting Plate Screws 0.24in/6mm (C) (X2)
- Fixed Leg (D) (X2)
- Silicone Ring (E) (X1)
- Spare Parts (X4)
4. Özellikler
| Özellik | Detay |
|---|---|
| Üretici | Ulecoce |
| Model Numarası | U18R |
| Parça Numarası | U18R-B |
| Ürün Boyutları | 26.39x23.16x9.6 cm |
| Ürün Ağırlığı | 1.5 kilo |
| Renk | Siyah |
| Stil | Topuz |
| Malzeme | Çinko |
| Kilit Tipi | Sürgü |
| Denetleyici Türü | Tuş takımı |
| Özel Özellikler | Auto-Lock, Passcode Unlock |
| Güç Kaynağı | 4 AA Pil (dahil değildir) |
| Hava Direnci | IP54 Dereceli |
| Kullanıcı Kodları | 100'e kadar |
5. Kurulum ve Kurulum
The Ulecoce U18R lock is designed for straightforward installation, typically requiring only a screwdriver. It is compatible with both left and right-hand doors.
5.1 Kurulum Öncesi Kontroller
- Kapı Uyumluluğu: Kapınızın aşağıdaki özelliklere uygun olduğundan emin olun:
- Backset: 2-3/8 inches (60mm) or 2-3/4 inches (70mm)
- Hole Diameter: 2-1/8 inches (54mm)
- Minimum Distance from door edge to hole center: 4 inches (101.6mm)
- Door Thickness: 1.38-2.17 inches (35mm-55mm)
- Mandal Deliği: Confirm if your door's latch hole is chiseled or not. The lock supports both configurations.
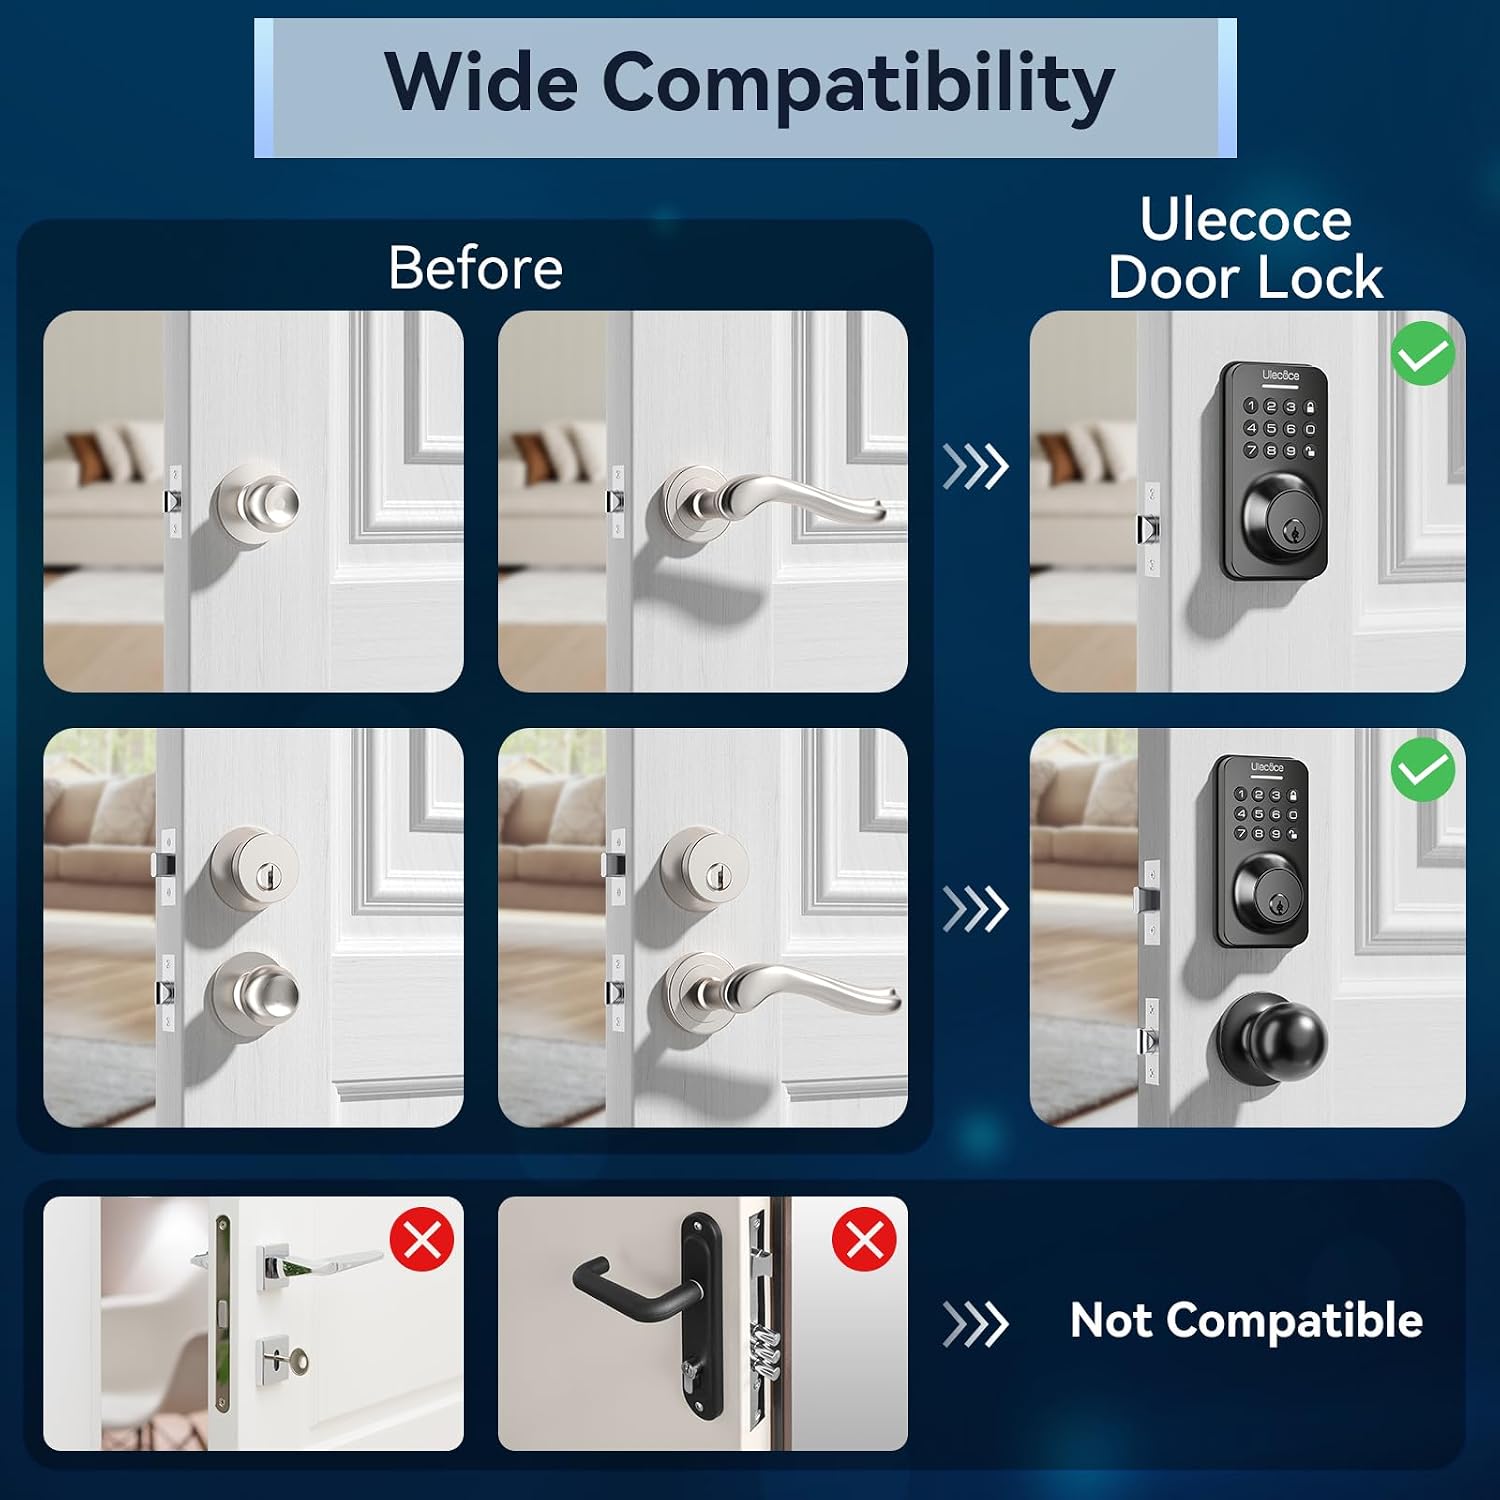
This image illustrates the critical door dimensions and latch hole types (chiseled vs. not chiseled) to check before installing the Ulecoce U18R lock. It also shows compatibility for left and right-hand doors.
5.2 Kurulum Adımları
- Refer to the included 'Hole Opening Diagram' and 'Installation Tutorial Card' for precise drilling and mounting instructions.
- Install the deadbolt latch and strike plate into the door frame.
- Mount the exterior keypad assembly and interior deadbolt assembly, ensuring proper cable connection.
- Install the door knob assembly.
- Insert 4 AA batteries into the interior unit.
- Test the lock's functionality with the backup keys and perform initial programming.
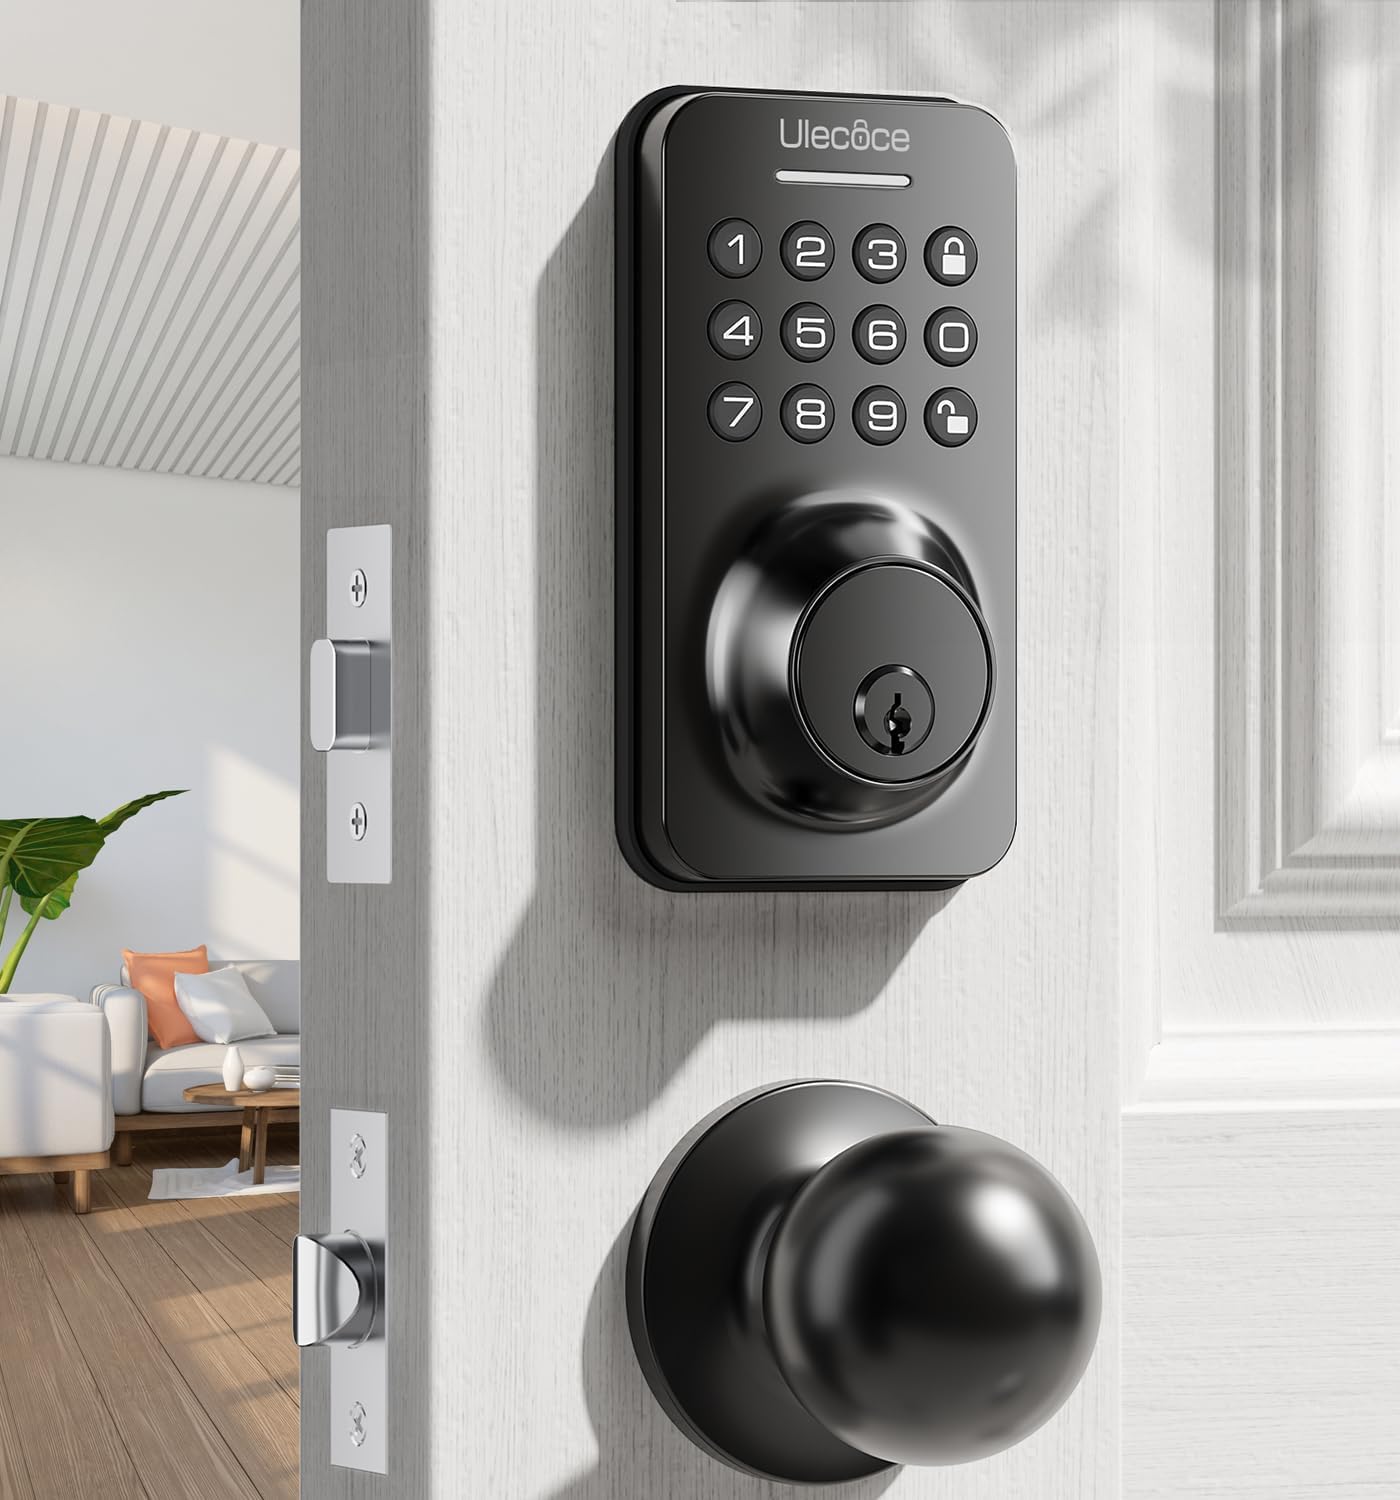
This image displays the Ulecoce Keyless Entry Door Lock Deadbolt with Handle Set, featuring a black finish, installed on a white door, showcasinestetik bütünleşmesi.

This image demonstrates the ease of installation, showing a person using only a screwdriver to install the Ulecoce U18R lock.
6. Operasyon
The Ulecoce U18R offers multiple convenient unlocking methods and smart access management features.
6.1 Kilit Açma Yöntemleri
- Tuş takımı kodu: Enter your programmed user code on the keypad.
- Tek Kullanımlık Kod: Generate temporary codes for guests or service providers.
- Fiziksel Anahtar: Use the provided backup keys for manual unlocking.
- Door Knob: The handle set allows for standard manual operation from the inside.

This image visually explains the various methods available to unlock the Ulecoce U18R, including keypad codes, one-time codes, physical keys, and the door knob.
6.2 Code Management
- The lock supports up to 3 administrator codes and 97 user codes.
- Codes can be permanent, one-time, or scheduled for specific access periods.
- Refer to the programming section in the 'Installation Tutorial Card' for detailed instructions on adding, modifying, or deleting codes.
6.3 Güvenlik Özellikleri
- Anti-Peep Tactile Keypad: You can enter random digits before or after your actual code to prevent others from guessing your entry sequence. The lock will recognize the correct consecutive code within the longer sequence.
- Otomatik kilit: The lock can be configured to automatically re-lock after a set period (10-30 seconds) once unlocked.
- Tek Dokunuşla Kilit: A dedicated button on the interior unit allows for immediate locking.

This image demonstrates the anti-peep feature of the keypad, showing how extra digits can be entered before or after the correct code to obscure it from onlookers.

This image shows a person holding a child, illustrating the convenience of the auto-lock feature, which automatically secures the door after a set time (10-30 seconds).
7. Bakım
7.1 Pil Değişimi
The lock is powered by 4 AA batteries. When the battery level is low, the lock will provide a low battery alert. It is recommended to use high-quality alkaline or lithium batteries for optimal performance and longevity. Replace all four batteries simultaneously.

This image displays the low battery indicator on the Ulecoce U18R lock's keypad, reminding users to replace batteries for continued operation.
7.2 Temizlik
Kilidin dış yüzeyini yumuşak bir bezle temizleyin.amp cloth. Avoid using harsh chemicals, abrasive cleaners, or solvents, as these can damage the finish and internal components.
7.3 Genel Kontrol
Periodically check all mounting screws for tightness to ensure the lock remains securely fastened to the door.
8. Sorun Giderme
- Kilit yanıt vermiyor: Check battery levels and replace if necessary. Ensure the keypad cable is securely connected.
- Codes not working: Verify that the correct code is being entered. Ensure the lock is not in a lockout mode. Re-program the code if issues persist.
- Otomatik kilitleme devreye girmiyor: Check the auto-lock settings in your programming. Ensure the door is fully closed and the deadbolt can extend freely.
- Difficulty turning the knob/deadbolt: Ensure the lock is properly aligned and installed. Check for any obstructions in the door frame or latch mechanism.
9. Garanti ve Destek
For technical assistance, troubleshooting guidance, or inquiries regarding warranty coverage, please contact Ulecoce customer service. Refer to the product packaging or the Ulecoce official webiletişim bilgileri için site.


