การแนะนำ
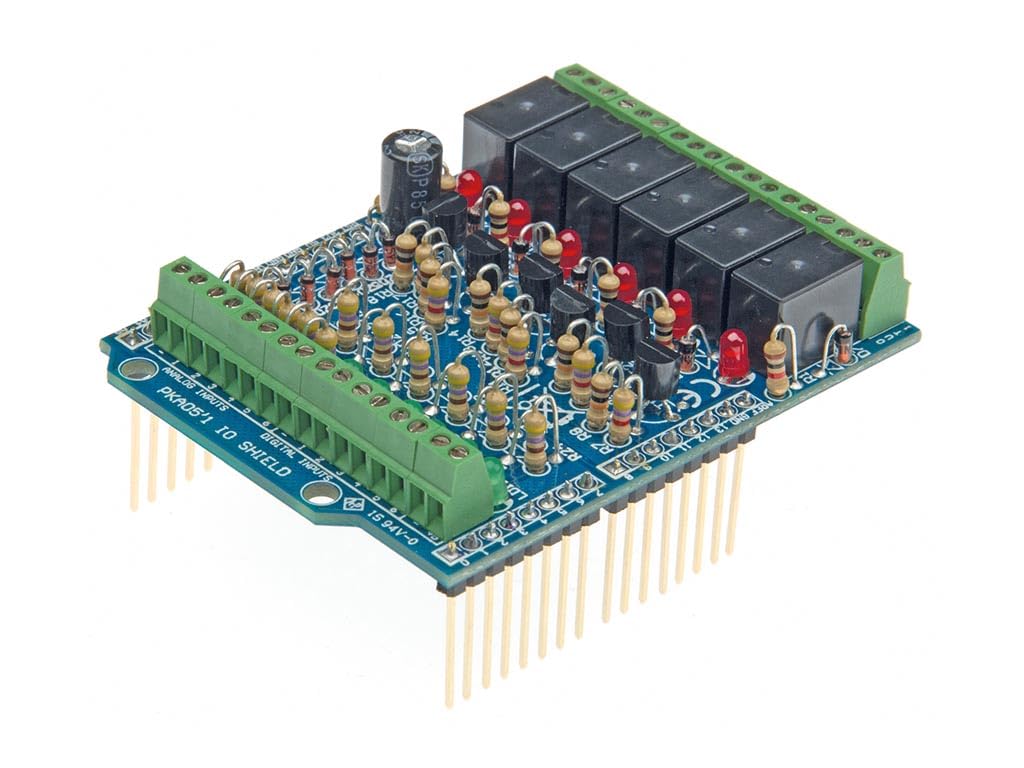
The Whadda WPK05 I/O module is a versatile, stackable shield designed to expand the capabilities of your Arduino UNO (not included). It provides 6 relay outputs and 6 analog/digital inputs, enabling a wide range of automation projects. This module is suitable for both beginners and experienced makers. An example program is available for download to facilitate immediate use. The WPK05 is designed for easy self-assembly and seamless integration with your Arduino UNO.
คำแนะนำการตั้งค่า
การแกะบรรจุภัณฑ์และการตรวจสอบ
Carefully unpack the Whadda WPK05 I/O module. Inspect all components for any visible damage. Ensure all parts listed in the product packaging are present.
Assembly (if kit version)
If you have the kit version, follow the detailed assembly instructions provided separately with the kit. Ensure all solder joints are clean and secure. The WPK05 is also available as a fully assembled module.
Connecting to Arduino UNO
The WPK05 is a shield designed to stack directly onto an Arduino UNO board.
- Align the header pins on the underside of the WPK05 module with the corresponding female headers on your Arduino UNO board.
- Gently press the WPK05 module down until it is firmly seated on the Arduino UNO. Ensure all pins are correctly aligned and inserted.
- Connect your Arduino UNO to a power source and your computer via USB.

คำแนะนำการใช้งาน
การตั้งค่าซอฟต์แวร์
To operate the WPK05 I/O module, you will need the Arduino IDE and the appropriate libraries.
- ดาวน์โหลดและติดตั้ง Arduino IDE จาก Arduino อย่างเป็นทางการ webเว็บไซต์.
- Connect your Arduino UNO with the WPK05 shield attached to your computer.
- Install any necessary libraries for relay control and analog/digital input handling. Refer to the Whadda product page or documentation for specific library recommendations.
- ดาวน์โหลดอดีตample program (sketch) provided by Whadda for the WPK05 module.
- เปิดอดีตample program in the Arduino IDE, select your Arduino UNO board and the correct COM port.
- Upload the program to your Arduino UNO.
Using Relay Outputs
The WPK05 features 6 relay outputs. These can be used to control higher voltage or current devices (e.g., lights, motors) that cannot be directly driven by the Arduino's digital pins.
- Connect the devices you wish to control to the green terminal blocks associated with the relay outputs. Observe proper wiring and safety precautions for the voltage and current ratings of your devices.
- In your Arduino code, use the appropriate digital pins to activate or deactivate the relays.
Using Analog/Digital Inputs
The module also provides 6 analog/digital inputs. These can be used to read signals from sensors, switches, or other input devices.
- Connect your input devices to the designated input terminals.
- In your Arduino code, read the state of these pins using
digitalRead()for digital inputs oranalogRead()for analog inputs.
การพิจารณาเรื่องอำนาจ
Ensure your Arduino UNO and connected devices receive adequate power. The WPK05 module itself draws power from the Arduino. If controlling high-power devices with the relays, ensure the external power supply for those devices is sufficient and correctly isolated.
การซ่อมบำรุง
- รักษาโมดูลให้สะอาด ปราศจากฝุ่นและความชื้น
- หลีกเลี่ยงการให้โมดูลสัมผัสกับอุณหภูมิที่สูงหรือต่ำเกินไปหรือแสงแดดโดยตรง
- Regularly check connections for looseness or corrosion.
- If the module is part of a permanent installation, consider housing it in a protective enclosure.
การแก้ไขปัญหา
โมดูลไม่ตอบสนอง
- Verify that the WPK05 module is correctly seated on the Arduino UNO.
- Check all wiring connections for continuity and correct polarity.
- Ensure the Arduino UNO is powered on and connected to your computer.
- Confirm that the correct board and COM port are selected in the Arduino IDE.
- Try uploading a simple "blink" sketch to the Arduino UNO without the shield to confirm the Arduino itself is functioning.
Relays Not Activating
- Check the power supply to the devices connected to the relays.
- Verify the digital pins controlling the relays are correctly defined and toggled in your Arduino code.
- Ensure the relay coil voltage ตรงกับเอาต์พุต voltage from the Arduino (typically 5V).
Input Readings Incorrect
- Check the wiring of your input sensors or switches.
- Verify that the correct analog or digital pins are being read in your Arduino code.
- ตรวจสอบให้แน่ใจว่าระดับเสียงของสัญญาณอินพุตถูกต้องtage levels are compatible with the Arduino (e.g., 0-5V for analog, 0V/5V for digital).
ข้อมูลจำเพาะ
| คุณสมบัติ | รายละเอียด |
|---|---|
| หมายเลขรุ่น | WPK05 |
| ยี่ห้อ | วาดดา |
| ความเข้ากันได้ | อาร์ดูอิโน UNO |
| รีเลย์เอาต์พุต | 6 |
| Analog/Digital Inputs | 6 |
| เล่มที่tage | 5 โวลต์ |
| สี | สีฟ้า |
| คุณสมบัติพิเศษ | พกพาได้ |
| การประกอบ | Kit (self-assembly) or pre-assembled module |
ข้อมูลการรับประกัน
Specific warranty details for the Whadda WPK05 I/O module are not provided in the available product data. Please refer to the manufacturer's official webดูรายละเอียดเพิ่มเติมได้ที่เว็บไซต์หรือติดต่อผู้ค้าปลีกเพื่อตรวจสอบเงื่อนไขและข้อกำหนดการรับประกัน
สนับสนุน
For technical support, additional documentation, or to download example programs, please visit the official Whadda website or the Velleman Group support portal. You may also contact your point of purchase for assistance.
Whadda is a brand of Velleman Group nv.


