1. บทนำ
ขอบคุณสำหรับการซื้อasing the TecMATE OptiMATE 7 Select 12V 10A Battery Charger. This advanced charger is designed to maintain and recover various 12V lead-acid batteries, including AGM, liquid, EFB, spiral cell, and gel types. It features patented Ampmatic technology for automatic current adjustment, multi-stage recovery charging, and a power supply mode for vehicle electronics. Please read this manual thoroughly before use to ensure safe and optimal performance.
2. ข้อมูลด้านความปลอดภัย
- Always connect the charger to the battery terminals before plugging it into the AC power outlet. Disconnect from AC power before disconnecting from the battery.
- ตรวจสอบให้แน่ใจว่าเครื่องชาร์จเข้ากันได้กับประเภทและแรงดันไฟฟ้าของแบตเตอรี่ของคุณtage (12V lead-acid only). This model is not suitable for 24V batteries.
- ห้ามพยายามชาร์จแบตเตอรี่ที่แช่แข็ง เสียหาย หรือไม่สามารถชาร์จได้
- Avoid charging batteries that have reached the end of their life or have internal short circuits, as the charger cannot revive them.
- ควรใช้ในบริเวณที่มีอากาศถ่ายเทสะดวก แบตเตอรี่อาจก่อให้เกิดก๊าซที่ติดไฟได้
- เก็บให้พ้นจากมือเด็กและสัตว์เลี้ยง
- อย่าให้เครื่องชาร์จโดนฝนหรือความชื้นมากเกินไป
- If the connection between the charger and cables feels tight, especially when new or in cold weather, gently warm the connector with a hairdryer to ease insertion.
3. สินค้าหมดview
The TecMATE OptiMATE 7 Select (Model TM257) is a high-performance 12V 10A battery charger designed for a wide range of lead-acid batteries. It incorporates several advanced features to ensure efficient charging, recovery, and long-term maintenance.
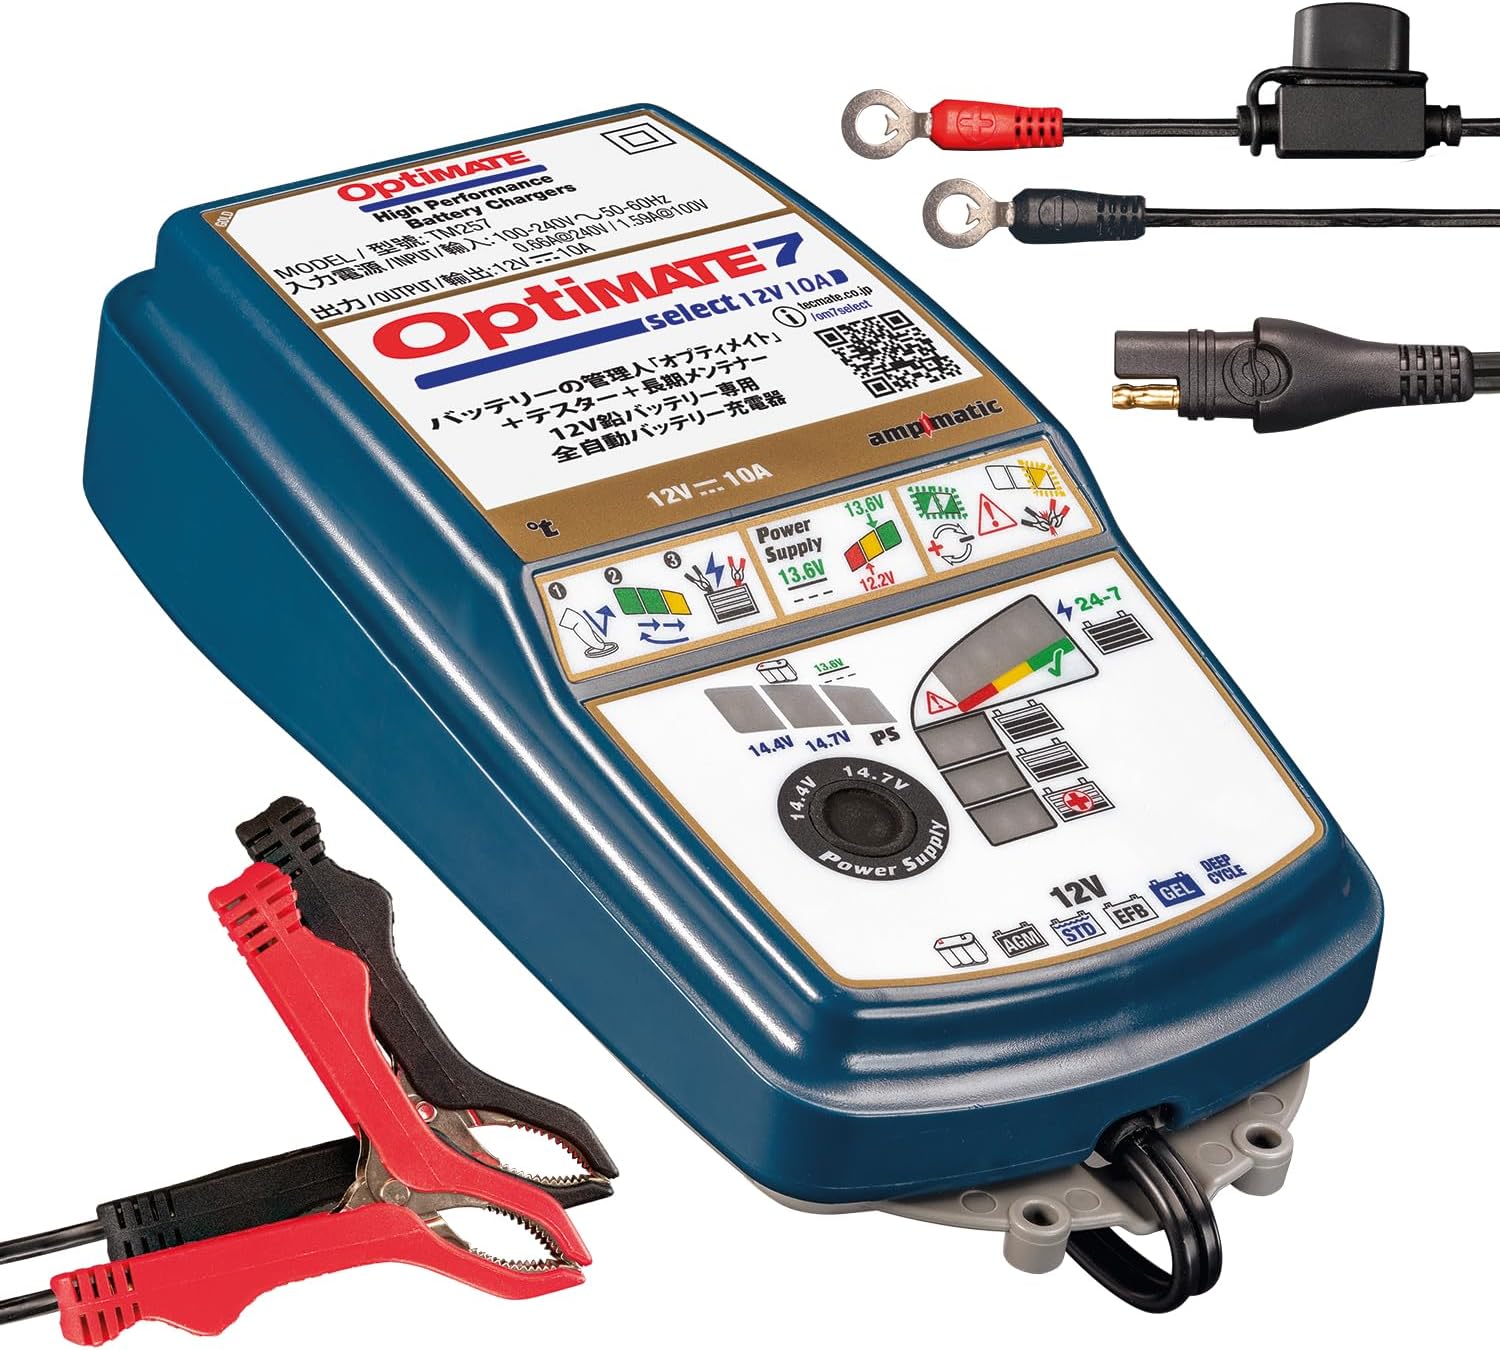
Image 1: TecMATE OptiMATE 7 Select charger with M8/M10 ring terminal and alligator clip cables.
คุณสมบัติหลัก:
- 12V Lead-Acid Battery Compatibility: Charges 12V AGM, liquid, EFB, spiral cell, and gel batteries from 3Ah to 240Ah.
- 10A เอาท์พุต: Provides a robust 10 Amp กระแสไฟชาร์จ.
- Ampmatic Technology: Patented technology that automatically adjusts the charging current based on battery size and condition.
- มัลติเอสtage Recovery Charging: Features a powerful 3-stage desulfation function to recover deeply discharged batteries.
- Battery Diagnostic Function: Easy-to-understand LED indicators (red, yellow, green) provide clear battery health status.
- 24/7 Maintenance Mode: Safely maintains the battery when left connected for extended periods, preventing overcharge.
- โหมดแหล่งจ่ายไฟ: Provides a stable 13.6V (max 8A) power supply, useful for vehicle diagnostics, tuning, or maintaining vehicle settings during battery changes.
- การชดเชยอุณหภูมิ: ปรับปริมาณการชาร์จอัตโนมัติtage based on ambient temperature for optimal performance.
4. การตั้งค่า
Before connecting the charger, ensure your vehicle is turned off and the ignition key is removed. Identify the battery terminals (positive '+' and negative '-').
อุปกรณ์เสริมที่รวมอยู่:
- M8/M10 Ring Terminal Cable: For permanent connection to battery terminals.
- Alligator Clip Cable: For temporary connection to battery terminals.
- Japanese Instruction Manual (refer to this translated version for English instructions).
ขั้นตอนการเชื่อมต่อ:
- เชื่อมต่อกับแบตเตอรี่: Choose either the ring terminal cable for a semi-permanent connection or the alligator clip cable for temporary use. Connect the red (+) clamp/ring to the positive (+) battery terminal and the black (-) clamp/ring to the negative (-) battery terminal. Ensure a secure connection. The battery can remain in the vehicle during charging.
- Connect Charger to AC Power: Plug the charger's AC power cord into a standard wall outlet (100-240V, 50-60Hz).

Image 2: Connection diagram for the OptiMATE charger. Connect to battery first, then to power outlet.
Note on Cable Connection: The connection point between the charger and the accessory cables (alligator clip or ring terminal) is designed to be tight for safety, preventing accidental disconnection. If you find it difficult to connect, especially when new or in cold conditions, gently warm the rubber part of the connector with a hairdryer for a few seconds to make it more pliable.
5. คู่มือการใช้งาน
Once connected, the OptiMATE 7 Select will automatically begin its charging program. The LED indicators on the charger will display the current stage ของกระบวนการชาร์จ
กระบวนการชาร์จอัตโนมัติ:
- การวินิจฉัย: The charger first assesses the battery's condition, including voltage และความต้านทานภายใน
- Recovery (Desulfation): If a deeply discharged or sulfated battery is detected, the charger will initiate a powerful 3-stage desulfation process using high-voltage pulses (up to 22V, limited to 16V when connected to a vehicle for protection) to break down lead sulfate crystals. This can recover batteries with as low as 0.5V.
- การเรียกเก็บเงินจำนวนมาก: The main charging phase where the battery receives the majority of its charge at maximum current (up to 10A). The Ampmatic function automatically adjusts the current based on the battery's capacity and condition.
- ค่าการดูดซึม: ฉบับที่tage is held constant while the current gradually decreases, bringing the battery to a full charge.
- การตรวจสอบ: The charger checks if the battery can retain its charge.
- Maintenance (Float Charge): Once fully charged, the charger switches to a long-term maintenance mode, delivering small currents as needed to keep the battery at optimal charge without overcharging. This mode is safe for 24/7 connection.

Image 3: OptiMATE's automatic adjustment technologies, including temperature compensation and Ampmatic current adjustment.
โหมดแหล่งจ่ายไฟ:
The OptiMATE 7 Select features a Power Supply mode, providing a stable 13.6V output (maximum 8A). This is useful for:
- Powering vehicle diagnostic equipment.
- Maintaining vehicle electronics settings during battery replacement.
- Supporting vehicle systems during tuning or software updates.
To activate Power Supply mode, refer to the detailed instructions in the full manual (often indicated by a specific LED pattern or button press). Connection to the battery is required when initiating this function.

Image 4: OptiMATE 7 Select in Power Supply mode, providing stable power to a vehicle.
6. การบำรุงรักษา
The OptiMATE 7 Select is designed for long-term battery maintenance. Its 24/7 maintenance mode ensures your battery remains optimally charged without risk of overcharging, extending its lifespan.
Long-Term Connection:
You can leave the charger connected to your battery indefinitely. The charger will automatically cycle between charging and rest periods, keeping the battery healthy. This is particularly beneficial for vehicles stored for extended periods, such as motorcycles, classic cars, or RVs.

Image 5: The OptiMATE charger provides safe, continuous charging and battery diagnosis.
การดูแลเครื่องชาร์จ:
- รักษาที่ชาร์จให้สะอาดและแห้ง
- Inspect cables and connectors regularly for any signs of damage.
- เก็บที่ชาร์จไว้ในที่เย็นและแห้งเมื่อไม่ได้ใช้งาน
7 การแก้ไขปัญหา
หัวข้อนี้จะกล่าวถึงปัญหาทั่วไปที่คุณอาจพบเจอ
ปัญหาทั่วไปและวิธีแก้ไข:
- Charger does not start or LEDs do not light up:
- ตรวจสอบให้แน่ใจว่าสายไฟ AC เสียบเข้ากับเต้ารับที่มีกระแสไฟอย่างแน่นหนาแล้ว
- Check that the battery connections are secure and correct (red to +, black to -).
- ตรวจสอบปริมาณแบตเตอรี่tage is above 0.5V. The charger cannot initiate charging for batteries below this threshold.
- Green LED lights up, but engine does not start:
- This may indicate a microscopic internal short circuit within the battery. While the surface voltage may appear normal, it drops sharply during engine startup.
- The OptiMATE's battery health diagnosis is a guideline; it may not detect all internal battery abnormalities.
- Internal battery short circuits cannot be repaired by a charger; battery replacement is necessary in such cases.
- Charging does not proceed beyond LED 4 (blue) for more than 24 hours:
- This can occur if the vehicle's electrical system temporarily activates during charging.
- Unplug the charger from the AC outlet, wait a few seconds, and then plug it back in to restart the charging cycle.
- If it restarts from red LED 3, leave it connected for about 5 minutes (with power on), then disconnect and reconnect the battery leads to confirm charging starts from LED 4 (blue).
- If it still restarts from LED 3 (red), connect the charger to the battery in Power Supply mode (LED #2 lights up) for 5 minutes. This may help it start from LED 4 (blue) more easily.
- Charger indicates an error (e.g., specific red LED flashing):
- Refer to the LED indicator guide in the full manual for specific error codes. Common errors include reverse polarity, short-circuited battery, or an unrecoverable battery.
8. ข้อมูลจำเพาะ
| คุณสมบัติ | ข้อมูลจำเพาะ |
|---|---|
| หมายเลขรุ่น | ทีเอ็ม257 |
| ยี่ห้อ | TecMATE |
| อินพุต Voltage | 100-240V, 50-60Hz |
| ปริมาณการส่งออกtage | 12โวลต์ |
| กระแสไฟขาออก | 10เอ |
| ช่วงความจุของแบตเตอรี่ | 3Ah - 240Ah |
| ประเภทแบตเตอรี่ที่เข้ากันได้ | 12V Lead-Acid (AGM, Liquid, EFB, Spiral Cell, Gel) |
| Power Supply Mode Output | 13.6V (Max 8A) |
| ขนาด (กว้าง x ยาว x สูง) | 27 x 17 x 13 ซม. |
| น้ำหนัก | 1.45 กก. |
| สี | สีฟ้า |
9. การรับประกันและการสนับสนุน
For warranty information and technical support, please refer to the official TecMATE webหรือติดต่อตัวแทนจำหน่ายในพื้นที่ของคุณ เก็บหลักฐานการซื้อไว้เพื่อใช้ในการเคลมประกัน
Official product information can be found at: https://tecmate.co.jp/om7select/ และ https://www.optimate1.com/om7select


