การแนะนำ
The ECG DM-817 is an auto-ranging digital multimeter designed for precise electrical measurements. It features a 6000-count display and 3-5/6 digit resolution, making it suitable for a wide range of applications. This manual provides detailed instructions for the safe and effective operation, maintenance, and troubleshooting of your DM-817 multimeter.
ข้อมูลด้านความปลอดภัย
Always observe the following safety precautions when using the DM-817 multimeter:
- ห้ามป้อนค่าเกินขีดจำกัดสูงสุดสำหรับฟังก์ชันใดๆ
- ใช้ความระมัดระวังอย่างยิ่งเมื่อทำงานกับโวลุ่มtagสูงกว่า 60V DC หรือ 30V AC RMS
- ตรวจสอบให้แน่ใจว่าสายวัดเชื่อมต่ออย่างถูกต้องและสวิตช์ฟังก์ชันอยู่ในตำแหน่งที่ถูกต้องก่อนทำการวัด
- Do not use the multimeter if it appears damaged or if the test leads are frayed.
- เปลี่ยนแบตเตอรี่และฟิวส์ด้วยชนิดและพิกัดที่ระบุไว้เท่านั้น
- ควรตัดการเชื่อมต่อสายทดสอบออกจากวงจรทุกครั้งก่อนเปลี่ยนฟังก์ชันการทำงาน
- ปฏิบัติตามกฎระเบียบด้านความปลอดภัยทั้งในระดับท้องถิ่นและระดับประเทศ
คำเตือน: ผลิตภัณฑ์นี้มีสารเคมีที่รัฐแคลิฟอร์เนียรู้จักว่าก่อให้เกิดมะเร็งและความพิการแต่กำเนิดหรืออันตรายต่อระบบสืบพันธุ์อื่นๆ สำหรับข้อมูลเพิ่มเติมโปรดเยี่ยมชม www.P65Warnings.ca.gov.
เนื้อหาแพ็คเกจ
ตรวจสอบว่ามีรายการทั้งหมดอยู่ในแพ็คเกจ:
- ECG DM-817 Digital Multimeter
- สายทดสอบ (สีแดง 1 เส้น สีดำ 1 เส้น)
- กระเป๋าใส่อุปกรณ์
- แบตเตอรี่ AAA 2 ก้อน (ติดตั้งไว้ล่วงหน้าหรือรวมแยกต่างหาก)
- คู่มือการใช้งาน (เอกสารนี้)

Image: The ECG DM-817 Digital Multimeter displayed alongside its included test leads, carrying case, and batteries.
สินค้าเกินview
Familiarize yourself with the components of your DM-817 multimeter:

ภาพ: ด้านหน้า view of the ECG DM-817 Digital Multimeter, showing the display, function dial, and input jacks.
- จอแสดงผล LCD: Shows measurement readings, units, and function indicators. Features a backlight for low-light conditions.
- แป้นหมุนเลือกฟังก์ชัน: สวิตช์หมุนเพื่อเลือกฟังก์ชันการวัด (ระดับเสียง)tage, Current, Resistance, Capacitance, Temperature, Frequency, Diode, Continuity).
- ปุ่มเลือก: Toggles between AC/DC, Diode/Continuity, or other sub-functions within a dial setting.
- ปุ่มถือ: หยุดการอ่านค่าปัจจุบันบนจอแสดงผล
- ปุ่มแบ็คไลท์: เปิดหรือปิดไฟแบ็คไลท์ของจอแสดงผล
- แจ็คอินพุต:
- VΩHzCAP°C: ข้อมูลป้อนเข้าสำหรับ Voltage, Resistance, Frequency, Capacitance, and Temperature measurements.
- มิลลิแอมป์: อินพุตสำหรับมิลลิampเอเร่และไมโครampการวัดกระแสไฟฟ้า (ฟิวส์)
- 10 ก: Input for high current measurements up to 10A (fused).
- คอม: จุดต่อสายดินร่วม (Common ground) สำหรับการวัดทั้งหมด
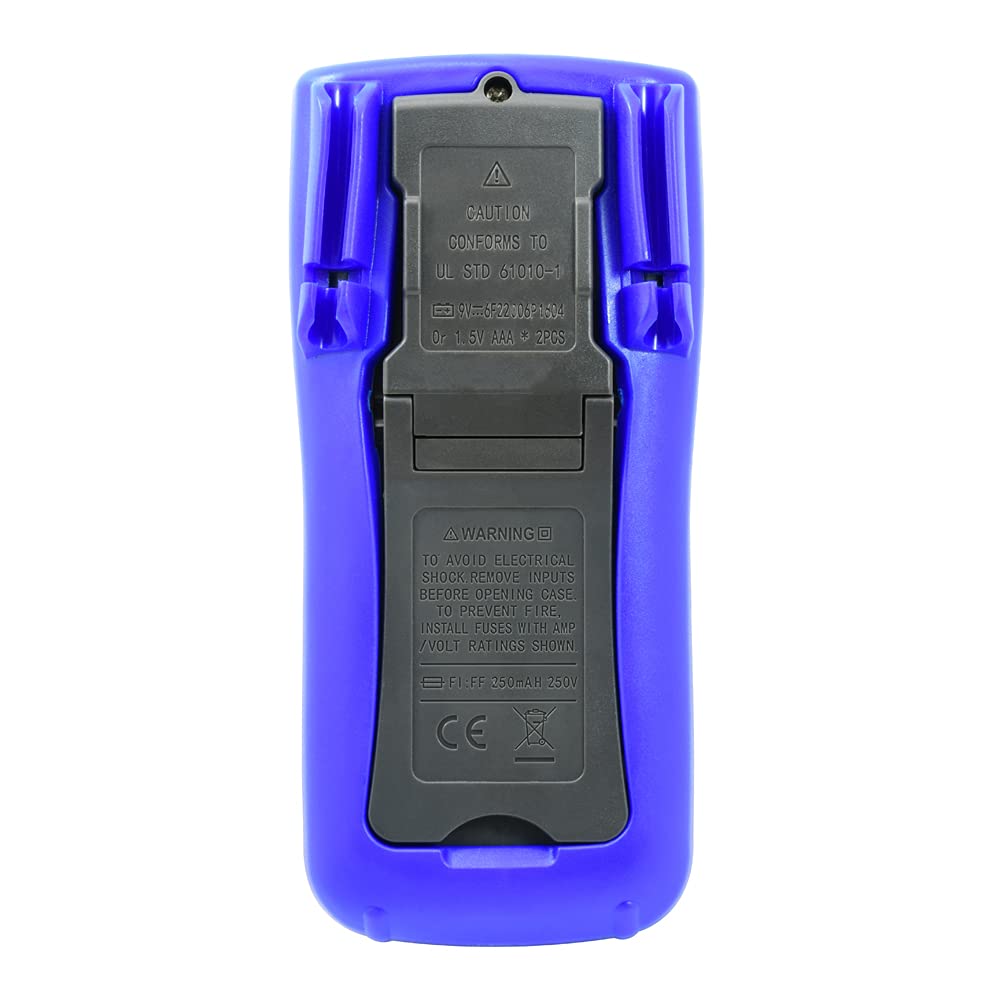
ภาพ: ด้านหลัง view of the ECG DM-817 Digital Multimeter, showing the battery compartment and kickstand.
The back of the multimeter features a battery compartment cover and a foldable kickstand for convenient hands-free operation.
การตั้งค่า
การติดตั้งแบตเตอรี่
The DM-817 requires two AAA batteries for operation. These are typically included. If not, or if the low battery indicator appears on the display, follow these steps:
- ตรวจสอบให้แน่ใจว่ามัลติมิเตอร์ปิดอยู่ และถอดสายวัดทั้งหมดออก
- ค้นหาฝาครอบช่องใส่แบตเตอรี่ที่ด้านหลังของเครื่อง
- ใช้ไขควงคลายสกรูที่ยึดฝาครอบแบตเตอรี่ออก
- ถอดฝาครอบออก
- ใส่แบตเตอรี่ AAA สองก้อน โดยสังเกตขั้วที่ถูกต้อง (+ และ -) ตามที่ระบุภายในช่องใส่
- ใส่ฝาครอบแบตเตอรี่และขันให้แน่นด้วยสกรู
คำแนะนำการใช้งาน
Before any measurement, ensure the test leads are securely plugged into the correct input jacks and the function dial is set to the desired measurement type.
การวัด DC Voltagอี (VDC)
- Plug the red test lead into the VΩHzCAP°C jack and the black test lead into the COM jack.
- หมุนแป้นหมุนเลือกฟังก์ชันไปที่ V (DC เล่มtage) position. The multimeter is auto-ranging.
- ต่อสายวัดทดสอบเข้ากับชิ้นส่วนหรือวงจรที่ต้องการวัด โดยสังเกตขั้วให้ถูกต้อง
- อ่านเล่มที่tagค่า e บนจอ LCD
การวัด AC Voltagอี (VAC)
- Plug the red test lead into the VΩHzCAP°C jack and the black test lead into the COM jack.
- หมุนแป้นหมุนเลือกฟังก์ชันไปที่ V~ (AC เล่มtage) position. The multimeter is auto-ranging.
- ต่อสายวัดเข้ากับชิ้นส่วนหรือวงจรที่ต้องการวัด
- อ่านเล่มที่tagค่า e บนจอ LCD
Measuring DC Current (DCA)
- ปิดไฟเข้าวงจร
- For currents up to 600mA, plug the red test lead into the mAµA jack. For currents up to 10A, plug the red test lead into the 10A jack. Plug the black test lead into the COM jack.
- หมุนแป้นหมุนเลือกฟังก์ชันไปที่ A ตำแหน่ง (กระแสไฟฟ้าตรง)
- ตัดวงจรและต่อมัลติมิเตอร์แบบอนุกรมเข้ากับวงจร
- จ่ายไฟให้กับวงจรและอ่านค่ากระแสไฟฟ้าบนหน้าจอ LCD
- Turn off power and disconnect the multimeter before restoring the circuit.
Measuring AC Current (ACA)
- ปิดไฟเข้าวงจร
- For currents up to 600mA, plug the red test lead into the mAµA jack. For currents up to 10A, plug the red test lead into the 10A jack. Plug the black test lead into the COM jack.
- หมุนแป้นหมุนเลือกฟังก์ชันไปที่ A~ ตำแหน่ง (กระแสไฟฟ้าสลับ)
- ตัดวงจรและต่อมัลติมิเตอร์แบบอนุกรมเข้ากับวงจร
- จ่ายไฟให้กับวงจรและอ่านค่ากระแสไฟฟ้าบนหน้าจอ LCD
- Turn off power and disconnect the multimeter before restoring the circuit.
การวัดค่าความต้านทาน (โอห์ม)
- Plug the red test lead into the VΩHzCAP°C jack and the black test lead into the COM jack.
- หมุนแป้นหมุนเลือกฟังก์ชันไปที่ Ω ตำแหน่ง (ต้านทาน)
- ตรวจสอบให้แน่ใจว่าวงจรถูกตัดพลังงานก่อนที่จะวัดความต้านทาน
- เชื่อมต่อสายทดสอบข้ามส่วนประกอบที่ต้องการวัด
- อ่านค่าความต้านทานบนจอ LCD
การวัดค่าความจุ (F)
- Plug the red test lead into the VΩHzCAP°C jack and the black test lead into the COM jack.
- หมุนแป้นหมุนเลือกฟังก์ชันไปที่ หมวก ตำแหน่ง (ความจุ)
- ตรวจสอบให้แน่ใจว่าตัวเก็บประจุถูกปล่อยประจุจนหมดก่อนทำการวัด
- เชื่อมต่อสายทดสอบข้ามตัวเก็บประจุ
- อ่านค่าความจุบนจอ LCD
Measuring Temperature (°C/°F)
- Plug the temperature probe (if included, otherwise use appropriate adapter) into the VΩHzCAP°C and COM jacks, observing polarity.
- หมุนแป้นหมุนเลือกฟังก์ชันไปที่ ° C / ° F ตำแหน่ง (อุณหภูมิ)
- The display will show the ambient temperature. Place the probe on or near the object whose temperature is to be measured.
- Read the temperature value on the LCD display. Use the SELECT button to toggle between Celsius and Fahrenheit.
Measuring Frequency (Hz)
- Plug the red test lead into the VΩHzCAP°C jack and the black test lead into the COM jack.
- หมุนแป้นหมุนเลือกฟังก์ชันไปที่ Hz (Frequency) position.
- ต่อสายทดสอบเข้ากับแหล่งสัญญาณ
- อ่านค่าความถี่บนจอ LCD
การทดสอบไดโอดและการตรวจสอบความต่อเนื่อง
- Plug the red test lead into the VΩHzCAP°C jack and the black test lead into the COM jack.
- หมุนแป้นหมุนเลือกฟังก์ชันไปที่ ไดโอด/ความต่อเนื่อง ตำแหน่ง.
- การทดสอบไดโอด: ต่อสายสีแดงเข้ากับขั้วบวกและสายสีดำเข้ากับขั้วลบของไดโอด แรงดันไฟฟ้าไปข้างหน้าtage drop will be displayed. Reverse the leads; an open circuit (OL) should be displayed.
- ตรวจสอบความต่อเนื่อง: Connect the test leads across the circuit or component. If continuity exists (resistance below approximately 50Ω), the buzzer will sound.
การซ่อมบำรุง
การทำความสะอาด
เช็ดเคสด้วยโฆษณาamp ผ้าและผงซักฟอกอ่อนๆ ห้ามใช้สารกัดกร่อนหรือตัวทำละลาย ควรทำความสะอาดขั้วอินพุตให้ปราศจากสิ่งสกปรกและความชื้น
การเปลี่ยนฟิวส์
If the current measurement functions stop working, the fuses may need replacement. Always use fuses with the specified ratings:
- mAµA input: F1 250mA/250V fast-blow fuse.
- 10A input: F2 10A/250V fast-blow fuse.
วิธีการเปลี่ยนฟิวส์:
- ตรวจสอบให้แน่ใจว่ามัลติมิเตอร์ปิดอยู่ และถอดสายวัดทั้งหมดออก
- Open the battery compartment cover as described in the "Battery Installation" section.
- The fuses are located inside the battery compartment. Carefully remove the old fuse.
- Insert a new fuse of the correct type and rating.
- เปลี่ยนฝาครอบแบตเตอรี่และยึดให้แน่น
พื้นที่จัดเก็บ
If the multimeter is not used for an extended period, remove the batteries to prevent leakage and damage to the unit. Store the multimeter in its carrying case in a cool, dry place away from direct sunlight and extreme temperatures.
การแก้ไขปัญหา
| ปัญหา | สาเหตุที่เป็นไปได้ | สารละลาย |
|---|---|---|
| ไม่มีจอแสดงผลหรือจอแสดงผลมืด | แบตเตอรี่หมดหรือเหลือน้อย | เปลี่ยนแบตเตอรี่ |
| แสดง "OL" (โอเวอร์โหลด) | Input value exceeds range; incorrect function selected | Select a higher range (if manual ranging) or correct function. Ensure leads are connected properly. |
| ไม่มีการวัดกระแสไฟฟ้า | Blown fuse; incorrect lead connection | Check and replace fuse if necessary. Ensure leads are in the correct current input jacks (mAµA or 10A). |
| การอ่านที่ไม่ถูกต้อง | Low battery; poor lead contact; external interference | Replace batteries. Ensure leads are clean and make good contact. Move away from strong electromagnetic fields. |
ข้อมูลจำเพาะ
The following table outlines the key specifications of the ECG DM-817 Digital Multimeter:

Image: Detailed specifications printed on the back of the ECG DM-817 product packaging.
| ประเภทการวัด | พิสัย | ความแม่นยำ |
|---|---|---|
| DC ฉบับที่tage | 600mV ถึง 1000V | ±(0.5% + 5 digits) to ±(0.8% + 5 digits) |
| ฉบับ ACtage (ทรูอาร์เอ็มเอส) | 600mV ถึง 750V | ±(0.8% + 5 digits) to ±(1.2% + 10 digits) |
| กระแสไฟฟ้าตรง | 600µA to 10A | ±(1.0% + 5 digits) to ±(2.0% + 30 digits) |
| กระแสไฟ AC | 600µA to 10A | ±(1.2% + 5 digits) to ±(2.5% + 30 digits) |
| ความต้านทาน | 600Ω ถึง 60MΩ | ±(0.8% + 5 digits) to ±(2.0% + 20 digits) |
| ความจุ | 10nF ถึง 6000µF | ±(3.5% + 20 digits) to ±(5.0% + 10 digits) |
| ความถี่ | 10Hz ถึง 10MHz | ±(0.1% + 3 หลัก) |
| อุณหภูมิ | -20°C ถึง 1000°C / -4°F ถึง 1832°F | ±(1.0% + 5 digits) to ±(2.0% + 5 digits) |
ข้อมูลจำเพาะทั่วไป:
- แสดง: 6000 Counts, 3-5/6 Digit LCD with Backlight
- ปิดเครื่องอัตโนมัติ: ใช่
- การเก็บข้อมูล: ใช่
- แหล่งพลังงาน: แบตเตอรี่ AAA 2 ก้อน (รวมอยู่ด้วย)
- ขนาด : 7.25 x 3.5 x 1.78 นิ้ว
- น้ำหนัก: 1 ปอนด์
- ระดับความปลอดภัย: CAT600 1000V, CATXNUMX XNUMXV แรงดันไฟฟ้า
การรับประกันและการสนับสนุน
For warranty information and technical support, please contact ECG customer service. Refer to the product packaging or the official ECG webเว็บไซต์สำหรับรายละเอียดการติดต่อล่าสุด
ผู้ผลิต: ECG, NTE