การแนะนำ
The STANLEY STHT77588-0 Stud Sensor S160 is designed to detect wood and metal studs, as well as live AC wires, behind common wall materials. This device provides visual and audible indications to help you locate framing members and electrical hazards before drilling or cutting into walls. Its slim profile and intuitive design make it suitable for various home improvement and construction tasks.
คุณสมบัติหลัก:
- Detects wood and metal studs up to 1-1/2 inches (38 mm) deep.
- Features a center finder and center marker for precise location of studs.
- Detects the presence of live AC wires up to 2 inches (50 mm) deep.
- Equipped with directional LED indicators and an audible alert for clear guidance.
- Ideal for tasks such as mounting televisions, hanging pictures, and installing shelves.
การตั้งค่า
1. การติดตั้งแบตเตอรี่
The STHT77588-0 Stud Sensor S160 requires two AAA batteries (included) for operation. To install or replace batteries:
- ค้นหาฝาครอบช่องใส่แบตเตอรี่ที่ด้านหลังของอุปกรณ์
- เลื่อนฝาเปิดออก
- ใส่แบตเตอรี่ AAA สองก้อน โดยตรวจสอบให้แน่ใจว่าขั้ว (+/-) ถูกต้องตามที่ระบุภายในช่องใส่
- ปิดฝาช่องใส่แบตเตอรี่ให้แน่น

รูปที่ 1 : ด้านหน้า view of the STANLEY STHT77588-0 Stud Sensor S160, showing its compact design.
2. การสอบเทียบเบื้องต้น
For accurate readings, the stud sensor must be calibrated against the wall surface before each use. This process ensures the device adapts to the wall's density and material.
- Place the stud sensor flat against the wall in an area where you are certain there are no studs or AC wires.
- Press and hold the power button (usually located on the side or front). The device will emit an audible beep and/or illuminate LEDs during calibration.
- Keep the device stationary against the wall until the calibration process is complete (typically indicated by a steady light or a change in sound).
- Release the power button. The device is now calibrated and ready for use.
บันทึก: If the device is calibrated over a stud or AC wire, it may provide inaccurate readings. Always calibrate over a clear section of the wall.
คำแนะนำการใช้งาน
1. Powering On and Scanning
To begin scanning, press and hold the power button. The device will perform a quick self-calibration. Once calibrated, slowly slide the device horizontally across the wall surface.
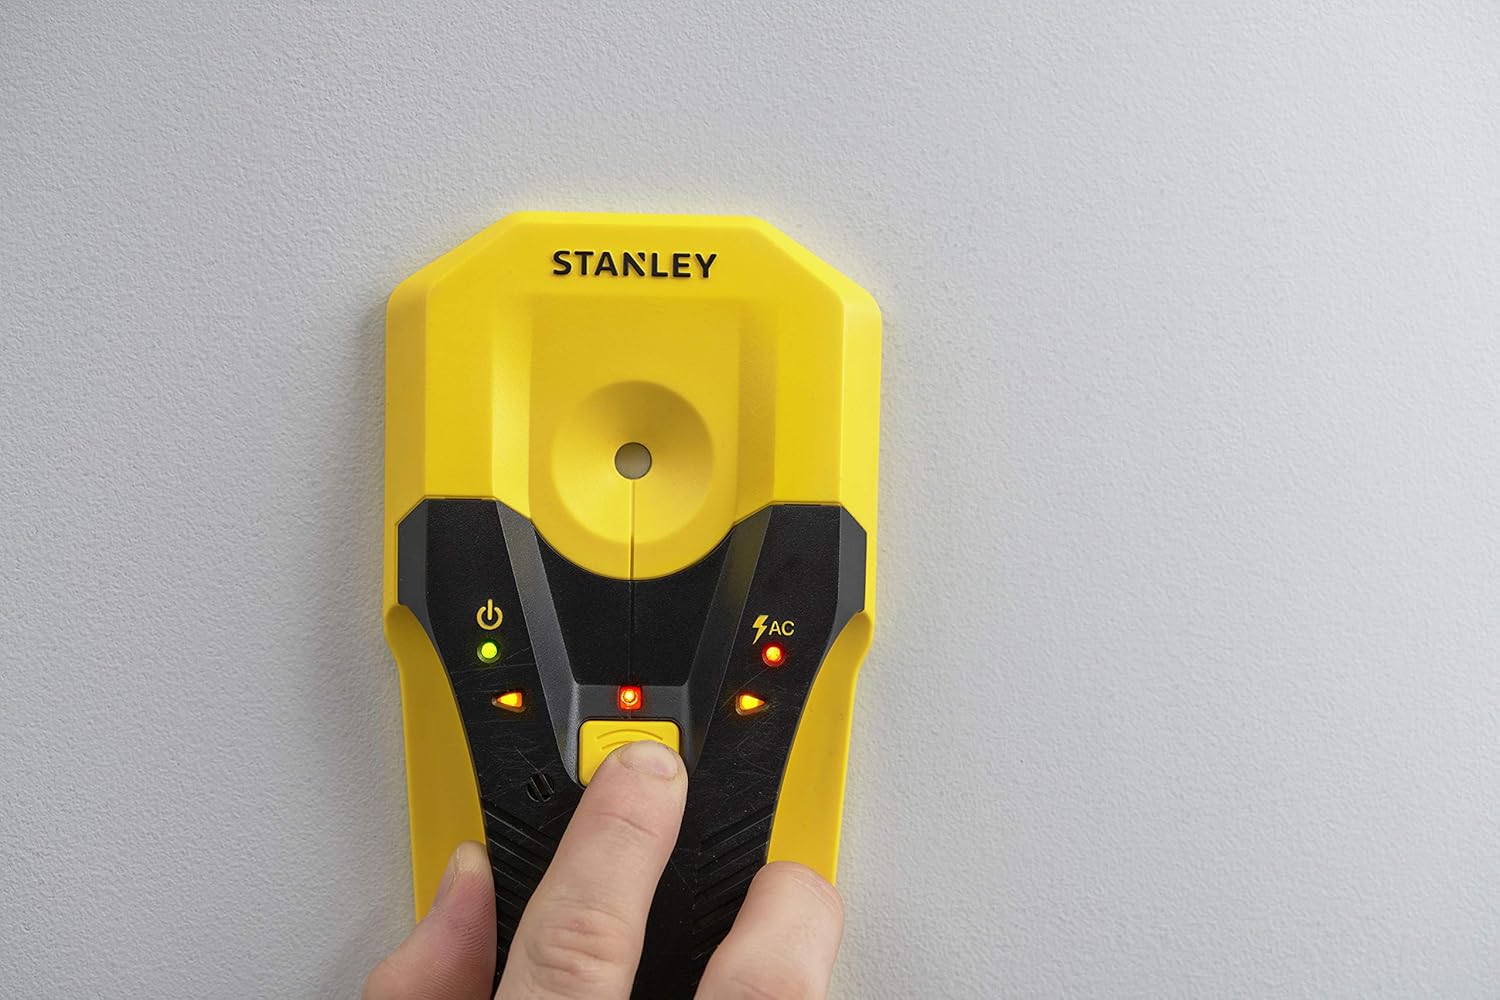
Figure 2: A hand pressing the power button to activate the stud sensor.
2. การตรวจหาหมุด
As the sensor moves over a stud, the directional LED indicators will light up sequentially, guiding you towards the center of the stud. An audible beep will also sound, increasing in frequency as you approach the center.
- Start scanning from a point where you are certain there is no stud.
- Slowly slide the sensor horizontally across the wall.
- When the device detects the edge of a stud, the LEDs will begin to illuminate.
- Continue sliding until the center LED illuminates and the audible tone becomes continuous. This indicates the center of the stud.
- Mark this spot. To confirm, scan the area from the opposite direction and mark the center again.
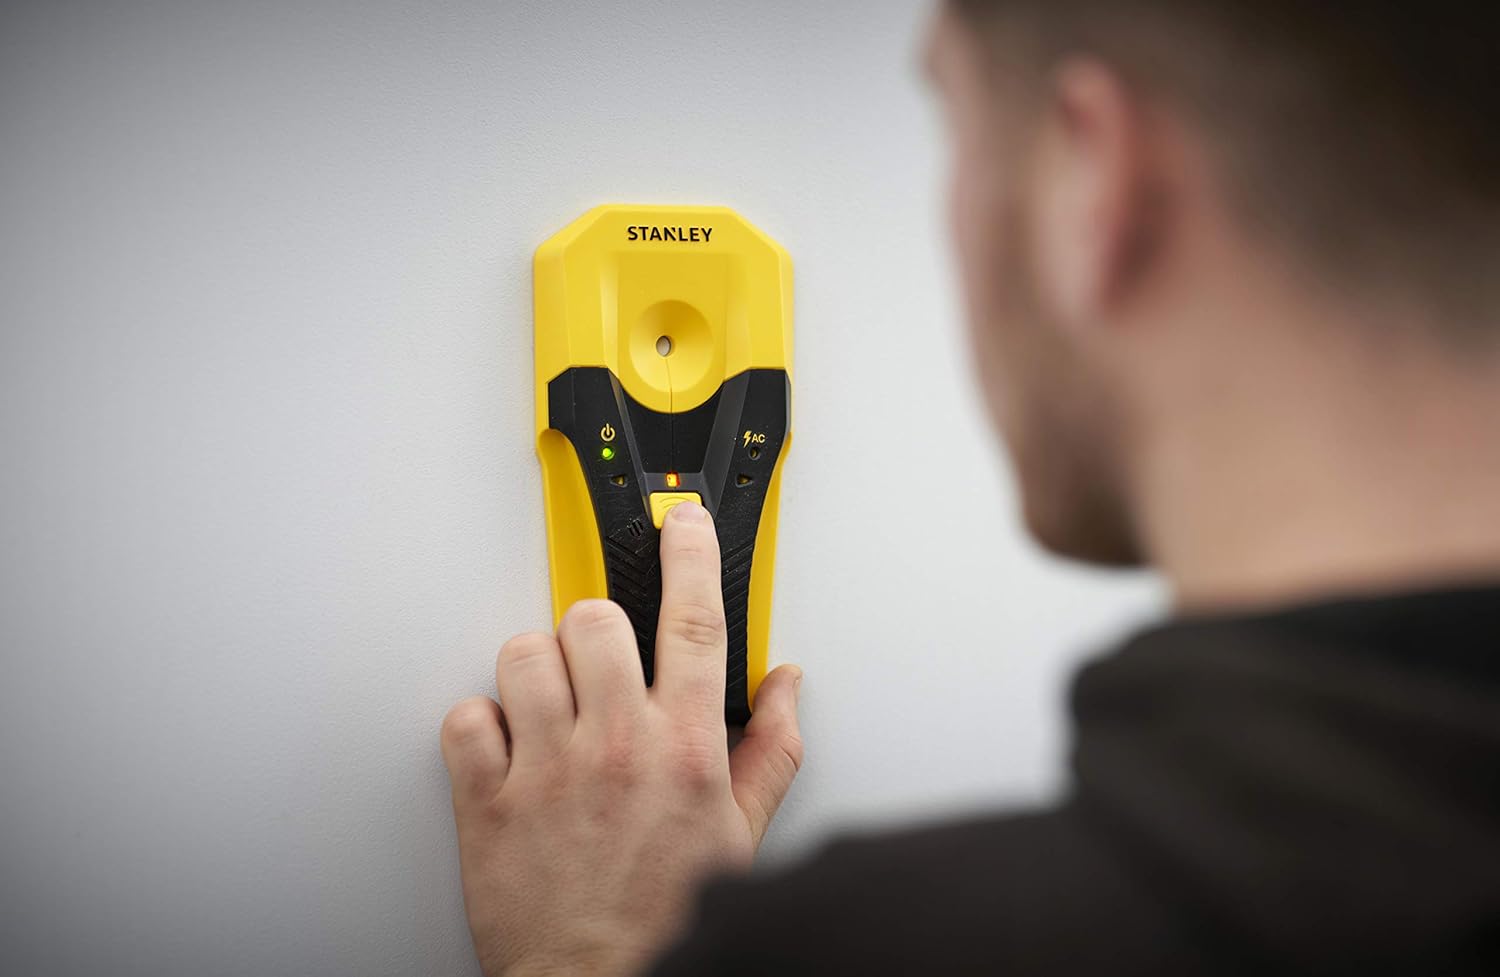
Figure 3: A user scanning a wall to locate studs or AC wires.
3. AC Wire Detection
The STHT77588-0 Stud Sensor S160 continuously monitors for live AC wires during stud detection. If a live AC wire is detected, a dedicated AC warning LED will illuminate, and a distinct audible alert will sound.

Figure 4: The AC detection light illuminated, indicating the presence of a live electrical wire.
คำเตือน: Always exercise extreme caution when live AC wires are detected. Disconnect power to the area if possible before proceeding with any work.
4. Marking Stud Locations
Once the center of a stud is identified, use the integrated center marker or a pencil to mark the location directly on the wall. The device often has a small notch or hole for precise marking.

Figure 5: A user marking the detected stud center on the wall.
การซ่อมบำรุง
Proper maintenance ensures the longevity and accuracy of your stud sensor.
- การทำความสะอาด: เช็ดเครื่องเบาๆงamp ใช้ผ้าเช็ดทำความสะอาด ห้ามใช้สารทำความสะอาดที่มีฤทธิ์กัดกร่อนหรือตัวทำละลาย เพราะอาจทำให้ผ้าเสียหายได้asinก.หรือส่วนประกอบอิเล็กทรอนิกส์
- พื้นที่จัดเก็บ: Store the stud sensor in a dry, cool place, away from direct sunlight and extreme temperatures. If storing for extended periods, remove the batteries to prevent leakage.
- การเปลี่ยนแบตเตอรี่: Replace batteries promptly when the low battery indicator appears or if the device behaves erratically.
การแก้ไขปัญหา
If you encounter issues with your STANLEY STHT77588-0 Stud Sensor S160, refer to the following common problems and solutions:
| ปัญหา | สาเหตุที่เป็นไปได้ | สารละลาย |
|---|---|---|
| อุปกรณ์ไม่เปิดเครื่อง | แบตเตอรี่เสียหรือติดตั้งไม่ถูกต้อง | ตรวจสอบขั้วแบตเตอรี่ เปลี่ยนแบตเตอรี่ AAA ใหม่ |
| การอ่านค่าที่ไม่ถูกต้องหรือไม่สม่ำเสมอ | Improper calibration; scanning too fast; wall material too dense. | Recalibrate the device on a clear section of the wall. Scan slower. Note that detection depth may vary with wall materials (e.g., thick plaster, ceramic tile). |
| AC warning light always on or flickering. | Live AC wires present; interference from other electronics. | Ensure no other electronic devices are nearby. If the warning persists, assume live wires are present and proceed with caution. |
| No detection of studs. | Studs are deeper than detection range; device malfunction. | Verify the wall material and thickness. Ensure proper calibration. If issues persist, contact customer support. |
ข้อมูลจำเพาะ
| ยี่ห้อ | สแตนลีย์ |
| หมายเลขรุ่น | STHT77588-0 |
| ความลึกในการตรวจจับหมุด | สูงสุด 1-1/2 นิ้ว (38 มม.) |
| AC Wire Detection Depth | สูงสุด 2 นิ้ว (50 มม.) |
| แหล่งพลังงาน | แบตเตอรี่ AAA 2 ก้อน (รวมอยู่ด้วย) |
| วัสดุ | พลาสติก |
| สี | สีดำ, สีเหลือง |
| น้ำหนักสินค้า | 6.4 ออนซ์ (181 กรัม) |
| ขนาดสินค้า (กว้าง x ยาว x สูง) | 10.24" x 6.89" x 0.98" (260 x 175 x 25 มม.) |
| การให้คะแนนการคุ้มครองระหว่างประเทศ | IP541 |
| การใช้ที่แนะนำ | TV mounting, hanging pictures and shelves |
ข้อมูลด้านความปลอดภัย
Please read and understand all safety instructions before using the STANLEY STHT77588-0 Stud Sensor S160.
- Always assume live AC wires are present until confirmed otherwise. Disconnect power to the area if possible before drilling or cutting.
- Do not rely solely on the stud sensor for critical applications. Use other methods (e.g., blueprints, tapping) to confirm findings when necessary.
- เก็บอุปกรณ์ให้ห่างจากน้ำและความชื้น
- ห้ามพยายามเปิดหรือดัดแปลงอุปกรณ์ ไม่มีชิ้นส่วนใดภายในที่ผู้ใช้สามารถซ่อมแซมได้
- กำจัดแบตเตอรี่อย่างมีความรับผิดชอบตามกฎระเบียบท้องถิ่น
การรับประกันและการสนับสนุน
STANLEY products are manufactured to high-quality standards. For specific warranty information, please refer to the warranty card included with your product or visit the official STANLEY webเว็บไซต์.
For technical assistance, troubleshooting beyond this manual, or to inquire about replacement parts, please contact STANLEY customer support through their official channels. Keep your purchase receipt and model number (STHT77588-0) handy when contacting support.
คุณมักจะพบข้อมูลสนับสนุนและคำถามที่พบบ่อยได้ที่ STANLEY brand store on Amazon หรืออย่างเป็นทางการของพวกเขา webเว็บไซต์.


