1. บทนำ
This manual provides detailed instructions for setting up, operating, maintaining, and troubleshooting your HUAWEI 4G Wireless Router B311As-853. Please read this manual thoroughly before using the device to ensure proper and safe operation.
2. เนื้อหาบรรจุภัณฑ์
ตรวจสอบว่าแพ็คเกจของคุณมีรายการต่อไปนี้:
- HUAWEI 4G Wireless Router B311As-853
- อะแดปเตอร์แปลงไฟ
- คู่มือเริ่มต้นอย่างรวดเร็ว (เอกสารนี้)
- สายเคเบิลอีเธอร์เน็ต (อาจแตกต่างกันไปตามภูมิภาค)
Note: Actual contents may vary. Please check the packaging for a complete list.
3. สินค้าหมดview
Familiarize yourself with the main components and indicators of your router.
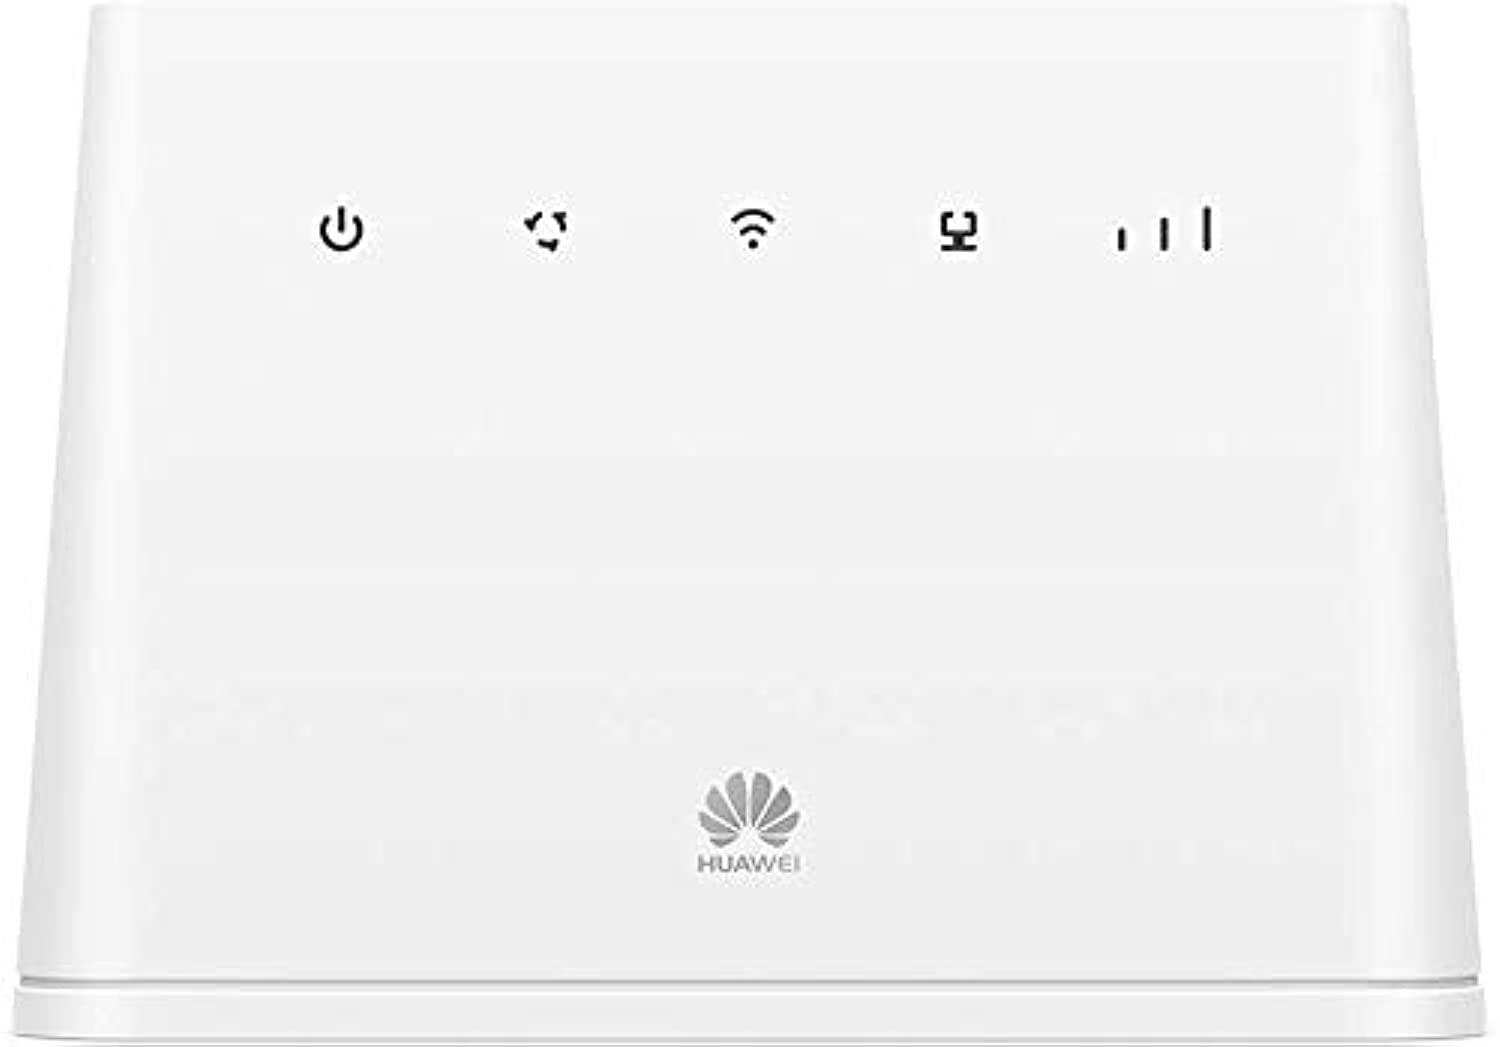
รูปที่ 1: ด้านหน้า view of the HUAWEI 4G Wireless Router B311As-853, showing power and WPS buttons, and indicator lights for power, network status, Wi-Fi, and signal strength.
ไฟแสดงสถานะ:
- ไฟแสดงสถานะพลังงาน: บ่งชี้สถานะพลังงาน
- ตัวบ่งชี้สถานะเครือข่าย: Shows connection to the 4G network.
- ตัวบ่งชี้ Wi-Fi: แสดงสถานะ Wi-Fi
- ตัวบ่งชี้ความแรงของสัญญาณ: แสดงความแรงของสัญญาณ 4G
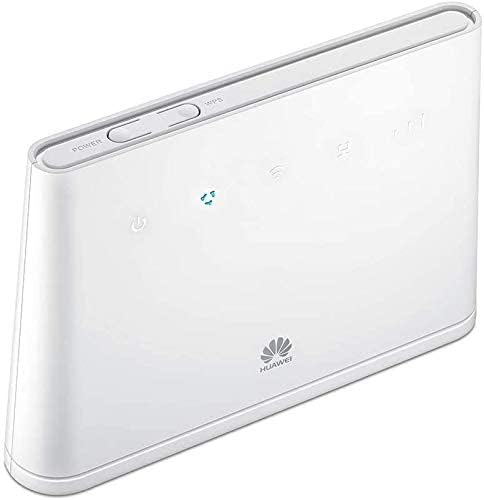
รูปที่ 2: ด้านข้าง view of the HUAWEI 4G Wireless Router B311As-853, showing ports and SIM card slot.
พอร์ตและปุ่ม:
- พอร์ตไฟ: เชื่อมต่อกับอะแดปเตอร์ไฟ
- พอร์ต LAN/WAN: เชื่อมต่อกับคอมพิวเตอร์หรืออุปกรณ์เครือข่ายอื่นๆ
- ช่องใส่ซิมการ์ด: ใส่ซิมการ์ด 4G ของคุณลงในช่องนี้
- ปุ่มรีเซ็ต: ใช้เพื่อคืนค่าการตั้งค่าจากโรงงาน
- ปุ่ม WPS: For quick Wi-Fi Protected Setup.
4. คู่มือการติดตั้ง
4.1. การใส่ซิมการ์ด
- ตรวจสอบให้แน่ใจว่าเราเตอร์ปิดอยู่
- ค้นหาช่องใส่การ์ด SIM ซึ่งโดยปกติจะอยู่ที่ด้านข้างหรือด้านล่างของอุปกรณ์
- Insert a standard 4G SIM card into the slot with the gold contacts facing down and the notched corner oriented correctly. Push until it clicks into place.
4.2. การเชื่อมต่อพลังงาน
- เชื่อมต่ออะแดปเตอร์ไฟฟ้าเข้ากับพอร์ตไฟฟ้าของเราเตอร์
- เสียบปลายอีกด้านหนึ่งของอะแดปเตอร์เข้ากับเต้ารับที่ผนัง
- Press the Power button to turn on the router. The Power indicator should light up.
4.3. การกำหนดค่าเริ่มต้น
You can connect to the router via Wi-Fi or an Ethernet cable.
การเชื่อมต่อผ่าน Wi-Fi:
- On your computer or smartphone, search for available Wi-Fi networks.
- เลือกชื่อเครือข่าย Wi-Fi (SSID) ที่พิมพ์อยู่บนฉลากด้านล่างของเราเตอร์ของคุณ
- ป้อนรหัสผ่าน Wi-Fi (คีย์) ที่พบบนฉลากของเราเตอร์ด้วย
Connecting via Ethernet:
- ต่อปลายด้านหนึ่งของสายอีเธอร์เน็ตเข้ากับพอร์ต LAN/WAN บนเราเตอร์
- Connect the other end of the Ethernet cable to your computer's Ethernet port.
การเข้าถึง Web หน้าการจัดการ:
- เปิด web เบราว์เซอร์ (เช่น Chrome, Firefox, Edge)
- ในแถบที่อยู่ ให้พิมพ์ที่อยู่ IP เริ่มต้น (โดยปกติ
192.168.8.1or192.168.1.1) หรือ web address printed on the router's label, then press Enter. - ป้อนชื่อผู้ใช้และรหัสผ่านเริ่มต้น (โดยปกติ)
adminสำหรับทั้งสองแบบ หรือตามที่ระบุไว้บนฉลากของเราเตอร์) - ทำตามคำแนะนำบนหน้าจอเพื่อทำการตั้งค่าเริ่มต้นให้เสร็จสมบูรณ์ รวมถึงการเปลี่ยนชื่อและรหัสผ่าน Wi-Fi เริ่มต้นเพื่อความปลอดภัย
5. คู่มือการใช้งาน
5.1. อุปกรณ์เชื่อมต่อ
Once the router is set up and connected to the internet, you can connect multiple devices:
- อุปกรณ์ Wi-Fi: Connect smartphones, tablets, laptops, and other Wi-Fi enabled devices using the Wi-Fi name (SSID) and password you configured.
- อุปกรณ์แบบมีสาย: ใช้สายเคเบิลอีเทอร์เน็ตเพื่อเชื่อมต่ออุปกรณ์ต่างๆ เช่น คอมพิวเตอร์เดสก์ท็อป สมาร์ททีวี หรือคอนโซลเกม เข้ากับพอร์ต LAN
5.2. ทำความเข้าใจไฟแสดงสถานะ
The indicator lights provide important information about the router's status:
- พลัง: ไฟสีเขียวสว่างแสดงว่าเปิดเครื่องแล้ว
- สถานะเครือข่าย: Solid blue/green indicates connected to 4G network; blinking indicates searching for network; red indicates no network or error.
- ไวไฟ : Solid green indicates Wi-Fi is active; blinking indicates data transmission.
- ความแรงของสัญญาณ: Multiple bars indicate strong signal; fewer bars indicate weaker signal.
5.3. การจัดการการตั้งค่า
เข้าถึง web management page (as described in Section 4.3) to manage advanced settings such as:
- การเปลี่ยนชื่อและรหัสผ่าน Wi-Fi
- Configuring network settings (APN, data limits).
- การจัดการอุปกรณ์ที่เชื่อมต่อ
- กำลังอัปเดตเฟิร์มแวร์
6. การบำรุงรักษา
6.1. การทำความสะอาด
Regularly clean the router to prevent dust buildup:
- Power off the device and unplug it from the power outlet.
- ใช้ผ้าแห้งนุ่มเช็ดภายนอก
- ห้ามใช้น้ำยาทำความสะอาดชนิดสเปรย์หรือสเปรย์
6.2. การอัปเดตเฟิร์มแวร์
ตรวจสอบและติดตั้งอัพเดตเฟิร์มแวร์เป็นระยะผ่าน web หน้าการจัดการ การอัปเดตเฟิร์มแวร์สามารถปรับปรุงประสิทธิภาพ เพิ่มคุณสมบัติใหม่ และเสริมสร้างความปลอดภัยได้
6.3. การรีเซ็ตเป็นการตั้งค่าจากโรงงาน
If you encounter persistent issues or forget your login credentials, you can reset the router to its factory default settings:
- With the router powered on, use a pointed object (like a paperclip) to press and hold the Reset button for approximately 5-10 seconds.
- ปล่อยปุ่มเมื่อไฟแสดงสถานะกะพริบ เราเตอร์จะรีสตาร์ทด้วยการตั้งค่าจากโรงงาน
- You will need to reconfigure the router after a factory reset.
7 การแก้ไขปัญหา
หัวข้อนี้จะกล่าวถึงปัญหาทั่วไปที่คุณอาจพบเจอ
7.1. ไม่มีการเชื่อมต่ออินเตอร์เน็ต
- ตรวจสอบซิมการ์ด: ตรวจสอบให้แน่ใจว่าใส่ซิมการ์ดถูกต้องและเปิดใช้งานแล้ว
- สัญญาณเครือข่าย: Check the Network Status and Signal Strength indicators. If the signal is weak or red, try moving the router to a location with better reception.
- การตั้งค่า APN: Verify that the Access Point Name (APN) settings in the web management page are correct for your mobile operator.
- รีสตาร์ทเราเตอร์: ปิดเราเตอร์ รอสักครู่ แล้วเปิดเครื่องอีกครั้ง
7.2. ความเร็ว Wi-Fi ช้า
- ความแรงของสัญญาณ: Ensure your connected device is within a good Wi-Fi signal range.
- การรบกวน: Move the router away from other electronic devices that might cause interference (e.g., cordless phones, microwaves).
- มีอุปกรณ์มากเกินไป: Disconnect some devices if too many are simultaneously using the network.
- เฟิร์มแวร์: ตรวจสอบให้แน่ใจว่าเฟิร์มแวร์ของเราเตอร์ได้รับการอัปเดตแล้ว
7.3. ไม่สามารถเข้าถึงได้ Web หน้าจัดการ
- ที่อยู่ IP: ตรวจสอบที่อยู่ IP ที่ป้อนในเบราว์เซอร์อีกครั้ง
- การเชื่อมต่อ: ตรวจสอบให้แน่ใจว่าอุปกรณ์ของคุณเชื่อมต่อกับเราเตอร์อย่างถูกต้องผ่าน Wi-Fi หรือ Ethernet แล้ว
- แคชเบราว์เซอร์: ล้างแคชและคุกกี้ของเบราว์เซอร์ของคุณหรือลองใช้เบราว์เซอร์อื่น
- รีเซ็ต: หากวิธีอื่น ๆ ไม่ได้ผล ให้ทำการรีเซ็ตเป็นค่าเริ่มต้นจากโรงงาน (ดูหัวข้อ 6.3)
8. ข้อมูลจำเพาะ
Key technical specifications for the HUAWEI 4G Wireless Router B311As-853:
| คุณสมบัติ | คำอธิบาย |
|---|---|
| ยี่ห้อ | หัวเว่ย |
| ชื่อรุ่น | B311As-853 |
| เทคโนโลยีการเชื่อมต่อ | ไร้สาย |
| มาตรฐานการสื่อสารไร้สาย | 802.11ac |
| ระดับย่านความถี่ | ดูอัลแบนด์ |
| อุปกรณ์ที่รองรับ | สมาร์ทโฟน |
| การใช้ที่แนะนำ | บ้าน |
| ส่วนประกอบที่รวมอยู่ | เราเตอร์ |
| ระบบปฏิบัติการ | เราเตอร์โอเอส |
| ขนาดการจัดส่ง | ขนาด 22.8 x 18.6 x 6.2 ซม. ; 670 กรัม |
| การอ้างอิงผู้ผลิต | 545542 |
9. ข้อมูลด้านความปลอดภัย
โปรดปฏิบัติตามข้อควรระวังด้านความปลอดภัยดังต่อไปนี้:
- อย่าวางอุปกรณ์ไว้ในที่ที่มีอุณหภูมิสูงหรือต่ำเกินไป แสงแดดโดยตรง หรือสภาพแวดล้อมที่มีความชื้นสูง
- ใช้เฉพาะอะแดปเตอร์ไฟฟ้าดั้งเดิมที่ให้มาพร้อมกับอุปกรณ์เท่านั้น
- เก็บอุปกรณ์ให้ห่างจากน้ำและของเหลวอื่นๆ
- อย่าพยายามเปิดหรือซ่อมแซมอุปกรณ์ด้วยตนเอง โปรดติดต่อเจ้าหน้าที่บริการที่มีคุณสมบัติเหมาะสม
- ตรวจสอบให้แน่ใจว่ามีการระบายอากาศที่เหมาะสมรอบๆ อุปกรณ์เพื่อป้องกันความร้อนสูงเกินไป
10. การรับประกันและการสนับสนุน
For warranty information and technical support, please refer to the warranty card included in your package or visit the official HUAWEI website. You can also contact HUAWEI customer service for assistance.
หัวเว่ยอย่างเป็นทางการ Webเว็บไซต์: Consumer.huawei.com