TP-Link TL-MR3420 Wireless N300 3G/4G Router User Manual
รุ่น: TL-MR3420
1. บทนำ
The TP-Link TL-MR3420 Wireless N300 3G/4G Router is designed to share a 3G/4G mobile broadband connection wirelessly. By connecting a compatible UMTS/HSPA/EVDO USB modem to the router, a Wi-Fi hotspot is instantly established, allowing multiple devices to access the internet. This router also features a 3G/WAN connection backup strategy, ensuring a continuous internet connection by switching between 3G/4G and WAN (Ethernet) connections as needed. It supports wireless N speeds of up to 300Mbps, suitable for various online activities.
2. เนื้อหาบรรจุภัณฑ์
- TP-Link TL-MR3420 Wireless N300 3G/4G Router
- อะแดปเตอร์แปลงไฟ
- สายเคเบิลอีเทอร์เน็ต
- คู่มือการติดตั้งแบบด่วน
3. ฮาร์ดแวร์โอเวอร์view
3.1 Front Panel and LEDs
The front panel of the router features LED indicators that provide information about the device's status, including power, system, WLAN, WAN, LAN, and 3G/4G connection status.

ภาพ: ด้านหน้า view of the TL-MR3420 router, showing the TP-Link logo and status LEDs.
3.2 Side Panel (USB Port)
The side panel includes a USB 2.0 port, primarily used for connecting a compatible 3G/4G USB modem.
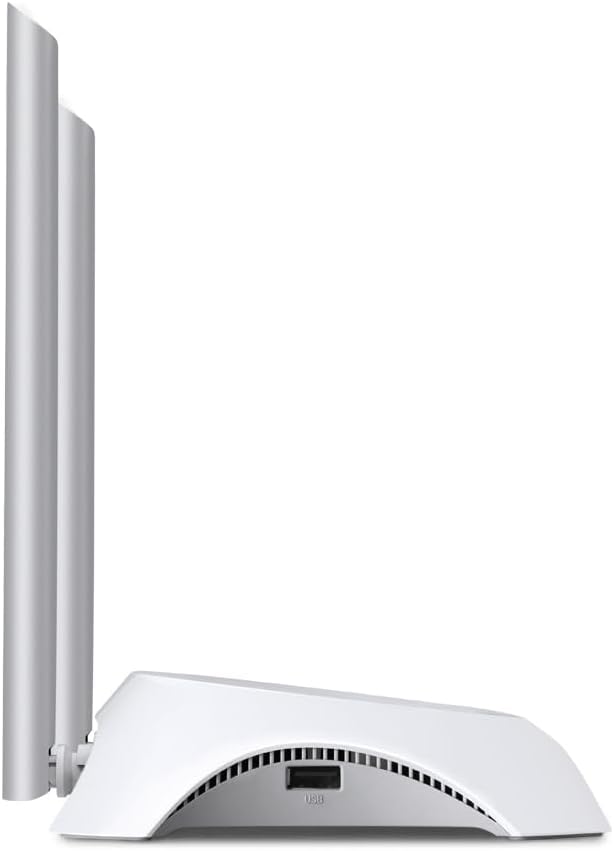
ภาพ: ด้านข้าง view of the TL-MR3420 router, highlighting the USB port for modem connection.
3.3 แผงด้านหลัง (พอร์ตและปุ่มต่างๆ)
The rear panel provides various ports and buttons for connectivity and control.
- พอร์ตไฟ: เชื่อมต่อกับอะแดปเตอร์ไฟ
- ปุ่มเปิด/ปิด: เปิดหรือปิดเราเตอร์
- พอร์ต WAN (สีน้ำเงิน): Connects to a DSL/Cable modem for traditional internet access.
- พอร์ต LAN (สีเหลือง): Four ports for connecting wired devices like computers or switches.
- ปุ่ม WPS/รีเซ็ต: กดเพื่อใช้งานฟังก์ชัน WPS; กดค้างไว้เพื่อรีเซ็ตเป็นค่าจากโรงงาน
- ขั้วต่อเสาอากาศ: For attaching the two external antennas.

ภาพ: ด้านหลัง view of the TL-MR3420 router, displaying the power port, WAN port, LAN ports, WPS/Reset button, and antenna connectors.
4. คู่มือการติดตั้ง
4.1 การเชื่อมต่อทางกายภาพ
- ติดเสาอากาศ: Screw the two detachable antennas firmly into their connectors on the rear panel.
- Connect 3G/4G USB Modem: Insert your compatible 3G/4G USB modem into the USB port on the side of the router.
- เปิดเครื่อง: ต่ออะแดปเตอร์แปลงไฟเข้ากับพอร์ตจ่ายไฟของเราเตอร์ แล้วเสียบเข้ากับเต้ารับที่ผนัง กดปุ่มเปิด/ปิดหากจำเป็น
- (Optional) Connect to WAN: If using a wired internet connection as a backup or primary, connect an Ethernet cable from your DSL/Cable modem to the blue WAN port on the router.
- (ไม่บังคับ) เชื่อมต่ออุปกรณ์แบบใช้สาย: Connect your computer or other wired devices to the yellow LAN ports using Ethernet cables.

Image: The TL-MR3420 router with a 3G USB modem connected to its side USB port.
4.2 การกำหนดค่าเริ่มต้น (Web อินเตอร์เฟซ)
- เชื่อมต่อกับเราเตอร์: Connect your computer to the router either via an Ethernet cable to a LAN port or wirelessly using the default Wi-Fi SSID printed on the router's label (e.g., TP-Link_XXXX).
- เข้าถึง Web เบราว์เซอร์: เปิด web เบราว์เซอร์ (เช่น Chrome, Firefox) และพิมพ์
http://tplinkwifi.netorhttp://192.168.0.1(หรือhttp://192.168.1.1) ลงในแถบที่อยู่ แล้วกด Enter - เข้าสู่ระบบ: ป้อนชื่อผู้ใช้และรหัสผ่านเริ่มต้นซึ่งโดยทั่วไป
adminfor both. If these do not work, check the label on the bottom of your router. - เรียกใช้การตั้งค่าด่วน: Follow the on-screen Quick Setup Wizard to configure your internet connection and wireless settings.
4.3 3G/4G Connection Setup
During the Quick Setup, select เราเตอร์ 3G/4G mode. The router will automatically detect your USB modem. You may need to select your region and ISP, and enter APN (Access Point Name) details if prompted. Ensure your 3G/4G USB modem is compatible with the TL-MR3420.
4.4 WAN Connection Setup (Optional)
If you are using a wired internet connection, configure the WAN settings. This can be done via Dynamic IP, Static IP, or PPPoE, depending on your Internet Service Provider (ISP) requirements. The TL-MR3420 supports a 3G/WAN failover strategy, allowing you to set a preferred connection (3G/4G or WAN) and use the other as a backup.
4.5 การตั้งค่าเครือข่ายไร้สาย
Set your desired Wireless Network Name (SSID) and a strong password (WPA/WPA2 Personal recommended) for your Wi-Fi network. This will secure your wireless connection.
5. การใช้งานเราเตอร์
5.1 ทำความเข้าใจเกี่ยวกับไฟ LED
| นำ | สถานะ | ข้อบ่งชี้ |
|---|---|---|
| พลัง | On | เราเตอร์เปิดใช้งานอยู่ |
| ระบบ | การกระพริบ | เราเตอร์ใช้งานได้ปกติ |
| ไว-แลน | เปิด/กะพริบ | Wireless function is enabled/data is being transmitted. |
| วัน | เปิด/กะพริบ | WAN port is connected/data is being transmitted. |
| แลน (1-4) | เปิด/กะพริบ | Corresponding LAN port is connected/data is being transmitted. |
| 3จี/4จี | เปิด/กะพริบ | 3G/4G modem is connected and working/data is being transmitted. |
5.2 การเชื่อมต่ออุปกรณ์
- อุปกรณ์ไร้สาย: ค้นหา your Wi-Fi network (SSID) on your device and enter the password you configured.
- อุปกรณ์แบบมีสาย: Connect an Ethernet cable from your device to any of the yellow LAN ports on the router.
5.3 การสลับระบบ 3G/WAN เมื่อเกิดข้อผิดพลาด
The router can be configured to use either 3G/4G or WAN as the primary internet connection, with the other serving as a backup. If the primary connection fails, the router will automatically switch to the backup, ensuring continuous internet access. This setting can be managed in the router's web interface under Network > WAN Backup.
6. การบำรุงรักษา
6.1 อัพเกรดเฟิร์มแวร์
Regularly check for and install firmware updates from the TP-Link official website. Firmware updates can improve performance, add new features, and fix bugs. Download the correct firmware for your model and follow the instructions provided on the TP-Link support page for upgrading via the web interface (System Tools > Firmware Upgrade).
6.2 การกำหนดค่าการสำรองและกู้คืน
คุณสามารถสำรองข้อมูลการตั้งค่าเราเตอร์ของคุณไปยังที่อื่นได้ file on your computer. This allows you to restore your settings quickly after a factory reset or if you need to revert to a previous configuration (System Tools > Backup & Restore).
6.3 การรีบูตระบบ
If the router is experiencing issues, a simple reboot can often resolve them. You can reboot the router from the web interface (System Tools > Reboot) or by unplugging and replugging the power adapter.
6.4 รีเซ็ตเป็นค่าโรงงาน
A factory reset will revert all settings to their default values. This can be done by pressing and holding the WPS/Reset button on the rear panel for approximately 5-10 seconds until the System LED flashes rapidly, or via the web interface (System Tools > Factory Defaults).
7 การแก้ไขปัญหา
- ไม่สามารถเข้าถึงอินเตอร์เน็ตได้:
- Check LED indicators: Ensure Power, System, WLAN, and 3G/4G (or WAN) LEDs are on or flashing correctly.
- Verify physical connections: Ensure all cables are securely connected.
- Check 3G/4G modem: Ensure it is properly inserted and recognized by the router.
- Confirm ISP settings: Verify that your 3G/4G or WAN settings (APN, connection type) are correct in the router's web อินเทอร์เฟซ
- Reboot the router and modem.
- ปัญหาการเชื่อมต่อไร้สาย:
- Ensure WLAN LED is on/flashing.
- Verify correct Wi-Fi SSID and password.
- ขยับเข้าไปใกล้เราเตอร์มากขึ้นเพื่อตรวจสอบความแรงของสัญญาณ
- Change wireless channel in router settings to avoid interference.
- ความเร็วอินเตอร์เน็ตช้า:
- Check your 3G/4G signal strength or WAN connection speed.
- Ensure no other devices are heavily using bandwidth.
- อัปเดตเฟิร์มแวร์เราเตอร์
8. ข้อมูลจำเพาะ
| คุณสมบัติ | รายละเอียด |
|---|---|
| ชื่อรุ่น | ทีแอล-MR3420 |
| ไร้มาตรฐาน | IEEE 802.11n, 802.11g, 802.11b |
| ความเร็วไร้สาย | สูงสุดถึง 300Mbps |
| ย่านความถี่ | 2.4 กิกะเฮิรตซ์ |
| ประเภทเสาอากาศ | 2x 5dBi Detachable Omni Directional Antennas |
| อินเทอร์เฟซ | 1x 10/100Mbps WAN Port, 4x 10/100Mbps LAN Ports, 1x USB 2.0 Port |
| ปุ่ม | WPS/Reset Button, Power On/Off Button |
| ขนาด (กว้าง x ลึก x สูง) | 11.34 x 8.9 x 2.8 นิ้ว (ขนาดสินค้า) |
| น้ำหนักสินค้า | 9.5 ออนซ์ |
| แหล่งจ่ายไฟ | 12VDC / 1A (External Power Adapter) |
| ความปลอดภัยแบบไร้สาย | 64/128-bit WEP, WPA/WPA2, WPA-PSK/WPA2-PSK encryption |
| อุปกรณ์ที่รองรับ | Personal Computer, UMTS/HSPA/EVDO USB Modems |
9. การรับประกันและการสนับสนุน
9.1 การรับประกันสินค้า
The TP-Link TL-MR3420 Wireless N300 3G/4G Router typically comes with a 2-year limited warranty. Please refer to the warranty card included in your package or visit the official TP-Link webเว็บไซต์สำหรับข้อกำหนดและเงื่อนไขการรับประกันโดยละเอียดที่เฉพาะเจาะจงกับภูมิภาคของคุณ
9.2 การสนับสนุนด้านเทคนิค
หากต้องการความช่วยเหลือด้านเทคนิค การแก้ไขปัญหา หรือสอบถามข้อมูลเพิ่มเติม โปรดไปที่เว็บไซต์ฝ่ายสนับสนุนอย่างเป็นทางการของ TP-Link website. You can find FAQs, firmware updates, and contact information for customer support.
- รองรับทีพีลิงค์ Webเว็บไซต์: www.tp-link.com/support/


