1. పరిచయం
This manual provides essential instructions for the proper setup, operation, and maintenance of your Argox AS-8250U Barcode Scanner. The AS-8250U is a long-range scanner designed for various applications, including retail, inventory management, invoicing, and factory receiving. It offers fast and accurate reading of PDF codes, Code 16K, and all standard linear symbologies.
2. భద్రతా సమాచారం
- స్కానర్ను తీవ్రమైన ఉష్ణోగ్రతలు, తేమ లేదా ప్రత్యక్ష సూర్యకాంతికి గురిచేయవద్దు.
- స్కానర్ను పడవేయడం లేదా తీవ్రమైన ప్రభావాలకు గురిచేయడం మానుకోండి.
- స్కానర్ను విడదీయడానికి లేదా సవరించడానికి ప్రయత్నించవద్దు. ఇది వారంటీని రద్దు చేస్తుంది.
- సరైన పనితీరును నిర్ధారించడానికి స్కానింగ్ విండోను శుభ్రంగా ఉంచండి.
- Use only the provided or recommended power source and cables.
3. ప్యాకేజీ విషయాలు
దయచేసి ఈ క్రింది అంశాల కోసం పెట్టెను ఎంచుకోండి:
- Argox AS-8250U Barcode Scanner
- USB Interface Cable (or other specified interface cable)
- వినియోగదారు మాన్యువల్ (ఈ పత్రం)
4. ఉత్పత్తి ముగిసిందిview
The Argox AS-8250U is a handheld barcode scanner designed for ergonomic use and efficient data capture.
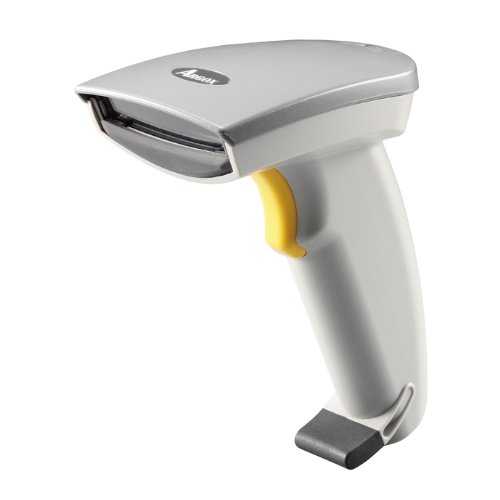
చిత్రం 1: ముందు వైపు view of the Argox AS-8250U Barcode Scanner. This image shows the scanner's ergonomic design, scanning window, and trigger button.

చిత్రం 2: కోణీయ view of the Argox AS-8250U Barcode Scanner, highlighting its compact form factor and the Argox logo.
ముఖ్య భాగాలు:
- స్కానింగ్ విండో: Emits and receives the laser beam for barcode reading.
- ట్రిగ్గర్ బటన్: Activates the scanning process.
- సూచిక కాంతి: Provides feedback on scanning status (e.g., successful read).
- Interface Port: Connects the scanner to the host device via USB, RS-232, or Keyboard Wedge (KBW).
5. సెటప్
5.1 స్కానర్ను కనెక్ట్ చేయడం
- Identify Interface: Determine the interface type required by your host system (USB, RS-232, or Keyboard Wedge). The AS-8250U supports all popular interfaces.
- కేబుల్ కనెక్ట్ చేయండి: Plug one end of the interface cable into the scanner's interface port.
- హోస్ట్కి కనెక్ట్ అవ్వండి: Plug the other end of the interface cable into the corresponding port on your computer or POS system.
- USB: Connect to an available USB port. The scanner is typically plug-and-play, and Windows will automatically install necessary drivers.
- RS-232: Connect to a serial port. You may need to configure serial port settings on your host system.
- Keyboard Wedge (KBW): Connect between your keyboard and the computer's keyboard port.
- పవర్ ఆన్: Once connected, the scanner should power on automatically. The indicator light may illuminate briefly.
5.2 Driver Installation (for USB)
For USB connections, the Argox AS-8250U is designed for plug-and-play functionality with Windows operating systems. Typically, no manual driver installation is required. Upon connecting the scanner to a USB port, your operating system should automatically detect and install the necessary drivers. If prompted, follow the on-screen instructions. A Windows utility is included for advanced configuration if needed.
6. స్కానర్ను ఆపరేట్ చేయడం
6.1 ప్రాథమిక స్కానింగ్ విధానం
- Prepare for Scan: Ensure the scanner is connected and powered on. Open an application on your host system where you want the barcode data to appear (e.g., a text editor, spreadsheet, or POS software).
- స్కానర్ను లక్ష్యంగా చేసుకోండి: Point the scanning window of the AS-8250U at the barcode you wish to read. The optimal scanning distance ranges from contact up to 250mm, depending on the barcode density.
- ట్రిగ్గర్ నొక్కండి: Press and hold the trigger button. A red laser line will emit from the scanning window.
- Scan the Barcode: Position the laser line across the entire barcode. Once a successful read occurs, the scanner will typically emit an audible beep and/or the indicator light will flash. The barcode data will then be transmitted to your host system.
- విడుదల ట్రిగ్గర్: Release the trigger button after a successful scan.
6.2 మద్దతు ఉన్న బార్కోడ్ చిహ్నాలు
The AS-8250U is capable of reading a wide range of barcode types, including:
- PDF codes
- కోడ్ 16K
- All standard linear (1D) symbologies (e.g., UPC/EAN/JAN, Code 39, Code 128, Interleaved 2 of 5, Codabar, etc.)
7. నిర్వహణ
7.1 స్కానర్ను శుభ్రపరచడం
- స్కానింగ్ విండో: మెత్తని, మెత్తని బట్టను ఉపయోగించండి డిampened with a mild, non-abrasive cleaner (e.g., glass cleaner) to gently wipe the scanning window. Avoid harsh chemicals or abrasive materials that could scratch the surface.
- బాహ్య సిasing: స్కానర్ యొక్క బాహ్య భాగాన్ని మృదువైన, d తో తుడవండి.amp cloth. Do not allow liquids to enter the scanner's internal components.
- కేబుల్స్: Inspect cables regularly for any signs of damage.
7.2 నిల్వ
When not in use, store the scanner in a clean, dry environment, away from direct sunlight and extreme temperatures. Protect it from dust and physical damage.
8. ట్రబుల్షూటింగ్
| సమస్య | సాధ్యమైన కారణం | పరిష్కారం |
|---|---|---|
| స్కానర్ పవర్ ఆన్ అవ్వదు. | Cable not properly connected or damaged. | Check cable connections at both the scanner and the host device. Try a different USB port or cable if available. |
| స్కానర్ బార్కోడ్లను చదవదు. |
|
|
| Barcode data is incorrect or incomplete. |
|
|
| హోస్ట్కు డేటా ప్రసారం చేయబడలేదు. |
|
|
9. స్పెసిఫికేషన్లు
| ఫీచర్ | వివరాలు |
|---|---|
| బ్రాండ్ | అర్గోక్స్ |
| మోడల్ | AS-8250U |
| తయారీదారు | Argox Information Co., Ltd, Taiwan |
| కనెక్టివిటీ టెక్నాలజీ | USB Cable (also supports RS-232, KBW) |
| స్కాన్ రేటు | సెకనుకు 200 స్కాన్లు |
| పని పరిధి | Contact to 250mm on medium density barcodes |
| మద్దతు ఉన్న చిహ్నాలు | PDF codes, Code 16K, all standard linear (1D) symbologies |
| ఆపరేటింగ్ సిస్టమ్ అనుకూలత | విండోస్ |
| అనుకూల పరికరాలు | డెస్క్టాప్, ల్యాప్టాప్ |
| శక్తి మూలం | కార్డెడ్ ఎలక్ట్రిక్ |
| వస్తువు బరువు | 420 గ్రా |
| ప్యాకేజీ కొలతలు | 22.8 x 11.8 x 11 సెం.మీ |
10. వారంటీ మరియు మద్దతు
For warranty information and technical support, please refer to the warranty card included with your product or visit the official Argox webవారంటీ క్లెయిమ్ల కోసం కొనుగోలు రుజువుగా మీ కొనుగోలు రసీదును ఉంచండి.
For further assistance, please contact Argox customer support through their official channels.


