1. Bubuka
This manual provides instructions for the operation and maintenance of your new Generic replacement infrared remote control for Quietside AC Air Conditioners. Please read this manual thoroughly before using the remote control to ensure proper function and to extend the life of the product. This remote is designed to be compatible with various Quietside AC models as listed above.
2. Émbaran Kasalametan
- Ulah campur accu heubeul jeung anyar.
- Ulah gaul batré basa, standar (karbon-séng), atawa rechargeable (nikel-kadmium).
- Sok geura cabut batré béak.
- Upami kadali jauh henteu dianggo kanggo waktos anu panjang, cabut batréna pikeun nyegah bocor.
- Jauhkeun batré tina jangkauan barudak.
- Ulah ngantepkeun remot kontrol ka sinar panonpoé langsung, panas, atanapi kalembaban.
3. Eusi Paket
pakét anjeun kedah ngandung:
- 1 x Generic Replacement Remote Control
Note: Batteries (2 x AAA) and a user manual are not included with this product.
4. Setelan: Pamasangan Batré
The remote control requires two AAA batteries (not included) for operation. Follow these steps to install them:
- Teangan tempat panutup kompartemen batré dina tonggong kadali jauh.
- Geser panutup ka handap atawa pencét kancing jeung angkat pikeun muka kompartemen.
- Insert two new AAA batteries, ensuring the positive (+) and negative (-) terminals match the diagrams inside the compartment.
- Ganti panutup kompartemen batré ku cara ngageser deui kana tempatna nepi ka klik aman.

Gambar 4.1: Tukangeun view of the remote control with the battery compartment open, ready for battery insertion.

Gambar 4.2: Lain view of the remote control's battery compartment, illustrating the correct orientation for battery placement.
Once batteries are installed, the remote control is ready for use. No programming is typically required for this replacement remote.
5. Parentah Operasi
Point the remote control directly at the infrared receiver on your Quietside AC unit. Ensure there are no obstructions between the remote and the AC unit.
5.1 Fungsi Dasar
- Daya ON/OFF: Pencét éta OFF/ON button to turn the AC unit on or off.
- Nyaluyukeun Suhu: Ngagunakeun éta + (Up) jeung - Tombol (Turun) pikeun ningkatkeun atanapi nurunkeun suhu anu dipikahoyong.
- Ngarobah Mode: Pencét éta MODÉ button to cycle through available operating modes (e.g., Cool, Heat, Fan, Dry, Auto).
5.2 Changing Temperature Unit (Celsius/Fahrenheit)
To switch the temperature display between Celsius (°C) and Fahrenheit (°F):
- Pencét sareng tahan sakaligus MODÉ tombol jeung - (Temperature Down) button.
- The display will toggle between Celsius and Fahrenheit. The default display is typically in Celsius.
6. Tombol Fungsi Leuwihview
Refer to the image below for the layout of the remote control buttons and their general functions.
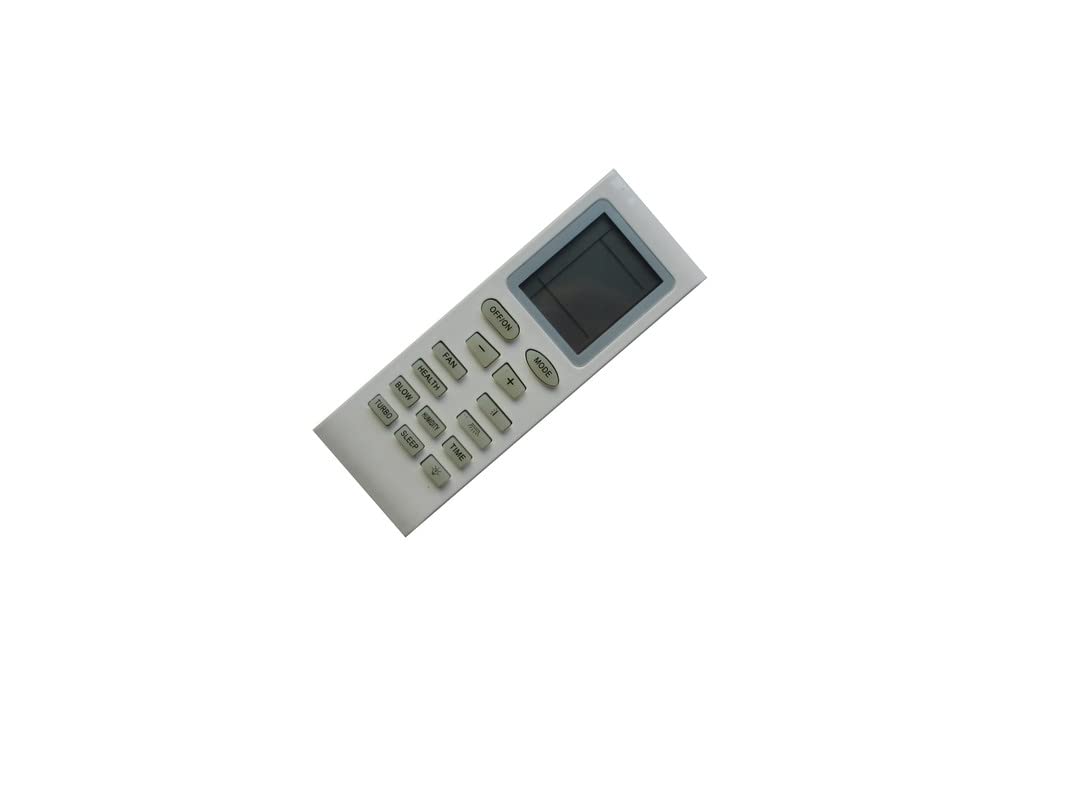
Gambar 6.1: Hareupeun view of the remote control, highlighting the display and various function buttons.
| Tombol | Fungsi |
|---|---|
| OFF/ON | Turns the AC unit on or off. |
| MODÉ | Ngaliwatan mode operasi (contona, Tiis, Panas, Kipas, Garing, Otomatis). |
| +/- | Adjusts temperature settings up or down. |
| kipas angin | Nyaluyukeun setélan kecepatan kipas. |
| kaséhatan | Activates or deactivates health-related functions (if supported by AC unit). |
| NIUP | Controls the fan blow function, often used to dry internal components. |
| Asor | Activates or adjusts dehumidification settings. |
| WAKTU | Sets timer functions (e.g., auto on/off). |
| TURBO | Ngaktipkeun pendinginan/pemanasan maksimum pikeun parobahan suhu anu gancang. |
| SARE | Adjusts settings for comfortable sleep (e.g., gradual temperature changes). |
Note: Not all functions may be supported by every Quietside AC model. Some buttons may have no effect depending on your specific unit.
7. Cara ngungkulan
| Masalah | Mungkin Cukang lantaranana / Solusi |
|---|---|
| Kadali jauh teu ngabales. |
|
| AC unit does not respond to certain buttons. |
|
| Pintonan taram atanapi kosong. |
|
8. Spésifikasi
- merek: Generik
- Alat anu cocog: Quietside AC Air Conditioners (Models: YB1FAF, QSVI-18A, QSVI-24A, QS09-VJ220, QSFMI-18A, QSVI-09A, QSVI-12A, 5304502215, QS12-VJ220, QS18-VJ220, QS24-VJ220, QSFMI-09A, QSFMI-12A)
- Téknologi konektipitas: Infrabeureum (IR)
- Sumber Daya: 2 x Batré AAA (teu kalebet)
- Jumlah Max Alat anu Dirojong: 1 (ngadalikeun hiji unit AC dina hiji waktu)
- Fitur husus: Temperature unit toggle (Celsius/Fahrenheit) by holding MODE and Temp Down buttons.
9. Pangropéa
- beberesih: Ngusap kadali jauh ku lawon lemes, garing. Ulah make cleaners cair atawa bahan abrasive.
- Ngagantian batré: Replace batteries when the remote's display becomes dim or the remote becomes unresponsive. Always replace both batteries at the same time.
- Panyimpenan: If not using the remote for an extended period, remove the batteries to prevent corrosion and store it in a cool, dry place.
10. Garansi jeung Rojongan
As this is a generic replacement product, specific warranty details may vary. Please refer to the seller's return policy or contact the seller directly for any support or warranty inquiries regarding this remote control.


