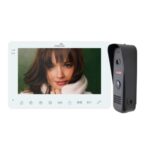
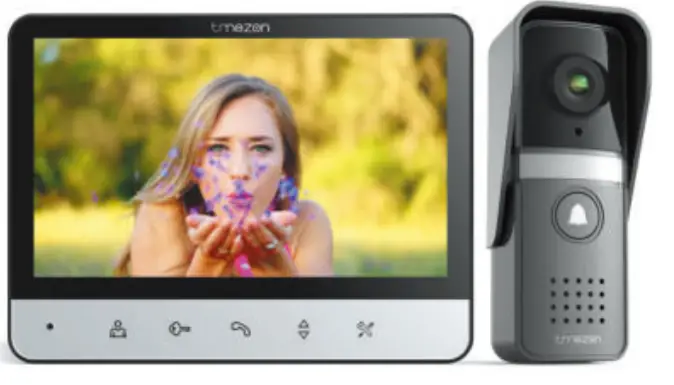
tmezon MZ-V20 4 Wire Connected Video Intercom Wired Video Intercom Kit
Specifications
- Display Resolution: 7 inch, 1024*600
- Intercom Duration: 120s
- Operating Temperature: -10°C to 40°C
- Number of Ringtones: 16 ringtones
- Power Supply: DC 12V
- Dimension: 136*181*18mm
- Angle Resolution
- Power Consumption
- Operating Temperature in Static State
Product Usage Instructions
- Step 1: Installation
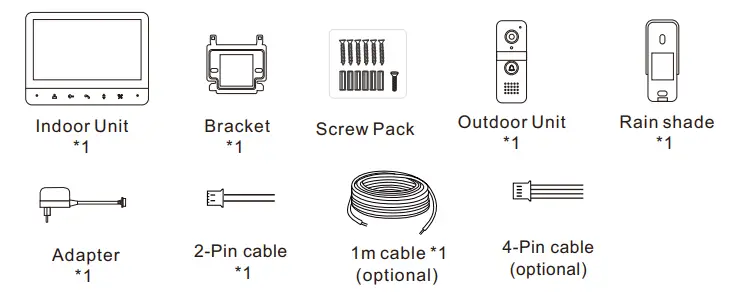
Mount the indoor unit using the provided bracket and screws. Connect the outdoor unit and rain shade. Use the adapter and cables as needed. - Step 2: Power On
Connect the power supply (DC 12V) to the device. - Step 3: Operation
Use the monitor with a resolution of 1024*600 to view visitors. Intercom conversations have a duration of 120 seconds. Choose from 16 different ringtones for notifications. - Step 4: Maintenance
Ensure the operating temperature is within -10°C to 40°C. Keep the device clean and free from obstructions for optimal performance.
- Q: What should I do if the device is not powering on?
A: Check the power supply connection and ensure it is securely connected. Verify that the power source is functioning correctly. - Q: Can I change the ringtones on the device?
A: Yes, you can select from the available 16 ringtones in the settings menu of the device. - Q: Is it possible to extend the cable length?
A: Yes, you can use the optional 1m or 4-Pin cable for extending the cable length as needed.
7″ Video Doorphone User manual
SCAN & FOLLOW US

Welcome to send email if any problem.
Support email: support@tmezon.com
Official Website: http://www.tmezon.com

Accessories
Specifications
| Monitor | Doorbell | ||
| Display | 7 inch | Angle | 80° |
| Resolution | 1024*600 | Resolution | 700 TVL |
| Intercom duration | 120s | Power Consumption | Static State<3W,
Working State<10W |
| Operating
Temperature |
-10~40℃ | Operating Temperature | -15~50℃ |
| Number of ringtones | 16 ringtones | Waterproof Level | Ip55 |
| Power supply |
DC 12V |
Relative
Humidity |
10%~90%(RH) |
| Dimension | 136*181*18mm | Dimension | 48*33*134mm |
Features
- 7inch TFT screen with wide screen images and no radiation, low power consumption but high definition.
- Water-proof, oxidation-proof, abrasion-proof and anti-vandalism metal alloy panel outdoor unit. Release the electric lock.
- Monitor the outside.
- 16 melodies for option.
- Ringtone, talking volume, image brightness and chroma settings through the menu.
Wiring Diagram
How to attach wires to terminals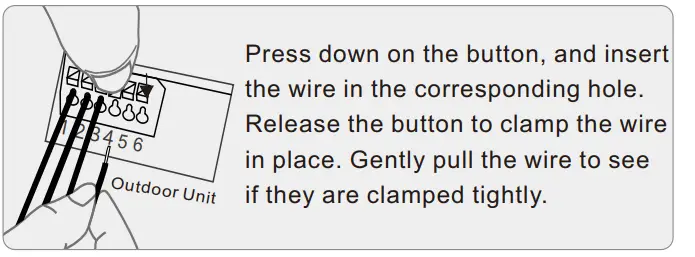
- Audio wire
- Ground wire
- Video wire
- Power wire
The connecting wire between the indoor and outdoor units:
- Distance 0 – 15m: RVV4×0.2 mm²
- Distance 15 – 30m: RVV4×0.5 mm²
Connection: Terminals 1/2/3/4 on the outdoor unit to terminals 1/2/3/4 on the indoor unit.
The LOCK terminals on the indoor unit or the 5/6 terminals on the outdoor unit are used to connect the electric lock . When connecting, use the RVV2×1.0 mm² cable and the cable length should be ≤15m.
Connecting the electric lock with both the indoor and outdoor unit at the same time is prohibited.
Before pressing the Electric Lock button, terminals (5/6 on the outdoor unit ) are in the “Normally Open” state. When pressing down the button, terminals are “shorted and connected”. The terminals are used to connect the electric lock that works in <30V, <3A, however, additional power supply for the lock to work is required.
Lock and power supply for unlocking are not supplied.
Connect the electric lock to Doorbell
Method 1: Power the electric lock by extra power supply (NO lock only)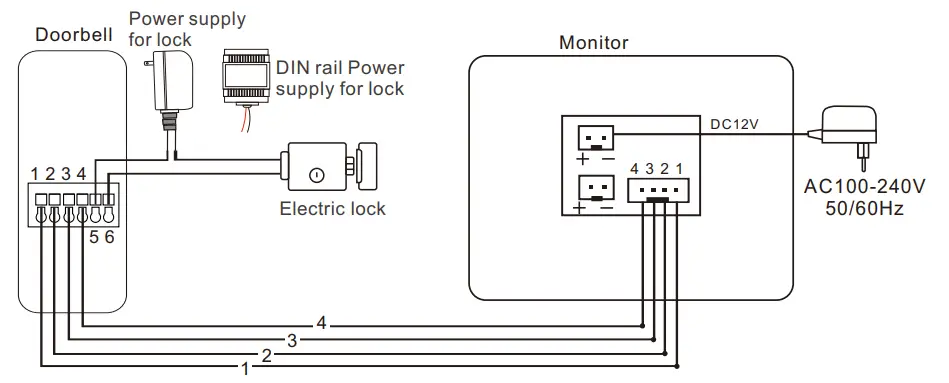 Method 2: Power the ele ctric lock with power supply control
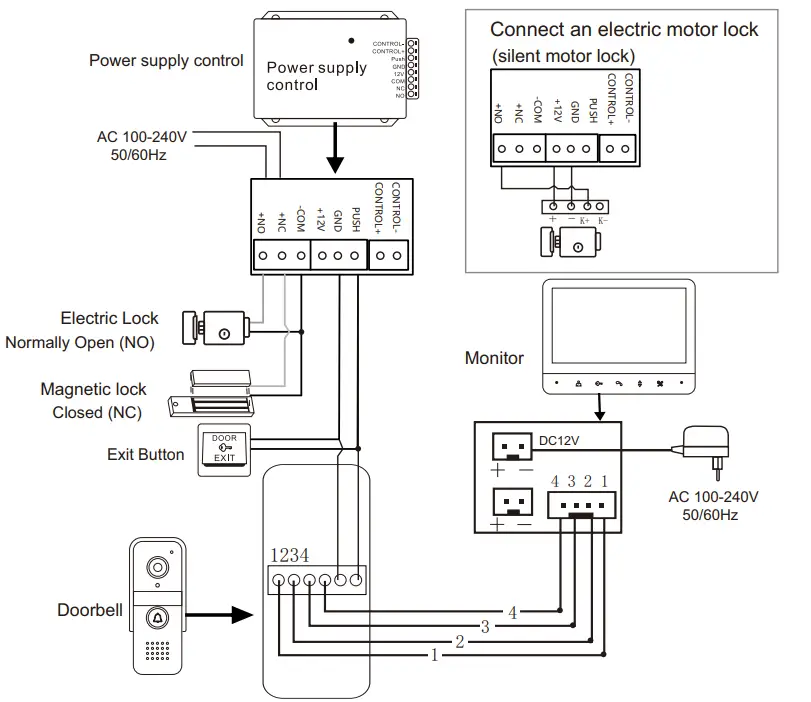
Connect the electric lock to Monitor
Method 1: Power the electric lock by the monitor (DC 12V NO lock only) 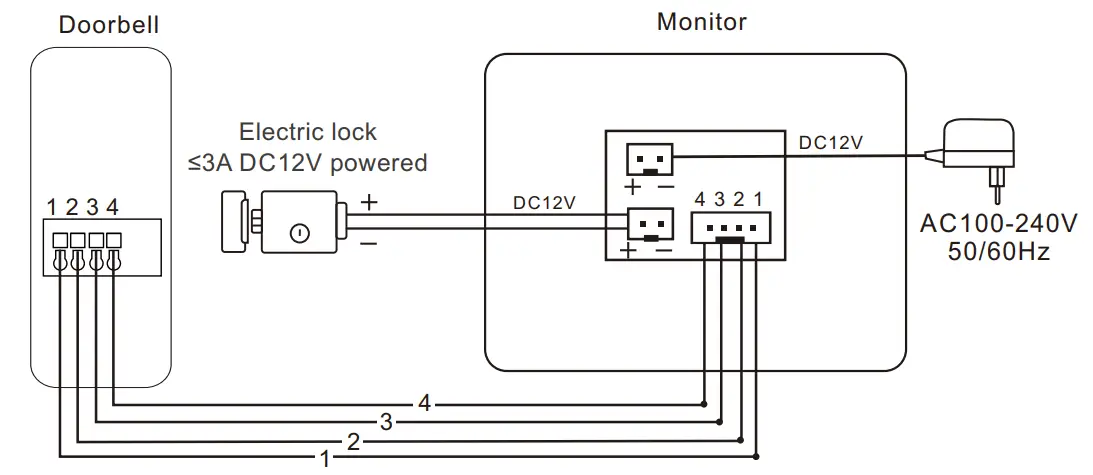 Method 2: Power the electric lock with power supply control
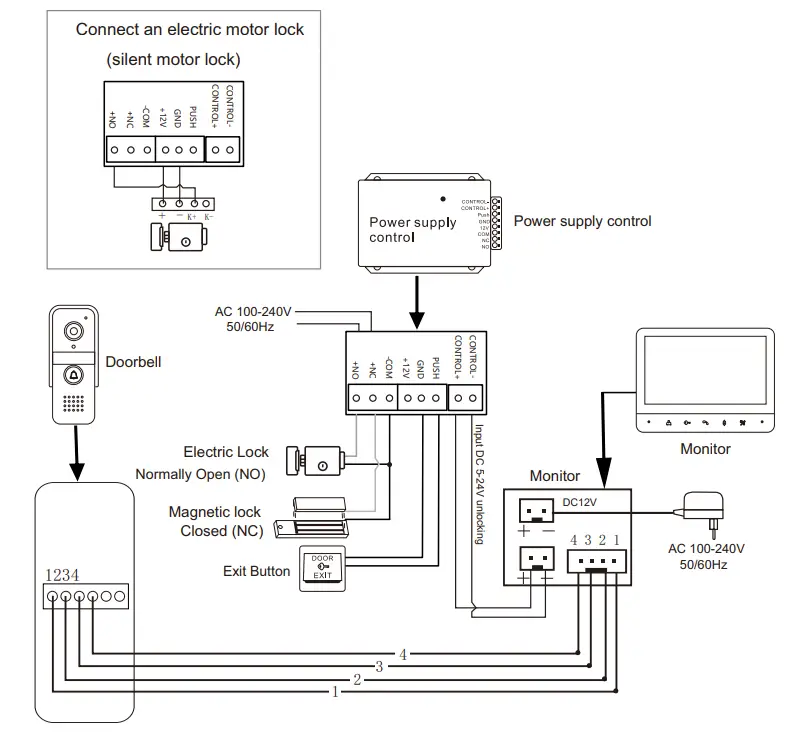
Scan QR code for tutorial video

Installation Instruction
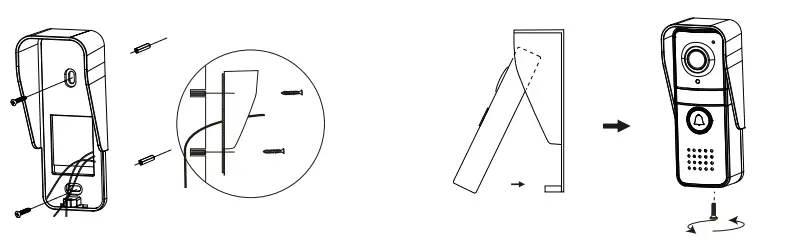
Outdoor unit installation
- Fasten the rain shade on the wall with screws. (1.4-1.6m high from the ground, screw size: 4*30BA)
- Connect the wires according to the wiring diagram.
- Fix into the rain shade and fasten the bottom with screws.
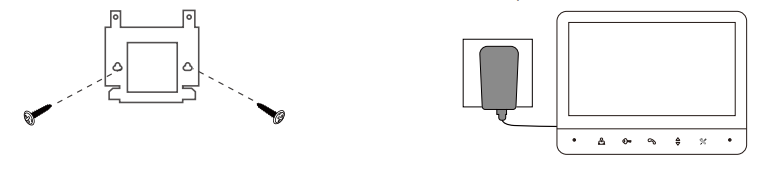
Indoor unit installation
- Fix the bracket on the wall with screws.(1.4-1.6m high from the ground )
- Connect the wires according to the wiring diagram.
- Hang on the bracket.
- Connect to power source.
NOTE:
- Turn off the power before wiring.
- If the product doesn’t work after installation, check if wires are connected properly and securely.
- Use a slightly damp soft cloth to clean the camera or screen.
- The outdoor unit must not be directly exposed to sunlight.
- If it is unable to unlock, check if wires are connected properly and securely. Also, make sure the voltage for unlocking is sufficient.
- The image quality may be interfered by strong electromagnetic signals, therefore, when using the product, avoid the electromagnetic sources such as motor and transformer and make sure the circumstance is barrier-free and no interference.
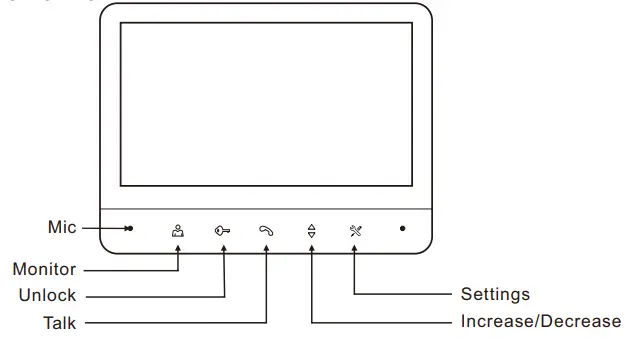
Function Keys and Operation Instruction
Indoor unit
- 1) When the visitor presses CALL Button on the outdoor unit, the indoor unit will ring and display the visitor’s image on the screen. Press TALK (
 ) button on the indoor unit to talk with the visitor. The talking time is 120s. During the 120s, you can:
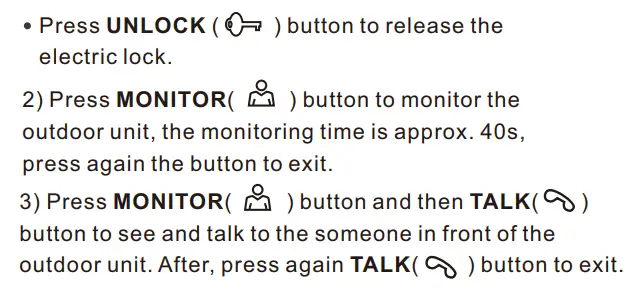
- 4) Ringtone, ringtone volume, talking volume, brightness and chroma settings as below:

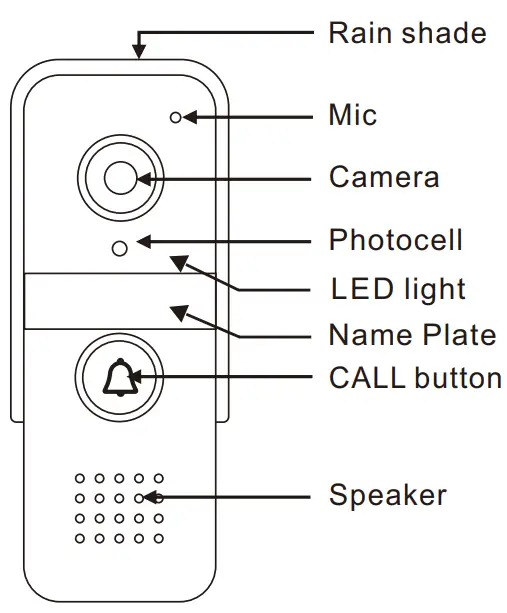
Outdoor unit
Documents / Resources
 |
tmezon MZ-V20 4 Wire Connected Video Intercom Wired Video Intercom Kit [pdf] User Manual V20, MZ-V20, MZ-V20 4 Wire Connected Video Intercom Wired Video Intercom Kit, MZ-V20, 4 Wire Connected Video Intercom Wired Video Intercom Kit, Video Intercom Wired Video Intercom Kit, Intercom Wired Video Intercom Kit, Video Intercom Kit, Intercom Kit, Kit |