![]()
R 3
USER MANUAL
www.sprleaf.com

R3 Dash Camera
Unlock Your Exclusive 2-Year Warranty Now
Your future self will thank you.
SCAN ME
OR Visit: sprleaf.com

https://www.sprleaf.com/%23WARRANTY
Why Risk It?
Accidents happen, but with this warranty, you’re covered. Act fast-after 14 days, this opportunity is gone forever!
Optional Accessories

Hardwire Kit for 24/7 Parking Monitoring

- Experience Complete Security – Even When Your Engine Is Off!
Our optional Hardwire Kit allows you to keep your dash cam powered around the clock, ensuring uninterrupted parking monitoring and extra peace of mind. No more worrying about drained batteries or missing critical footage. - Continuous Power Supply: Maintains your dash cam’ s functionality 24/7
- Easy Wiring: Directly connects to your car’ s fuse box for reliable power
- Enhanced Security: Helps capture parking incidents or unexpected bumps
- Interested in the Hardwire Kit?
We’re happy to provide this accessory to enhance your driving safety experience. Simply reach out to our dedicated support team at: contact@sprleaf.com
Important Installation & Usage Reminder
For the best experience and to ensure proper usage, please carefully read the included user manual.
If you prefer a visual guide, simply scan the QR code below for a quick, step-by-step video tutorial.
Following the video instructions helps you complete setup with ease and confidence.
Installation Video QR Code

https://www.youtube.com/watch?v=Pp8Pb12Fhts
Thank you for choosing Sprleaf !
We’re delighted to have you as part of our community and hope you’re enjoying your new product. If you need any assistance or have suggestions to improve it, please don’t hesitate to contact us.
![]() contact@sprleaf.com
contact@sprleaf.com
Our dedicated support team is here to assist you and will respond within 24 hours.
 |
 |
| https://www.facebook.com/sprleafoffical/ | https://www.instagram.com/sprleafauto/ |
 |
 |
| https://www.sprleaf.com/ | contact@sprleaf.com |
Product Overview
Standard items

Device Layout

- TF Card Slot
- UP Button
- MENU Button
- DOWN Button
- Home Screen
- OK Button
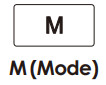
- M (Mode) Button
- LOCK Button
- POWER Button
- External Camera Port
- Front Camera
- Type-C Power Port
Button Functions
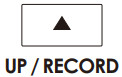 |
1. Press to start/stop recording in standby mode. 2. Hold for 2 seconds to take a photo. 3. Navigate up in settings or playback mode. 4. Hold to delete a clip in playback mode. 5. During playback: hold to rewind; press once to skip to the previous file. |
 |
1. Press to cycle through video settings, general settings and standby mode. |
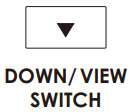 |
1. Press to switch camera views on the screen in standby mode. 2. Hold for 2 seconds to mute or unmute audio recording. 3. Navigate down in settings or playback mode. 4. Hold to delete a clip in playback mode. 5. During playback: hold to fast-forward; press once to skip to the next file. |
 |
1. Press to turn on/off Wi-Fi. 2. Pause/resume during playback. 3. Confirm selections |
 |
1. Press once to enter playback mode. 2. Press to cycle through options or hold to return to home screen. |
 |
1. Short press to lock video while recording |
 |
1. Press to power on; hold for 2 seconds to power off. 2. In standby mode: press to turn the screen on/off. |
Let’s Get Started
Step 1: Power on the Device
- Insert the provided memory card into the dashcam.
- Connect the charger to your vehicle’s 12V DC outlet and plug it into the dashcam. The dashcam should power on automatically and begin recording.
- Format the memory card to ensure compatibility and optimal performance.
- Connect each of the additional cameras to the dashcam to ensure they are working properly.

 Please stop recording and power off the device before removing or inserting the memory card.
- Use only the provided charger. Sprleaf is not responsible for any damage caused by unauthorized chargers.
- We recommend reformatting the memory card each time files are transferred to a computer, or at least once a month. Regular reformatting helps prevent errors and missing files, maintains a clean file structure, and reduces the risk of corruption.
Step 2: Install the Rear and Side Cameras
- After confirming that all cameras are functional, install the rear and side cameras first, checking their positioning by viewing the camera feed on the dashcam’s screen to ensure optimal alignment.
- Mount the rear camera as shown in the illustration. Use the provided tool to neatly secure and hide the cable along the interior trim.
- The rear camera can be mounted either on the upper interior of the rear windshield or on the exterior above the license plate.

- Mount each side camera as shown in the illustration. Adjust it to your preferred viewing angle and hide the cables along the interior trim.
- When routing the cable through the car door, avoid running it in a direct or diagonal line—this may cause the cable to be pinched over time. Instead, run the cable upward or downward for a short distance before passing it through the door seam to ensure long-term reliability.

- To enable parking assist, locate the reverse light wires near the rear lights or trunk. Use a circuit tester to identify the correct wire and connect the rear camera’s red wire to it. This will allow the rear camera to activate automatically when you shift into reverse, displaying parking assist lines on the screen to guide you.
- Next, adjust the rear camera’s angle as needed for a clear view. Secure any loose cables using cable ties to keep everything tidy and out of the way.

Recording Interface Overview

Settings
Video Settings
Press the Menu Button to access the video settings. Use the UP or DOWN button to navigate options, and press OK to confirm. When finished, hold the MENU Button to exit.
- Loop Recording: 1 minute / 2 minutes / 3 minutes / Off
When Loop Recording is enabled, the device continuously overwrites older video, keeping only the footage within the selected time range. Videos outside this range are replaced with new recordings.
- Press the OK Button to manually lock a video segment, which will be saved in the “Event” folder.
- Timelapse Record: Off / 1 FPS / 2 FPS / 4 FPS
Records at less frames per second, which uses less storage than regular video while still capturing key moments. Time-lapse videos are saved in the VIDEO folder and contain images without sound, making it easier to review footage quickly. - Gravity Sensing: High / Medium / Low / Close When enabled, the device locks recordings if it detects an impact.
Locked files are marked with a lock icon, saved as protected, and won’t be overwritten but can be manually deleted. - Date Stamp: On / Off
- Recording Audio: On / Off
- Exposure: -3, -2, -1, 0, 1, 2, 3
- Light Frequency: 50Hz, 60Hz
General Settings
Press the Menu Button twice to access the general settings. Use the UP or DOWN button to navigate options, and press OK to confirm. When finished, hold the MENU Button to exit.
- Screen Saver: Off / Speed Date / 15 seconds / 1 minute
- Format: If a TF card is inserted, remaining storage is displayed; if not, “No Card” appears. Press OK to format.
![]() Formatting will erase all files on the card, including protected files.
Formatting will erase all files on the card, including protected files.
Ensure important files are backed up before formatting.
- Language: Simplified Chinese / Traditional Chinese / English / French / Spanish, Portuguese / German / Italian / Russian / Japanese / Korean.
- Parking Monitor: Off / Gravity Sensing / Time Lapse / Radar-Monitor
- Gravity Sensing: High / Medium / Low / Close
![]() The parking monitoring function operates only with a hardwire kit (sold separately). For detailed instructions, please search ‘dashcam hardwiring’ on YouTube or contact us for assistance.
The parking monitoring function operates only with a hardwire kit (sold separately). For detailed instructions, please search ‘dashcam hardwiring’ on YouTube or contact us for assistance.
- System Volume: High/ Middle / Low / Close
- Key Sound: Off / On
- Date and Time: Press the OK button to cycle through options and use the UP or DOWN button to adjust values. Press the MENU button to confirm when finished.
- WiFi: Off / On / Always On
- WiFi Band: 5G / 2.4G
- Restore Factory Setting: Press the OK button to restore the device.
- About: Firmware Version
Playback Mode
In standby mode, press the M button to enter playback mode.
- File Organization: Videos are saved in folders for front, left, right, and rear recordings. Use the M button to switch folders, and the UP and
- DOWN buttons to navigate files.
- Play/Pause: Select a video file and press OK to play or pause.
- Fast Forward/Rewind: While playing a video, hold the UP button to fast forward and the DOWN button to rewind.
- Delete Files: In playback mode, hold the UP / DOWN button to open the delete menu, select “Confirm” to delete the current file.
Viewing Recorded Files
- Remove the TF card and insert it into a card reader.
- Connect the reader to your computer’s USB port to open the drive.
You will see folders such as:
Event: Locked video files
Park: Parking monitoring videos
Photo: Saved photos
Video: General video recordings
![]() File Backup: For long-term storage of important videos, copy them from the TF card to your computer. This will free up space on the TF
File Backup: For long-term storage of important videos, copy them from the TF card to your computer. This will free up space on the TF

Connecting to Wi-Fi
Step 1: Download the App
Search for GFG Drive on the App Store or Google Play Store, or scan the QR code to download the app to your mobile device.

http://app.sunningsoft.com/app/gfgdrive/gfgdrive.html
Step 2: Enable Wi-Fi on Dash Cam
- Turn on Wi-Fi through General Settings or by holding the OK Button.
- The Wi-Fi name (SSID) and password (12345678) will appear on the screen.
Step 3: Open the GFG Drive App
- Launch the App on your mobile device.
- Important: For first-time activation, ensure your mobile device is connected to the internet using Wi-Fi or cellular data. (If not online, the dash cam’s Wi-Fi connection will prompt you to reconnect to a Wi-Fi router for activation.)
![]() You must download the video before sharing it with friends and family on the App.
You must download the video before sharing it with friends and family on the App.
- Once connected to the internet, tap ‘Add My Device’ .

Step 4: Connect to Dash Cam’ s Wi-Fi
- Switch your mobile device’s Wi-Fi connection to the dash cam’s network.
- Reopen the App
- The app will automatically connect to the dash cam once the Wi-Fi connection is established.

Wi-Fi Connect Troubleshooting
- During the activation process, please ensure you enable the following settings on your device:
Allow “Find Devices on Local Networks”
Allow the device to use your location
Allow the use of WLAN and cellular data - These permissions help ensure seamless connectivity and optimal performance of your dash cam.
- For Apple iOS Devices:
Go to Settings > Cellular. Scroll down and turn off Wi-Fi Assist.
Connect to the camera’s Wi-Fi, then open the GFG Drive app and tap Connect. - For Android Devices:
Go to Settings > Connections > Wi-Fi. Tap the three dots in the top-right corner, select Advanced, and turn off Switch to Mobile Data.
Connect to the camera’s Wi-Fi, then open the GFG Drive app and tap Connect.
![]() If you still cannot connect, please try turning off Mobile Data.
If you still cannot connect, please try turning off Mobile Data.
If you don’t see the network (SSID) in Wi-Fi settings, try moving to another location to avoid interference.
For further assistance, contact our support team at contact@sprleaf.com
Safety Information for Proper Use
Driving and Product Operation
- Refrain from adjusting or operating the device while the vehicle is moving; distraction could increase accident risk and potential injury or death.
- Mount the unit where it won’t obstruct the driver’s view. Poor placement may contribute to collisions. Check state and local laws before attaching anything to the windshield.
Power Supply
- Avoid handling the power cord with wet hands to reduce electric-shock risk.
- Replace damaged power cables promptly, as faults may lead to fire or shock.
- Keep the cable away from heat sources, since extreme heat can soften insulation and pose a fire hazard.
- Use the supplied cable with the correct connector and ensure it is firmly seated; loose connections might cause overheating or recording failure.
- Do not cut, modify, or sharply bend the cord, and avoid placing heavy items on it; damage can result in electrical failure or fire.
- Rely on SPRLEAF-approved accessories; compatibility with third-party parts is not guaranteed.
- Confirm the plug is secure after connection—vehicle vibration could otherwise disconnect power and stop recording.
Children and Pets
Store the product beyond the reach of children and animals. A broken device may cause injury.
Other Information About the Product
Product Management and Operation
- Detaching the unit from its mount while powered on may cause malfunction.
- Continuous exposure to direct or intense sunlight can impair the lens or internal circuits.
- Rough roads can shift alignment—periodically confirm the camera’s position.
- Apply only moderate pressure to the buttons to help prevent damage.
- Clean with a soft, dry cloth; chemical cleaners or solvents may degrade plastic components.
- Avoid disassembly, drops, or impacts, as these actions void the warranty and may impair performance.
- Prevent foreign objects, moisture, or high humidity from entering the device; internal electronics could fail.
- In some vehicles, the 12 V outlet remains live after the engine is off; leaving the dash cam plugged in might drain the battery.
Recording Notes
- Video quality may vary with lighting, weather, tunnels, and ambient temperature.
- SPRLEAF cannot guarantee retrieval of lost or corrupted footage.
- Though engineered to withstand strong impacts, severe collisions could still interrupt recording.
- Keep both windshield and lens clean; dust or debris may degrade captured images.ach of children and animals. A broken device may cause injury.
Documents / Resources
 |
SPRLEAF R3 Dash Camera [pdf] User Manual R3, R3 Dash Camera, R3, Dash Camera, Camera |