sainlogic Weather Station App

Specifications
- Compatibility: iOS 12.0 or higher, Android devices
- Power Requirement: Power adapter
- Wireless Connectivity: Wi-Fi
- Range: Up to 16ft (5m)
Download the “Sainlogic” app in Google Play or Apple App Store.
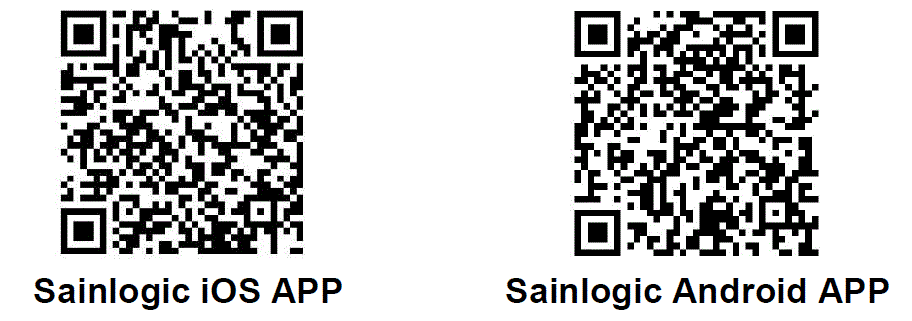
Sainlogic Weather APP
- Search the “Sainlogic”
 app on the Apple APP Store or Google Play Store and download into your iOS or Android Smart devices (Smart Phone or Tablet).
 - Note: If you are using an iPhone or iPad, make sure IOS version is 12.0 or upper. If not please update accordingly.
Console WiFi Configuration Via APP
- Note: Wi-Fi function only works when power adapter is plugged in.
- Note: Make sure Location Services(GPS) in your smart phone are ON, and Allow “Sainlogic” to use your location, otherwise wifi configuration can not be proceeded.
Add New Devices Via WiFi
- Click the Home List
 and select the “Add New Devices”.
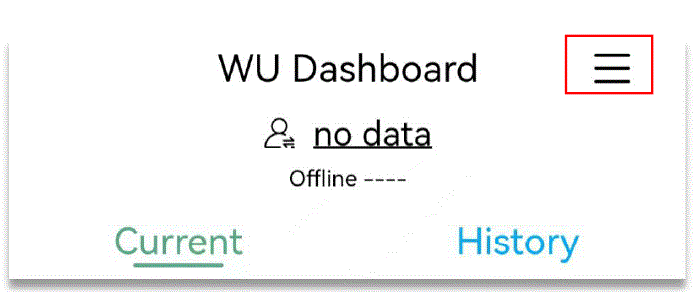
- In WU Registration Page, follow the steps to sign in and add a new device. If you have any problem in these steps please refer to weather server registration in part 8.
After the new device is created and Station ID and Key information is available, press “Next”.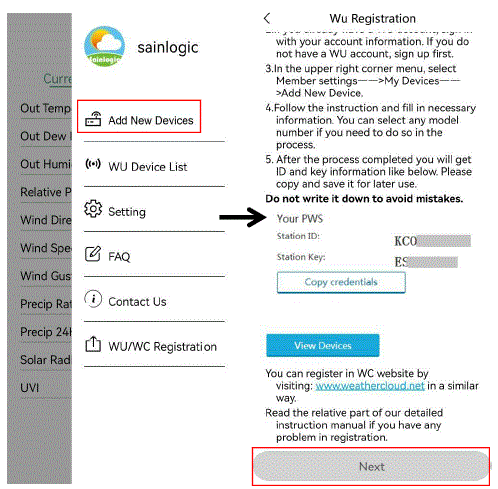
- WiFi Configuration
Note: Power up the weather station console with adapter in this step, the WiFi icon will flash to signify that it has entered WAP (wireless access point) mode, and is ready for WiFi settings.
Note: You can not connect two or more devices at the same time in WAP mode.
After make sure the console is plugged in and wifi icon is flashing. Press “Next” button.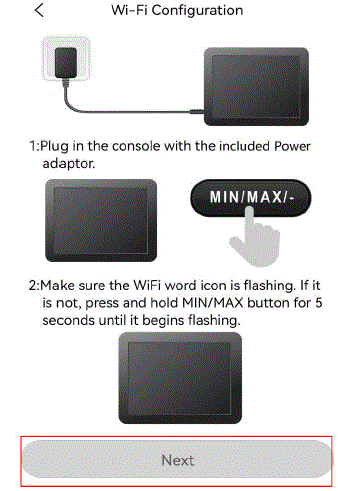
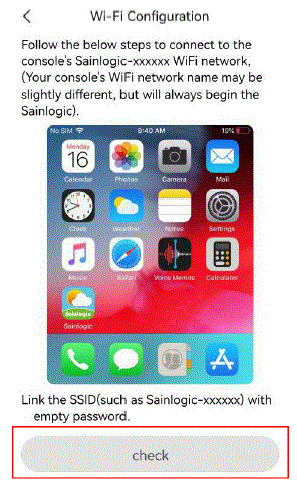
- Click the “Setting” icon on the Smart phone, select the WLAN List, and connect to the “Sainlogic” WiFi. Follow the steps of the flash video in the App.
Note: Place the router and display console less than 16ft (5m) to ensure that the WiFi signal is stable.
Note: This “Sainlogic” network does not require any password, you can connect directly. If you are unable to connect, check if your firewall (router or windows system) stops unfamiliar network connections.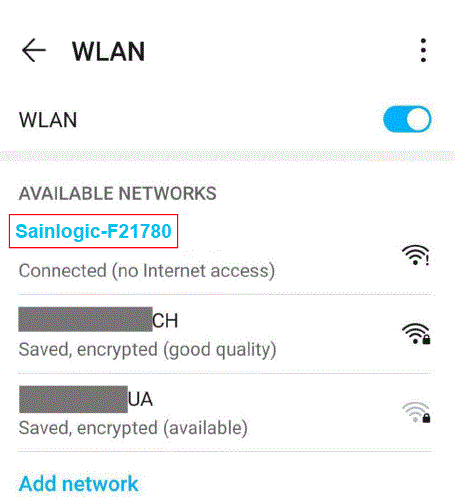
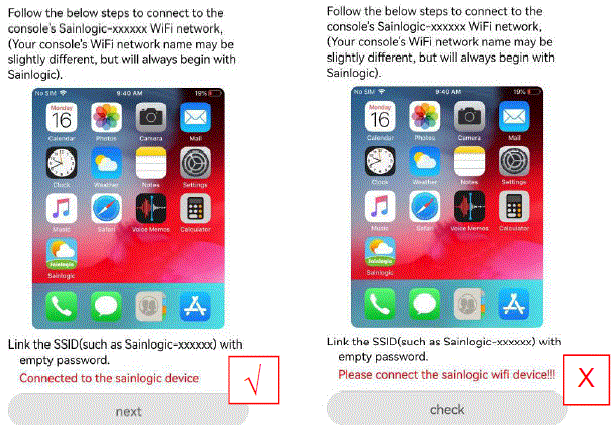
- When the “Sainlogic” WiFi connected successfully, return back to APP and click the “Check” button on Wi-Fi Configuration Page.
- If the “Sainlogic” WiFi connect successfully, it will display “Connected to the sainlogic device”.
- If the “Sainlogic” WiFi connect failed, it will display “Pls connect the sainlogic wifi device”.
- In Wi-Fi Network Setup page, fill in all the information and click the “Save” button.
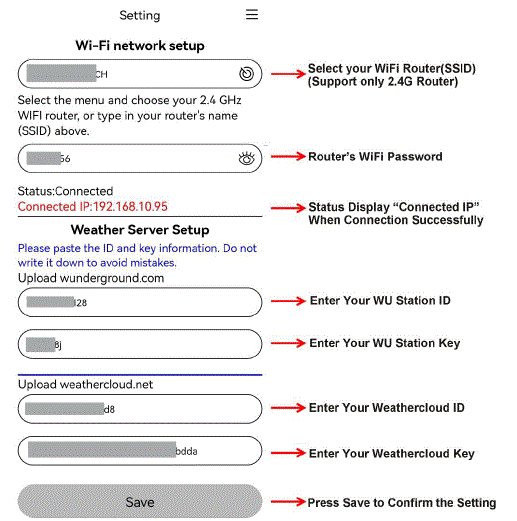 Note: You can fill in one or both of wunderground and weathercloud Station ID and key to upload the weather data.
Note: When Input station ID and key, copy and paste source text strictly (Take notice of space and upper or lower case of letters here).
Note: WLAN Networks with hidden SSIDS cannot be recognized for the “Network” entry. If the SSID of your WLAN is hidden, you will have to enter it manually. - After above set-up completed, go back to Home Page. The Current and History weather data will display after a while. (After the real-time data comes out, it takes 1-5 minutes for historical data to be available)
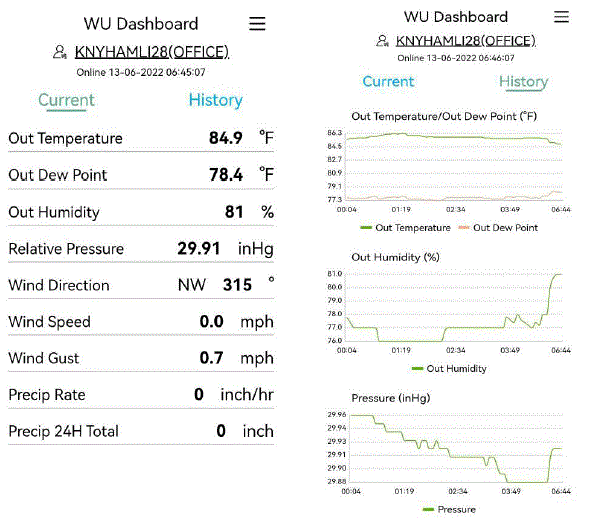
- Once WiFi network and Weather Server Setup page connected successfully, disconnect sainlogic wifi and connect your home router wifi, the indoor display console wifi icon
 icon will display solid for weather data uploading to weather server.
Other Features on Weather APP
Add Existed WU Device
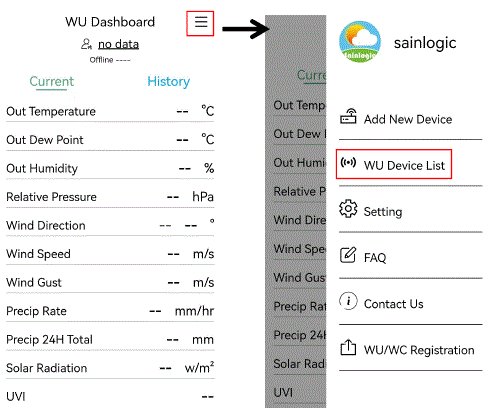
Add Existed WU Device: If you already have a sainlogic weather station which has been registered with a WU Station ID, you can add it in this App for data view.
- Click the home List and select the “WU Device List”.
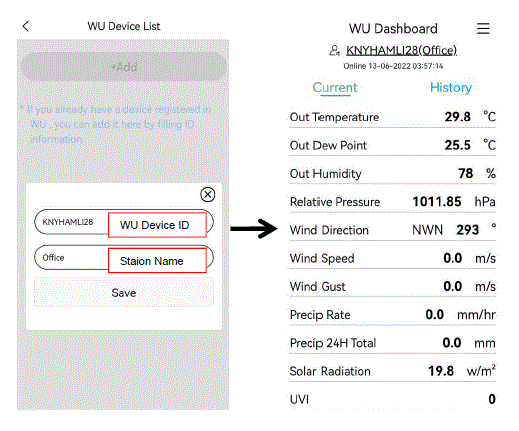
- Input the WU Station ID and Station Name, click the “Save” button and the WU weather data will display.
- Note: The station name is optional, you can leave it empty or fill in any name such as room, office, etc.
- Note: If you have added more than one WU devices, click the WU device below to easily select other devices in the list.

Weather Parameters Unit Set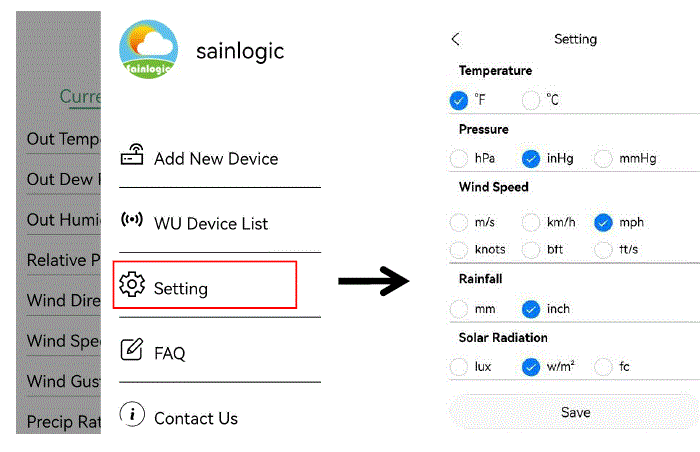
FAQ (Trouble Shooting)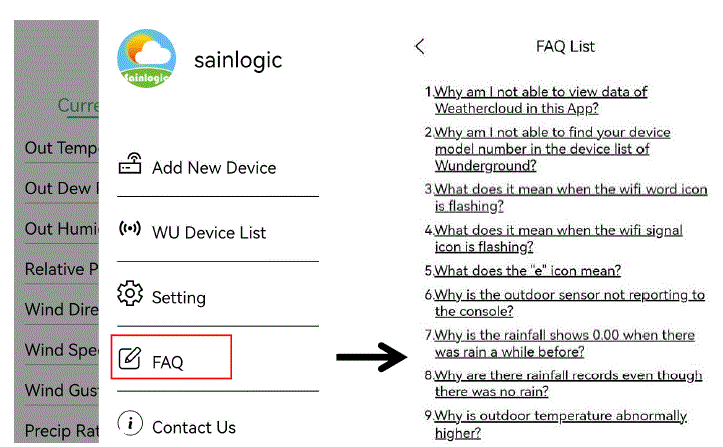
Contact Us
Console Wifi Configuration Via Webpage
You can complete wifi configuration by webpage as well if you do not want to download an App.
- Power up the display console with an adapter.
- Make sure that the WiFi icon is flashing on the console.( If the WiFi icon remains on solidly, long-press Min/Max key for 3 seconds and the wifi icon will flash again )
- Open WLAN list in your laptop (smart phone or Ipad) and select the “Sainlogic” WiFi. (This network does not require any password, you can connect directly)
- When the “Sainlogic” WiFi is connected successfully, input the IP address http://192.168.5.1 into any browser, and the “WiFi Network Setup” Page will display (Same as APP “WiFi Network Setup” page).
- Select your home 2.4G router WiFi and input the password. Fill in with WU/WC device ID and Key.
- Save the “WiFi Network Setup” Page and the status display “Connected IP”, then the console WiFi connection succeeds.
- Disconnect Sainlogic wifi and connect your home router wifi. The console wifi icon and “e” icon will display solid for weather data uploading to WU/WC web page .
Note: Sometimes you need to wait about 30 minutes to see the updated data online.
View the Weather Data Via Webpage
Log into https://www.wunderground.com/ with previously registered Email and Password. Or Visit: https://www.wunderground.com/dashboard/pws/STATIONID, where STATIONID is your weather station ID (example, KCAPALMD241).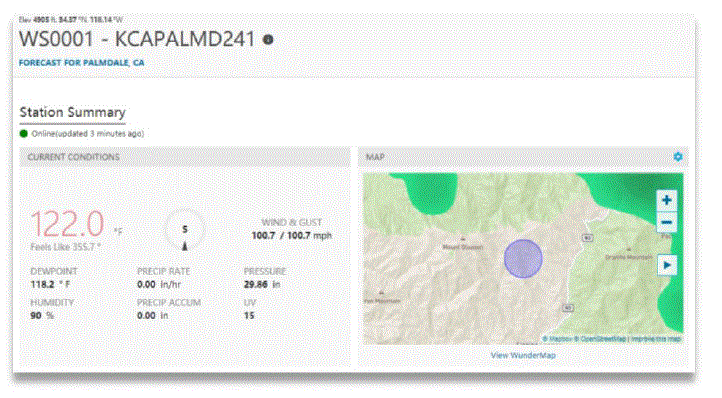
Note: Any issues about WU/WC registration process, you can contact WU/WC support or us.
WiFi Connection Status
 WiFi icon is always on: The display console is connected with your WiFi router.
 WiFi icon keep flashing: WiFi signal is not stable or the display console is trying to connect the router.
 WiFi icon is gone: The display console is not connected to the WiFi router. ( Press the Min/Max key for 3 seconds and re-plug the power adapter at the same time to reset, the WiFi icon will flash again )
- When the console successfully connects to your any website of weather servers, the data signal icon
 will appear on the LCD display.
 - If the data signal icon
 stay on, the weather station display console is currently uploading to the server. If the icon
 disappears, the console is not connected to the weather server for more than 30 minutes.
Time Server Sync Status
After the display console has connected to the internet, it will automatically connect the internet time server to obtain the time. Once the connection succeeds and the console’s time has updated, the SYNC icon will appear on the LCD.
Display Console Firmware Upgrade
You may get the latest firmware of the console and upgrade as below.
- Connect the Display Console Sainlogic WiFi first on laptop, or Smart devices.
- Once WiFi connected, enter the following IP address into the browser’s address bar: http://192.168.5.1/upgrade.html, the following website page will be displayed on your browser.
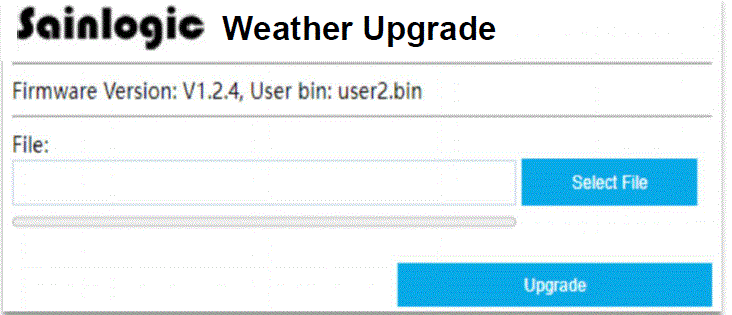
- Click “Select File” button and select the binary file (extension “.bin”) intended for updating your display console.
- Click “Upgrade” and start to update. Once the process has been successfully completed, a prompt page will reminds you that the WiFi firmware will automatically restarted.
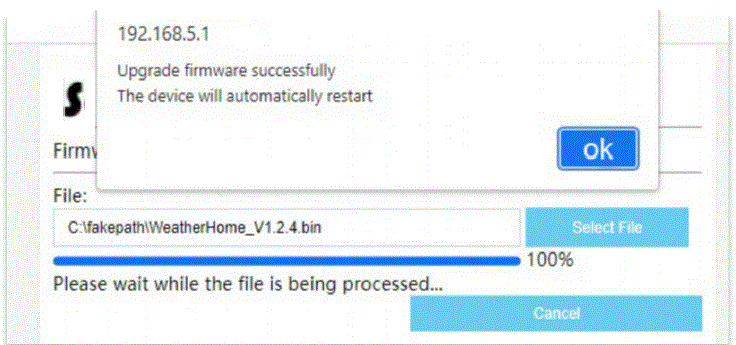
Note: In this upgrade process, only update the WiFi firmware, the console doesn’t reset.
Weather Server Registration
Note: If you already have a Wunderground or Weathercloud account, you can skip this step and create “New Device” directly.
Sign up on Wunderground.com
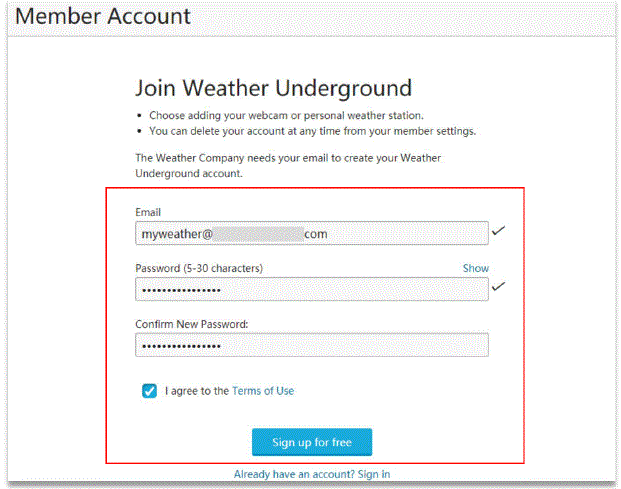
- Visit the “https://www.wunderground.com” website, and click “Join” button, input the Email and password, and select“Sign up for free” button to create your own account.

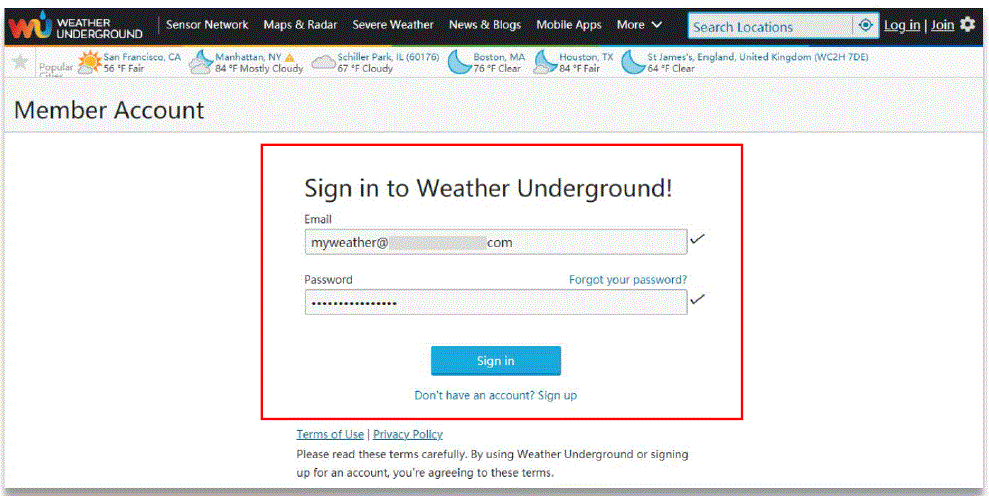
- Click “Sign in” button to log in, and switch to Member Settings page.
- Select My Devices tab and click “Add New Devices”.
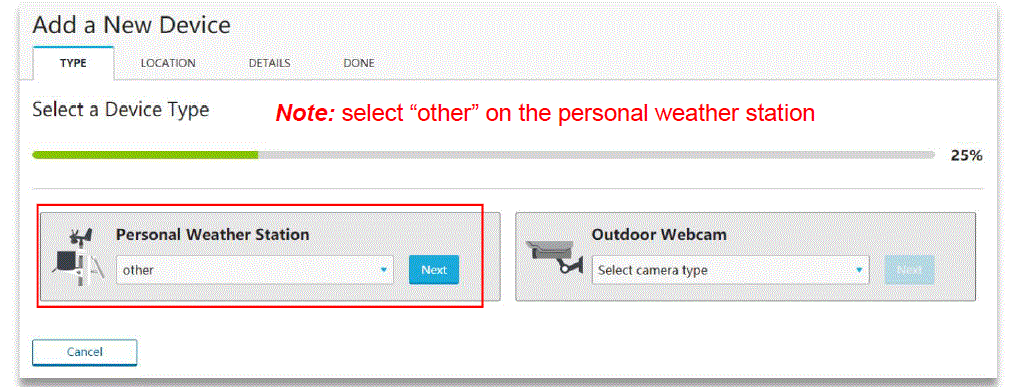
Note: In “Add New Devices” page , set the “TYPE”, “LOCATION”, “DETAILS” and “DONE” page step by step until 100% completion .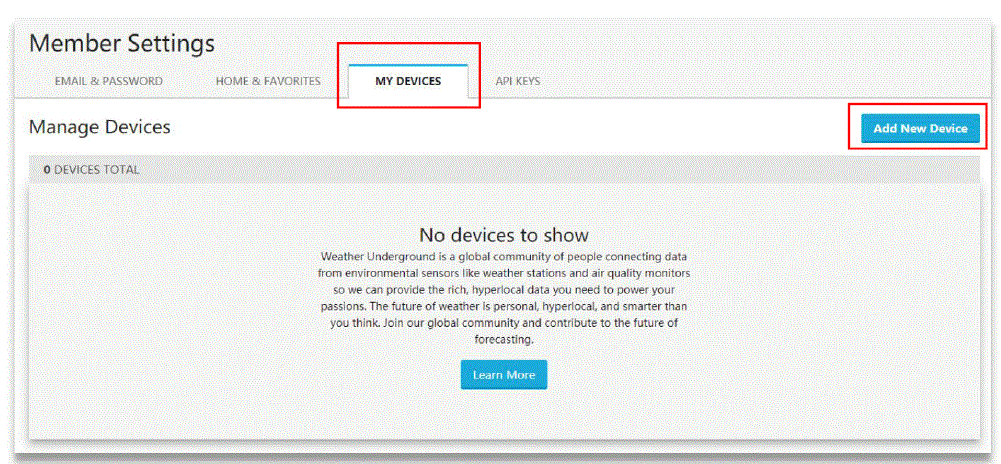
- In TYPE Page, click “Personal Weather Station” drop-down list to select “Other”.
- In LOCATION Page, Select “Address” or “Manual” Option, find and input your local position and press “Next”.
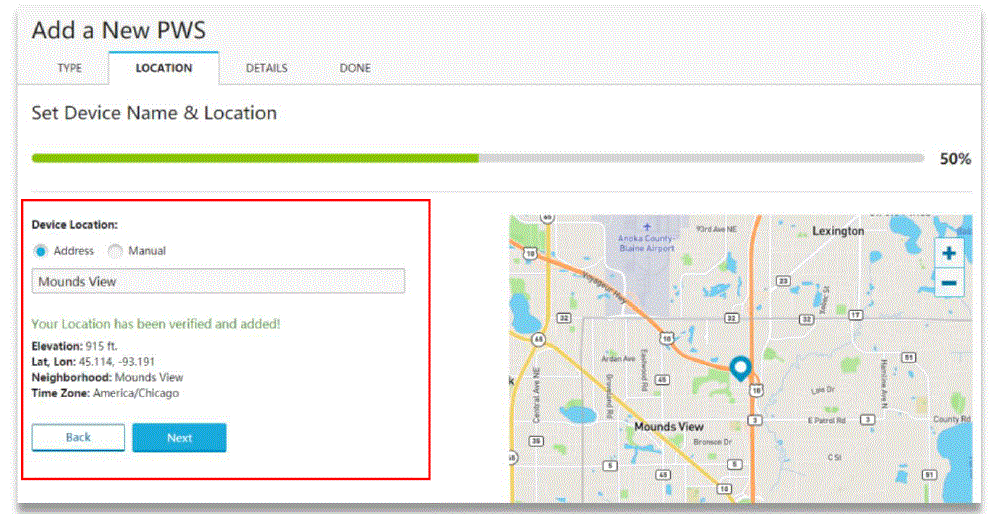
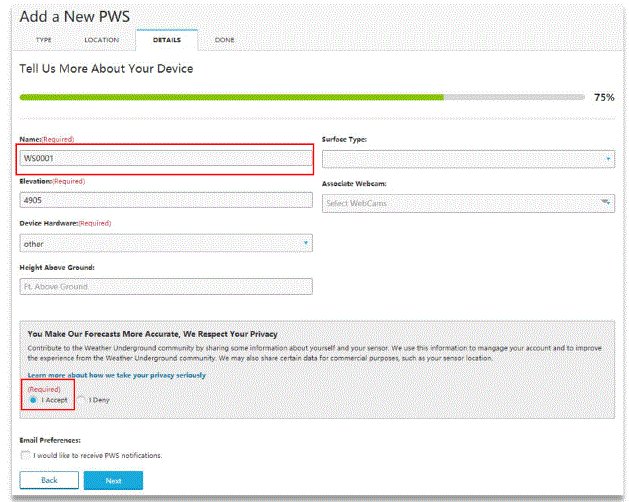
- In DETAILS Page , Fill in the “Required” information and Press “Next”.
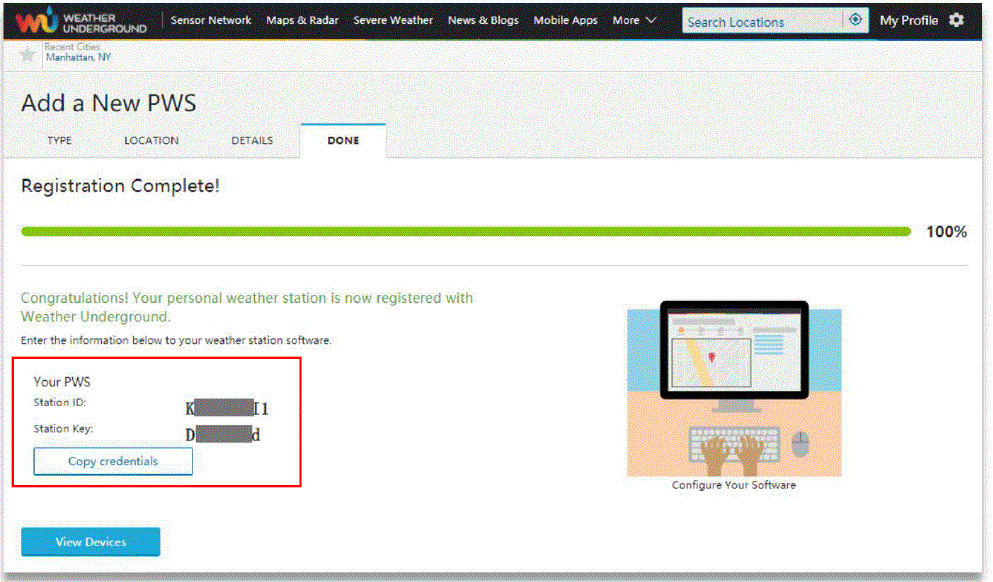
- In DONE Page, the device “Station ID” and “Station Key” are shown, copy and record the information for late use
Sign up on Weathercloud.net
- Visit the https://www.weathercloud.net website, input a Username, Email and Password, and click the “Sign up” button to create a free and new account.
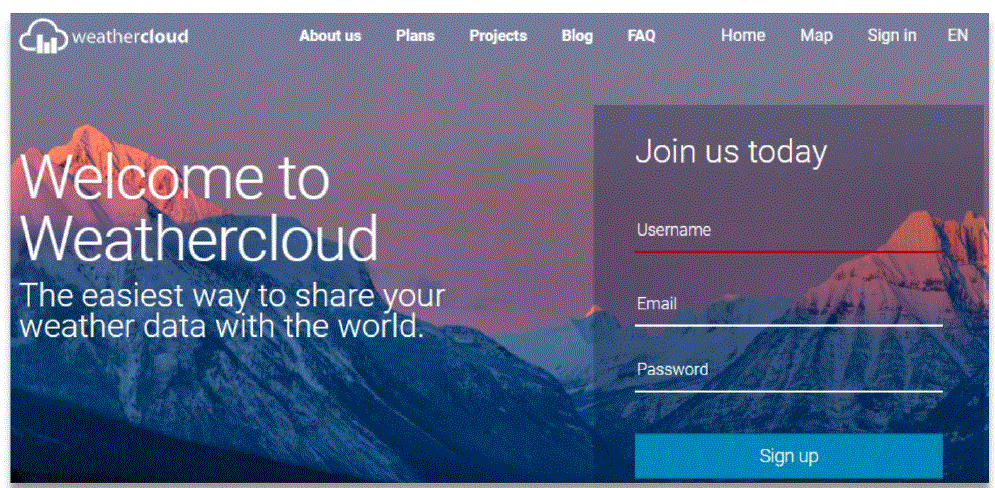
- Check your registered email to activate your account.
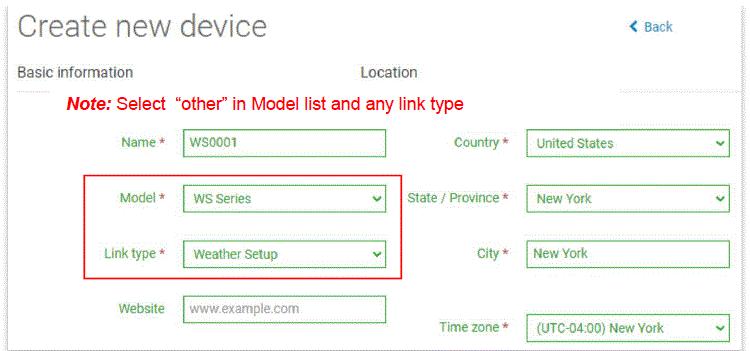
- Sign in to your account and click “Create device”.
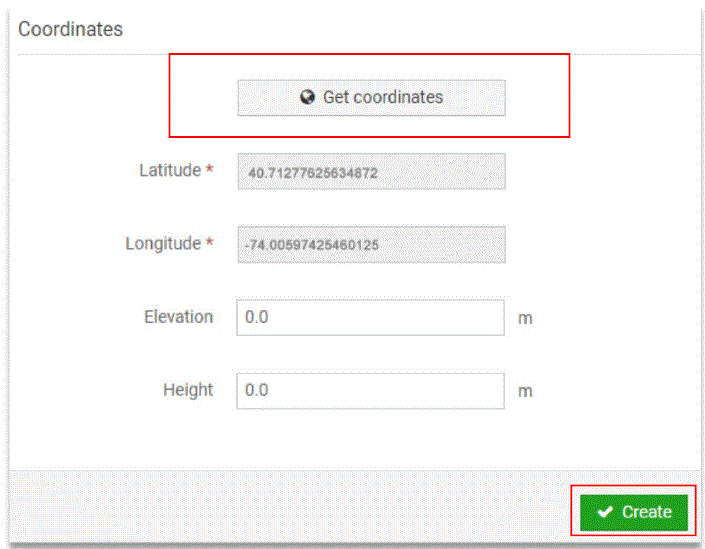
- Fill in all the required “Red Star” part and click “Create” Note: Select“other” in Model list and any link type.
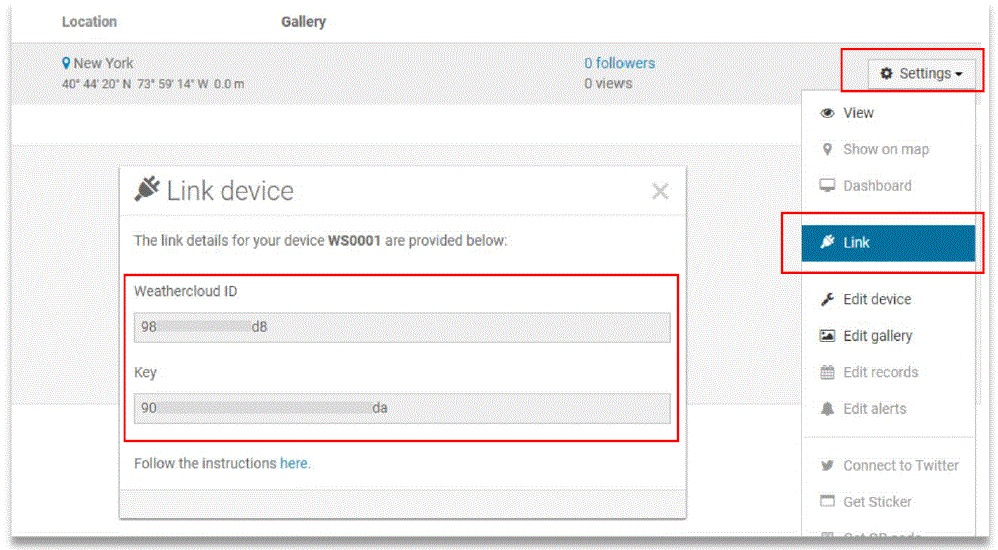
- Click link in the Settings list to find and record the “weathercloud ID” and “Key” information for later use.
WiFi Specifications
| WIFI Standard: | 802.11 b/g/n |
| WiFi Console RF Frequency: | 2.4 GHz |
| Device Compatibility: | Build-in WiFi with WAP Mode, Smart Device (laptops, computers, smart phones and smart pads). |
| Web Browser Compatibility: | HTML 5 (such as the latest versions of Chrome, Safari, IE, Edge, Firefox or Opera). |
| Line of sight WiFi RF transmission (in open air): | 80ft (20m) |
Trouble Shooting Guide
WiFi does not display on console
- Check your router for problems.
- Check WiFi symbol on the display. If wireless connectivity is successful the
- WiFi icon
 will be displayed all the time.
 - Make sure your modem WiFi settings are correct (network name, and password).
- Make sure the console is plugged into AC power. The console will not connect to WiFi when powered by batteries only.
- The console only supports and connects to 2.4GHz routers. If you own a 5 GHz router, and it is a dual band router, you will need to select 2.4GHz in operation
- The console does not support guest networks.
Data not reporting to www.wunderground.com or www.weathercloud.net
- Confirm your station key is correct. It is the password you registered on Wunderground.com.
- Your Wunderground.com password cannot begin with a non-alphanumeric character (a limitation of Wundeground.com, not the station). Example, $worknet is not a valid password, but worknet$ is valid.
- Confirm your station ID is correct.
- Make sure the date and time is correct on the console. If incorrect, you may be reporting old data, not real time data.
- Make sure your time zone is set properly. If incorrect, you may be reporting old data, not real time data. Check your router firewall settings. The console sends data via Port 80.
Manufacturer:
- Sainlogic High TechInnovation Co.,LTD
- 1034 2 Cypr ess Lakes Dr,
- Ja cksonville, FL 32256
- United State
- www.sainlogic.com
- Email: info@sainlogic.com
FAQ
Q: What should I do if I cannot connect to Sainlogic WiFi?
A: If you are unable to connect, check if your firewall (router or Windows system) blocks unfamiliar network connections. Additionally, ensure that you are within range and have followed the setup instructions carefully.
Documents / Resources
 |
sainlogic Weather Station App [pdf] User Guide Weather Station App, Station App, App |