ROLL-A-SHADE RASSSECPSVER.1 Sun Sensor Eclipse

Hardware Included
- Sun sensor bracket

- Sun sensor

- USB micro b

- Eclipse screws
- #8-18 x 3/4” Screws

Tools Required
- Phillips head

- Drill

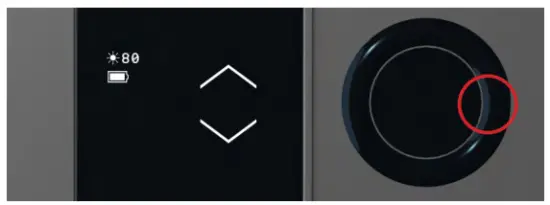
A. Reawaken From Sleep Mode
- Use paper Clip to press reset button
- Check for Battery level on screen. If low use usb charger to fully charge.
B. Enable and Set Time
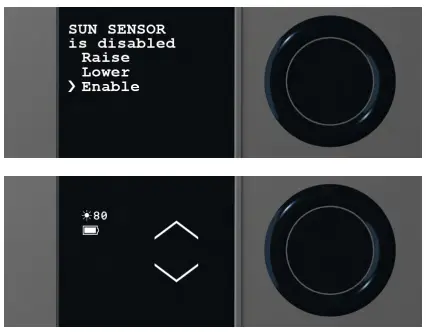
- Make sure Sun Sensor is enabled to detect sun.
If enabled, you will see sun and number on menu screen. Go to step 2.
1A. If not enabled:


Note: USB is only for charging and NOT to be kept in when mounting.

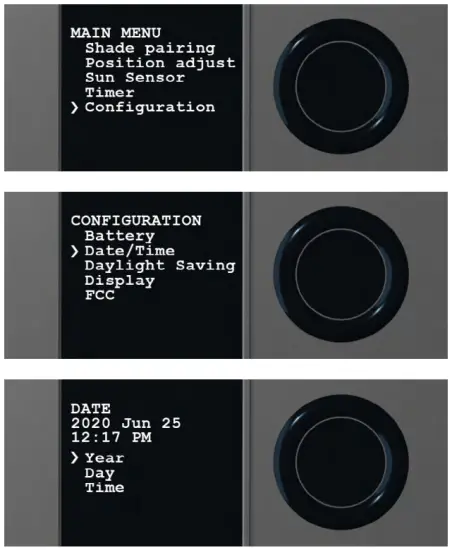
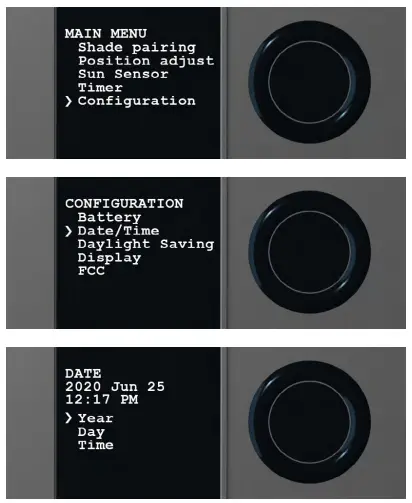
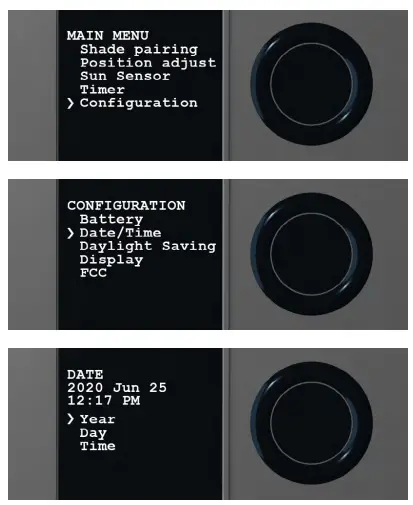
- Final step in programming is to set date and time.
a. Configuration > Date and Time
Once completed press back 4x - The Eclipse is now ready to be mounted into the window.
Note: Do NOT leave USB plugged into sensor when mounted.
C. Install Bracket
- Install Sun Sensor bracket into mullion vertically or horizontally.
Note: Must be at least two screws in every bracket.
TOP INSTALLATION
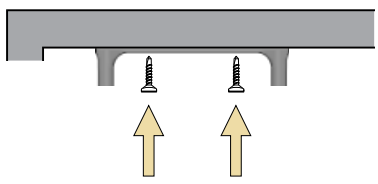
BOTTOM INSTALLATION

SIDE INSTALLATION
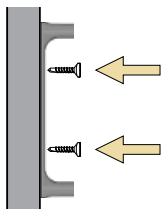
- Install Sun Sensor into bracket
Note: Must be at least two screws installed into Sun Sensor.
Note 2: Make sure screen and buttons are facing you.

- Sun Sensor installation check.
Note: Make sure all screws are securely fastened into the bracket and Sun Sensor.

Faces into room
FRONT

Faces outside
BACK

- Test Sun Sensor
Note: Device is designed for interior installations only.
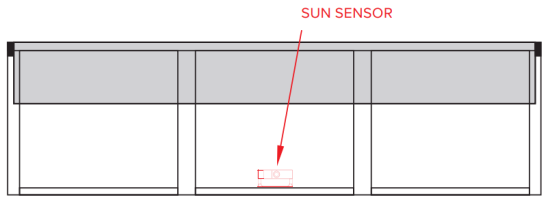
Correct – Perfect Placement
Correct – Sensor location clear of obstructing shadows

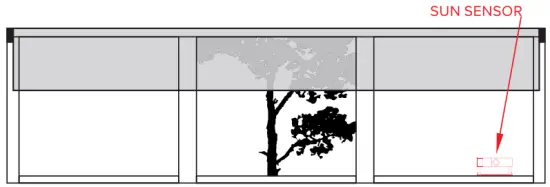
Incorrect – Sensor obstruction by shadows

Incorrect – Sensor obstruction by shadows
D. Roll-A-Shade Eclipse Pairing
WHEN SHADES ARE NOT PAIRED
- To pair shades to Eclipse, go to Main Menu > Shade Pairing > Pair with shade > Make sure shade is on > Either press button on motor head > shade will jog to show complete.
a. Shades will now be paired

- Make sure Sun Sensor is enabled to detect sun.
If enabled, you will see sun and number on menu screen. Go to step 3.

2A. If not enabled:
- Final step in programming is to set date and time.
a. Configuration > Date and Time
Once completed press back 4x - The Eclipse is now ready to be mounted into the window.
Note: Do NOT leave USB plugged into sensor when mounted.
E. Somfy Eclipse Pairing
WHEN SHADES ARE NOT PAIRED
WHEN SHADES ARE NOT PAIRED BUT YOU HAVE A REMOTE TRANSMITTER
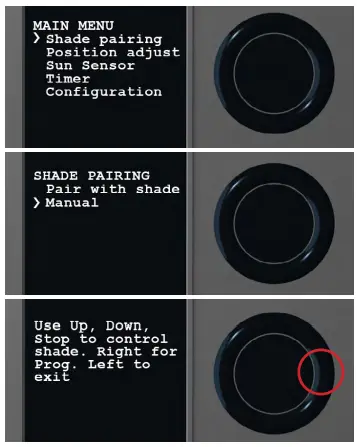
- Use your remote or wall switch to put shades in programming mode.
a. Press the programming button on back of remote with paperclip until shade jogs.
b. QUICKLY switch to Eclipse and go all the way to the left to copy and paste the programming into the eclipse.
i. Main Menu>Shade Pairing>Manual> Use Up, Down, Stop to control shade.
Right for Prog. Left to exit.
(Motor will jog when paired)
c. The shades are now paired - Make sure Sun Sensor is enabled to detect sun.
If enabled, you will see sun and number on menu screen. Go to step 3.

2A. If not enabled: - Final step in programming is to set date and time.
a. Configuration > Date and Time
Once completed press back 4x - The Eclipse is now ready to be mounted into the window.
Note: Do NOT leave USB plugged into sensor when mounted.
Sun Sensor Warranty
Roll A Shade® warrants Eclipse to be free from defects in materials and workmanship for 5 years when used properly and operated under normal conditions from the date of purchase. If Eclipse is found to be defective and covered by the warranty, we will, at our option, repair or replace it free of charge. This product warranty does not cover any conditions or damages resulting from misuse or abuse, accidents, alterations, neglect, damage by others, natural disasters, exposure to the elements, or failure to follow Roll-A-Shade’s instructions with respect to installation, use and maintenance. The repair or replacement of defective product is the purchaser’s sole remedy and the limit of Roll A Shade’s obligation. EXCEPT AS EXPRESSLY PROVIDED IN THIS PARAGRAPH, ROLL A SHADE® MAKES NO REPRESENTATIONS OR WARRANTIES OF ANY KIND, NATURE OR DESCRIPTION, EXPRESSED OR IMPLIED, INCLUDING WITHOUT LIMITATION ANY WARRANTY OF MERCHANTABILITY OR FITNESS OF ANY PRODUCTS FOR ANY PARTICULAR PURPOSE, AND HEREBY DISCLAIMS THE SAME. In no event shall Roll A Shade® be liable or responsible for incidental or consequential damages or for any other direct or indirect damage, loss, cost, expense or fee. WARRANTY Exclusions:
- Installation and usage are not in accordance with our installation and operating instructions.
- Product has been opened, dismantled or returned with clear evidence of abuse or other damage.
- Product has been used to perform functions other than the functions it was designed to handle, namely motorizing window shades.
- Product is used with electrical accessories (switches, relays, etc.) that have not been previously approved in writing by the Roll A Shade®.
Roll A Shade Eclipse
FCC ID: 2AUXUECLIPSE-S1
Contains FCC ID: QOQMGM12P3
This device complies with part 15 of the FCC Rules. Operation is subject to the following two conditions:
- This device may not cause harmful interference, and
- this device must accept any interference received, including interference that may cause undesired operation.
NOTE: This equipment has been tested and found to comply with the limits for a Class B digital device, pursuant to part 15 of the FCC Rules. These limits are designed to provide reasonable protection against harmful interference in a residential installation. This equipment generates, uses and can radiate radio frequency energy and, if not installed and used in accordance with the instructions, may cause harmful interference to radio communications.
However, there is no guarantee that interference will not occur in a particular installation. If this equipment does cause harmful interference to radio or television reception, which can be determined by turning the equipment off and on, the user is encouraged to try to correct the interference by one or more of the following measures:
- Reorient or relocate the receiving antenna.
- Increase the separation between the equipment and receiver.
- Connect the equipment into an outlet on a circuit different from that to which the receiver is connected.
- Consult the dealer or an experienced radio/TV technician for help.
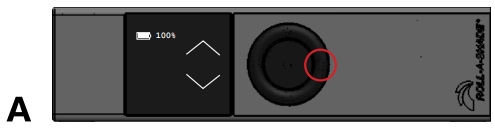
(OPTIONAL) Sun Sensor Orientation
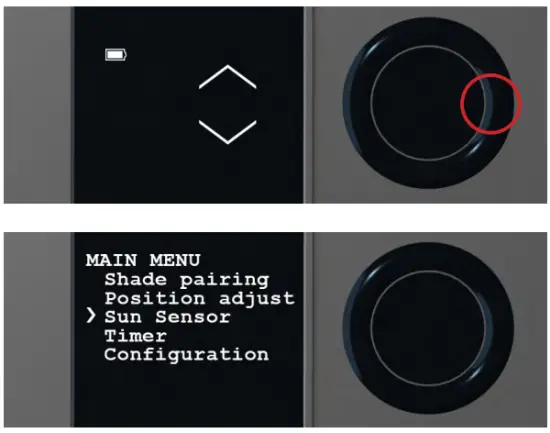
(A) Click the right button to access “Main Menu”.
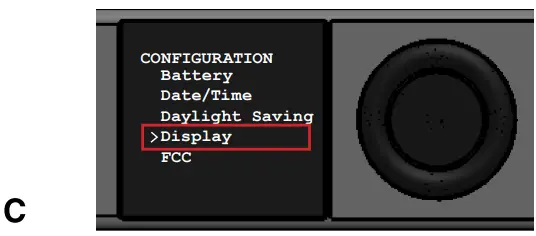
(B) Use navigation buttons to access “Configuration”.
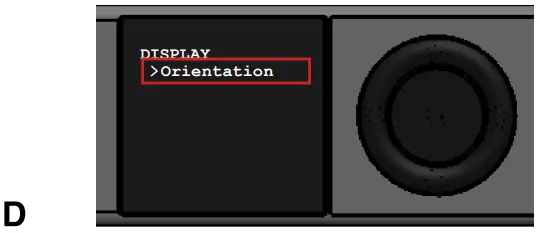
(C) Navigate to “Display”. (D) Click “Orientation”.
(E) You will see four different options of display orientations.
Note: Selection orientation in the display settings to adjust to the following direction: top, bottom and/or side installation etc.

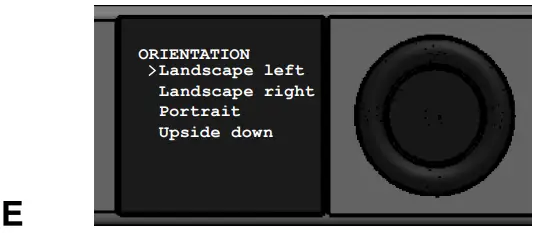
Note 2: Follwing images (F), (G), (H), (I) will be examples of each display orientation.
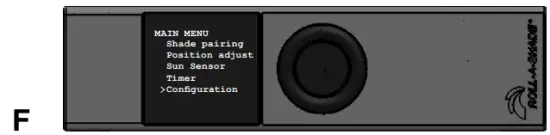
LANDSCAPE LEFT
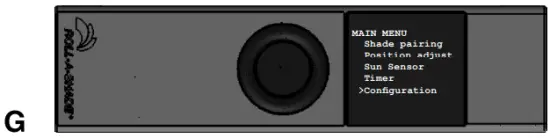
LANDSCAPE RIGHT

PORTRAIT
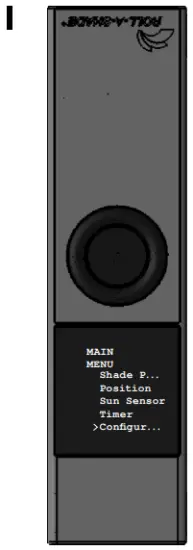
UPSIDE DOWN
Customer Support
www.rollashade.com
© Copyright 2025 Roll A Shade® Inc., All rights reserved. – Contractor #916075 ECLIPSE Ver: 1103
12101 Madera Way Riverside, CA 92503
Phone: 888-245-5077
Fax: 951-245-5075
www.rollashade.com
![]()
Documents / Resources
 |
ROLL-A-SHADE RASSSECPSVER.1 Sun Sensor Eclipse [pdf] Instruction Manual RASSSECPSVER.1 Sun Sensor Eclipse, RASSSECPSVER.1, Sun Sensor Eclipse, Sensor Eclipse |


