OPTEX PIE-1 PoE IP Encoder Instruction Manual

FEATURES
- PIE-1 changes analog relay output signals (N.C.) to original ASCII code.
- PIE-1 can supply power to detector using a PoE hub or switch.
SAFETY PRECAUTION
- Follow all cautions and instructions in this manual before installation.
- Keep this manual after installation so that you can read when necessary.
- Remember the meanings of “Warning” and “Caution” below to use the product safely.
![]() Warning
Warning
If you ignore a warning, the user or other people may be injured or dead.
![]() Caution
Caution
If you ignore a caution, the user or other people may be injured or the product or something around it may be damaged.
![]() Warning
Warning
- Do not repair, dismantle or modify the product yourself.
- Do not touch the product with a wet hand.
- Be careful not to damage other interior wiring when installing or wiring the product.
- Power off the product immediately if smoke, odor or strange sound emits from the product.
- Do not install the product in an extremely moist place such as a bathroom or a place where the product may be wet.
![]() Caution
Caution
- Insert the connectors securely when wiring.
CE Statement
Warning: This is a class A product. In a domestic environment this product may cause radio interference in which case the user may be required to take adequate measures. (EN55022)
PARTS IDENTIFICATION
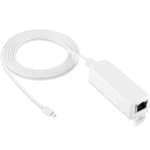
- Main unit of PIE-1
- SIP mounting plate for Gang Box
- Gasket sheet for Gang Box

- No. 6-32 UNC screw (5/8 inch), 6 pcs

- Alarm 10-pin cable (26cm)

- Power 2-pin cable (26cm)

- Alarm 6-pin cable (10cm)

- Alarm 4-pin cable (10cm)

- Power 2-pin cable (10cm)

![]() Caution
Caution
- Be sure to use the attached cables.
- Do not use 12V and 24V power sources at the same time.
Connectors

CONNECT PIE-1 TO THE SIP MAIN UNIT

Step 1
- Prepare an appropriate Dual Gang Box.
- Using an Allen key, detach the SIP base from the SIP main unit

Step 2
- Plug the alarm 10-pin cable to PIE-1.
- Plug the power 2-pin cable to PIE-1. Use the 12VDC connector.
Note: When using an optional heating unit, use the 24VDC connector. - Set the Selector switch of PIE-1 to the left.
- Plug a CAT5 cable to the Ethernet connector for PoE.
- Place the PIE-1 into the Dual Gang Box.

Step 3
- Take off a rectangular gasket and two round gasket from the gasket sheet.
- Apply the rectangular gasket on the SIP mounting plate.
- Apply the two round gaskets in layers around the round hole of the SIP mounting plate.

Step 4
- Pass the alarm 10-pin cable and the power 2-pin cable through the hole.
- Using four screws, mount the SIP mounting plate to the Gang Box.
- Pass the cables through the hole on the back of the SIP base.
- Using two screws, mount the SIP base to the SIP mounting plate on the Gang Box.
Step 5
Plug the alarm 6-pin cable, the alarm 4-pin cable and the power 2-pin cable to terminals on the SIP base.

Note: Refer to the ConnectionTable.
Step 6
- Connect the power and alarm cables.
- If cables are too long, put the extra portions into the Gang Box.

Step 7
Mount the SIP main unit onto the SIP base.

![]() Warning
Warning
When the PIE-1 unit is accommodated not in Gang box, mount it in weather proof box or cabinet to avoid moisture.
PIE-1 CONNECTION TABLE FOR SIP SERIES
| Model Name | Alarm 6-pin cable | Alarm 4-pin cable | Power 2-pin cable | ||||
| Orange pair | Yellow pair | Green pair | Blue pair | Purple pair | Red | Black | |
| SIP-100 | Far | Ne ar | Creep | Tamper | Trouble | (+) | (-) |
| SIP-5030, 404/5, 4010/5, 3020/5 | – | Alarm | Creep | Tamper | Trouble | (+) | (-) |
| SIP-404, 4010, 3020 | – | Alarm | – | Tamper | Trouble | (+) | (-) |
![]() Caution
Caution
Be sure to insulate the cables you are not using.
AFTER INSTALLATION
- Before using PIE-1, set the IP addresses of PIE-1 and the computer in the following procedure.
The default settings of PIE-1 are as follows.
IP Address: 192.168.0.126
Subnet Mask: 255.255.255.0
Defoult Gateway: 0.0.0.0
- Set the local area connection.
 An example of IP address settings
IP Address: 192.168.0.1
Subnet Mask : 255.255.255.0 - Using Internet Explorer, access the site below. (http://192.168.0.126/)
- Enter the user ID and the password below.
User ID: PIE-1
Password: OPTEX - Change the IP address if necessary.
- Select the detector you have connected.

- After changing settings. Click “Save Config” button.
- Click “Overview” button. Confirm the settings in the Overview screen.

Download the detailed instructions at our site.(http://www.optex.co.jp/e/redwall/download/index.html)
Confirm the output of the Event Code, and set VMS/NVR.
After setting VMS/NVR, conduct a walk test
RESETTING
If you forget the IP address you have set, reset it to obtain the default IP address in the following procedure.
- Pull off the cable connected to the Ethernet connector for PoE. PIE-1 turns off.
- While pressing the RESET button, connect the cable to the Ethernet connector for PoE again. PIE-1 turns on.

- Keep pressing the RESET button until the green and yellow LEDs both go off. (They go off within ten seconds.)
- Release the RESET button. The software restarts, and PIE-1 obtains the default IP address.
CONNECT PIE-1 TO THE RLS UNIT

Note>> Use a switch or hub conforming to IEEE802at type2.
Step 1
Using a screwdriver, remove the cover from the RLS main unit.
Step 2
- Plug the power 2-pin cable to the RLS main unit.
- Plug the CAT5 cable to Ethernet connector of the RLS main unit.

Step 3
- Plug the power 2-pin cable to PIE-1. Use the 24VDC connector.
- Set the Selector switch of PIE-1 to the right.

- Lead a CAT5e cable from the switching hub into the RLS main unit through a hole on its bottom.
- Plug the CAT5e cable to the Ethernet connector for PoE of PIE-1.
- Plug the CAT5 cable, already connected to the RLS main unit (Step 2(2)), to the Ethernet connector for detector of PIE-1.
Step 4
- Connect the power cables.
- Place PIE-1 into the cover.

Step 5
- Mount the cover onto the RLS main unit.

Note>> When use REDSCAN series, use CAT5e or greater cable between the PIE-1 unit and the PoE Hub.
*Required power less than 25.5W, can use the PoE Plus Hub.
SPECIFICATIONS
| Power supply | PoE* (IEEE802.3af/at compliant) |
| Power output | 24VDC 800mA max, 12VDC 50mA max |
| Signal input | 5 input for dry contacts (N.C. only) |
| Place of use | Outdoor (Inside of the waterproof case) |
| Alarm output | Redwall event code (UDP/TCP) |
| Operating temperature | -40 to +60°C (-40 to + 140°F) |
| Operating humidity | 95% RH. max |
| Operation LED (Normal) | Green light is ON when the power is supplied by PoE |
| Operation LED (When communicating) | Yellow light blinks during communication |
| Function setting | Use web browser |
| Dimension | 67.5mm x 94.7mm x 33.0mm (2.66” x 3.73” x 1.30”) |
| Weight | 270g (8.8 oz:Including all parts) Main unit : 90g(3.2 oz) |
| Supported protocols | IPv4, ARP, UDP, TCP, ICMP, HTTP |
| Accessories | Alarm 10-pin cable (26cm), Alarm 6-pin cable (10cm), Alarm 4-pin cable (10cm), Power 2-pin cable (26cm), Power 2-pin cable (10cm), SIP mounting plate for Gang Box, Gasket sheet for Gang Box, No. 6-32 UNC screw (5/8 inch) x 6 |
*Required power less than 12.95W, can use the PoE Hub.
Required power less than 25.5W, can use the PoE Plus Hub.
*Specifications may be modified without prior notice.
DIMENSIONS

OPTEX CO., LTD. (JAPAN) (ISO 9001 Certified) (ISO 14001 Certified) URL:http://www.optex.co.jp/e/
5-8-12 Ogoto Otsu Shiga 520-0101 JAPAN TEL:+81-77-579-8670 FAX:+81-77-579-8190
OPTEX INCORPORATED (USA) TEL:+1-909-993-5770 Tech:(800)966-7839 URL:http://www.optexamerica.com/
OPTEX SECURITY SAS (FRANCE) TEL:+33-437-55-50-50 URL:http://www.optex-security.com/
OPTEX (EUROPE) LTD. (UK) TEL:+44-1628-631000 URL:http://www.optexeurope.com/
OPTEX SECURITY Sp. z o. o. (POLAND) TEL:+48-22-598-06-55 URL:http://www.optex.com.pl/

Documents / Resources
 |
OPTEX PIE-1 PoE IP Encoder [pdf] Instruction Manual PIE-1 PoE IP Encoder, PIE-1, PoE IP Encoder, IP Encoder, Encoder |
 |
OPTEX PIE-1 PoE IP Encoder [pdf] Instruction Manual PIE-1 PoE IP Encoder, PIE-1, PoE IP Encoder, IP Encoder, Encoder |