![]() LAUNCHKEY 25
LAUNCHKEY 25
Launchkey 25 User Guide
Version 1.1
Introduction to the Launchkey 25
Get hands-on control of your music software with Launchkey 25. It works instantly with major DAWs and features a crisp OLED display, synth-action keybed, 16 velocity-sensitive pads, and powerful on-board creative tools.
- Get in-depth DAW control
Powerful control of Ableton Live, Logic Pro, FL Studio, Cubase, Reaper, Reason, Ardour, and more, with no set-up required. - Tweak your software
Eight encoders give you instant control over your DAW mixer, virtual instruments and effects. - Perform with a high-quality keybed
25 note synth-action keyboard delivers exceptional playability and musical feel. - Play drums and instruments
16 velocity-sensitive pads with polyphonic aftertouch for playing drums and instruments (patented pad technology). - Powerful tools for creating chords and patterns
Powerful built-in Arpeggiator and three Chord Modes to easily create musical progressions: Fixed Chord, User Chord and Chord Maps. - Always stay in key
Scale Mode keeps you in the right key; Chord Detector tells you what chord you’re currently playing. - Connect to other instruments
A 5-pin DIN MIDI out port means you can connect Launchkey 25 to synths and other MIDI hardware. - Additional Software
Comes with Ableton Live Lite and a collection of pro-grade virtual instruments: Visit novationmusic.com/launchkey for a full list of included software.
Box Contents
- Launchkey 25
- 1.5m (4’11”) USB type C-to-A Cable
Getting started with your Launchkey 25
Connecting and Powering
Your Launchkey is USB bus-powered, it’s powered when you connect it to your computer with a USB-C to A cable (1).
Your Launchkey also has a 6.35mm (1/4″) jack Sustain input. This input supports sustain pedals and momentary foot switches (2).
Easy Start
Easy Start gives you a step-by-step guide to setting up your Launchkey and creates personalised tutorials based on how you plan to use your Launchkey. This online tool also guides you through your Launchkey’s registration process and accessing the software bundle.
On both Windows and Mac computers, when you connect your Launchkey to your computer, it first appears as a Mass Storage Device, like a USB drive. Open the drive and double click ‘Click Here To Get Started.url’. Click ‘Get Started’ to open Easy Start in your web browser.
After you’ve opened Easy Start, follow the step-by-step guide, to install and use your Launchkey. Alternatively, if you don’t want to use the Easy Start tool, visit our website to register your Launchkey manually and access the software bundle.
id.focusritegroup.com/register
![]() IMPORTANT
IMPORTANT
It’s crucial you update your Launchkey’s firmware when you first plug it in, whether you go through Easy Start or not.
If you don’t update the firmware of your Launchkey, it’s likely many features won’t work.
To update your Launchkey’s firmware, you need to use Novation Components. Go to components.novationmusic.com to update your firmware.
To find out more about Novation Components, see What is Novation Components? [7].
What is Novation Components?
Novation Components allows you to customise your Launchkey to suit your workflow and preferences. There are two versions of Components, a desktop app (Components Standalone) and a web version. To use the web version, you must use a Web MIDI-enabled browser (such as Google Chrome or Opera). You can find both versions of Components here:
components.novationmusic.com  The key features and functions of Novation Components for your Launchkey are:
- Firmware Updates: Novation Components is the place to update the firmware of your Launchkey.
This ensures you always have the latest features, improvements, and bug fixes. You’ll also need to do a firmware update when you first receive your Launchkey, otherwise some features may not work properly. - Custom Modes: With Novation Components, you can create custom MIDI mappings for your Launchkey. This allows you to assign specific functions to different controls on the keyboard, giving you a personalised and efficient workflow tailored to your preferences.
- Backup and Restore: Safeguard your custom settings and configurations by creating backups with Novation Components. If you need to restore your Launchkey to a previous state or transfer settings between devices, this feature makes the process simple and efficient.
Troubleshooting
For help getting started with your Launchkey, visit: novationmusic.com/get-started
If you have any questions or need any help at any time with your Launchkey, visit our Help Centre. Here you can also contact our support team: support.novationmusic.com
We recommend you check for updates to your Launchkey so you have the latest features and bug fixes. To update your Launchkey’s firmware, you need to use Components:
components.novationmusic.com
Launchkey 25 hardware overview

- Pitch and Modulation wheels.
• Pitch Wheel – bend the pitch of the note(s) you’re playing and send pitch bend messages.
• Modulation Wheel – an assignable wheel to control any hardware or software parameter. - Octave + and Octave – buttons [14] – transpose the keyboard in octaves. Press both buttons to reset to the default octave.
- Screen, Shift, and Settings buttons – the screen and the two buttons directly below.
• Screen – shows important information and gives visual feedback from controls and DAWs.
• Shift button [12] – access secondary controls assigned to buttons, visible in text on the front panel.
• Settings button [42] – access the settings menu. - The six buttons below the screen:
• Track buttons – move through tracks in your DAW.
• Scale button [22] – enable and control Scale mode.
• Chord Map button [24] – enable and control Chord Map mode.
• Arp button [35] – enable and control arp mode.
Latch button – Hold Shift and press the Arp button to access the Latch button.
• Fixed Chord button [34] – enable and control Fixed Chord Mode. - Encoders [17] – assignable encoder controls.
- Encoder bank buttons – move ˄ up and ˅ down through banks of encoder controls.
- Workflow buttons – A set of four buttons.
• Capture MIDI button [52] – recover recently played MIDI notes in supported DAWs.
• Undo (Redo) button [52] – triggers your DAW’s undo function. Hold Shift and press Undo to trigger the Redo function.
• Quantise button [52] – trigger the quantise function in supported DAWs to snap notes to the grid.
• Metronome button [52] – enable the metronome in supported DAWs. - Pad bank ˄ up and ˅ down buttons – two buttons to the left of the pads to move up and down the pads, e.g. moving clips in Live, accessing different chords etc.
- Pads [19] – 16 velocity-sensitive, aftertouch-enabled, pads that change functionality depending on the pad mode.
- To the right of the pads are the:
• > Button – Scene Launch button.
• Function button – enables various secondary functions based on the pad mode. - Transport buttons [51] – Clockwise starting top left: Stop, Loop, Play, and Record.

- USB Port – a type-C USB port. Sends and receives data, and powers your Launchkey.
- MIDI Out port (5-pin DIN) – sends MIDI from your Launchkey to external MIDI hardware.
- Sustain input – connect a sustain pedal (expression, soft, and sostenuto pedals are not supported).
 – Kensington Lock, use a lock to secure your Launchkey and deter theft.
![]() DRUM PAD TERMINOLOGY
DRUM PAD TERMINOLOGY
Throughout this user guide, we’ll refer to the drum pads in the following way:
- The two buttons to the left of the pads are the Pad Bank up and down buttons.
- The pads are numbered left to right: the top row 1 to 8 and the bottom row 9 to 16.
- The two buttons to the right of the pads are the > Scene launch and function buttons.

Shift button
The Launchkey’s Shift button allows access to secondary functions on many buttons. To access the secondary functions, hold Shift and press the button. This is a list of buttons with secondary, shift functions. Some functions vary by DAW.
You can also use the Shift button to preview controls. Hold Shift and move a fader or an encoder and the screen shows you the value without changing it.
![]() NOTE
NOTE
When you hold shift any buttons with a shift function available light.
Table 1. Buttons Shift Functions
| Combination | Function |
| Shift + Octave + | Transpose + [15] |
| Shift + Octave – | Transpose – [15] |
| Shift + < Track button | < Track left [45] |
| Shift + > Track button | Track > right [45] |
| Shift + Arp | Latch [35] |
| Shift + Undo | Redo [52] |
Table 2. Pad Shift Functions
| Combination | Function |
| Shift + Pad 1 | Encoder Mode: Plugin [46] |
| Shift + Pad 2 | Encoder Mode: Mixer |
| Shift + Pad 3 | Encoder Mode: Sends |
| Shift + Pad 4 | Encoder Mode: Transport [47] |
| Shift + Pad 5 | Encoder Mode: Custom 1 [18] |
| Shift + Pad 6 | Encoder Mode: Custom 2 [18] |
| Shift + Pad 7 | Encoder Mode: Custom 3 [18] |
| Shift + Pad 8 | Encoder Mode: Custom 4 [18] |
| Shift + Pad 9 | Pad Mode: DAW [44] |
| Shift + Pad 10 | Pad Mode: Drum [49] |
| Shift + Pad 11 | Pad Mode: User Chord |
| Shift + Pad 12 | Pad Mode: Arp Pattern [39] |
| Shift + Pad 13 | Pad Mode: Custom 1 [21] |
| Shift + Pad 14 | Pad Mode: Custom 2 [21] |
| Shift + Pad 15 | Pad Mode: Custom 3 [21] |
| Shift + Pad 16 | Pad Mode: Custom 4 [21] |
Latching Modifier Buttons
Some Launchkey functions need you to press a button combination starting with a ‘modifier’ button, for example, Shift + a button. You can ‘latch’ modifier buttons to make these functions easier. To latch a modifier button, double press the modifier button.
This applies to the following buttons:
- Shift
- Split – double tap shift and hold Split to make choosing a spit point easier.
Playing the Launchkey 25’s keyboard
Your Launchkey keyboard gives you both Octave and Transposition options, and you can also play with parts. Parts allow you to change on the fly, split, or layer your keys to send MIDI messages on multiple MIDI channels.
Changing Octave
When you power on your Launchkey 25 its keyboard defaults to the note range C2 – C4 where C3 is middle C.
You can change the octave range using the Octave – and Octave + buttons. The octave shift range for the Launchkey 25 is -4 to +5 octaves. To reset to the default octave, press both Octave – and Octave + buttons together.
When you change the ctave range, the screen temporarily shows the octave shift in a number (e.g +1) and the range the current keyboard is at, e.g. C1 – C5. In addition to the temporary screen display, the Octave buttons light to show the octave position. With no octave shift, the Octave buttons are off. When you shift up an octave the Octave + buttons lights, when you shift down an octave the Octave – button lights. The button brightness shows the shift amount, the brighter the button, the more the shift.
In total, there are 128 MIDI notes. 128 is not divisible by 12 so you can shift the octave and transposition, so some keys are out of the MIDI note range. When you shift to the extreme ends of the MIDI note range, out of range keys won’t play any notes.
Transposing the keys
You can transpose your Launchkey 25’s keys up or down in semitone increments. The transposition range is ±12 semitones.
To transpose the keys, hold the Shift button and press Octave – or Octave +. Octave – transposes the keys down one semitone, Octave + transposes the keys up one semitone. When you change transposition, the screen temporarily shows the semitone shift as a number and the current keyboard range.
Control areas of the Launchkey 25
Your Launchkey has a few areas of control we’ll cover in the next few sections:
- Encoders
- Pads
- Transport and workflow buttons.

Encoder Modes
Your Launchkey’s encoders have eight modes. To change modes, hold the Shift button and press a pad from 1-8.
Some modes are only available while you’re using a DAW. For more information, see the section relating to your DAW.
The encoder modes available are:
| Drum Pad Number | Mode | Availability |
| 1 | Plugin | DAW Mode Only |
| 2 | Mixer | DAW Mode Only |
| 3 | Sends | DAW Mode Only |
| 4 | Transport | DAW Mode Only |
| 5 | Custom 1 | Always |
| 6 | Custom 2 | Always |
| 7 | Custom 3 | Always |
| 8 | Custom 4 | Always |
The pad for the current encoder mode lights bright pink. The other available modes light dim pink.
Unavailable modes, for example, if you don’t have a DAW open, are unlit.
When you enter an Encoder mode, the screen temporarily shows the control name and the mode you selected.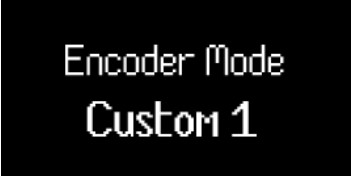 When you select a Custom mode, the mode title is the name you give the Custom mode when you create it in
Novation Components. For more information, visit What is Novation Components? [7].
Using the Encoder Custom Modes
Your Launchkey has four Custom Modes. Custom modes allow you to send customised MIDI messages from the controls. You can set up the messages each control sends in Novation Components.
When you move an encoder in a custom mode, the screen displays the parameter name and the value. You can set the parameter name in Components but if you’ve not set this the screen displays the destination of the MIDI message. In each Custom mode, there are two pages of encoder controls. To access the other page, press the Bank Next or Bank Previous buttons to the right of the encoders.
 The default page is page one. On page one, only the Bank Next button lights to show you can access the second page. On page two, the Bank Previous button lights to show you can access the first page.
When you change the encoder page, the screen temporarily displays which page you’re on.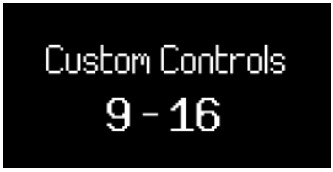 Pad Modes
Your Launchkey’s pads have eight modes. To change the mode, hold the Shift button and press a pad from 9-16.
Some modes are only available while you’re using a DAW. For more information, see the section relating to your DAW.
Drum mode is the default selected mode, the pad modes available are:
| Drum Pad Number | Mode | Availability |
| 9 | DAW (see Common DAW Control [44]) | DAW Mode Only |
| 10 | Drum [50] | Always |
| 11 | User Chord | Always |
| 12 | Arp Pattern [39] | Always |
| 13 | Custom 1 [21] | Always |
| 14 | Custom 2 [21] | Always |
| 15 | Custom 3 [21] | Always |
| 16 | Custom 4 [21] | Always |
The last pad mode you select lights bright blue. The other available modes light dim blue, unavailable modes are unlit.
When you enter a new Pad mode, the screen temporarily shows the control name and the mode you select. When you select a Custom mode, the mode title is the name you give the Custom mode when you create it in Novation Components. For more information, visit Components [7].
Drum Pad mode
When you select the Drum pad mode, the pads trigger MIDI notes. By default, the notes are arranged from C1 to D♯2 (bottom left to top right) and on MIDI channel 10. In Drum mode, the pads light blue outside your DAW and the track colour in your DAW. The pads light when you play the pads.
 Transposing the Drum pads
You can use the up and down buttons, to the left of the pads, to change which notes the pads trigger. The Shifts are in ± eight semitones. For example, pressing the up pad in the default position shifts the bottom left pad to G♯1 and the top right pad to E2.
To reset the pads to the default note arrangement, press the up and down buttons together.
When you change the drum pad notes, the screen temporarily shows the new drum pad note range. Due to C1 being the default starting point, you can shift some pads out of the note range. When drum pads are out of the note range, they don’t light or output any MIDI.
Pad Custom Modes
Your Launchkey has four Custom Modes. Custom modes allow you to send customised MIDI messages from the controls. You can set up the messages each control sends in Novation Components.
When you enable a custom mode, the pads output custom messages you can set up in Components.
When you press a pad in a custom mode, the screen displays the parameter name and the value. You can set the parameter names in Components but if you’ve not set this the screen displays the destination of the MIDI message, e.g. CC 21.
Using the Launchkey 25’s Scale Mode
Scale mode allows you to pick a scale and your Launchkey helps you play in that scale more easily.
To enable scale mode, press the Scale button. When you turn on scale mode, the screen shows the currently selected scale:
Changing the scale
You can change the scale using the first three encoders.
- Encoder 1 changes the scale’s root note. The default root note is C.
- Encoder 2 changes the scale. The default scale is Major.
- Encoder 3 changes the scale mode. There are three modes:
• Snap to scale [23] • Filter out of scale [23] • Easy scale. [23] The Default mode is Snap to Scale.
![]() TIP
TIP
Hold Shift and move an encoder to show the parameter on the screen without changing it.
Scales
The table shows the Scales available by moving encoder 2.
| Scales | |
| Major | Dorian #4 |
| Minor | Phrygian Dominant |
| Dorian | Melodic Minor |
| Mixolydian | Lydian Augmented |
| Lydian | Lydian Dominant |
| Phrygian | Super Locrian |
| Locrian | 8-tone Spanish |
| Whole Tone | Bhairav |
| Half Whole Dim | Hungarian Minor |
| Whole Half Diminished | Hirajoshi |
| Blues | In-Sen |
| Minor Pentatonic | Iwato |
| Major Pentatonic | Kumoi |
| Harmonic Minor | Pelog-Selisir |
| Harmonic Major | Pelog-Tembung |
Snap to Scale
In Snap to Scale mode, your Launchkey rounds any note outside the Scale to the nearest note in the chosen scale.
Filter out of Scale
In Filter out of Scale mode, your Launchkey filters out any notes not in the chosen scale. Any time you press the key of a note not in the scale, that note won’t play.
Easy Scale
In Easy Scale mode, your Launchkey maps all the notes in your chosen scale to your Launchkey’s white keys.
![]() TIP
TIP
If your chosen scale has less than seven notes, the scale won’t match the octaves on the keyboard. This allows you to do harp-like runs by dragging your fingers up and down the keyboard.
Using the Launchkey 25’s Chord Modes
Your Launchkey has three different built in chord modes to help you create ideas or push your music to the next level. The chord modes available are:
- Chord Map – set the scale and use the encoders and performance controls to discover new chord banks and play them via the drum pads.
- User Chord – define the key chords in your workflow by assigning your favourites to the drum pads.
- Fixed Chord – set up a chord using the keys and play it in new places using a single key press.
![]() NOTE
NOTE
Chord modes on your Launchkey 25 may not be on the same MIDI channel as your keys. By Default, Chord modes send their notes out on MIDI Channel 3. To change this, go to: Settings → Press the Pad ˄ up and ˅ down buttons until you see Chords Channel → Set the channel using the pads or Encoder 1.
Chord Map
In Chord Map mode, your Launchkey’s pads and encoders enable you to perform chords that fit with the Scale you select. Chord map is based on a few key functions:
- The leftmost eight pads, the Chord pads, allow you to play chords that fit the selected scale. Press the eight pads to trigger the chords. Although there are eight chords accessible, each chord map gives you access to 40 chord banks that fit the scale.
- The rightmost six pads, or Performance pads, let you perform the chords in different ways (e.g. arps or inversions). To use the performance pads, hold the performance pad and press the blue chord pads to play the chords with the performance effect (you might need to press the chord pad multiple times to hear the full performance effect).
- The encoders give you access to parameters to change the chords, Adventure, Explore, Spread, and Roll. Changing the Adventure and Explore parameters gives you access to the 40 banks of eight chords.
The Spread and Roll parameters change the way the chords sound.
To access Chord Map, press the Chord Map button.
Chord Map Sets
Chord map gives you a chord set to match the key and scale you’ve selected using scale mode.
When you play a chord, the screen shows the name of the chord and visual representation of the keyboard notes it’s triggering.
The chord sets and the matching scales are shown in the table below:
| Chord Set | Chord Set |
| Major | Major Major Pentatonic Whole Tone |
| Minor | Minor Minor Pentatonic Blues Melodic Minor Hirajoshi Kumoi Hungarian Minor |
| Dorian | Dorian Dorian #4 |
| Mixolydian | Mixolydian |
| Lydian | Lydian Lydian Augmented Lydian Dominant |
| Phrygian | Phrygian In Sen Iwato Pelog-Selisir Half Whole Diminished |
| Locrian | Locrian Super Locrian |
| Harmonic Minor | Harmonic Minor Bhairav Whole Half Diminished |
| Harmonic Major | Harmonic Major |
| Phrygian Dominant Pelog-Tembung 8 tone spanish |
Phrygian Dominant Pelog-Tembung 8 tone spanish |
 Each Chord Set is made up of 40 chord banks. If you imagine there’s a table of the chord banks with a scale of Explore and Adventure, as you increase each parameter you progress across the chord banks. The higher the Adventure and Explore parameters, the more gnarly the resulting chords get.
Chord Map performance pads
The right-most six pads (Pads 6-8 and 14-16) enable the Chord map performance functions. To use them, you hold the performance pads then press the chord pads. When you hold the performance pad, it changes how you play the chord. To use the performance pads, hold, or latch, a performance pad on the right, in this case Split: Left and right, and press a chord pad to play that chord with the performance element.
The performance pads change the chords in the following way. For detailed descriptions, see the relevant section.
| Pad | Behaviour |
| 6 | Manual Arp Up [28] – each press on the chord pads cycles through the chord’s notes. |
| 7 | Inversion Up [30] – Plays through the chord’s different inversions with each press. |
| 8 | Split: Bass + Chord [31] – Two presses of the chord pad play the bass note, followed by the rest of the chord’s notes. |
| 14 | Manual Arp Down [28] – each press on the chord pads cycles through the chord’s notes. |
| 15 | Inversion Down [30] – Plays the chord’s first inversion down. |
| 16 | Split: Left and Right [31] – Two presses of the chord pad play what would be the left and right handed versions of the chord. |
![]() NOTE
NOTE
You can only use one performance pad at a time.
To latch a performance pad, so you don’t have to hold it:
- Press the Scene launch button > to enable latching.
- Press the performance pad you’d like to latch.
When Latch is on, the Scene Launch button > lights white and the performance pads toggle between on and off.
Turning latch off, turns off any active performance/modifier pads.
Chord Map Manual Arp
The manual arp performance modes (there are two modes, Manual Arp Up and Manual Arp Down) change the chord pads from playing a chord to playing each note of the chord, with each press of the pad. For example, to play a three note chord (a triad) you need to press the chord pad three times to play all three notes of the chord.
Changing chord or releasing the performance pad resets the arp cycle.
Manual Arp Up
In Manual Arp Up mode, the chord notes cycle from the lowest note of the chord to the highest note of the chord, then reset.
In the case of a C Major chord the notes are C, E and G; Manual Arp Up plays the notes in the order C, E, G, C, E, G, C etc. Manual Arp Down
In Manual Arp Down mode, the chord notes cycle from the highest note of the chord to the lowest note of the chord, then reset.
Again, in the case of a C Major chord where the notes are C, E and G; Manual Arp Down, plays the notes in descending order G, E, C, G, E, C, G etc. Chord Map Inversion
The Inversion performance pad allows you to play through different chord inversions each time the chord pad is played. In music, a chord inversion is a different way of playing a chord where the root note (the chord’s name, e.g. C) is no longer the bass, or lowest, note in the chord.
To do this, hold the inversion performance pad and each time you press the chord pad it pitches the notes in the chord up (Inversion Up) or down (Inversion Down) by an octave, starting with the lowest note. After all notes have been pitched up (four presses) the chord resets to the original chord.
The cycle resets whenever you play a new chord or release the performance pad.
Inversion Up
With Inversion-Up held, a C major triad (C, E and G) looks like this:
| Action | Chord output |
| Chord pad played without the performance pad | C3, E3, G3 |
| Inversion pad held, chord pad 1st press | C4, E3, G3 (1st inversion) |
| Inversion pad held, chord pad 2nd press | C4, E4, G3 (2nd inversion) |
| Inversion pad held, chord pad 3rd press | C4, E4, G4, (Octave up) |
| Inversion pad held, chord pad 4th press | C3, E3, G3, (Original Chord, Cycle resets) |
Inversion Down
With Inversion Down held, a C major triad (C, E and G) looks like this:
| Action | Chord output |
| Chord pad played without the performance pad | C3, E3, G3 |
| Inversion pad held, chord pad 1st press | C3, E3, G2 (2nd inversion) |
| Inversion pad held, chord pad 2nd press | C3, E2, G2 (1st inversion) |
| Inversion pad held, chord pad 3rd press | C2, E2, G2, (Octave down) |
| Inversion pad held, chord pad 4th press | C3, E3, G3, (Original Chord, Cycle resets) |
Chord Map Split Mode
The Split modes emulate playing the keyboard with two hands.
- In Split: Bass + chord, the first press plays the bass note. The second press plays the rest of the chord’s notes.
- In Split: Left and right, the first press plays the two lowest notes. The second press plays the rest of the chord’s notes.
Like the other modes, these cycles are reset when the chord changes or if you release the performance pad.
In both modes, the first press plays straight, the 2nd press follows the roll function.
User Chord Mode
User Chord mode allows you to input your own chords.
To access User Chord hold Shift and press Drum Pad 11.
When you’re in User Chord mode, if you’ve not added any chords yet the pads are blank. In the following example we’ve added chords to five pads: To play a chord, press a blue pad. The pad lights white when you’re playing a chord.
Assigning User Chords
To assign a user chord to the pads:
- Press and hold a blank pad. The screen shows a representation of the keyboard.

- Press the notes on the keyboard you want to assign to the chord. You can either play the entire chord, or play each note independently (e.g. for chords you can’t play with one hand). You can assign up to six notes– the Launchkey ignores any extra notes.
The screen shows the notes you’ve added to the chord and the chord name:
- Release the pad.
The pad lights the colour of the user chord bank you’re in, see Changing User Chord Banks.
Transposing User Chords
In User Chord mode you can use the pad ˄ up and ˅ down buttons, to the left of the pads to transpose the entire User Chord bank.
To transpose by a single semitone, press either the pad up or pad down button. You can transpose up to 12 semitones (one octave) up or down.
To transpose by an octave (12 semitones) hold shift and press the pad up or pad down buttons. You can transpose up to three octaves, up or down.
Removing User Chords
To remove your User Chords, hold the Function button and press the chord’s pad you want to remove.
When you hold the function button, any pads with a chord light red and the screen shows “Delete Chord!”: Fixed Chord Mode
Fixed Chord mode allows you to assign a chord to the keys. You can make chords up to six notes using the keyboard, then play and transpose the same chord harmony playing the keys up and down the keyboard.
Assigning a Fixed Chord
- Press and hold the Fixed Chord button.
- Press the notes on the keyboard you want to assign to the chord. You can either play the entire chord, or play each note independently (e.g. for chords you can’t play with one hand). The screen shows a visual representation of the chord’s notes and name.
- Release the Fixed Chord button.
Fixed Chord remembers the notes and intervals, and Fixed chord mode is now on. The Fixed Chord button lights to shows this.
To turn Fixed Chord mode on/off, press the Fixed Chord button. The last saved chord is available. To reassign the Fixed Chord, repeat the steps above. This clears the previous chord.
Removing a Fixed Chord
- Press and hold the Fixed Chord button.
- Press any single key on the keyboard.
- Release the Fixed Chord button.
Using the Launchkey’s Arpeggiator (Arp)
An arpeggiator (arp for short) allows you to hold a number of notes, e.g. a chord, and your Launchkey plays each note individually in a sequence.
To enable your Launchkey’s arp press the Arp button. When the Arp is on, the Arp button lights and the screen shows the arpeggiator controls in the order they are assigned to the encoders:
- BPM (Tempo) [36]
- Swing [37]
- Rate [37]
- Gate [38]
- Type [38]
- Oct (Octaves) [38]
- Mut (Mutate) [38]
- Rytm (Rhythm) [38]

![]() TIP
TIP
Holding Shift and pressing Arp latches the arpeggiator. Any notes you press last indefinitely while the arp continues to play them. You can trigger a new set of notes to overwrite the arp notes.
Arp latch is really useful for experimenting with arp settings without keeping your fingers on the keys.
Arp Controls
With Arp on, the Launchkey’s encoders map to the arp’s controls. Moving an encoder temporarily displays the parameter and the value on the Launchkey’s screen.
![]() TIP
TIP
Hold Shift and move an encoder to show the parameter on the screen without changing it.
The following arp controls are available on the encoders:
| Encoder | Parameter | Default value |
| 1 | Tempo (BPM) | 120 |
| 2 | Swing | 0 |
| 3 | Rate | 16-Jan |
| 4 | Gate | 50% |
| 5 | Type | Up |
| 6 | Octaves (Oct) | 1 |
| 7 | Mutate (Mut) | 0% |
| 8 | Deviate (Dev) | 0 |
Arp Tempo
Tempo controls the arp’s speed in beats per minute (BPM) when your Launchkey isn’t receiving a MIDI clock.
You can set the internal tempo of the Launchkey from 40 to 240 BPM using encoder 1. The default tempo is 120 BPM.
When your Launchkey is receiving MIDI clock, and you move encoder 1, the screen displays the tempo it’s synchronising to instead of the internal BPM.
Arp Swing
By default, each note in an arpeggiator pattern is equally spaced in time. At the default tempo and rate of 120 BPM, 16th notes the pattern repeats every two seconds, making the steps one-eighth of a second apart.
Changing the Arp Swing parameter from its default value of 0% changes the timing of even-numbered steps (the offbeats).
You can adjust swing using encoder 2 in the range of -79%, negative swing, to +79%, positive swing.
A negative swing value shortens the time between an even step and the previous odd step, a positive Swing value has the opposite effect.
This diagram gives a rough visual representation of what happens in each swing setting:
Arp Rate
You can control the Arp rate, or the musical division of the arp notes, using encoder 3. Arp rate defines how often the notes play per bar.
The Rates available are:
- 1/4
- 1/4 triplet
- 1/8
- 1/8 triplet
- 1/16
- 1/16 triplet
- 1/32
- 1/32 triplet
Arp Gate
Encoder 4 controls how much of the time between the arp notes each note fills. The range is 0% to 95%.
![]() TIP
TIP
It is possible to have longer gates, see Arp Tie [40] for more information.
Arp Type
Encoder 5 changes the Arp Type. Arp Type refers to how the notes, or chord, you are holding are played by the arpeggiator.
| Arp Type | Behaviour |
| Up | Plays each note from the lowest note to the highest note. |
| Down | Plays each note from the highest note to the lowest note. |
| Up/Down | Plays each note from low to high, then back again. The highest and lowest notes are not repeated. |
| Up/Down 2 | The highest and lowest notes are repeated. |
| As Played | Plays the notes you’re holding in the order you played them. |
| Random | Plays the notes you’re holding in a random order. |
| Chord | Plays all notes as a chord on each arpeggiator step. |
| Strum | Notes play when you move the modulation control. Hold some keys and as you move up or down with the modulation control the notes (or Latched or Chord mode notes) play. This emulates the way chords are strummed on a guitar. |
Arp Octave
Encoder 6 adjusts the number of octaves the arpeggiator plays the notes over. You can select from one to four octaves.
Arp Mutate
Encoder 7 adjusts how much the mutate control affects the arpeggiator. Arp mutate affects all arp types.
Turning encoder 7 adds variation to your arpeggio. A new ‘mutation’ happens each time you move the encoder or retrigger from the keys. When you stop turning the encoder, the notes are set and repeat indefinitely.
Arp Rhythm
Encoder 8 changes the arp’s rhythm and shows a representation of the steps on the screen.
Turning the Rhythm encoder makes rhythmic variations. Every time you move the encoder, you’ll create a different pattern of rests.
Arp Pattern Mode
Arp Pattern is a pad mode that brings your arpeggiator steps onto the pads and gives you extra arp functionality for more interactive arp editing.
To access Arp Pattern Mode, hold shift and press Drum Pad 12.
When you select Arp pattern mode, the screen temporarily shows Pad Mode Arp Pattern.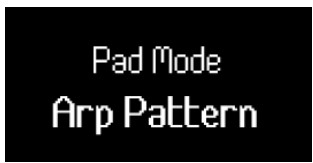 In Arp Pattern Mode:
- Active steps are lit blue and inactive steps are unlit. The arp plays active steps and mutes for inactive steps. When the arp is playing, the current step position lights on the top row of pads.

- You turn off arp steps using the top row of drum pads. Press a pad to remove the step from the arp sequence.

- The bottom row of pads gives you more arp functions you can control per step. Press the Function button to cycle between the three functions available: Accent [40], Ratchet [41] and Tie [40].
These steps are the same as the arp rhythm pattern. Arp rhythm mode affects the grid, changing the arp rhythm value changes the pattern shown in the grid and overwrites any changes you make.
Arp Tie
When Arp Tie is on, the Function button lights red and any steps with Arp Tie light red.
Arp tie, links two notes in an arp pattern together. In Arp Tie mode, press a pad on the bottom row to tie that arp step to the next step. The pad turns red to show the step above it is tied.
When a step has a tie on it, the Arp gate increases to 110%. Arp Accent
When Arp Accent is on, the Function button lights orange and any steps with Arp Accent light orange.
When you add an accent to a step, the Arp step’s velocity jumps by +30 velocity compared to the step without an accent.
The Accent velocity value is capped at 127.
![]() NOTE
NOTE
Accent affects both notes when Accent and Ratchet [41] are both active for a step. Arp Ratchet
When Arp Ratchet is on, the Function button lights yellow and any steps with Arp Ratchet on light yellow.
When you add arp ratchet to a step, the arp plays two triggers for that step. For example, if the arp is at 1/16 a step with ratchet on plays two 1/32 notes. The pitch of the notes stays the same.
Launchkey 25 settings
To access the Settings menu, press the Settings button. When settings is active, the Settings button is fully lit.
The Settings menu takes over the screen, pads, and encoders. To navigate settings use the:
- ˄ Up and ˅ down buttons to move through the settings screens.
- < Track and Track > buttons, Encoder 1, or the pads to change the value of the current setting.
 Each screen shows you the Setting and the current value:
 To exit Settings, press Settings again. This returns the keyboard to its previous pad and encoder modes.
The settings are:
| Setting | Value range | Description | Default value |
| MIDI Channel Keys | 1-16 | Sets the MIDI Channel the keys transmit on. | 1 |
| Chords Channel | 1-16 | Sets the MIDI channel the chord modes transmit on. | 3 |
| Drums Channel | 1-16 | Sets the MIDI channel the drum mode transmit on. | 10 |
| Vel Curve (Keys) | Soft Normal Hard Fixed |
Sets the key’s velocity curve. | Normal |
| Vel Curve (Pads) | Soft Normal Hard Fixed |
Sets the pad’s velocity curve. | Normal |
| Fixed Velocity | 1-127 | Changes the value of the fixed velocity and the accent value in the arp gates. |
120 |
| Arp Velocity | On/Off | When on, the Arp takes the velocity values from the keys. When off, Arp velocity defaults to 100. |
On |
| Arp Note Source | Part A Part B |
Sets which part triggers the arpeggiator. | Part A |
| Pad Aftertouch | Off Channel Poly |
Defines if the pads transmit aftertouch and if so, which type. |
Polyphonic |
| Pad AT Threshold | Low Normal High |
Sets the point when aftertouch starts on the pads. | Normal |
| MIDI Clock Out | On/Off | Enables or disables if the Launchkey transmits MIDI clock. |
On |
| LED Brightness | 1-10 | Controls the LED brightness. | 8 |
| Screen Brightness | 1-10 | Controls the screen brightness. | 8 |
| Display Timeout | 1-10 | Changes the length of temporary screen messages in 1 second intervals. |
5 |
| External Feedback | On/Off | Changes incoming MIDI to light corresponding drum or custom mode pads. |
On |
| Vegas Mode | On/Off | Enable or disable Vegas mode. | Off |
| Power On Modes | Encoder Mode: Custom 1–4 Pad Mode: Drum – Custom 4 |
Encoder Mode: Custom 1–4 Pad Mode: Drum – Custom 4 |
Fader: Custom 1 Encoder: Custom 1 Pad: Drum |
DAW control with the Launchkey 25
The Launchkey can control a range of DAWs (Digital Audio Workstations) using various Encoder and Pad modes.
You can use the Encoder modes on your Launchkey to control Plugins, your DAW’s Mixer, Sends, and DAW
Transport modes using the Encoders.
You can also use your Launchkey’s pads in DAW and Pad modes.
Many of the DAW controls on your Launchkey are DAW specific, whereas others are shared features. We’ve split the DAW features into two sections:
- Features common to all DAWs.
- Features specific to certain DAWs.
Read through both the Common DAW Controls [44] section and the section about your DAW to fully understand how you can integrate Launchkey in your workflow.
Common DAW Control
Common DAW control relates to your Launchkey’s features that work in all supported DAWs.
Once you’ve read this section, you can read the section relating to your DAW.
Default DAW Control Modes
When you first connect your Launchkey to a DAW, the sections of your Launchkey default to the following modes:
| Control Area | Default Mode |
| Encoders | Plugin |
| Drum Pads | DAW |
| Fader Buttons | Arm |
Track Buttons and Navigation
The track buttons do the same thing in all DAWs: Press Track > to move to the next track, and < Track to move to the previous track.
When you move tracks, your Launchkey 25’s screen temporarily shows the new track’s name. When you hold Shift, the Track buttons light to show you when you’re able to move track. For example, if you’re on Track 1, the < Track button wouldn’t light as you can only move to the next track.
Track Banking
Track Banking allows you to move tracks in groups of eight. The bank of tracks you’re on is also the set of eight tracks your Launchkey’s mixer settings (e.g. encoders ) control.
To bank by eight tracks, hold Shift and press the < Track or Track > buttons to move to the previous or next bank.
When you move banks, your Launchkey 25’s screen temporarily shows the new set of tracks, e.g. Mixer Tracks 9 – 16.
DAW Encoder Modes
Encoder modes assign your Launchkey 25’s encoders to different sets of controls.
To change Encoder mode, hold the Shift button and press one of the top row’s pads.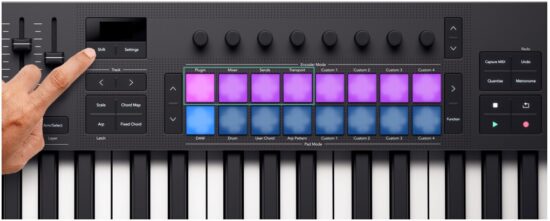 The Encoder modes that relate to DAW control are:
- Plugin – controls the currently focused plugin.
- Mixer – controls Tracks’ Level and Pan.
- Sends – controls the DAW Mixers Send controls
- Transport – controls elements of the DAWs transport beyond the Play/Pause/Loop/Stop buttons
For more information on each DAW Encoder mode, read the next few sections.
Plugin Encoder Mode
Plugin mode assigns your encoders to control the currently focused plugin in your DAW. You can control your DAW’s stock plugin effects and instruments and third-party plugins.
Each DAW has its own way of assigning plugin controls to the encoders, so please see the section relating to your DAW.
Transport Encoder Mode
Transport encoder mode brings controls of your DAW’s arrangement view onto your encoders, giving you hands-on control of your project’s navigation.
The screen shows short names for the following controls, explained in the table below and following sections:
| Encoder | Function | Short name |
| 1 | Transport Position (Scrub) | Scrb |
| 2 | Zoom | Zoom |
| 3 | Loop Start point | LPS |
| 4 | Loop End point | LPE |
| 5 | Marker selection | Mark |
| 6 | N/A | |
| 7 | N/A | |
| 8 | Tempo (BPM) | BPM |
![]() NOTE
NOTE
This mode is slightly different in Ableton Live. For more information, see Live’s Transport Encoder Mode [55].
Playback Position
In Transport Encoder mode, Encoder 1 controls the Scrub, or Playback Position. The Encoder moves the play head left and right through your arrangement in beats.
The screen shows the current play head position in bars and beats.
Zoom
In Transport Encoder mode, Encoder 2 increases and decreases the Zoom level.
Moving the Zoom encoder clockwise Zooms in, anti-clockwise Zooms out.
The screen temporarily shows the last Zoom change: Loop Start and End
In Transport Encoder mode, Encoders 3 and 4 control the Loop Start and Loop End points in your DAW. Turning the encoders clockwise or anti-clockwise moves the Loop points forward or backwards in beats.
When you change the Loop points, the screen temporarily shows the Loop point you’ve changed, and its position in Bars and Beats.
Marker Select
In Transport Encoder mode, Encoder 5 moves your DAW’s playhead between markers you’ve set up in your DAW.
Moving the encoder clockwise or anti-clockwise moves your playhead to the next or previous marker.
When you move markers, the screen temporarily shows the name of the marker you’ve moved to.
If you’ve not set up any markers in your project yet, the Marker Select encoder doesn’t do anything and when you move it the screen shows ‘No Markers’: The way you add markers varies by DAW. To find out how to add markers in your DAW, read the user guide for your specific DAW.
Using the DAW and Drum Pad modes
In terms of DAW control, the pads have two modes: DAW and Drum. You can change these using Shift + Drum pad mode buttons.
In DAW mode, the pads change function depending on the DAW you’re using. Checkout the DAW specific sections of this user guide to find out more.
Drum mode
In Drum mode, the pads follow the same behaviour as the regular Drum Pad mode [50].
However, when you’re using Drum mode in a DAW, the pads light in the colour of the currently selected track to clarify which track you’re controlling.
Drum Pad mode
When you select the Drum pad mode, the pads trigger MIDI notes. By default, the notes are arranged from C1 to D♯2 (bottom left to top right) and on MIDI channel 10. In Drum mode, the pads light blue outside your DAW and the track colour in your DAW. The pads light when you play the pads.
 Transposing the Drum pads
You can use the up and down buttons, to the left of the pads, to change which notes the pads trigger. The Shifts are in ± eight semitones. For example, pressing the up pad in the default position shifts the bottom left pad to G♯1 and the top right pad to E2.
To reset the pads to the default note arrangement, press the up and down buttons together.
When you change the drum pad notes, the screen temporarily shows the new drum pad note range. Due to C1 being the default starting point, you can shift some pads out of the note range. When drum pads are out of the note range, they don’t light or output any MIDI.
Transport Buttons
The transport buttons match the transport functions of your DAW. However, you can use the Shift button to access extra functions.
| Button | Function | Shift/Secondary Function |
 |
Starts playback. | Hold shift and press Play to pauses/continue playback. |
 |
Stops playback. | Press Stop for a second time to return the playhead to the start of your project. |
 |
Toggles your DAW’s main record function. | |
 |
Toggles loop on/off. |
Workflow Buttons
The workflow buttons of your Launchkey give you quick access to DAW features to speed up your workflow.
| Button | Function | Shift Function |
 |
Triggers Capture MIDI (retrospective MIDI record if available in your DAW). |
|
 |
Toggles the metronome on/off. | |
 |
Triggers your DAW’s quantise function on the last recorded, or selected MIDI clip. | |
 |
Triggers your DAW’s undo function (like ctrl/ command + Z) |
Triggers your DAW’s redo function (like shift + ctrl/command + Z) |
Controlling Ableton Live with the Launchkey 25
In addition to the Launchkey’s Common DAW Control [44], you have the following integration specifically designed for you to get the most out of Ableton Live.
Navigating in Ableton Live
When you connect your Launchkey and open Ableton Live, you’ll see a 2×8 focus ring around the clips. This ring represents the two rows of eight pads on your Launchkey. Changing Track
The highlighted track in Live is the currently selected track. Any Track related controls, e.g. your Launchkey’s encoders, affect the selected track. To change the selected track, press one of the Track <> buttons. When you move track:
- Your Launchkey’s screen shows you the name of the newly selected track.
- The track is ‘soft-armed’ so you can play it straight away.
- Any Track related controls, e.g. your Launchkey’s encoders, affect the newly selected track.
The focus ring only moves when you move the track past the eighth track in the current selection.
Track Banking
To bank in sets of eight tracks, hold Shift and press the Track <> buttons. The focus ring moves to include that track, either at the start or end of the focus area, depending on the direction you’re banking.
Moving between Clips
To move the focus ring up and down to select new clips in the same tracks, use the Pad ˄ up and ˅ down buttons.
Ableton Live Encoder modes
For the most part the Encoder modes on your Launchkey follow the common DAW Encoder modes [46].
However, the plugin control gives you access to more of Ableton’s Devices.
Ableton Live Plugin Encoder Mode
The Plugin encoder mode gives you control over eight parameters at a time in the currently selected device or instrument.
The encoders initially control the top eight parameters, but you can use the encoder bank buttons to access more pages of controls for each device. As you move through screen shows the device name and the title for the bank of controls.
Changing device
You can change devices within the same track by holding Shift and pressing the encoder bank up/down buttons.
When you move the device, the screen shows the track name and the new device name.
Live’s Transport Encoder Mode
Transport encoder mode brings controls of your DAW’s arrangement view onto your encoders, giving you hands-on control of your project’s navigation.
The screen shows short names for the following controls, explained in the table below and following sections:
| Encoder | Function | Short name |
| 1 | Arrangement view playback position | PlaybackPosition |
| 2 | Zoom horizontal (to playback position) | Zoom Horizontal |
| 3 | Zoom vertical (Track Height) | Zoom Vertical |
| 4 | Loop Start point | Loop Start |
| 5 | Loop End Point | Loop End |
| 6 | Marker Selection | Marker Select |
| 7 | N/A | |
| 8 | Tempo (BPM) | Tempo |
Playback Position
In Transport Encoder mode, Encoder 1 controls the Scrub, or Playback Position. The Encoder moves the play head left and right through your arrangement in beats.
The screen shows the current play head position in bars and beats.
Ableton’s Zoom Control
There are two encoders assigned to zoom in Live: Zoom Horizontal and Zoom Vertical.
Zoom Horizontal
In Arrangement view, Zoom Horizontal keeps the track heights the same but zooms in and out keeping the playback position central to the zoom.
In Session view, the Zoom Horizontal encoder moves between tracks.
Zoom Vertical
In Arrangement view, Zoom Vertical changes the track heights.
In Session view, the Zoom Vertical encoder adjusts the selected clips.
Loop Start and End
In Transport Encoder mode, Encoders 3 and 4 control the Loop Start and Loop End points in your DAW.
Turning the encoders clockwise or anti-clockwise moves the Loop points forward or backwards in beats.
When you change the Loop points, the screen temporarily shows the Loop point you’ve changed, and its position in Bars and Beats.
Marker Select
In Transport Encoder mode, Encoder 5 moves your DAW’s playhead between markers you’ve set up in your DAW.
Moving the encoder clockwise or anti-clockwise moves your playhead to the next or previous marker.
When you move markers, the screen temporarily shows the name of the marker you’ve moved to.
If you’ve not set up any markers in your project yet, the Marker Select encoder doesn’t do anything and when you move it the screen shows ‘No Markers’: The way you add markers varies by DAW. To find out how to add markers in your DAW, read the user guide for your specific DAW.
Ableton Live Pad Modes
In Ableton Live, your Launchkey has three pad modes.
- Clip – for clip launching.
- Sequencer – for editing and sequencing MIDI clips from the Launchkey ‘s pads.
- Drum – for controlling Ableton’s Drum Rack device.
To access the Clip or Sequencer pad modes, hold Shift and press Pad 9 (DAW) once for Clip and twice for Sequencer. The screen shows you which Pad mode you’re in when you press the DAW pad. To access the Drum pad mode, hold Shift and press pad 10 (Drum).
Ableton Live Clip Launcher Pad Modes
In the Clip pad mode your Launchkey gives you controls for live performing your set, bringing Ableton’s session mode to life. You have access to clip launching, stopping, and track Mutes and Solos.
Ableton Live Clip Pad Mode
In Clip launching mode, the pads represent the 2×8 focus ring in Live’s Session view. Each pad controls a clip in Session view.
Pads light a few ways depending on their state:
- Unlit pads show the clip slot is empty.
- Available clips light the same colour as their clip in Live.
- Pads flash green to show you’ve cued that clip, and pulse green when a clip is playing.
- Pads flash red to show you’ve cued that clip for recording, and pulse red while you’re recording.

To launch an entire Scene (a row of clips), press the Scene launch > button to the right of the top row. The Scene launch button lights the same colour as the scene in Live, if you have set up Scene colours.
Changing the bottom pad row
You can change what the bottom row of pads controls using the function button. Each press of the function button cycles through the following controls:
- Clip Launcher (the default mode as described above).
- Stop mode. [58]
- Mute mode. [58]
- Solo mode. [59]
Ableton Live Pad Mode: Stop
Stop mode changes the function of the bottom row, so pressing a pad stops the currently playing clip on that track.
In Stop mode, the pads light red; they light bright red when the track has a clip playing and dim red for tracks that don’t have a playing clip. In Stop mode, the Function button lights red. Ableton Live Pad Mode: Mute
Mute mode changes the function of the bottom row so they show the Mute status of each track. Pressing a pad Mutes, or unmutes, a track.
In Mute mode, the pads light orange; they light bright yellow when the track is active and dim yellow for muted tracks. In Mute mode, the Function button lights yellow. Ableton Live Pad Mode: Solo
Solo mode changes the function of the bottom row, so pressing a pad changes the Solo state of that track.
In Solo mode, the pads light blue; they light bright blue when the track is Soloed and dim blue that aren’t Soloed. In Stop mode, the Function button lights blue. Using the Launchkey 25’s Ableton Sequencer
Your Launchkey 25 gives you hardware control of Ableton Live’s clip sequencers. You can create drum patterns and sequence notes inside clips using the Launchkey’s pads and modify your sequences using the encoders.
To access the Sequencer mode, hold Shift and press drum pad 9, DAW, so the screen shows Pad Mode Sequencer 2/2. When you enter Sequencer mode, what the pads show changes depending on what you have selected in Live:
| You have a MIDI track selected but no clip selected. | The pads don’t show anything, when you add steps to the sequence Live creates a new clip in the selected clip slot for that MIDI track. |
| You have a MIDI track selected and a clip selected. | The currently selected MIDI Clip’s sequence is shown on the pads, and you can edit the sequence (the pads could also be blank if there are no notes in the clip). |
| You have an audio track selected. | Nothing is shown on the pads, you can only create sequences using MIDI tracks. |
Launchkey’s Ableton Sequencer layout and navigation
The Launchkey’s 16 Pads each represent a 16th step sequencer, allowing you to see a bar of a clip at any point.
Steps with active notes light in the track colour for the clip. Empty steps remain unlit. When the clip is playing the play position is represented by a white pad. Pad layout with arrows showing the direction of the sequencer
You can create and edit more than a bar of a clip using the Down buttons to the left of the pads to create the extra steps. You can move between steps 1-16, 17-32, and more, using the Up and Down buttons.
You can also hold Function and press the Down button to duplicate the current clip and create a clip double the length with identical bars. After you’ve done this you can tweak each bar for variation.
Launchkey’s Melody and Drum Sequencers
The Launchkey has two styles of sequencer, melody, and drum, depending on the instrument assigned to the MIDI track selected. The instrument varies how you enter notes slightly.
If you select a MIDI track with a Drum Rack, you’ll see the drum sequencer. The drum sequencer shows the note sequence for a single drum, the currently selected Drum Rack Pad, e.g. the snare drum. Changing the currently selected Drum Rack Pad changes what the pads show.
For all other tracks types, the pads use the melody sequencer. The melody sequencer shows you all steps that have notes and allows you to sequence polyphonic material.
Entering notes to the Launchkey’s Ableton Sequencer
As there are two different styles of sequencer, drum and melody, there are two methods of inputting notes.
Drum Sequencer
This method works when you have a MIDI track selected that’s using Ableton’s Drum Rack device.
- Select a clip [64]. If the clip is empty the pads are blank, if the clip has notes you’ll see lit pads for each active step of the selected drum.
- Select a drum rack pad, to do this, press a key on the keyboard that corresponds to the drum you want to use, e.g. D1 selects the Snare drum here.

- Press a pad for each step of the sequence you want to assign your selected drum to. In the example below we’ve added a snare to steps 5, 13, and 14.
 To remove notes from the sequence, press a key to select the drum rack pad you’d like to remove and press the pads for the steps you’d like to remove.
Melody Sequencer
This method works for all instruments, except Drum Racks, on MIDI tracks.
- Select a clip [64]. If the clip is empty, the pads are blank. If the clip has notes, you’ll see lit pads for each active step.
- You can enter notes in two ways:
1. Press the note or chord you want to enter on the keys, then press a pad to add it to that step. You don’t have to hold the keys, your Launchkey remembers the last key(s) you played and add these to a step when you press the corresponding pad.
2. Hold a pad and play the note(s) you want to enter on the keys.
![]() TIP
TIP
You can add notes and chords to multiple steps simultaneously by pressing multiple pads simultaneously.
Duplicating Notes
You can duplicate notes to different steps in the clip. To do this:
- Hold the Function button. The screen shows Duplicate:

- Press and hold the step you want to copy.
- Press the empty step you want to copy the notes to.
Adjusting Note Sequencer note settings
You can use the Launchkey’s sequencer to adjust each step’s settings.
To do this, press and hold a note in the Sequence, the screen shows the Note Edit settings you can access from encoders 1-4.
| Encoder | Note Setting | Explanation |
| 1 | Velocity | Changes the velocity of the note. You can hold multiple pads to adjust the velocity for multiple notes simultaneously. |
| 2 | Length | Changes the length of the note in steps up until the next instance of that note. |
| 3 | Fine (Length) | Changes the length of the note in tenths of a step (0.1 steps) up until the next instance of that note. |
| 4 | Nudge | Moves the note backward up to -20% or forward up to +70% (as long as the note is not at the start/end of the clip). |
Selecting Clips in Launchkey’s Ableton Sequencer
Clicking any MIDI Clip in Ableton using your mouse selects that Clip and allows you to edit the sequence using your Launchkey’s pads. However, you can also change the Clip from the Launchkey. To do this in Sequencer pad mode:
- Press the Scene Launch button to the right of the top pad row. The screen shows Sequencer Select Clip.
 The pads show the clips available in the current focus ring using the clip colour. Red clips show empty clip slots. You can use the ˄ up and ˅ down and Track <> buttons to move the focus ring.
- Press a pad to enter that clip and start sequencing it. Depending on the clip you choose:
• Pressing a MIDI clip takes you to step entry view to edit the sequence.
• Pressing an empty MIDI clip creates a new sequence in the slot and takes to the step entry view to edit the sequence.
• Pressing a clip on an audio track does nothing.
Pressing the scene launch button again takes you to the current sequence.
Controlling Ableton Live’s transport
The Transport section of your Launchkey works according to the explanation in common DAW controls:
Transport [51], except for the record button.
Ableton’s record button
What your Launchkey’s record button does varies depending on the view you have open in Live.
- In Session view, the Record button triggers clip recording for the currently selected clip.
- In Arrangement view, the Record button triggers recording for all armed tracks into the arrangement.
Ableton Live Global Scale
In Ableton Live, your Launchkey synchronises with Ableton Live’s Scale Mode.
When you change the Scale, or open a Live set, the Scale is sent to the Launchkey, this allows the Launchkey’s Chord modes to sync with your Live set.
Controlling Logic Pro with the Launchkey 25
In addition to the Launchkey’s Common DAW Control [44], you have the following integration specifically designed for you to get the most from Logic Pro.
Logic Pro: Encoder Modes
Plugin Mode
In Plugin DAW mode, your Launchkey’s encoders control Logic Pro’s Smart controls for the currently selected plugin or instrument.
When you move an encoder, your screen shows you the name of the track, the parameter, and the value. If the plugin or instrument has more than eight smart controls, you can use the encoder bank buttons to move to addition pages.
![]() TIP
TIP
You can access Logic Pro’s Smart controls in the top left corner of Logic or using the shortcut ‘B’ on your Mac’s keyboard.
Logic Pro Mixer Mode – EQ
Logic Pro’s Mixer encoder mode has three pages, the first two are the common DAW Mixer modes, Volume and Pan (see Mixer Encoder Mode). Logic has an extra page for Logic’s EQ plugin.
To access the EQ mixer mode, use the encoder bank down button. If you don’t have an EQ plugin on that track, moving to Mixer EQ mode adds one to the track you’re on.
When you enter Mixer EQ mode the screen temporarily shows Mixer EQ, when you move the encoders in Mixer EQ mode, the screen shows the track name, EQ parameter and the value (either frequency in Hz or gain in dB). When you’re in EQ Mixer mode, the encoders map to the following Logic Pro EQ controls:
| Encoder | Parameter | Screen Name |
| 1 | Band 2 Frequency | Low Shelf |
| 2 | Band 2 Gain | Low Shelf |
| 3 | Band 4 Frequency | Low Mid |
| 4 | Band 4 Gain | Low Mid |
| 5 | Band 6 Frequency | High Mid |
| 6 | Band 6 Gain | High Mid |
| 7 | Band 7 Frequency | High Shelf |
| 8 | Band 7 Gain | High Shelf |
![]() TIP
TIP
A tip to remember EQ mode is: the odd Encoders control the Bands’ Frequency and the even encoders control the Bands’ Gain.
Logic Pro Pad Modes
DAW Mode
In Logic Pro, DAW pad mode is split into two sub-modes:
- Mixer (Select/Arm/Solo/Mute)
- Live Loops
To change the sub-mode, press the function button. When you change sub-mode, the screen temporarily shows the Pad Function:
Logic Pro Mixer Pad Mode
Mixer Mode gives you control of Select, Record Arm, Solo, and Mute using the pads.
On page one the top pad row controls which track is selected and the pads light the track colour. The bottom row controls the record arm state, bright red shows the track is record armed, and dim red shows a track is not record armed.
On page two, the top pad row controls track Solos and the bottom pad row controls track Mutes.
To change between Select/Arm and Solo/Mute, press the Pad ˄ up and ˅ down Navigation buttons. Select/Arm is the default pad mode.
You can use < Track and Track > to move by a single track, or use track banking to move the eight tracks the pads control.
![]() NOTE
NOTE
Any Send or “Master” [sic] tracks also show up in Mixer mode. You can change the Mute/Solo states in the same way as other tracks.
Live Loops Mode
Live Loops mode gives your Launchkey control over individual Loops and the scene buttons to trigger a column of loops.
The top row of pads controls your Loops.
The bottom row of pads controls the Scenes.
Loop Pads
The top row of pads represent the Loops of the selected track. The colours on the pads match the Loop colours.
![]() TIP
TIP
To change colours in Logic Pro, go to View > Show Colors > Select a Loop > Click a colour to change the Loop colour.
To play a Loop, press a pad. While a loop is playing, the pad pulses green.
To stop a Loop, press the playing Loop’s pad.
If you press another pad on the same row, this cues the next Loop. The next loop starts according to how you’ve set your “Quantize Start” option in the top right of the Live Loops window. To record a Loop, press an empty Loop slot (a non-lit pad). While the Loop is recording, the pad flashes red, press it again to stop the Loop recording and start the Loop playing.
Scene Pads
Pressing a bottom row Pad triggers a Scene. In Logic Pro Live Loops, a Scene is a column of Loops, i.e. a Loop from each track. Logic Pro Live Loops Scene buttons at the bottom of the page. The orange bar shows which scenes correspond to the eight pads.
 The Launchkey 25’s bottom pad row trigger Logic Live Loops scenes.
![]() NOTE
NOTE
Triggering a Scene doesn’t trigger recording in empty Loop slots.
Any playing Loop’s pad pulses green to show it’s active. As you navigate (see Navigating in Logic Pro Live Loops Mode [72]) through tracks, you’ll see which Loops are playing as part of the playing Scene.
Navigating in Logic Pro Live Loops Mode
In Live Loops mode, the ˄ Up and ˅ Down buttons to the left of the pads move between the tracks.
The Track <> buttons scroll left and right through your Loops/Scenes.
As you move around your Tracks and Scenes, the Pad colours update in real-time to match the Live Loops cells
Controlling Cubase with the Launchkey
In addition to the Launchkey’s Common DAW Control [44], you have the following integration designed for you to get the most from Cubase.
The Launchkey defaults to the following modes:
- Encoder Mode – Plugin
- Pad mode – DAW
For information on what each control on your Launchkey is controlling, go to MIDI Remote at the bottom of your Cubase window, and you’ll see the following:
![]() TIP
TIP
It’s also possible to control Nuendo, Steinberg’s “advanced audio production” DAW. The control behaviour is the same as Cubase.
Encoder Modes
Using Cubase’s Plugin Encoder Mode
In Plugin mode, your Launchkey encoders map to Cubase’s eight Quick Controls.
Cubase’s Quick Controls work on a per-track basis. When you change the selected Track, the Encoders map to the Quick Controls you’ve set up for that track.
![]() TIP
TIP
To set up Quick Control assignments for each track in Cubase see the Track Quick Controls section in the Cubase User Guide.
You can see the Quick Controls assignments in the MIDI Remote section of Cubase. When you move an encoder, the screen temporarily shows you the Quick Control’s name and value.
 Using Cubase Encoder Mode: Mixer EQ
Cubase’s Mixer encoder mode has three pages, the first two are the common DAW Mixer modes, Volume and Pan. (see Mixer Encoder Mode). Cubase has an extra page for controlling the EQ section of Cubase’s channel strip.
To control Cubase’s EQ, use the encoder Bank buttons to go to the Mixer EQ page. When your encoders are in Mixer EQ Mode, the encoders map to the following:
| Encoder | Parameter | Screen Name |
| 1 | Band 1 Frequency | Lo Freq |
| 2 | Band 1 Gain | Lo Gain |
| 3 | Band 2 Frquency | LMF Freq |
| 4 | Band 2 Gain | LMF Gain |
| 5 | Band 3 Frequency | HMF Freq |
| 6 | Band 3 Gain | HMF Gain |
| 7 | Band 4 Frequency | Hi Freq |
| 8 | Band 4 Gain | Hi Gain |
![]() TIP
TIP
To open the Cubase channel strip, go to the MixConsole and click the Edit Channel Settings button ![]() for the track you want to adjust.
for the track you want to adjust.
Cubase Pad Modes
Using DAW pad mode in Cubase
In DAW pad mode, there are two pages of pads.
- Page 1 – Controls Select and Arm
- Page 2 – Controls Mute and Solo
To move between pages use the ˄ up and ˅ down buttons to the left of the pads.
When you change page, the screen temporarily shows you which settings the pads are controlling: On the Select Arm page, the top row controls track select and the pads light in the track colours.
The bottom row controls the Recording Arm setting for the track. Pads light bright red to show a track is armed, and dim red to show it’s unarmed. On page 2 the top row controls Mixer Solo. The pads light bright pink to show a track is soloed and dim pink to show an un-soloed track.
The bottom pad row controls Mute. The pads light yellow, bright yellow to show muted tracks and dim yellow to show unmuted tracks.
Controlling FL Studio with the Launchkey 25
In addition to the Launchkey’s Common DAW Control [44], you have the following integration specifically designed for you to get the most out of FL Studio.
FL Studio Encoder Modes
FL Studio Plugin Encoder Mode
In Plugin Mode, you can use the Launchkey’s encoders to control eight parameters in the plugin you have in focus. Most native FL Studio plugins support Launchkey’s encoder mode.
![]() NOTE
NOTE
The parameters the Launchkey maps to in FL Studio’s plugins are fixed preset mappings. For third-party plugins, you can use the Custom encoder mode to create your own mappings.
FL Studio Mixer Encoder Mode
In Mixer encoder mode, your Launchkey has the control over the FL Studio Channel Rack, Mixer, and EQ. There are five pages of control, you can use the encoder bank buttons to move between the controls:
| Page | Mixer Mode |
| 1 | Channel Rack Volume |
| 2 | Channel Rack Pan |
| 3 | Mixer Volume |
| 4 | Mixer Pan |
| 5 | EQ |
FL Studio Channel Rack Volume
The encoders control the Mixer Volume in the Channel Rack. FL Studio Channel Rack Pan
The encoders control the mixer pan in the Channel Rack. FL Studio Mixer Volume
The encoders control the volume in the mixer section. FL Studio Mixer Pan
The encoders control the mixer pan in the mixer section. FL Studio Mixer EQ Control
When you’re controlling FL Studio’s EQ the encoders map to the following Equalizer controls:
| Encoder | Parameter | Screen name |
| 1 | Band 1 Frequency | Low Shelf |
| 2 | Band 1Level | Low Shelf |
| 3 | Band 2 Frequency | Peaking |
| 4 | Band 2 Level | Peaking |
| 5 | Band 3 Frequency | High Shelf |
| 6 | Band 3 Level | High Shelf |
 FL Studio DAW Pad mode
The DAW pad mode acts as a Channel Rack selector with up to 16 Channel Rack channels at once. Each pad represents a single channel you can trigger using a C5 note. The pads light the channel colour for the channel you assign the pad to.
When you press a pad, FL Studio selects the channel and triggers audio. The pad then lights white to show the selected channel, and the channel’s name shows momentarily on the screen. You can select one channel from the hardware at a time. The Launchkey shows when you have no channel selected in FL Studio.
The pad layout is left to right, bottom to top, in two rows of eight. The channels in the lower row align with the Channel Rack Pan/Volume pot layout.
Launchkey 25’s Specifications
Weight and Dimensions
| Weight | 1.82 kg (4.01 lbs) |
| Height (including encoders) |
79 mm (3.11 “) |
| Width | 461 mm (18.15 “) |
| Depth | 251 mm (9.88 “) |
 Technical Specifications
This table gives you an idea of how the Launchkey 25 differs to the other models in the range.
| Controls | Launchkey Mini 25 and Launchkey Mini 37 |
Launchkey 25 and Launchkey 37 | Launchkey 49 and Launchkey 61 |
| Pitch and Modulation | Two touch-strip controls | Two wheels | Two wheels |
| Keys | 25/37 mini synth-action keys | 25/37 synth-action keys | 49/61 semi-weighted keys |
| Velocity sensitive keys | Yes | Yes | Yes |
| Drum Pads | 16 | 16 | 16 |
| Velocity sensitive pads with polyphonic aftertouch |
Yes | Yes | Yes |
| Encoders | 8 | 8 | 8 |
| Faders | – | – | 9 |
| Fader buttons | — | – | 9 |
| Transport buttons | Play Record |
Stop Loop Play Record |
Stop Loop Play Record |
| Workflow buttons | – | Capture MIDI Undo (Redo) Quantise Metronone |
Capture MIDI Undo (Redo) Quantise Metronone |
Novation Notices
Troubleshooting
For help getting started with your Launchkey, visit: novationmusic.com/get-started
If you have any questions or need any help at any time with your Launchkey, visit our Help Centre. Here you can also contact our support team: support.novationmusic.com
We recommend you check for updates to your Launchkey so you have the latest features and bug fixes. To update your Launchkey’s firmware, you need to use Components: components.novationmusic.com
Trade Marks
The Novation trademark is owned by Focusrite Audio Engineering Ltd. All other brands, products, company names, and any other registered names or trade marks mentioned in this manual belong to their respective owners.
Disclaimer
Novation has taken all steps to ensure the information given here is correct and complete. In no event can Novation accept any liability or responsibility for any loss or damage to the owner of the equipment, any third party, or any equipment which may result from this manual or the equipment it describes. The information provided in this document may be changed at any time without warning. Specifications and appearance may differ from those listed and illustrated.
Copyright and Legal Notices
Novation is a registered trademark and Launchkey is a trademark of Focusrite Group PLC.
All other trademarks and trade names are the property of their respective owners.
2024 © Focusrite Audio Engineering Limited. All rights reserved.
![]() ELECTROSTATIC DISCHARGE (ESD)
ELECTROSTATIC DISCHARGE (ESD)
A strong electrostatic discharge (ESD) may affect the normal operation of this product. If this happens, reset the unit by removing and replugging the USB cable. Normal operation should return.
Credits
Novation would like to thank the following Launchkey MK4 team members for their hard work in bringing you this product:
Aarron Beveridge, Adam Able, Adam Briffa, Adrien Fauconnet, Alex Wu, Andre Cerqueira, Arnav Luthra, Ben Bates, Conor Boyd, Dan Mitchell, Dan Stephens, Daniel Clarke, Daniel Johnson, Daniel Kay, Danny Nugent, Dave Curtis, Davide Cuoghi, Ed Fry, Eddie Judd, Ellen Dawes, Emma Davies, Emma Fitzmaurice, Gagan Mudhar, Greg Zielinski, Hannah Budworth-Mead, Hannah Williams, Jake Helps, Jan Krutisch, Jason Cheung, Joe Deller, Julian Mountford, Kai Van Dongen, Lewis Williams, Lola Muresan, Loz Jackson, Mario Buoninfante, Martin Haynes, Mobashir Ahmed, Mukesh Lavingia, Nicholas Howlett, Nick Bookman, Nick Van Peteghem, Ollie Russell-Pearcey, Paul Mansell, Pierre Ruiz, Richard Collard, Robert Briggs, Rudy McIntyre, Ryan Gray, Sam Counihan, Samuel Price, Sandor Zsuga, Si Halstead, Skye Stephenson, Stefan Archer, Taavi Bonny, Taren Gopinathan, Tom Carter, Tom Harrington, Vidur Dahiya, Vini Moreira, Wade Dawson, Will Charlton, Will Cunningham-Booth.
Authored by Ed Fry.
![]()
Documents / Resources
 |
novation 25 Launch Key [pdf] User Guide 25 Launch Key, 25, Launch Key, Key |