CAI-150 Multi Functional Calculator DIY Kit
“
Specifications:
- Work Voltage: DC 6V
- Display Color: Blue/White Screen
- Power Type: CR2032*2 Battery (Not Included)
- Work Temperature: -40~85°C
- Work Humidity: 5%~95% RH
- Size (Installed): 126*86*36mm
Product Information:
The CAI-150 Multi-Functional Calculator DIY Kit is a versatile
electronic soldering kit that integrates five different computing
functions. It is powered by two CR2032 button batteries and
features a traditional LCD1602 display screen for real-time
calculation display. This kit serves as both a DIY electronic
welding project to enhance understanding of circuits and soldering
skills, as well as a practical experimental workbench tool.
Product Usage Instructions:
1. Basic Arithmetic Calculator:
Perform basic arithmetic calculations using the keypad and
display screen.
2. 4-Color or 5-Color Ring Resistance Calculator:
Input the color sequence of the metal film resistor surface to
obtain resistor’s resistance value and error value.
3. Calculate the Working Series Resistor for LED:
Utilize the kit to determine the appropriate series resistor for
LEDs.
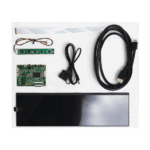
Component Listing:
FAQ:
Q: Do I need to prepare CR2032 batteries for this kit?
A: Yes, this version of the kit does not include CR2032
batteries, so users need to prepare them separately.
“`
CAI-150 Multi-Functional Calculator DIY Kit
CAI-150 Multi-Functional Calculator DIY Kit
Note: This version does not include CR2032 batteries, users need to prepare them.
1.Introduction:
CAI-150 is Multi-Functional Calculator Electronic Soldering DIY Kit. It is powered by two CR2032 button batteries, integrates five different computing functions, and uses a traditional LCD1602 display screen to display the calculation process and results in real-time.
It can not only be used as a DIY electronic welding kit that allows you to better understand the circuit and learn how to soldering, but also as a very suitable experimental workbench tool.
2.Feature:
1>.Basic Arithmetic Calculator 2>.4-Color or 5-Color Ring Resistance Calculator 3>.Calculate the working series resistor for LED 4>.Decimal to Hexadecimal 5>.Hexadecimal to Decimal 6>.Arithmetic Square Root Calculator 7>.Classic LCD1602 LCD Display Screen 8>.4*5 Transparent Matrix Keyboard 9>.Automatic power off without operation within 30 seconds 10>.DIY Hand Soldering
3.Parameter:
1>.Work voltage: DC 6V 2>.Display Color: Blue/White Screen 3>.Power Type: CR2032*2 Battery(NOT Included) 13>.Work Temperature:-40~85 14>.Work Humidity:5%~95%RH 15>.Size(Installed):126*86*36mm
4.Use Methods:
1>.Function-1: Basic Decimal Arithmetic Calculator with decimal point and minus sign. E.g: Calculate the result of ` 5*6 ‘. Steps: 1.1>.Press `ON’ button to power ON. 1.2>.Press the buttons ` 5 ‘, ` * ‘, ` 6 ‘and ` = ‘ in sequence. 1.3>.Automatically Calculate and display Results 30 1.4>.Press `AC’ button can be cleared to zero. E.g: Calculate the result of ` -8+2 ‘. Steps: 1.1>.Press `ON’ button to power ON. 1.2>.Press the buttons ` – ‘, ` 8 ‘, ` + ‘, ` 2 ‘and ` = ‘ in sequence. 1.3>.Automatically Calculate and display Results – 6 1.4>.Press `AC’ button can be cleared to zero.
2>.Function-2: 4-Color or 5-Color Ring Resistance Calculator. Input the color of the metal film resistor surface in sequence, then you can get resistor’s resistance value and error value.
E.g: 5-Color Ring Resistor within Yellow,Violet,Black,Brown,Brown. Steps: 2.1>.Press `ON’ button to power ON. 2.2>.Press `MODE’ button to switch to `Color Ring R C 5′ display interface. 2.3>.Press the buttons `Yellow’, `Violet’, `Black’, `Brown’ and `Brown’ in sequence. 2.4>.Automatically Calculate and display Results resistance value 4700ohm and error value 1% 2.5>.Press `AC’ button can be cleared to zero. E.g: 4-Color Ring Resistor within Green,Red,Yellow,Gold. Steps: 2.1>.Press `ON’ button to power ON. 2.2>.Press `MODE’ button to switch to `Color Ring R C 5′ display interface. 2.3>.Press `’ button to switch to `Color Ring R C 4′ display interface. 2.4>.Press the buttons `Green’, `Red’, `Yellow’, and `Gold’ in sequence. 2.5>.Automatically Calculate and display Results resistance value 520Kohm and error value 5%
1
CAI-150 Multi-Functional Calculator DIY Kit
2.6>.Press `AC’ button can be cleared to zero. Note: Operation error if display `error’. 3>.Function-3:Calculate Series Resistor for LED. Note: The following parameters need to be known: Circuit Work Voltage, LED Work Voltage, LED Work Current, Then you can calculate and obtain the series resistance value. Calculate Formula: R=U/I=(Vi-Vd)/I. Vi is the Circuit Work Voltage. Vd is the LED Work Voltage. I is the LED Work Current. R is the series resistor. E.g: Circuit Work Voltage Vi is 5V, LED Work Voltage Vd is 3V, LED Work Current I is10mA. So the resistor’s work voltage is Vi-Vd=5V-3V=2V. Steps: 3.1>.Press `ON’ button to power ON. 3.2>.Press `MODE’ button to switch to `Rled Vi-Vi= V I= mA R= ‘ display interface. 3.3>.Press `’ button to input LED Work Current. 3.4>.Press the buttons ` 1 ‘, ` 0 ‘ and ` = ‘ in sequence. 3.5>.Automatically Calculate and display Results resistance value 200ohm. 3.6>.Press `AC’ button can be cleared to zero. 4>.Function-4:Decimal to Hexadecimal and Hexadecimal to Decimal. E.g: Decimal to Hexadecimal. Steps: 4.1>.Press `ON’ button to power ON. 4.2>.Press `MODE’ button to switch to `10HEX-16HEX’ display interface. 4.3>.Input Decimal value and then can get a Hexadecimal value automatically. 4.4>.Press `AC’ button can be cleared to zero. E.g: Hexadecimal to Decimal. Steps: 4.1>.Press `ON’ button to power ON. 4.2>.Press `MODE’ button to switch to `10HEX-16HEX’ display interface. 4.3>.Press `’ button to switch to `16HEX-10HEX’ display interface. 4.4>.Input Hexadecimal value and then can get a Decimal value automatically. 4.5>.Press `AC’ button can be cleared to zero. 5>.Function-5: Arithmetic Square Root Calculator. E.g: Calculate the value of `4′. Steps: 5.1>.Press `ON’ button to power ON and display Basic Decimal Arithmetic Calculator. 5.2>.Press `’ button to switch to `0′ display interface at. 5.3>.Press the buttons ` 4 ‘, and ` = ‘ in sequence. 5.4>.Automatically Calculate and display Results resistance value 2. 5.5>.Press `AC’ button can be cleared to zero. 6>.CR2032 Battery: It is powered by two RC2032 batteries(NOT Include). Due to limited battery capacity, frequent use or prolonged standby may result in low battery power and inability to function properly. Please replace the batteries promptly. 7>.Automatic shutdown: Automatic power off without operation within 30 seconds.
5.Component Listing:
NO. Component Name
PCB Marker
Parameter
QTY
1 IN4148 Diode
D1,D2
DO-35
2
2 Metal Film Resistor
R5
330ohm
1
3 Metal Film Resistor
R4
1Kohm
1
4 Metal Film Resistor
R1,R2,R3
10Kohm
3
5 16Pin Male Pin
LCD1602
19mm
1
6 16Pin Female Pin
LCD1602
1
7 Ceramic Capacitor
C4
0.1uF 104
1
8 7550A-1 Voltage Regulator
U1
TO-92
1
9 S8550 Transistor
Q1
TO-92
1
10 S9013 Transistor
Q2
TO-92
1
2
CAI-150 Multi-Functional Calculator DIY Kit
11 IAP15W413AS
U2
DIP-28
1
12 IC Socket
U2
DIP-28
1
13 CR2032 Battery Socket
BT2
2
14 Black Button
S1-S20
12*12mm
20
15 Blue Button Cap
S1-S20
20
16 Transparent Button Cap
S1-S20
20
17 Self Tapping Screw
8mm
4
18 Self Tapping Screw
7mm
8
19 LCD1602 Display Module
LCD1602
1
20 Black Shell
2
21 PCB Circuit Board
220*68mm
1
Note:Users can complete the installation according to the PCB silk screen and component list.
6.Schematic Diagram:
7.Application:
1>.Training welding skills 2>.Student school 3>.DIY production 4>.Project Design 5>.Electronic competition 6>.Gift giving 7>.Crafts collection 8>.Home decoration 9>.Souvenir collection 10>.Graduation design 11>.Holiday gifts
3
CAI-150 Multi-Functional Calculator DIY Kit
8.Installation Tips:
1>.User needs to prepare the welding tool at first. 1.1>.Soldering iron (<50 Watt) 1.2>.Rosin core (“radio”) solder 1.3>.Wire cutters 1.4>.Wire strippers 1.5>.Screwdriver
2>.Please be patient until the installation is complete. 3>.The package is DIY kit.It need finish install by user. 4>.The soldering iron can’t touch the components for a long time(1.0 second), otherwise it will damage the components. 5>.Pay attention to the positive and negative of the components. 6>.Strictly prohibit short circuit. 7>.User must install the LED according to the specified rules.Otherwise some LED will not light. 8>.Install complex components preferentially. 9>.Make sure all components are in right direction and right place. 10>.It is strongly recommended to read the installation manual before starting installation!!! 11>.Please wear anti-static gloves or anti-static wristbands when installing electronic components.
9.Installation Steps(Please be patient install!!!):
4
CAI-150 Multi-Functional Calculator DIY Kit 5
CAI-150 Multi-Functional Calculator DIY Kit 6
CAI-150 Multi-Functional Calculator DIY Kit 7
CAI-150 Multi-Functional Calculator DIY Kit 8
CAI-150 Multi-Functional Calculator DIY Kit 9
CAI-150 Multi-Functional Calculator DIY Kit 10
CAI-150 Multi-Functional Calculator DIY Kit 11
CAI-150 Multi-Functional Calculator DIY Kit 12
CAI-150 Multi-Functional Calculator DIY Kit 13
CAI-150 Multi-Functional Calculator DIY Kit 14
CAI-150 Multi-Functional Calculator DIY Kit 15
CAI-150 Multi-Functional Calculator DIY Kit 16
CAI-150 Multi-Functional Calculator DIY Kit 17
CAI-150 Multi-Functional Calculator DIY Kit 18
Documents / Resources
 |
MOKCUM CAI-150 Multi Functional Calculator DIY Kit [pdf] Instruction Manual CAI-150, CAI-150 Multi Functional Calculator DIY Kit, Multi Functional Calculator DIY Kit, Calculator DIY Kit, DIY Kit, Kit |