Logitech Signature M650 Wireless Mouse

Logitech Signature M650 Wireless Mouse
INTRODUCTION
Getting Started – Signature M650
LEARN MORE ABOUT YOUR PRODUCT
Connect your mouse to your device
You can pair your mouse to your device using the Bluetooth® Low Energy connection or our new Logi Bolt receiver.
To pair through Bluetooth®:
 |
STEP 1 Remove the pull tab from the mouse. It will automatically turn on. Channel 1 will be ready to pair. |
To pair through Logi Bolt receiver:
 |
STEP 1 Take the Logi Bolt receiver from the compartment inside the battery door but don’t remove the pull tab yet. |
 |
STEP 2 Insert the receiver into any available USB port on your desktop or laptop. |
 |
STEP 3 Now you can remove the pull tab from the mouse. It will automatically turn on. The receiver will be connected to Channel 1 and your mouse will be ready to use. |
Install Logitech Software
Download Logitech Software to customize your mouse and benefit from advanced shortcuts and all the possibilities this mouse has to offer. Click here to download and learn more about the full range of features.
Product Overview

- SmartWheel scroll wheel
- Battery status LED
- Connection Status LED
- Connect button
- 4000DPI sensor
- On/Off toggle switch
- Battery and receiver compartment
- Back/Forward buttons
Our new Logitech SmartWheel on your mouse
 |
The Signature M650 and M650L feature SmartWheel scrolling that delivers precision or speed the moment you need it. Seamlessly switch between these two scrolling styles with the flick of your finger.
|
Horizontal Scroll
 |
You can scroll horizontally with your mouse.
This is done with a two-button combination: press and hold one of the side buttons and scroll with the wheel simultaneously. NOTE: The horizontal scroll is ON by default. You can customize this feature on the Point & Scroll tab in Logitech software. For more detailed information on Horizontal Scroll, click here. |
Back/Forward buttons
 |
The back and forward buttons enhance navigation and simplify tasks.
To move back and forward, press the back or forward button to navigate web or document pages, depending on the location of the mouse pointer. |
Logitech software lets you assign other useful functions to the buttons, including undo/redo, OS navigation, volume up/down, and more.
- Download and run Logitech Options+. Click here to download the software.
- An installer window will pop up on your screen — click Install Options+.

- Once Logitech Options+ is installed, a window will open and you’ll be able to see an image of your mouse. Click on it.

- You will be taken into a quick onboarding process that shows you how to customize your mouse. We highly recommend not to skip it.

- Once you’re finished, on the left side of the window, click Buttons.

- Click on any of the buttons that you wish to customize.

- Select the function you like to set on that button from the options that appear on the right rise of the screen and you are done!

App-Specific Settings
Your mouse buttons can be assigned to perform different functions for different applications. You can assign the side buttons to control volume in Spotify, copy/paste in Microsoft Excel, or undo/redo in Adobe Photoshop.
When you install Logitech software, you can install predefined app-specific settings that will adapt the mouse button behavior to the selected applications.
Here are the app-specific settings we have created for you:
 |
1 | 2 | |
| Default settings | Middle button | Forward | Back |
| Browser (Chrome, Edge, Safari) | Open link in a new tab | Forward | Back |
| Zoom/Teams | Middle button | Start/Stop Video | Mute/unmute Microphone |
| Media (Spotify, VLC, Quicktime) | Middle button | Forward | Back |
| Microsoft Excel | Pan (hold and move the mouse) | Redo | Undo |
| Microsoft Word | Autoscroll | Redo | Undo |
|
Microsoft PowerPoint |
Pan (hold and move the mouse) | Redo | Undo |
|
Adobe Photoshop |
Pan (hold and move the mouse) | Redo | Undo |
Each of these settings can be customized manually, for any application.
If you want more advanced functionality, you can assign any of the side buttons of the mouse to be the Gesture Button. This will transform your forward or back button into a powerful multi-function button allowing you to use gestures for desktop navigation, app management, pan, zoom, and more.
On the Mouse tab, select any side button (forward or back) button and click on Gesture Button.

By default, the gesture buttons will allow you to navigate between windows and desktops. In order to perform the gestures, you will need to hold the button while you move the mouse
Check battery status
 |
The LED on the top of the mouse indicates battery status.
You can install Logitech software to receive battery status notifications, including low-charge warnings. |
| LED Color | Status | Time Out | Indications |
| Green | Steady | 5 seconds | From 100% to >5% charge |
| Red | Pulsing | 5 seconds steady, followed by 3 minutes pulsing |
Critical level (equivalent to 1 month average use) or below
NOTE: The red LED will pulse every time the device wakes up from deep sleep. |
Battery life and replacement
Battery information:
- Requires 1 AA alkaline battery
- Expected battery life is up to 24 months
Installing a new battery
 |
Slide the battery compartment cover down and then lift it off. Insert the battery, making sure that it faces the correct direction and then replace the battery cover. |
Left-handed version:
 |
Logitech M650L has a left-handed version (M650L Left). It has the same feature definition as the right-handed version with the only difference being that the side buttons are on the right side of the mouse for better accessibility with your left thumb.
Your mouse will still have the main click function on the left. If you prefer to swap it to the right button, you can use Logitech software. |
Specs & Details
Q/A
Sometimes your mouse will need a firmware update to:
– Improve the device security
– Improve or add a certain function
– Fix bugs
– Other
To see if there is a firmware update for your mouse, go to Logi Options+, select your mouse, and then click Settings on the left side of the window.
Under the ABOUT section, you’ll see your device Firmware version. Click CHECK FOR UPDATE — a firmware update tool will appear on your screen to notify if there is an update available. Follow the instructions that are shown on the firmware update tool and you’re ready to continue using your mouse.
Logitech has carefully selected the materials on your mouse to be stain-resistant and easy to clean. However bright colors (Off White and Rose Pink) are more apt to get dirty over normal use.
– We recommend the following practices to keep your mouse clean for a longer time:
Clean your mouse weekly to avoid getting stains that are hard to remove (see the link below for cleaning instructions).
– Avoid eating snacks with high pigment or grease concentrations while using your mouse (fruits, chips, snacks, sweets).
– Avoid touching your face while using your mouse. This will prevent substance transfer to your device (oil, make up, creams, lotions, perfumes, and so on).
– Avoid using lotions on your hands while using your mouse.
– If you get ink stains on your hands, make sure you remove them with alcohol wipes before touching your mouse.
– In case your mouse has been stained, please see Cleaning your Logitech device.
Support for pairing the BOLT receiver on Chrome OS is not yet available. However, you can use the Logi app available on Windows OS or Mac OS to unpair/pair your device(s). For this pairing process, you will need to download and install LOGITECH OPTIONS+. Once installed, please select the ADD DEVICE button in the top right corner of the screen, then select the LOGI BOLT RECEIVER and follow the onscreen instructions.
NOTE: You need to follow this process only if you’re pairing your mouse to a new BOLT receiver or a receiver from another BOLT device. If you want to repair your mouse with the dongle that came with the product you just need to put the device on pairing mode and connect the dongle to your computer.
We recommend using a Bluetooth Low Energy direct connection to pair your mouse to your Chrome OS host device. All functions will be available with this connection.
If you need to use the BOLT receiver to connect your mouse to your Chrome OS host device, please be aware you will encounter some limitations on the experience.
NOTE: Avoid using your mouse connected through Bolt receiver to a Chrome OS device with a touch screen when used in tablet mode or Chrome OS touch-only devices.
You can customize how you use the Signature M650 wireless mouse after you download and install the Logi Options+ (Beta) application. The software lets you:
– Adjust the pointer speed
– Adjust scrolling speed (when connected to macOS host)
– Reverse the scroll wheel direction
– Customize three buttons: two side buttons and the middle button (ex. assign side buttons copy/paste instead of default forward/backward)
– Customize gestures (ex. hold button and move right to switch applications)
– Customize for different actions in different applications (ex. mute audio/video while using Zoom or copy/paste in MS Word)
– Know when the battery is low
You can learn about and download the Logi Options+ Beta software here.
Logi Options+ Beta version .80 includes support for the Logitech Signature Series M650 and M750 wireless mice. Logi Options+ is currently nearing the end of an extensive and thorough Beta period.
f your device stops responding, first confirm that the Logi Bolt receiver is working properly. Use the steps below:
1. Open Device Manager and make sure your product is listed.
2. If the receiver is plugged into a USB hub or extender, try plugging it into a port directly on the computer
3. Windows only — try a different USB port. If it makes a difference, try updating the motherboard USB chipset driver.
4. If the receiver is Logi Bolt ready, identified by this logo ![]() open Logi Bolt Software and check if the device is found there.
open Logi Bolt Software and check if the device is found there.
5. If not, follow the steps to connect the device to a Logi Bolt receiver.
6. Try using the receiver on a different computer.
7. If it’s still not working on the second computer, check Device Manager to see if the device is recognized.
8. If your product is still not recognized, the fault is most likely related to the USB receiver rather than the keyboard or mouse. Please contact Customer Support.
Unable to pair to Logi Bolt Receiver
If you’re unable to pair your device to the Logi Bolt receiver, do the following:
STEP A:
1. Make sure the device is found in Devices and Printers. If the device is not there, follow steps 2 and 3.
2. If connected to a USB HUB, USB Extender, or to the PC case, try connecting to a port directly on the computer motherboard.
3. Try a different USB port; if a USB 3.0 port was used previously, try a USB 2.0 port instead.
STEP B:
Open Logi Bolt Software and see if your device is listed there. If it’s not listed, follow the steps to connect the device to a Logi Bolt receiver. See Connect a new device to a Logi Bolt USB receiver for more information.
Logi Bolt devices can be recognized by this logo, found on the back of the device next to the Bluetooth logo:![]()
Logi Bolt devices are not compatible with Unifying USB receivers, and Unifying devices are not compatible with Logi Bolt USB receivers.
A right-click is comparable to a long-press with your finger. Using the mouse, there’s no need to hold down to have the menu appear — it shows in an instant.
NOTE: This functionality is subject to support by the app maker.
You can change the scrolling direction of your mouse from Natural Scrolling to the other direction. Here’s how:
1. Go to Settings > General > Trackpad and Mouse.
2. Slide the toggle to the left to turn off Natural Scrolling. 
To pair your mouse to iPad, do the following:
1. Turn your mouse ON.
– The LED should start blinking fast. If it doesn’t, perform a long press on the Easy-Switch button on the mouse.
2. Open the iPad Settings and tap Bluetooth settings.
3. Choose your mouse in the list of Devices.
When you connect your Logitech device, you might see a warning message.
If this happens, make sure to connect only the devices you’ll be using. The more devices that are connected, the more interference you might have between them.
If you are having connectivity issues, disconnect any Bluetooth accessories that you’re not using. To disconnect a device:
– In Settings > Bluetooth, tap the information button next to the device name, then tap Disconnect.
If your Bluetooth mouse or keyboard does not reconnect after a reboot at the login screen and only reconnects after the login, this might be related to FileVault encryption.
When FileVault is enabled, Bluetooth mice and keyboards will only re-connect after login.
Potential solutions:
– If your Logitech device came with a USB receiver, using it will solve the issue.
– Use your MacBook keyboard and trackpad to login.
– Use a USB keyboard or mouse to login.
Note: This issue is fixed from macOS 12.3 or later on M1. Users with an older version might still experience it.
In the event your Logitech device needs cleaning we have some recommendations:
Before You Clean
– If your device is cabled, please unplug your device from your computer first.
– If your device has user-replaceable batteries, please remove the batteries.
– Be sure to switch off your device and then wait 5-10 seconds before starting to clean.
– Don’t put cleaning liquids directly on your device.
– For devices that are not waterproof, please keep moisture to a minimum and avoid any liquid dripping or seeping into the device
– When using cleaning sprays, spray the cloth and wipe — do not spray the device directly. Never submerge the device in a liquid, cleaning or otherwise.
– Don’t use bleach, acetone/nail polish remover, strong solvents, or abrasives.
Cleaning Keyboards
– To clean the keys, use regular tap water to lightly moisten a soft, lint-free cloth and gently wipe down the keys.
– Use compressed air to remove any loose debris and dust between the keys. If you do not have compressed air available, you could also use cold-air from a hair-dryer.
– You can also use fragrance-free disinfecting wipes, fragrance-free anti-bacterial wet wipes, makeup removing tissue, or alcohol swabs containing less than 25% concentration of alcohol.
– Don’t use bleach, acetone/nail polish remover, strong solvents, or abrasives.
Cleaning Mice or Presentation Devices
– Use tap water to lightly moisten a soft, lint-free cloth and gently wipe down the device.
– Use lens cleaner to lightly moisten a soft, lint-free cloth and gently wipe down your device.
– You can also use fragrance-free disinfecting wipes, fragrance-free anti-bacterial wet wipes, makeup removing tissue, or alcohol swabs containing less than 25% concentration of alcohol.
– Don’t use bleach, acetone/nail polish remover, strong solvents, or abrasives.
Cleaning Headsets
– Plastic parts (headband, mic boom, etc.): it is recommended to use fragrance-free disinfecting wipes, fragrance-free anti-bacterial wet wipes, makeup-removing tissue, or alcohol swabs containing less than 25% concentration of alcohol.
– Leatherette earpads: it is recommended to use fragrance-free disinfecting wipes, fragrance-free anti-bacterial wet wipes, or make-up removal tissue. Alcohol wipes can be used on a limited basis.
– For the braided cable: it is recommended to use anti-bacterial wet wipes. When wiping cables and cords, grip the cord mid-way and pull towards the product. Don’t forcefully pull the cable away from the product or away from the computer.
– Don’t use bleach, acetone/nail polish remover, strong solvents, or abrasives.
Cleaning Webcams
– Use tap water to lightly moisten a soft, lint-free cloth and gently wipe down the device.
– Use lens cleaner to lightly moisten a soft, lint-free cloth and gently wipe down the webcam lens.
– Don’t use bleach, acetone/nail polish remover, strong solvents, or abrasives.
If Your Device Still Isn’t Clean
– In most cases, you can use isopropyl alcohol (rubbing alcohol) or fragrance-free anti-bacterial wipes and apply more pressure when cleaning. Before using rubbing alcohol or wipes, we suggest you test it first in an inconspicuous area to make sure it doesn’t cause discoloration or remove any printing on your device.
– If you’re still not able to get your device clean, please consider contacting us.
COVID-19
Logitech encourages users to properly sanitize their products in accordance with guidelines put out by the World Health Organization and the Centers for Disease Control guidelines.
These troubleshooting steps go from easy to more advanced.
Please follow the steps in order and check if the device works after each step.
Make sure you have the latest version of macOS
Apple is regularly improving the way macOS handles Bluetooth devices.
Click here for instructions on how to update macOS.
Make sure you have the right Bluetooth parameters
1. Navigate to the Bluetooth preference pane in System Preferences:
– Go to Apple Menu > System Preferences > Bluetooth 
2. Make sure that Bluetooth is turned On.

3. In the bottom-right corner of the Bluetooth Preference window, click Advanced. 
4. Make sure all three options are checked:
– Open Bluetooth Setup Assistant at startup if no keyboard is detected
– Open Bluetooth Setup Assistant at startup if no mouse or trackpad is detected
– Allow Bluetooth devices to wake this computer

NOTE: These options ensure that Bluetooth-enabled devices can wake your Mac and that the OS Bluetooth Setup Assistant will launch if a Bluetooth keyboard, mouse or trackpad is not detected as connected to your Mac.
5. Click OK.
Restart the Mac Bluetooth Connection on your Mac
1. Navigate to the Bluetooth preference pane in System Preferences:
2. Go to Apple Menu > System Preferences > Bluetooth
3. Click Turn Bluetooth Off.

4. Wait a few seconds, and then click Turn Bluetooth On. 
5. Check to see if the Logitech Bluetooth device is working. If not, go to the next steps.
Remove your Logitech device from the list of devices and try to pair again
1. Navigate to the Bluetooth preference pane in System Preferences:
– Go to Apple Menu > System Preferences > Bluetooth
2. Locate your device in the Devices list, and click on the “x” to remove it. 

3. Re-pair your device by following the procedure described here.
Disable the hand-off feature
1. In some cases, disabling the iCloud hand-off functionality can help.
Navigate to the General preference pane in System Preferences:
– Go to Apple Menu > System Preferences > General 
2. Make sure Handoff is unchecked.

Reset the Mac’s Bluetooth settings
WARNING: This will reset your Mac, and cause it to forget all of the Bluetooth devices you have ever used. You will need to re-configure each device.
1. Make sure Bluetooth is enabled and that you can see the Bluetooth icon in the Mac Menu Bar at the top of the screen. (You’ll need to check the box Show Bluetooth in menu bar in the Bluetooth preferences).
2. Hold down the Shift and Option keys, and then click the Bluetooth icon in the Mac Menu Bar.

3. The Bluetooth menu will appear, and you will see additional hidden items in the drop-down menu. Select Debug and then Remove all devices. This clears the Bluetooth device table and you’ll then need to reset the Bluetooth system.

4. Hold down the Shift and Option keys again, click on the Bluetooth menu and select Debug > Reset the Bluetooth Module.

5. You will now need to repair all your Bluetooth devices following standard Bluetooth pairing procedures.
To re-pair your Logitech Bluetooth device:
NOTE: Make sure all your Bluetooth devices are on and have enough battery life before you re-pair them.
When the new Bluetooth Preference file is created, you’ll need to re-pair all your Bluetooth devices with your Mac. Here’s how:
1. If the Bluetooth Assistant starts up, follow the onscreen instructions and you should be ready to go. If the Assistant doesn’t appear, go to Step 3.
2. Click Apple > System Preferences, and select the Bluetooth Preference pane.
3. Your Bluetooth devices should be listed with a Pair button next to each unpaired device. Click Pair to associate each Bluetooth device with your Mac.
4. Check to see if the Logitech Bluetooth device is working. If not, go to the next steps.
Delete your Mac’s Bluetooth Preference List
The Mac’s Bluetooth Preference List may be corrupted. This preference list stores all the Bluetooth devices pairings and their current states. If the list is corrupted, you’ll need to remove your Mac’s Bluetooth Preference List and re-pair your device.
NOTE: This will delete all pairing for your Bluetooth devices from your computer, not just Logitech devices.
1. Click Apple > System Preferences, and select the Bluetooth Preference pane.
2. Click Turn Bluetooth Off.

3. Open a Finder window and navigate to the /YourStartupDrive/Library/Preferences folder. Press Command-Shift-G on your keyboard and enter /Library/Preferences in the box.
Typically this will be in /Macintosh HD/Library/Preferences. If you changed the name of your startup drive, then the first part of the pathname above will be that [Name]; for example, [Name]/Library/Preferences.
4. With the Preferences folder open in the Finder, look for the file called com.apple.Bluetooth.plist. This is your Bluetooth Preference List. This file could be corrupted and cause problems with your Logitech Bluetooth device.
5. Select the com.apple.Bluetooth.plist file and drag it to the desktop.
NOTE: This will create a backup file on your desktop if you ever want to go back to the original setup. At any point, you can drag this file back to the Preferences folder.
6. In the Finder window that is open to the /YourStartupDrive/Library/Preferences folder, right-click the com.apple.Bluetooth.plist file and select Move to Trash from the pop-up menu. 
7. If you are asked for an administrator password to move the file to the trash, enter the password and click OK.
8. Close any open applications, then restart your Mac.
9. Re-pair your Logitech Bluetooth device.
Bluetooth troubleshooting for Logitech Bluetooth Mice, Keyboards and Presentation remotes
Bluetooth troubleshooting for Logitech Bluetooth Mice, Keyboards and Presentation remotes
Try these steps to fix issues with your Logitech Bluetooth device:
Bluetooth allows you to connect your device wirelessly to your computer without using a USB receiver. Follow these steps to connect via Bluetooth.
Check if your computer is compatible with the latest Bluetooth technology
The latest generation of Bluetooth is called Bluetooth Low Energy and is not compatible with computers that have an older version of Bluetooth (called Bluetooth 3.0 or Bluetooth Classic).
NOTE: Computers with Windows 7 cannot connect with devices that use Bluetooth Low Energy.
1. Make sure that your computer has a recent operating system:
– Windows 8 or later
– macOS 10.10 or later
2. Check if your computer hardware supports Bluetooth Low Energy. If you don’t know, click here for more information.
Set your Logitech device in ‘pairing mode’
In order for the computer to see your Logitech device, you need to put your Logitech device in discoverable mode or pairing mode.
Most Logitech products are equipped with a Bluetooth button or Bluetooth key and have a Bluetooth status LED.
– Make sure your device is turned ON
– Hold down the Bluetooth button for three seconds, until the LED starts blinking rapidly. This indicates that the device is ready for pairing.
See the Support page for your product to find more information on how to pair your specific Logitech device.
Complete the pairing on your computer
You will need to complete the Bluetooth pairing on your computer, tablet or phone.
See Connect your Logitech Bluetooth device for more information on how to do this depending on your operating system (OS).
Follow these steps if you experience disconnections or lag with your Logitech Bluetooth device.
Troubleshooting checklist
1. Make sure that Bluetooth is ON or enabled on your computer.
2. Make sure your Logitech product is ON.
3. Make sure that your Logitech device and computer are within close proximity of each other.
4. Try moving away from metal and other sources of wireless signal.
Try moving away from:
– Any device that could emit wireless waves: Microwave, cordless phone, baby monitor, wireless speaker, garage door opener, WiFi router
– Computer power supplies
– Strong WiFi signals (learn more)
– Metal or metal wiring in the wall
5. Check the battery of your Logitech Bluetooth product. Low battery power can adversely affect connectivity and overall functionality.
6. If your device has removable batteries, try removing and re-inserting the batteries in your device.
7. Make sure your operating system (OS) is up to date.
Advanced troubleshooting
If the problem still persists, you will need to follow specific steps based on your device OS:
Click on the link below to resolve Bluetooth wireless issues on:
Windows
Mac OS X
Send a feedback report to Logitech
Help us improve our products by submitting a bug report using our Logitech Options Software:
1. Open Logitech Options.
2. Click More.
3. Select the problem you see and then click Send feedback report.
The following steps show you how to prepare your Logitech device for Bluetooth pairing and then how to pair it to computers or devices running:
– Windows
– macOS
– Chrome OS
– Android
– iOS
Prepare your Logitech device for Bluetooth pairing
Most Logitech products are equipped with a Connect button and will have a Bluetooth Status LED. Usually the pairing sequence is started by holding down the Connect button until the LED starts blinking rapidly. This indicates that the device is ready for pairing.
NOTE: If you’re having trouble starting the pairing process, please refer to the user documentation that came with your device, or visit the support page for your product at support.logitech.com.
============
Windows
Select the version of Windows you’re running and then follow the steps to pair your device.
– Windows 7
– Windows 8
– Windows 10
Windows 7
1. Open the Control Panel.
2. Select Hardware and Sound.
3. Select Devices and Printers.
4. Select Bluetooth Devices.
5. Select Add a device.
In the list of Bluetooth devices, select the Logitech device you want to connect to and click Next.
Follow the onscreen instructions to finish pairing.
Windows 8
1. Go to Apps, then find and select Control Panel.
2. Select Devices and Printers.
3. Select Add a device.
In the list of Bluetooth devices, select the Logitech device you want to connect to and select Next.
Follow the onscreen instructions to finish pairing.
Windows 10
1. Select the Windows icon, then select Settings.
2. Select Devices, then Bluetooth in the left pane.
In the list of Bluetooth devices, select the Logitech device you want to connect to and select Pair.
Follow the onscreen instructions to finish pairing.
NOTE: It may take up to five minutes for Windows to download and enable all drivers, depending on your computer’s specifications and your internet speed. If you have not been able to connect your device, repeat the pairing steps and wait a while before you test the connection.
=============
macOS
1. Open System Preferences and click Bluetooth.
2. Select the Logitech device you want to connect to from the Devices list and click Pair.
3. Follow the onscreen instructions to finish pairing.
Upon pairing, the LED light on your Logitech device stops blinking and glows steady for 5 seconds. The light then turns off to save energy.
==============
Chrome OS
1. Click the status area in the lower right corner of your desktop.
2. Click Bluetooth enabled or Bluetooth disabled in the pop-up menu.
NOTE: If you had to click on Bluetooth disabled, that means the Bluetooth connection on your Chrome device needs to first be enabled.
3. Select Manage devices… and click Add Bluetooth device.
4. Select the name of the Logitech device you want to connect to from the list of available devices and click Connect.
5. Follow the onscreen instructions to finish pairing.
Upon pairing, the LED light on your Logitech device stops blinking and glows steady for 5 seconds. The light then turns off to save energy
=============
Android
1. Go to Settings and Networks and select Bluetooth.
2. Select name of the Logitech device you want to connect from the list of available devices and click Pair.
3. Follow the onscreen instructions to finish pairing.
Upon pairing, the LED light on the Logitech device stops blinking and glows steady for 5 seconds. The light then turns off to save energy.
=====================
iOS
1. Open Settings and click Bluetooth.
2. Tap on the Logitech device you want to connect to from the Other Devices list.
3. The Logitech device will be listed under My Devices when paired successfully.
Upon pairing, the LED light on the Logitech device stops blinking and glows steady for 5 seconds. The light then turns off to save energy.
All about Logi Options+
1. If you have a supported mouse or keyboard, and are on a supported OS version, download the app here.
2. If you currently use Logitech Options, please make sure you are on Options version 8.54 or newer before you start the installation of Options+. You can find the latest version of Options here.
3. The app is currently supported in these languages.
You can also mass install and configure Logitech Options+ remotely for your workforce.


Version 1.20
Aug 24, 2022
This release includes support for new devices and some fixes.
New devices
- Ergo M575, Ergo M575 for Business, Ergo K860, and Ergo K860 for Business
- Wireless Mouse M170, M185, M187, M235, M310, M310t, M510, M720
- Wireless Keyboard and Mouse combo MK850
- Wireless Keyboard K540/K545 (Windows only)
What’s fixed
===========
Version 1.11
Aug 1, 2022
This release includes some fixes.
What’s fixed
- Bug fixes and enhancements
============
Version 1.1
June 30, 2022
This release includes support for a new device, firmware update and some fixes.
New devices
- Signature K650
New features
-
Firmware update for MX Mechanical, MX Mechanical Mini, & K855 Keyboards
What’s fixed
- Fix for some crashes and hangs
=============
Version 1.0
May 24, 2022
We are coming out of beta! This is our first official release and we could not have gotten here without our incredible user community. Thank you to everyone who participated in the beta and helped us improve the app! We are just getting started and we will continue to raise the bar with Options+.
We’re still working on bringing more devices to Options+. If you have a device that is not supported yet, we’re sorry about the wait. While we work on it, we’ll continue to support you with Options. Thanks for your patience, there’s more coming soon.
New devices
- MX Master 3S mouse
- MX Mechanical and MX Mechanical Mini keyboards
- K855 Keyboard
- POP Keys and POP Mouse
New features
-
Check for firmware updates from the device settings page.
What’s fixed
- Fixed some crashes and hangs
=================
Version 0.92
April 19, 2022
This release includes support for new devices.
New devices
- Lift, Lift Left, and Lift for Business mice
New features
- The app can now be mass deployed remotely making it easy to outfit the entire workforce with Options+.
What’s fixed
- Fixed the issue where devices sometimes show download errors on the home screen.
- Fixed some crashes and hangs.
What’s improved
- Create custom settings for M1 Mac native versions of Adobe Photoshop.
- The app is now compatible with macOS Universal Control feature. Please note that your customization will not work on the secondary computer when you switch to it using Universal Control. Learn more.
- Made improvements to address the issues where your device would not show up in the app.
==============
Version 0.91
Mar 19, 2022
This release includes features to add and remove devices from your computer.
New features
- Connect devices to your computer via a USB receiver or Bluetooth using the Add device button.
- Remove a previously paired device using the remove button on the home screen for inactive devices and the remove button from the device settings for an active device.
What’s fixed
- Fixed the issue where an invisible icon was getting added in the menu bar on macOS.
- Fixed the issue where devices sometimes show download errors on the home screen.
- Fixed some crashes and hangs.
What’s improved
- Create custom settings for apps downloaded from the Windows app store.
- Security enhancements.
=============
Version 0.90
Feb 21, 2022
This release includes several new features.
New features
- Support for M650 for Business
- Native support for Apple Silicon M1 Mac computers.
- You can now log into the app to backup your device settings to the cloud. You can set up your devices on another computer easily by logging in to the app on that computer and fetching your settings from the backup.
- Create and edit videos faster in Adobe Premiere Pro with your MX Master 3, MX Anywhere 3, M650, M650 for Business, and M750 mice with predefined settings.
- You can request support and report issues with our Customer Support team from the app settings.
What’s fixed
- Fixed some app hangs.
What’s improved
- Made improvements to address the issues where your device would not show up in the app or would show as inactive.
- Security enhancements.
==========
Version 0.80
Jan 10, 2022
This release includes support for new devices.
New devices
- M650, M650 Left, and M750 mice
New features
- Create videos faster in Final Cut Pro with your MX Master 3 or MX Anywhere 3 mice with predefined settings.
- Switch between two pointer speed presets with the press of a button. Move the pointer at your normal speed with one preset and quickly switch to slower movement with the other for more precise work.
What’s changed?
- We discovered issues with the feature that lets you change the names of the computers connected to your keyboard from the Easy-Switch menu. We’ve removed the option while we identify a robust solution for the issues.
===============
Version 0.70.7969
December 21, 2021
What’s fixed
- Fixed the issue where scrolling was extra fast on macOS and in some apps on Windows when Smooth scrolling was enabled.
===================
December 17, 2021
This release includes support for new devices.
New devices
- MX Keys Mini, MX Keys Mini for Mac, and MX Keys Mini for Business keyboards
- MX Keys for Business keyboard
- MX Master 3 for Business mouse
- MX Anywhere 3 for Business mouse
New features
-
Work easier and faster in Microsoft Word and PowerPoint with your MX Master 3 or MX Anywhere 3 mice with predefined settings.
NOTE: If you had previously created custom settings for Word or PowerPoint on Windows, please remove them and add them back for the new actions to work. You can remove the custom settings by hovering over the Word or PowerPoint icons in the app and clicking the remove button.
What’s fixed
- Fixed some crashes.
- The app desktop shortcut on Windows, if removed, will not be added back after an update.
What’s improved
- You can now create app-specific settings for Adobe Photoshop 2022.
============
Version 0.61
November 11, 2021
This release includes support for macOS 12 and other fixes.
New features
-
The app is compatible with macOS 12.
What’s fixed
- Fixed the screen capture action on Windows. Added a separate action called Screen snip that triggers the screen snip tool.
- Fixed the issue of two app icons in the launchpad on macOS 12.
- Fixed some crashes.
=============
Version 0.60
October 21, 2021
This release includes predefined settings optimized for Microsoft Excel and various bug fixes.
New features
-
Work easier and faster in Microsoft Excel with your MX Master 3 or MX Anywhere 3 mice with predefined optimized settings.
Note: If you had previously created custom settings for Excel on Windows, please remove them and add Excel back for the new actions to work. You can remove the custom settings by hovering over the Excel icon in the app and clicking the remove button.
What’s fixed
- Fixed some crashes.
What’s improved
- Improved the screen capture action on Windows. You can now capture the entire screen or only a part of it.
==================
Version 0.51
September 15, 2021
This release includes support for additional languages and some new features.
New features
- The app is now supported in five additional languages — Danish, Finnish, Greek, Norwegian, and Swedish.
- Reset your mouse to its factory settings from the device settings menu.
What’s fixed
- Fixed some crashes.
==============
Version 0.50
September 1, 2021
This release includes support for additional languages and some new features.
New features
- The app is now supported in 6 additional languages – Traditional Chinese, Italian, Dutch, Portuguese, Brazilian Portuguese, and Polish.
- Hold one of the side buttons and use the scroll wheel to scroll horizontally with your MX Anywhere 3 in documents, web pages, etc.
- Work easier and faster in Adobe Photoshop with your MX Master 3 or MX Anywhere 3 mice with predefined optimized settings.
- Reset keyboard to its factory settings from the device settings menu.
- The app can be set to follow the system color theme between light and dark themes from the app settings.
What’s fixed
- Fixed some crashes.
- Fixed an issue wherein the keyboard was not switching with the mouse when you Flowed from one computer to the other.
- Fixed the issue wherein you could not switch between multiple applications with your buttons on Windows.
- Fixed some translation issues.
==================
Version 0.42
July 23, 2021
What’s New
This release includes support for new devices and various bug fixes.
New devices
- K380 and K380 for Mac keyboards
- M275, M280, M320, M330, B330, and M331 mice
New features
- Assign keyboard shortcuts to your MX Master 3 thumbwheel.
- Assign and perform advanced click actions including double click with your mice buttons on Mac.
What’s fixed
- Fixed some crashes.
- Fixed an issue wherein the keyboard was not switching with the mouse when you Flowed from one computer to the other.
- Fixed the issue wherein you could not switch between multiple applications with your buttons on Windows.
- Fixed some translation issues.
===========
Version 0.41
July 1, 2021
This release includes backlighting controls for MX Keys, advanced click actions for buttons on Windows, and various bug fixes.
New features
- Assign and perform advanced click actions including double click with your mice buttons on Windows.
- Assign and trigger Action center on Windows with your mice buttons.
- Enable or disable backlighting and battery-saving mode for your MX Keys from the device settings menu.
- View the backlighting level via an overlay as you adjust it.
- Learn the status of the fn lock via an overlay every time you toggle it using the Fn+Esc shortcut.
What’s fixed
- Fixed some crashes.
- Fixed an issue that was preventing some users from installing the app on Windows.
- Made improvements to fix the issues wherein some users are unable to find and connect their computers via Flow.
- Fixed the issue wherein the app would sometimes show that Flow needs to be set up even though it’s already set up.
- Fixed the issue wherein the Flow setup instructions would sometimes not show correctly.
- Fixed some UI and translation issues.
- Improved the sensitivity of volume up and down actions when assigned to custom gestures.
- Reduced the size of the app icon on macOS.
==================
Version 0.40
May 26, 2021
This is the first public beta release of the software. It includes support for the main features of MX Master 3, MX Anywhere 3, and MX Keys devices.
New devices
- MX Master 3 and MX Master 3 for Mac
- MX Anywhere 3 and MX Anywhere 3 for Mac
- MX Keys and MX Keys for Mac
New features
- View your battery and connectivity status. Be notified when your battery is running low.
- Customize the buttons or keys to perform actions of your choice. You can even customize them per application.
- Work easier and faster with predefined mouse settings optimized for your favorite apps — Google Chrome, Microsoft Edge, Safari, Zoom, and Microsoft Teams.
- Customize the pointing and scrolling experience of your mouse.
- Assign mouse gestures to any button from the Buttons menu, hold the button and move the mouse up, down, left, or right to perform different actions that help you navigate your windows, control songs, and more.
- Use and control multiple computers seamlessly with Flow. Switch to another computer by simply moving your cursor to the edge of the screen. Effortlessly transfer text, images, and files between computers — just copy on one and paste to the other.
- View the computers to which your keyboard is connected.
- Get notified when you toggle caps lock, scroll lock, and num lock (only on Windows) on your keyboard.
- Use the app in light or dark themes.
- Share feedback using the feedback button.
==============
About Options+
Options+ will have many of the same features as Options, but with an updated interface designed to offer an easier and better experience for all. Over time, Options+ will also get new features that were previously not possible in Options.
The “+” is for better design and user experience, with more features available over time. The app is free to use.
Once Options+ is officially released, it will replace Options for the products currently supported in Options. We will bring those products to Options+ over time, as well as future products on our roadmap. This allows us to offer the best experience for your products.
You can find a list here of supported devices. We plan to bring additional devices to Options+, so please continue to check back for updates.
We’re working on bringing more products from Options to Options+. If you have a device that is not yet supported, we’re sincerely sorry about the wait. We’ll continue adding more products during the next few months. We will also continue to add features this year and in the future to provide the best possible experience for our Logitech community.
We encourage and welcome input from the community in order to help us create the best experience for all. Please report issues using the support button and request new features using the feedback button in the app settings page.
If you experience any issues with installing or opening the app, please reach out to our Customer Support team here.
INTRODUCTION
This feature on Logi Options+ allows you to backup the customization of your Options+ supported device automatically to the cloud after creating an account. If you are planning to use your device on a new computer or wish to go back to your old settings on the same computer, log into your Options+ account on that computer and fetch the settings you want from a backup to set up your device and get going.
HOW IT WORKS
When you are logged into Logi Options+ with a verified account, your device settings are automatically backed up to the cloud by default. You can manage the settings and the backups from the Backups tab under More settings of your device (as shown):
Manage settings and backups by clicking on More > Backups:
– AUTOMATIC BACKUP OF SETTINGS — if the Automatically create backups of settings for all devices checkbox is enabled, any settings you have or modify for all of your devices on that computer are backed up to the cloud automatically. The checkbox is enabled by default. You can disable it if you don’t want the settings of your devices to be backed up automatically.
– CREATE A BACKUP NOW — this button allows you to backup your current device settings now, if you need to fetch them later.
– RESTORE SETTINGS FROM BACKUP — this button lets you view and restore all the available backups you have for that device that are compatible with that computer, as shown above.
The settings for a device are backed up for every computer that you have your device connected to and have Logi Options+ that you are logged into. Every time you make some modifications to your device settings, they get backed up with that computer name. The backups can be differentiated based on the following:
– Name of the computer. (Ex. John’s Work Laptop)
– Make and/or model of the computer. (Ex. Dell Inc., Macbook Pro (13-inch) and so on)
– The time when the backup was made
The desired settings can then be selected and restored accordingly.
WHAT SETTINGS GET BACKED UP
– Configuration of all the buttons of your mouse
– Configuration of all the keys of your keyboard
– Point & Scroll settings of your mouse
– Any application-specific settings of your device
WHAT SETTINGS ARE NOT BACKED UP
– Flow settings
– Options+ app settings
Connecting your device
Please check here to see if your device is supported in Options+. If it is supported and still doesn’t show up, you can report the issue using the support button in the app settings
You can connect your device using either Bluetooth or our USB receiver.
Preparing your device to pair
Most Logitech products are equipped with a Connect button. Usually, the pairing sequence is started by holding down the Connect button until the LED starts blinking rapidly. This indicates that the device is ready for pairing.
NOTE: If you’re having trouble starting the pairing process, please refer to the user documentation that came with your device, or visit the support page for your product at support.logitech.com.
Pairing using Bluetooth
Windows
1. Select the Windows icon, then select Settings.
2. Select Devices, then Bluetooth in the left pane.
3. In the list of Bluetooth devices, select the Logitech device you want to connect to and select Pair.
4. Follow the on-screen instructions to finish pairing.
NOTE: It may take up to five minutes for Windows to download and enable all drivers, depending on your computer’s specifications and your internet speed. If you have not been able to connect your device, repeat the pairing steps and wait a while before you test the connection.
macOS
1. Open System Preferences and click Bluetooth.
2. Select the Logitech device you want to connect to from the Devices list and click Pair.
3. Follow the on-screen instructions to finish pairing.
Pairing using the USB receiver
1. Plug the USB receiver into a USB port on your computer.
2, Open the Logi Options software, click Add device, and follow the instructions to connect the device. If you don’t have Logi Options software, you can download it here.
Upon pairing, the LED light on your device stops blinking and glows steadily for five seconds. The light then turns off to save energy.
These troubleshooting steps go from easy to more advanced.
Please follow the steps in order and check if the device works after each step.
Make sure you have the latest version of Windows
Microsoft is regularly improving the way Windows handles Bluetooth devices. Check to make sure you have installed the latest updates.
– Click Start, then go to Settings > Windows Update, and select Check for updates. See Microsoft for more details on how to update Windows. If prompted, you should also include the optional updates related to Bluetooth, WiFi, or radio.
Make sure you have the latest Bluetooth drivers
Computer manufacturers are regularly improving the way they handle Bluetooth devices. Make sure you install the latest Bluetooth drivers from your computer manufacturer:
Lenovo computers
1. Click Start, and then go to Lenovo Vantage (formerly Lenovo Companion), and select System Update. Then select Check for Updates.
2. If there is an update available, click Install selected. Optional updates are not required but are recommended. Click here for more details on how to update your Lenovo computer.
HP computers
1. Click Start > All apps and then go to HP Support Assistant or search for support assistant. If it is not installed you can install it from the HP site here.
2. In the Devices window, select your HP computer and click on Updates. Optional updates are not required but are recommended. Click here for more details on how to update your HP computer.
Dell computers
1. Click Start, and then go to Dell Command | Update and select Check. You can also go to the Dell support page here and scan your system for new updates.
2. If there is an update available, select Install. Optional updates are not required but are recommended.
Other computers
Check the product support page of your computer manufacturer’s website to see how to update your system.
Make sure Bluetooth is turned ON on your computer
Click Start, then select Settings > Bluetooth & devices. Make sure Bluetooth is turned ON. If you’re using a laptop with a Bluetooth switch, make sure the switch is turned on.
Restart Bluetooth on your computer
1. Navigate to the Bluetooth settings pane:
Click Start > Settings > Bluetooth & devices.
2. Click on the Bluetooth switch to turn Bluetooth Off.
3. Wait a few seconds and then click on the Bluetooth switch to turn Bluetooth On.
4. Check to see if the Logitech Bluetooth device is working. If not, go to the next steps.
Remove your Logitech device from the list of devices and try to pair again
1. Navigate to the Bluetooth Settings pane:
Click Start > Settings > Bluetooth & devices.
2. Locate your device, click on the menu icon in the right corner, 
and then select Remove device.
3. In the next prompt, click on Yes.
4. Re-pair your device by following the procedure described here.
Run the Windows Bluetooth troubleshooter
Click Start, then select Settings > Troubleshoot > Other troubleshooters. Under Other, find Bluetooth, click on Run and follow the onscreen instructions.
Advanced: Try to change Bluetooth parameters
1. In Device Manager, change the Bluetooth wireless adapter power settings:In the search box on the taskbar, type Device Manager, then select from the menu.
2. In Device Manager, expand Bluetooth, right-click on the Bluetooth wireless adapter (ex. “Dell Wireless XYZ adapter”, or “Intel(R) Wireless Bluetooth”), and then click Properties.
3. In the Properties window, click the Power Management tab and uncheck Allow the computer to turn off this device to save power.
4. Click OK.
5. Restart your computer to apply the change.
Important: These troubleshooting steps go from easy to more advanced. Please follow the steps in order and check if the device works after each step.
Make sure you have the latest version of macOS
Apple is regularly improving the way macOS handles Bluetooth devices. For instructions on how to update macOS, click here.
Make sure you have the right Bluetooth parameters
1. Navigate to the Bluetooth preference pane in System Preferences:
Go to Apple Menu > System Preferences > Bluetooth
2. Make sure that Bluetooth is turned On.
3. In the bottom-right corner of the Bluetooth Preference window, click Advanced. (If you are on an Apple Silicon Mac, please skip this and the next step as the Advanced options are no longer available.)
4. Make sure both options are checked:
– Open Bluetooth Setup Assistant at startup if no keyboard is detected
– Open Bluetooth Setup Assistant at startup if no mouse or trackpad is detected 
NOTE: These options ensure that Bluetooth Setup Assistant will launch if a Bluetooth keyboard, mouse, or trackpad is not detected as connected to your Mac.
5. Click OK.
Restart the Bluetooth connection on your Mac
Navigate to the Bluetooth preference pane in System Preferences:
1. Go to Apple Menu > System Preferences > Bluetooth
2. Click Turn Bluetooth Off.
3. Wait a few seconds, and then click Turn Bluetooth On.
4. Check to see if the Logitech Bluetooth device is working. If not, go to the next steps.
Remove your Logitech device from the list of devices and try to pair again
1. Navigate to the Bluetooth preference pane in System Preferences:
– Go to Apple Menu > System Preferences > Bluetooth
2. Locate your device in the Devices list, and click on the “x” to remove it.

3. Re-pair your device by following the procedure described here.
Disable the hand-off feature
1. In some cases, disabling the iCloud hand-off functionality can help.
Navigate to the General preference pane in System Preferences:
Go to Apple Menu > System Preferences > General
2. Make sure Allow Handoff between this Mac and your iCloud devices is not checked.
The Logi Options+ software requires the following user permissions on macOS 10.15 and later due to some Apple policies to enable the device features.
ACCESSIBILITY
Accessibility permission is needed for most of the basic features like scrolling, back and forward actions, gestures, volume control, zoom, etc.
To provide access,
1. Click Open Accessibility.
2. Click the lock icon at the bottom left corner and enter your password to unlock.
3. In the right panel, check the box for Logi Options+ to grant permission.
INPUT MONITORING
Input monitoring permission is needed for all the features enabled by the software such as scrolling, back and forward, gestures, etc.
To provide access,
1. Click Open Input Monitoring.
2. Click the lock icon at the bottom left corner and enter your password to unlock.
3. In the right panel, check the box for Logi Options+ and select Quit & Reopen when prompted to grant permission.

NOTE: If you clicked Later, please uncheck the checkbox for Logi Options+, check it again and press Quit Now when prompted.
Ideally, Secure Input should only be enabled while the cursor is active in a sensitive information field, such as when you enter a password, and should be disabled right after you leave the password field. However, some applications may leave the Secure Input state enabled.
In that case, you may experience the following issues with your devices supported by Logi Options+:
– When the device is paired via Bluetooth, it’s either not detected by Options+ or none of the software-enabled features work (basic device functionality will continue to work, however).
– When the device is paired via a Unifying receiver, keyboard shortcuts assigned to your buttons or keys will not work.
If you encounter these issues, check to see which application has Secure Input enabled on your system by following these steps:
1. Launch Terminal from /Applications/Utilities folder.
2. Type the following command in Terminal and press Enter:
ioreg -l -d 1 -w 0 | grep SecureInput
1. If the command returns back no information, then Secure Input is not enabled on the system.
2. If the command returns back some information, then look for “kCGSSessionSecureInputPID”=xxxx. The number xxxx points to the Process ID (PID) of the application/process that has Secure Input enabled:
3. Launch Activity Monitor from /Applications/Utilities folder.
4. Search for PID (from step 2) which has secure input enabled to figure out which application/process has secure input enabled
Once you know which application has Secure Input enabled, close that application to resolve the issues with Logitech Options+.
Sometimes, some applications including Webroot Secure Anywhere and LastPass may always leave secure input enabled. In that case, connect your device via a USB receiver or pause the application that’s causing the issue for your devices to work. Please note that pausing the application could mean you may lose any security and privacy protections the app was providing.
Troubleshooting : Flow
Introduction to Flow
Logitech Flow allows you to use and control multiple computers seamlessly.
You can switch to another computer by simply moving your cursor to the edge of the screen. You can also effortlessly transfer text, images, or files between computers — just copy on one and paste to the other.
You can even use Flow between Windows and macOS.
Setting up Flow
Setting up Logitech Flow is quick and easy. To set up Flow:
– Download and Install Logi Options+ — Download and install Logi Options+ on your computers.
– Pair your mouse to the computers — Logitech Flow uses Logitech Easy-Switch™ technology to switch between your computers. You need to pair your mouse via the USB receiver or Bluetooth on different channels (1, 2, and 3) to your computers. You can find instructions to pair your mouse to a computer here. You can use two or three different computers on your Logitech Flow configuration.
– Connect computers to the same network — Make sure all your computers are connected to the same wireless or wired network. In office environments, where network ports can be blocked, you might need to talk to your network administrator in case Logitech Flow cannot establish a connection.
– Set up Logitech Flow — When you set up Logitech Flow, your computer will find other computers on the network that are paired to the same mouse. Please wait for the connection process to take place so you can start using Logitech Flow. If other computers could not be found on your network, you might need to enable Logitech Flow on your other computer(s) — make sure you have an active internet connection for the initial connection to be established.
If you have problems during the setup process, please refer to the troubleshooting section below.
Using Flow
After setting up Logitech Flow, you can automatically switch between computers just by moving your mouse cursor to the edge of the screen. To change the behavior of Flow to your specific needs, you can customize it from the Flow tab in the app.
Enable/Disable Flow
You can enable or disable Flow whenever you like. Your computer arrangement and preferences won’t be lost. This is ideal if you want to temporarily disable Logitech Flow.
Manage your computers
You can rearrange your computer setup to match your desktop layout by dragging and dropping them to the desired position.
Logitech Flow supports two or three computers, depending on how many Easy-Switch devices your mouse supports. You can add an additional computer by clicking on the Add Computer button. Make sure to follow the setup process for each computer before clicking the add computers button.
Click the more options button for each computer to disable or remove it.
Disable — temporarily disables a computer until you re-enable it. This is ideal if you don’t want to temporarily automatically switch to this computer.
Remove — permanently removes a computer from Logitech Flow. You won’t be able to automatically switch to it. Your mouse will still be paired to your computer, so you can still use your mouse’s Easy-Switch™ button to switch to it.
Switch between computers
Move to the edge — switch between computers just by reaching the edge of the screen.
Hold Ctrl and move to the edge — switch between computers by holding the Ctrl key on your keyboard and moving to the edge of the screen with your mouse cursor.
Copy and Paste
With copy and paste enabled, you can copy text, images, and files from one computer and paste them on another. Just copy the content you want on one computer, switch to another computer using Logitech Flow, and paste the content. Transferring content and files depends on your network speed. Large-sized images or files might take minutes to be transferred.
Note: Certain file types, which can be opened on one system, might not be supported on another if the application that supports it is not installed.
Note: Dragging files from one computer to drop on another is not supported by Logitech Flow.
Keyboard Link
With a compatible Logitech keyboard, you can have the best Logitech Flow experience. If you have a Logitech Flow supported keyboard, you’ll be able to link it to your mouse so it follows your mouse when you switch to another computer. Your keyboard will be available in the drop-down list if it’s paired to your Logitech Flow computers.
Note: Make sure your keyboard is paired and listed as a device. In case it’s not listed, try switching between computers and re-launching the app.
Logitech Flow supported keyboards: You can find a list of Logitech Flow supported keyboards
I get a message saying that Logitech Flow was unable to find or establish a connection to other computers, what can I do?
Logitech Flow relies on your network for its initial configuration and regular use. Follow the steps below to start using Logitech Flow:
1. Make sure your mouse shows up on Options+ on all computers.
2. Make sure that your computers are connected to the same network.
3. Make sure that the Options+ communication channel is not blocked by any firewall or antivirus application.
4. Make sure that you have a working internet connection.
5. Make sure that you have enabled Flow on all computers.
Note: Logitech Flow uses the network to link multiple (up to three) computers and allow them to share a mouse and keyboard. To accomplish this, Flow uses a fixed UDP port (59870) to listen for and discover other computers that are on the same subnet and can ping each other using UDP broadcasts.
How do I pair my mouse to another computer?
To learn how to pair your mouse to different computers, please visit Logitech’s support page to find specific connection information for your device.
I keep switching to the other computer by mistake when I reach the edge
Enable the Hold Ctrl and move to the edge option on Options+. This will allow you to have more control and switch only when your keyboard Ctrl key is down and you reach the designated edge.
When my computer goes to sleep or it’s on the login screen, Logitech Flow does not work. Why does that happen?
Logitech Flow relies on your network connection to automatically find other computers during setup, switch between computers, and transfer content across them. Depending on your computer settings, your network connection is disabled while your computer is asleep and Flow might not be running. To use Flow, make sure your computer is awake, you’re logged in and the network connection is established.
I transfer certain files but I’m unable to open them on my other computer?
Logitech Flow can transfer text, images, and files across computers using the clipboard. This means you can copy content from one machine, switch to another computer and paste the file. If you don’t have an application that can open that file it might not be recognized by your operating system.
I have a keyboard paired to both computers but I don’t see my keyboard as an option on the drop-down list, what should I do?
If you still continue to have issues, try restarting both computers and enabling the Keyboard link on Options+.
1. Make sure that you have a Logitech Flow supported keyboard.
2. Make sure that the keyboard shows up in Options+ on all your computers. Try switching between the computers using the Easy-Switch key and restarting Options+ to make sure it’s connected. If you still continue to have issues, try restarting both computers.
If you connect your mouse on a different channel or with a different connection type to the computer that was previously set up in a Flow network, you will be unable to flow into that computer. To resolve this issue, please try the following steps on that computer:
1. Open Options+ app and click on the flow-enabled mouse. Visit the Flow tab, click on more settings and Reset flow
2. Close the app
3. Remove the flow folder
On Mac
Open Finder and in menu bar items, click on Go -> Go to folder, enter ~/Library/Application Support/LogiOptionsPlus and remove flow folder
On Windows
Open File Explorer and go to C:UsersusernameAppDataLocalLogiOptionsPlus and remove flow folder
4. Restart the computer
5. Open Options+ app and setup Flow again
If the Flow screen does not load and is stuck with the loading spinner, please turn off your mouse and turn it back on to resolve it.
We are working on this issue and will fix it in one of our upcoming updates.
From macOS 12.4 onwards, Options+ needs Bluetooth permission to detect a Bluetooth device if it’s not actively connected to that computer. If the app does not have the Bluetooth permission, you will not be able to Flow into that computer as it cannot detect the device. To resolve this issue, please grant Bluetooth permission by following the below instructions:
1. Open System Preferences > Security & Privacy > Privacy.
2. Select Bluetooth from the left menu.
3. Click the lock icon at the bottom left corner and enter your password to unlock.
4. In the right panel, check the box for Logi Options+ and select Quit & Reopen when prompted to grant permission.

NOTE: If you clicked Later, please uncheck the checkbox for Logi Options+, check it again, and press Quit Now when prompted.
Troubleshooting : macOS
Important: These troubleshooting steps go from easy to more advanced. Please follow the steps in order and check if the device works after each step.
Make sure you have the latest version of macOS
Apple is regularly improving the way macOS handles Bluetooth devices. For instructions on how to update macOS, click here.
Make sure you have the right Bluetooth parameters
1. Navigate to the Bluetooth preference pane in System Preferences:
Go to Apple Menu > System Preferences > Bluetooth
2. Make sure that Bluetooth is turned On.
3. In the bottom-right corner of the Bluetooth Preference window, click Advanced. (If you are on an Apple Silicon Mac, please skip this and the next step as the Advanced options are no longer available.)
4. Make sure both options are checked:Open Bluetooth Setup Assistant at startup if no keyboard is detected
Open Bluetooth Setup Assistant at startup if no mouse or trackpad is detected
NOTE: These options ensure that Bluetooth Setup Assistant will launch if a Bluetooth keyboard, mouse, or trackpad is not detected as connected to your Mac.
5. Click OK.
Restart the Bluetooth connection on your Mac
1. Navigate to the Bluetooth preference pane in System Preferences:
Go to Apple Menu > System Preferences > Bluetooth
2. Click Turn Bluetooth Off.
3. Wait a few seconds, and then click Turn Bluetooth On.
4. Check to see if the Logitech Bluetooth device is working. If not, go to the next steps.
Remove your Logitech device from the list of devices and try to pair again
1. Navigate to the Bluetooth preference pane in System Preferences:
Go to Apple Menu > System Preferences > Bluetooth
2. Locate your device in the Devices list, and click on the “x” to remove it.
3. Re-pair your device by following the procedure described here.
Disable the hand-off feature
In some cases, disabling the iCloud hand-off functionality can help.
1. Navigate to the General preference pane in System Preferences:
Go to Apple Menu > System Preferences > General
2. Make sure Allow Handoff between this Mac and your iCloud devices is not checked.
The Logi Options+ software requires the following user permissions on macOS 10.15 and later due to some Apple policies to enable the device features.
ACCESSIBILITY
Accessibility permission is needed for most of the basic features like scrolling, back and forward actions, gestures, volume control, zoom, etc.
To provide access:
1. Click Open Accessibility.
2. Click the lock icon at the bottom left corner and enter your password to unlock.
3. In the right panel, check the box for Logi Options+ to grant permission.
INPUT MONITORING
Input monitoring permission is needed for all the features enabled by the software such as scrolling, back and forward, gestures, etc.
To provide access:
1. Click Open Input Monitoring.
2. Click the lock icon at the bottom left corner and enter your password to unlock.
3. In the right panel, check the box for Logi Options+ and select Quit & Reopen when prompted to grant permission.
NOTE: If you clicked Later, please uncheck the checkbox for Logi Options+, check it again and press Quit Now when prompted.
Ideally, Secure Input should only be enabled while the cursor is active in a sensitive information field, such as when you enter a password, and should be disabled right after you leave the password field. However, some applications may leave the Secure Input state enabled. In that case, you may experience the following issues with your devices supported by Logi Options+:
1. When the device is paired via Bluetooth, it’s either not detected by Options+ or none of the software-enabled features work (basic device functionality will continue to work, however).
2. When the device is paired via a Unifying receiver, keyboard shortcuts assigned to your buttons or keys will not work.
1. If you encounter these issues, check to see which application has Secure Input enabled on your system by following these steps:
2. Launch Terminal from /Applications/Utilities folder.
Type the following command in Terminal and press Enter:
ioreg -l -d 1 -w 0 | grep SecureInput
1. If the command returns back no information, then Secure Input is not enabled on the system.
2. If the command returns back some information, then look for “kCGSSessionSecureInputPID”=xxxx. The number xxxx points to the Process ID (PID) of the application/process that has Secure Input enabled:
3. Launch Activity Monitor from /Applications/Utilities folder.
4. Search for PID (from step 2) which has secure input enabled to figure out which application/process has secure input enabled
Once you know which application has Secure Input enabled, close that application to resolve the issues with Logitech Options+.
Sometimes, some applications including Webroot Secure Anywhere and LastPass may always leave secure input enabled. In that case, connect your device via a USB receiver or pause the application that’s causing the issue for your devices to work. Please note that pausing the application could mean you may lose any security and privacy protections the app was providing.
Yes, Options+ has native support for Apple silicon computers starting with version 0.90.
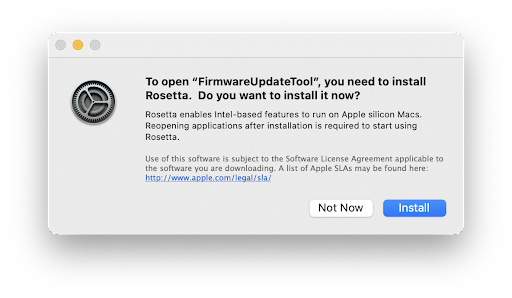
Please note that the Logi Bolt app to pair your device to your computer doesn’t have native support for Apple silicon. You can still install and use it via the Rosetta emulator that macOS prompts you to install when you launch the Logi Bolt installer.
The Logi Bolt app features will be added to Options+ in March 2022 after which, you will no longer need the Logi Bolt app.
We have an issue wherein the Check for firmware update button in the device settings does not open the firmware update tool on M1 Mac computers if Rosetta is not installed. The firmware update tool requires Rosetta to run on M1 Mac computers. While we address this issue, you can open the firmware update tool from /Library/ApplicationSupport/Logitech.localized/LogiOptionsPlus to check for and install firmware updates. When you open the tool, you’ll be prompted to install Rosetta. Please click install to open the tool.
We will be integrating the firmware update tool into Options+ in the future at which point, Rosetta will not be needed for installing firmware updates.
Options+ does not need and does not use your location. It is getting added to your location services on macOS due to an issue with a framework we use in the app. The entry for Options+ is unchecked by default and you can leave it unchecked, thereby not sharing your location. Meanwhile, we are working on getting the issue fixed.
Yes, Options+ is compatible with macOS Universal Control. But there are a few limitations as described below:
1. When Universal Control is used to switch from Computer A to Computer B, your Logitech devices are not physically connected to Computer B. So, any configuration you have for your device via Options+ will not work in Computer B. Your device will work as it would if Options+ were not installed. For your device configuration in computer B to work, you will need to connect to computer B directly or using our Flow feature.
2. If the Flow feature is set up between the two computers and Universal Control is enabled, Universal control takes precedence and Flow doesn’t work. To use Flow, please disable Universal Control.
On some macOS 12 computers, inactive devices connected via Bluetooth still remain on the app UI even after they are removed from the Bluetooth menu. If you experience this issue, restart your computer to remove the device from the app UI.
From macOS 12.4 onwards, Options+ needs Bluetooth permission to detect a Bluetooth device if it’s not actively connected to that computer. If the app does not have the Bluetooth permission, you will not be able to Flow into that computer as it cannot detect the device. To resolve this issue, please grant Bluetooth permission by following the below instructions:
1. Open System Preferences > Security & Privacy > Privacy.
2. Select Bluetooth from the left menu.
3. Click the lock icon at the bottom left corner and enter your password to unlock.
4. In the right panel, check the box for Logi Options+ and select Quit & Reopen when prompted to grant permission.
NOTE: If you clicked Later, please uncheck the checkbox for Logi Options+, check it again, and press Quit Now when prompted.
Troubleshooting : Windows
These troubleshooting steps go from easy to more advanced.
Please follow the steps in order and check if the device works after each step.
Make sure you have the latest version of Windows
Microsoft is regularly improving the way Windows handles Bluetooth devices. Check to make sure you have installed the latest updates.
– Click Start, then go to Settings > Windows Update, and select Check for updates. See Microsoft for more details on how to update Windows. If prompted, you should also include the optional updates related to Bluetooth, WiFi, or radio.
Make sure you have the latest Bluetooth drivers
Computer manufacturers are regularly improving the way they handle Bluetooth devices. Make sure you install the latest Bluetooth drivers from your computer manufacturer:
Lenovo computers
1. Click Start, and then go to Lenovo Vantage (formerly Lenovo Companion), and select System Update. Then select Check for Updates.
2. If there is an update available, click Install selected. Optional updates are not required but are recommended. Click here for more details on how to update your Lenovo computer.
HP computers
1. Click Start > All apps and then go to HP Support Assistant or search for support assistant. If it is not installed you can install it from the HP site here.
2. In the Devices window, select your HP computer and click on Updates. Optional updates are not required but are recommended. Click here for more details on how to update your HP computer.
Dell computers
1. Click Start, and then go to Dell Command | Update and select Check. You can also go to the Dell support page here and scan your system for new updates.
2. If there is an update available, select Install. Optional updates are not required but are recommended.
Other computers
Check the product support page of your computer manufacturer’s website to see how to update your system.
Make sure Bluetooth is turned ON on your computer
Click Start, then select Settings > Bluetooth & devices. Make sure Bluetooth is turned ON. If you’re using a laptop with a Bluetooth switch, make sure the switch is turned on.
Restart Bluetooth on your computer
1. Navigate to the Bluetooth settings pane:
Click Start > Settings > Bluetooth & devices.
2. Click on the Bluetooth switch to turn Bluetooth Off.
3. Wait a few seconds and then click on the Bluetooth switch to turn Bluetooth On.
4. Check to see if the Logitech Bluetooth device is working. If not, go to the next steps.
Remove your Logitech device from the list of devices and try to pair again
1. Navigate to the Bluetooth Settings pane:
Click Start > Settings > Bluetooth & devices.
2. Locate your device, click on the menu icon in the right corner,
and then select Remove device.
3. In the next prompt, click on Yes.
4. Re-pair your device by following the procedure described here.
Run the Windows Bluetooth troubleshooter
Click Start, then select Settings > Troubleshoot > Other troubleshooters. Under Other, find Bluetooth, click on Run and follow the onscreen instructions.
Advanced: Try to change Bluetooth parameters
1. In Device Manager, change the Bluetooth wireless adapter power settings:In the search box on the taskbar, type Device Manager, then select from the menu.
2. In Device Manager, expand Bluetooth, right-click on the Bluetooth wireless adapter (ex. “Dell Wireless XYZ adapter”, or “Intel(R) Wireless Bluetooth”), and then click Properties.
3. In the Properties window, click the Power Management tab and uncheck Allow the computer to turn off this device to save power.
4. Click OK.
5. Restart your computer to apply the change.
Microsoft Windows and Apple macOS dictation is at present only available in select countries and languages.
You can read more about dictation and get updated supported language lists below:
– Windows
– Mac
If you experience any issues with dictation on Windows with an unsupported language such as your typing is garbled or incorrect, reboot your computer as this should resolve the issue. Alternatively, if your Logitech keyboard has an emoji key, try pressing it, as this could also resolve the issue. If it doesn’t, please reboot your computer.
You can also stop the “Microsoft Text Input Application” in Microsoft Activity Manager.
You can use the dictation feature to dictate text instead of typing. This feature is provided by Windows and macOS and is currently only available in select countries and languages. You will also need a microphone and a reliable internet connection.
You can read more about dictation and get updated lists of supported languages below:
Windows
Mac
In some cases, the dictation key will only work when Options+ software is installed. You can download the software here.
If you experience any typing issues, please see I tried to use the Microsoft Windows dictation feature but my language is not supported. Now my typing is garbled or incorrect for more help.
Options+ with other apps
If you have any pending Windows OS updates on your computer, you may experience failures with creating custom settings for your mouse for applications that require plugins to be installed. These include Microsoft Excel, Word, PowerPoint, Adobe Photoshop, and Adobe Premiere Pro. To resolve this issue, please install the pending Windows update and try again.
To remove the LogiOptionsPlusAdobe plugin from Adobe Creative Cloud after uninstalling Options+, click on the ‘…’ more options, and then select uninstall.

The Logi Options Plus Adobe plugin only connects to Adobe Photoshop and Adobe Premiere Pro apps if you added custom settings for those apps for your mouse. The plugin shows the other Adobe apps you have installed on your computer such as Illustrator or Indesign in the Creative Cloud app but it does not connect to those apps.

If you created custom mouse settings for Adobe Photoshop, used two versions of Photoshop, opened both versions and closed one of them, your custom mouse settings may not work on the other open version. To resolve this issue, please restart the open version of Photoshop.
On M1 Mac computers, you can create and use Photoshop-specific settings for your mouse in the same admin account where the Adobe Creative Cloud app was installed. If you switch to a different admin account, you’ll need to re-install the Creative Cloud app in that account to create and use Photoshop-specific settings.
On M1 Mac computers, if you added custom settings for your mouse for Adobe Photoshop and Adobe Premiere Pro, and are running Adobe Photoshop via Rosetta, your button actions may be performed twice. This happens because two Options+ Photoshop plugins get activated and both of them perform the actions. To resolve this issue, please disable one of them from the Adobe Creative Cloud Marketplace. To disable one them, do the following:
1. Open Adobe Creative Cloud.
2. Visit the Stock & Marketplace menu, click on the Plugins menu and in the left menu, select Manage plugins.
3. Click on ‘…’ more options for Logi Options Plus and click Disable.
NOTE: To see if you’re running Photoshop via Rosetta:
1. Right-click on the application icon in the Applications folder.
2. Select Get info.
3. Check if the Open using Rosetta box is checked.
Even after you remove custom mouse settings for Adobe Photoshop on your M1 computer, the plugin will remain connected due to a limitation. We are working with Adobe to overcome this issue. Meanwhile, the only way to completely disconnect is to uninstall Options+.
Updates
If the Delete key stops working after you customize the key, we recommend removing the customization to use the delete functionality
If your mouse or keyboard stops working during a firmware update and starts to blink repeatedly red and green, this means the firmware update has failed.
Use the instructions below to get the mouse or keyboard working again. After you download the firmware, select how your device is connected, either using the receiver (Logi Bolt/Unifying) or Bluetooth and then follow the instructions.
1. Download the Firmware Update Tool specific to your operating system.
2. If your mouse or keyboard is connected to a Logi Bolt/Unifying receiver, follow these steps. Otherwise, skip to Step 3.
– Make sure to use the Logi Bolt/Unifying receiver that originally came with your keyboard/mouse.
– If your keyboard/mouse uses batteries, please take the batteries out and put them back in or try replacing them.
– Unplug the Logi Bolt/Unifying receiver and reinsert it into the USB port.
– Turn off and on the keyboard/mouse using the power button/slider.
– Press any button on the keyboard/mouse to wake up the device.
Launch the downloaded Firmware Update Tool and follow the on-screen instructions.
– If your keyboard/mouse still does not work, please reboot your computer and repeat the steps at least two more times.
3. If your mouse or keyboard is connected using Bluetooth and is still paired to your Windows or macOS computer: Turn off and on your computer’s Bluetooth or reboot your computer.
– Turn off and on the keyboard/mouse using the power button/slider.
– Launch the downloaded Firmware Update Tool and follow the on-screen instructions.
– If your keyboard/mouse still does not work, please reboot your computer and repeat the steps at least two more times.
Do not remove the device pairing from the System Bluetooth or Logi Bolt when the device is blinking red and green.
If the issue persists, please contact our customer support team.
DOWNLOAD RESOURCES
SPECIFICATION
|
Product Name |
Logitech Signature M650 Wireless Mouse |
|
Connection Type |
Logi Bolt USB Receiver, Bluetooth Low Energy Technology |
|
Wireless Range |
10 m (33-ft) |
|
Number of Buttons |
5 (Left/Right-click, Back/Forward, Scroll-wheel with middle click) |
|
Sensor Technology |
Logitech Advanced Optical Tracking |
|
Nominal Value |
400 dpi |
|
Max Value |
Up to 4000 |
|
Battery Type |
1 x AA battery (included) |
|
Battery Life |
Up to 24 months with Logi Bolt USB Receiver, Up to 20 months with Bluetooth® |
|
Dimensions (Signature M650) |
Height: 4.26 in (108.2 mm), Width: 2.4 in (61 mm), Depth: 1.52 in (38.8 mm), Weight: 3.58 oz (101.4 g) |
|
Dimensions (Signature M650 L) |
Height: 4.67 in (118.7 mm), Width: 2.61 in (66.2 mm), Depth: 1.65 in (42 mm), Weight: 4.07 oz (115.4 g) |
|
Dimensions (Signature M650 L Left) |
Height: 4.67 in (118.7 mm), Width: 2.61 in (66.2 mm), Depth: 1.65 in (42 mm), Weight: 4.07 oz (115.4 g) |
|
Optional Software |
Supported by Logitech Options+ on macOS 10.15 or later and Windows® 10, 11 or later |
|
Sustainability |
Off-white plastics: 26% post-consumer recycled material, Rose plastics: 26% post-consumer recycled material, Graphite plastics: 64% post-consumer recycled material |
|
Part Number
|
Red Signature M650 L: 910-006358, Off-white Signature M650 L: 910-006233, Rose Signature M650: 910-006251, Graphite Signature M650 L: 910-006231, Blue Signature M650 L: 910-006232, Off-white Signature M650: 910-006252, Graphite Signature M650: 910-006250, Off-white Signature M650 L LEFT: 910-006235, Graphite Signature M650 L LEFT: 910-006234 |
FAQ’S
However, the Signature M650 performs better overall. It can connect via Bluetooth and its USB receiver, and it feels much better built. While it doesn’t have a dedicated free-scrolling mode, you can briefly unlock free-scrolling by flicking the scroll wheel.
Go to Settings and Networks and select Bluetooth.
Select name of the Logitech device you want to connect from the list of available devices and click Pair.
If your Logitech wireless mouse supports Bluetooth, you can connect it via Bluetooth instead of a receiver. To do this on a Windows 10 PC, go to Settings > Devices > Add Bluetooth. On your mouse, press the Connect button; the device should appear as an available Bluetooth device on your screen.
Select your mouse.
Select the Sensitivity (DPI) icon.
Drag the sliders to your desired DPI.
The reasons why your wireless mouse might not be working is because it has a low battery, it isn’t connected to the right port, the USB drivers are not properly installed, or the surface on which you are using the mouse is not optimized for the mouse.
Installing a Bluetooth mouse in Windows
Go to ‘Settings’ via the Windows logo and then gear wheel, and click ‘Devices’.
Switch on Bluetooth.
Press and hold the synchronization button on the bottom of the mouse. It’ll now appear in the list of devices.
Choose the mouse from the list to connect it to your computer.
Alongside the power button on the bottom of your mouse, there should be a Connect button (as mentioned above). Some Logitech mouse devices have a Channel button, which lets you decide what Bluetooth channel to use when you pair your device.
When the rapid fire button is pressed, the timer circuit sends a series of pulses to the controller that simulate the button being clicked. This circuit lets you click up to 800 times per minute. A similar circuit could even be used for console video game controllers.
How to enable/disable Enhance Pointer Precision
Press the keyboard shortcut Windows key + R.
Type “control” and press Enter.
From the list of items, open the Mouse settings. Ad.
Now, a window will open. Navigate to the Pointer Options tab.
Finally, you can now enable or disable the “Enhance Pointer Precision” setting.
To pair the mouse to your computer, remove the pull tab from the Logi Bolt receiver and insert it into a USB port on your computer. The LED will flash blue and then turn solid blue. Then, remove the pull tab from the mouse. It will automatically turn on. The receiver will be connected to Channel 1 and your mouse will be ready to use.
Your Logi Bolt receiver can be set up for up to 4 different devices with 4 different channels (1-4). To change channels, simply hold down the connect button on your receiver until you see a solid red light (about 3 seconds). Then press any button on your mouse or keyboard so that it is in pairing mode (the LED will flash blue). When you see a solid blue light on your Logi Bolt receiver, release both buttons at the same time. Your new channel is now set!
Make sure that you have removed all other Bluetooth® devices from pairing mode before trying again with this device. Also make sure that you are within 10 meters of your device when trying to connect, as this is optimal range for Bluetooth® devices. If these steps don’t work, try resetting both devices by holding down both buttons for 5 seconds until they turn off and then turning them back on again by pressing their respective buttons once more. If this still doesn’t work, try resetting both devices by removing them from pairing mode and then re-pairing them through their original setup process again. If all else fails, please contact our customer service team at http://support.logitech.com
You can clean your Logitech device using a soft, lint-free cloth. Do not use water or any cleaning solutions containing alcohol, solvents, or harsh chemicals as they can damage the device.
To see if there is a firmware update for your mouse, go to Logi Options+, select your mouse, and then click Settings on the left side of the window. Under the ABOUT section, you’ll see your device Firmware version. Click CHECK FOR UPDATE — a firmware update tool will appear on your screen to notify if there is an update available. Follow the instructions that are shown on the firmware update tool, and you’re ready to continue using your mouse.
You can assign any of the side buttons of the mouse to be the Gesture Button. This will transform your forward or back button into a powerful multi-function button allowing you to use gestures for desktop navigation, app management, pan, zoom, and more. On the Mouse tab, select any side button (forward or back) button and click on Gesture Button.
Download and run Logitech Options+. Click here to download the software. Once Logitech Options+ is installed, a window will open, and you’ll be able to see an image of your mouse. Click on it. You will be taken into a quick onboarding process that shows you how to customize your mouse. Once you’re finished, on the left side of the window, click Buttons. Click on any of the buttons that you wish to customize. Select the function you like to set on that button from the options that appear on the right rise of the screen, and you are done!
If you prefer to swap the main click function to the right button, you can use Logitech software.
Yes, there is a left-handed version of the Logitech Signature M650 Wireless Mouse (M650L Left). It has the same feature definition as the right-handed version with the only difference being that the side buttons are on the right side of the mouse for better accessibility with your left thumb.
Slide the battery compartment cover down and then lift it off. Insert the battery, making sure that it faces the correct direction, and then replace the battery cover.
The LED on the top of the mouse indicates battery status. You can also install Logitech software to receive battery status notifications, including low-charge warnings.
You can scroll horizontally with your mouse by pressing and holding one of the side buttons and scrolling with the wheel simultaneously. The horizontal scroll is ON by default, but you can customize this feature on the Point & Scroll tab in Logitech software.
You can download Logitech software to customize your mouse and benefit from advanced shortcuts. Click here to download and learn more about the full range of features.
You can pair your mouse to your device using Bluetooth® Low Energy connection or Logi Bolt receiver. To pair through Bluetooth®, remove the pull tab from the mouse, and it will automatically turn on. Channel 1 will be ready to pair. To pair through Logi Bolt receiver, take the receiver from the compartment inside the battery door but don’t remove the pull tab yet. Insert the receiver into any available USB port on your desktop or laptop. Now you can remove the pull tab from the mouse, and it will automatically turn on. The receiver will be connected to Channel 1, and your mouse will be ready to use.
VIDEO
www://logitech.com/


