Glowforge Compact Filter
Specifications
- Manufacturer: Glowforge
- Warranty: Limited Warranty
- Region: European Union (subject to consumer product warranty laws)
Introduction
You already know about the incredible things you can do with a Glowforge 3D laser printer. With a Compact Filter, you can do those things anywhere. But before you can do any of that, you’ll need to read the information in this manual. Our job is to make sure that every part of your Glowforge experience is delightful. Unfortunately, right now you’ll need to read a few pages that are not delightful: the Compact Filter safety information. They’re a little dry, and a bit scary. The safety section was written by our safety team, in the most direct language possible, to make absolutely certain you can operate your Compact Filter safely. After the safety talk, we’ll get back to the fun part: unboxing, simple setup… and step by step instructions for how to use your Compact Filter during laser time!
PS: If you see anything that is unclear or seems incorrect, please let us know immediately at support@glowforge.com.
Safety
Now, it’s time to be serious. Improperly operating the Compact Filter unit can cause fire and health hazards. These can result in serious injury or even death.
Before you start
- Read this manual before using your Compact Filter, and ensure everyone else who uses it reads this too.
- Always follow all instructions in this manual, in the Glowforge Manual and in the Glowforge App.
- Use the Compact Filter only with a Glowforge Basic, Plus, or Pro.
- Children require the supervision and assistance of an adult at all times.
- This product may be subject to regulations and standards, particularly when installed in an educational institution or place of work. Ensure that you comply with all applicable rules.
Electrical Safety
To reduce the risk of electric shock or fire:
- Do not try to service, repair, or modify the Compact Filter in a manner not described in this manual.
- Do not open any sealed portion of the Compact Filter or try to access the wiring. Damage caused by opening the case is not covered by the warranty.
- If the Compact Filter or its power cord is damaged, unplug the power cord and contact support@glowforge.com immediately.
- In the event of any emergency or malfunction, unplug the power cord on the back of the unit.
- Use only a properly grounded 120 VAC outlet that meets local building codes.
- The Compact Filter may draw up to 3 amps. Ensure that the circuit can support at least a 350 watt load. Note: a standard 15A household outlet can support both a Glowforge printer and a Compact Filter if nothing else is drawing power from the circuit.
General Safety
- If you detect a strong, sharp smell that also causes eyes, nose, or throat irritation, or if there is visible smoke escaping your Glowforge printer while the lid is closed, your Compact Filter is not operating properly. Follow all instructions in this manual. If the irritation and/or smoke emissions do not abate, discontinue using your Compact Filter and contact support.
- Do not disconnect the hose, open the case, touch anything inside, or perform any maintenance or operations while the Compact Filter is plugged in.
- The Compact Filter has sparking parts inside. Do not use in areas where gasoline, paint, flammable liquids, or gases are used or stored.
- Do not use the Compact Filter without a Filter Cartridge.
- Do not plug in the Compact Filter while the lid is open or the latches are not fully engaged. Doing so could cause electric shocks or physical harm from moving parts.
- Do not use the Compact Filter when the Filter Cartridge is clogged. This will shorten the life of the machine and and any resulting damage caused is not covered by your warranty.
- Do not modify a Filter Cartridge for any reason.
- Use only with Filter Cartridges manufactured by Glowforge for use with this Compact Filter.
Operating Environment
To prolong the life of your Compact Filter and to reduce the risk of fire or mechanical failure:
- Do not use if the ambient temperature is below 40 degrees Fahrenheit (5 Celsius) or over 120 degrees Fahrenheit (48 Celsius).
- Do not use if the ambient air is below 40% humidity or above 80% humidity. Air above 80%humidity can clog the filter which may cause damage.
- Do not use the Compact Filter outdoors.
- Do not use the Compact Filter in an environment where it may come into contact with liquids, moisture, grease, or excessive dust or small particles.
Materials
- Use your Compact Filter only when printing on material that is laser compatible. Only the manufacturer or supplier of material can confirm that it is laser compatible. Glowforge recommends the use of Proofgrade™ materials with the Compact Filter.
- Non-laser compatible materials may contain harmful or toxic chemicals that are not treated by the Compact Filter and could cause injury or death.
- ● Non-laser compatible materials may cause damage to your Compact Filter.
● Some laser-compatible materials, such as MDF or Proofgrade Draftboard, may cause the Filter Cartridge to need replacement more frequently.
● Damage resulting from the use of non-laser compatible materials is not covered by the Compact Filter warranty.
Compact Filter Regulatory Information
This product conforms to applicable CE requirements and RoHs. It is suitable for use with Glowforge Basic, Plus, and Pro 3D laser printers.
Specifications
The Compact Filter has the following specifications:
| Compact Filter | |
| Air Inlet Interface | 100mm diameter Flange |
| Input Voltage | AC110V |
| Maximum Power | 350W (3A) |
| Filtering Efficiency | 0.3μm 99.97% |
| Noise | <70dB |
| Systemic Flow | 350m³/h |
| Dimensions of Main Unit | L410×W265×H430mm |
| Weight | 22.0kg |
The Compact Filter is manufactured by:
- Glowforge, Inc. 2200 1st Avenue South, First Floor
- Seattle, WA 98134
- For more information or support, contact support@glowforge.com
Labeling
This label appears on the back of every Compact Filter, with an appropriate serial number, in the spot indicated by the arrow in the diagram below.

Getting Started
Now that you’ve read all about Safety, you’re ready to get lasering!
Unboxing will take just a few minutes – we can’t wait for you to get started either. Of course, if you encounter any challenges along the way, our Customer Success team can be reached at support@glowforge.com to help.
Let’s get started, shall we?
Check for damage
If your packaging or any part of your Compact Filter shipment is visibly damaged on arrival, we want to make it right as soon as possible! Send photos of the damage to support@glowforge.com and wait until you hear back from us. If the Compact Filter itself is visibly damaged, do not plug it in or attempt to operate it; contact us immediately.
Unbox your Compact Filter
- Locate your Compact Filter.
Your Compact Filter must be on a flat surface, like the floor. It needs to be positioned so that the 8 foot exhaust hose can connect to the back of your Glowforge while making no more than three 90-degree bends.
Your Compact Filter blows air out, so ensure that there are no obstructions within two inches of the vents on either side.
- Unseal your Compact Filter box.
Carefully cut tape sealing the top of your Compact Filter box and open it. Remove the power cord and the top piece of foam.
- Remove the Compact Filter.
The Compact Filter is heavy, so have a friend help. Grasp the two handles on top of the Compact Filter through the clear plastic bag and lift the filter out of the box. Place it on the floor.
- Remove the bag.
Lift the clear plastic bag over the top of the filter to remove it.
- Save the packaging material including the box, foam, and bags.
If you need to move your Compact Filter, for example to ship it back for warranty service, you’ll need all the original packing materials. The Compact Filter cannot be shipped safely without the original packaging materials.


Connect Compact Filter to your Glowforge
- Connect Compact Filter to Glowforge Printer with exhaust hose.
- Take the exhaust hose and two ring clamps that came with your Glowforge Printer. If you would like a new one, you can purchase a new one in the Glowforge shop: https://shop.glowforge.com/products/hose?taxon_id=57

- If you are using the exhaust hose to vent to the outside, you may reuse the hose, and you may skip this step since the hose is already connected to your Glowforge.
- Squeeze the two ends of the ring clamp together to make it larger, then slide the end over the hose.
- While squeezing the ring clamp again, slide the hose and the clamp over the the exhaust connection on the back of your Glowforge printer. The clamp pressure will hold it in place.
- Let go. Check that the clamp is holding the exhaust hose tightly to the exhaust connection. Make sure the hose does not come off with a gentle tug.

- Take the exhaust hose and two ring clamps that came with your Glowforge Printer. If you would like a new one, you can purchase a new one in the Glowforge shop: https://shop.glowforge.com/products/hose?taxon_id=57
- Connect Hose to Compact Filter
- Put the other clamp around the other end of the hose. Repeat the procedure above to attach the exhaust hose to the top of the Compact Filter with the ring clamp.
- Keep the hose as straight as you can, with no more than three turns of 90 degrees or less. Make sure the hose isn’t twisted, pinched, kinked, punctured, or flattened. If there is extra hose, do not let it sag; wrap it tightly with duct tape to
- keep the hose length as short as possible.

- Connect to electrical power

- Verify that the power switch is “Off” (the 0 side depressed, as shown).
- Verify the filter is installed and the lid is firmly closed.
- Plug the power cord into the back of the Compact Filter, then plug the power cord into the electrical socket. A standard grounded household socket works well.
- Enable the Compact Filter in the Glowforge UI
- Go to https://app.glowforge.com and log in, if necessary
- Click the “Trace” button

- Click the gear icon, and then click the switch next to “Compact Filter attached”. When you are done, the circle should be on the right, and the switch should turn teal.
 The fans will now run at a lower speed during every print on this machine, to match the Compact Filter’s internal fans.
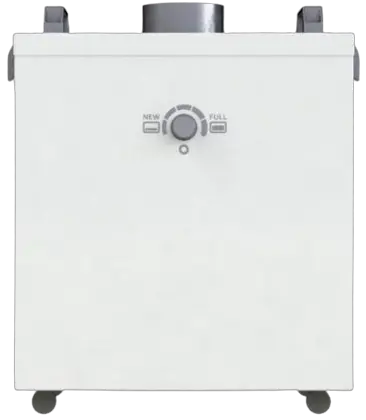
- Turn your Compact Filter knob to the right setting.
- The knob on the Compact Filter controls the power to the fan. When it is too high or too low, your Compact Filter will not work properly.
- When you first use your Compact Filter, turn it to “New”. The fan will use its lowest power setting, which is the best setting for a new filter. Do not use a higher setting, as more power will move air too quickly, and smoke and fumes may not be completely removed.
- After you have used the filter for a while, the filter cartridge will start to fill. More power will be required to move the air through the Compact Filter, and the “New” setting will no longer reduce smoke and fumes. If you find there are still smoke and fumes on the lowest setting, use the middle setting, halfway between “New” and “Full”.
- Finally, when the filter cartridge is almost full, it will again stop reducing smoke and fumes, and more power will be required to fully eliminate smoke and fumes.. Turn the knob to “Full”.
 To begin, set your Compact Filter knob to “New”. Your Compact Filter is now ready for use, with the fan off.
Print something amazing
Perform the following steps for each print.
- Choose your materials.
Your Compact Filter has been tested with a wide variety of Proofgrade materials, and designed to work with all laser-compatible materials. However, some materials, like Proofgrade Draftboard or MDF, will cause your filter cartridge to fill up and require replacement much more quickly than others. - Turn on your Compact Filter.
Use the switch next to the power cord to turn your Compact Filter on before each print. - Run your print.
Ensure that you use laser-compatible materials, like Proofgrade hardwood, plywood, and acrylic. Different materials will fill the filter cartridge at different rates. MDF and Proofgrade Draftboard are not recommended, as they will cause the filter cartridge to fill quickly. - When your print is done, leave your Compact Filter running.
Running air through your Compact Filter will prolong the life of the cartridge. For best results, leave it running one minute for each minute that you print. For example, when you finish two 30-minute prints, leave it running for an hour after they finish. - Turn off your Compact Filter.
When you’re done, use the switch next to the power cable to turn off the Compact Filter.
Materials will have an odor when they’re removed. If you prefer, you can reduce this odor by leaving the materials in your Glowforge longer while the Compact Filter is running.
Cleaning, Service & Moving
Unplug your Compact Filter off before cleaning, moving, changing the filter cartridge, or doing any other cleaning or maintenance.
Change Filter Cartridge
When you detect smells during printing even when the Compact Filter dial is set to “Full”, it’s time to change the filter cartridge. Here’s how.
- Turn off and unplug your Compact Filter
The power switch is located on the back, next to the cord. Turn it off first, then unplug it from the wall. - Open Compact Filter
There are four latches holding the top of the Compact Filter in place. Lift the bottom of all four latches to release them. You do not need to remove the exhaust hose to change the filter cartridge. - Remove and dispose of old filter cartridge
Grab and lift the two fabric handles to remove the filter cartridge from the Compact Filter. Dispose of the used filter cartridge in the garbage.
- Replace with a new filter cartridge
You can purchase new filter cartridges from https://shop.glowforge.com. Unwrap the filter cartridge and inspect it for possible damage. Lower the new filter cartridge in the same way you removed the old one. - Latch the lid closed and recheck the exhaust hose.
Inspect each latch to ensure it is fully closed. Grab the lid handles and pull upward on the lid to ensure it does not come off. Finally, check the exhaust hose to ensure it has not become disconnected from either the lid or the back of your Glowforge.
That’s it – you’re ready to print!
Cleaning
Turn off and unplug your Compact Filter off before cleaning. Ensure that the Compact Filter is closed before cleaning; interior areas should not be cleaned. You can clean all exterior surfaces with a rag dampened with isopropyl alcohol. Do not spray liquids on the compact filter as they may get inside.
Moving
For protection, the Compact Filter must be packed in its original packaging when moved to a new location. Whether it’s for a big move, taking your Glowforge printer and Compact Filter to an event, or for warranty service, you’ll need to package your Compact Filter properly with the original box and packing materials. The Compact Filter cannot be shipped safely without the original packaging materials. To repack your Compact Filter, power the unit off and disconnect the power cord. Disconnect the exhaust hose and hose clamp from the lid. Re-pack in the original packaging.
Troubleshooting
Reducing Odors
The Compact Air Filter is designed to allow you to safely and comfortably operate your Glowforge printer indoors. It will dramatically reduce odors, smoke, and fumes to safe levels. You should smell little to no odor coming from the exhaust vents of the Compact Filter itself.
Note, however, that even when used properly, odors may still occur from the following:
- Opening the lid after a print. Tiny amounts of smoke and fumes remain trapped in the crumb tray, and will escape when the lid is opened and the material is removed. This can be reduced by leaving the material in the Glowforge for a minute or two before removal.
- The materials themselves. After printing, the materials may have an odor for as long as a day or two. This can be minimized by using Proofgrade material, removing and disposing of the protective coating (which has the bulk of the odor), and by setting the materials aside for a day.
- The Glowforge itself. After being used for many hours, tiny particles of dust and resin will accumulate on the Glowforge itself. To minimize the odor, keep the lid closed when not in use, clean according to the Glowforge printer user manual, and leave the Glowforge connected to the Compact Filter when not in use.
Eliminating smoke and fumes
If you detect a strong, sharp smell that also causes eyes, nose, or throat irritation, or if there is visible smoke escaping your Glowforge printer while the lid is closed, your Compact Filter is not operating properly. Discontinue using your Compact Filter and follow these instructions.
- Ensure your Compact Filter is turned on before every print, and left running until the print is complete.
- Check if the exhaust hose is securely connected to the Glowforge printer and the Compact Filter.
- Check if the Compact Filter is enabled in the Glowforge UI. You will only need to do this once. After it is enabled, all users will have it enabled from that point forward.
- Make sure that, when you turn on your Compact Filter, you turn it on to the right setting. If the fan is moving too slow or too fast, the filter will not work properly.
- Check if the hose is connected properly, with no more than three 90 degree turns.
- Check if the materials you are using are laser-compatible. The Compact Filter has been tested with Proofgrade materials; other materials might have smoke and fumes that are not fully removed by the Compact Filter.
- Change the filter cartridge. If you have been printing for a while, it may be time to replace your filter cartridge.
- Inspect all four latches to be sure they are tightly closed.
- Check the hose to make sure it is not kinked, squished, or twisted.
- Remove the hose and inspect the inside to ensure it is not obstructed.
- Review the “Reducing Odors” section above for other sources of smell.
If all of these do not help, you are using a new filter and the “New” setting, and you are experiencing eye, nose, and throat irritation when using Proofgrade materials with your Compact Filter, stop using your Compact Filter and contact Glowforge support.
Compact Filter doesn’t turn on
If the power switch is on, the machine is not running, and the power indicator doesn’t light up, the fuse may need to be replaced.
- Turn off and unplug your Compact Filter
- Remove and replace the fuse next to power switch
We have included a free spare fuse with your Compact Filter.
 Service
Other than the procedures shown above, the Compact Filter may not be serviced or repaired by the user. Should service or repair be required, it must be returned to the factory; contact support@glowforge.com for instructions.
Finding Community & Support
Still have questions? Looking for ideas on getting the most from your Glowforge and Compact Filter? We’re here to help you succeed!
Community Forum
Most Glowforge owners have registered at the Glowforge Community Forum, where hundreds of Glowforge owners post each day. You’ll find some incredibly talented (and helpful) folks who can provide assistance, suggestions, and ideas to help you make the most of your Glowforge and Compact Filter.
Support Online
Go to https://glowforge.com/support to find information, troubleshooting, and guidance any time of day or night.
Support by Email
We are here for you! Email support@glowforge.com with your questions, challenges, feedback, and even your stories of perfect prints. Our goal is to reply within hours on weekdays, and always within three days.
We provide the best support when we fully understand what you’re facing. Please send:
- What happened, and what you expected to happen
- A description of the steps you took
- The date and time of the issue
- The materials you were using
- At least one photo that shows your Compact Filter, exhaust hose, and Glowforge so we can see how they’re connected
- Additional photos or information that may help us understand the problem
FAQ
What does the warranty cover?
The warranty covers specific conditions such as manufacturing defects but does not include damage from misuse, accidental damage, or modifications not authorized by Glowforge.
How do I make a warranty claim?
To make a warranty claim, follow the instructions provided in the warranty documentation and contact Glowforge for assistance.
Documents / Resources
 |
Glowforge Compact Filter [pdf] User Manual Compact Filter, Compact, Filter |