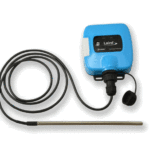
ATrack BL1 Series Rugged Bluetooth Sensor

Specifications
- Product: BL1 Series Rugged Bluetooth Sensor
- Model: BL1/BL1-T
- User Manual Version: V00 (DVT) Aug. 21th, 2024
Product Information
Notification
Disclaimer: This document and related products are developed by ATrack Technology Inc. Changes in functionalities, specifications, and firmware functions may occur without notice. ATrack Technology Inc. products are not intended for life support or rescue equipment.
Pro duct name and Model name
- Product name: Rugged Bluetooth Sensor
- Model name: BL1/BL1-T
Contact Manufacturer
- Company name: ATrack Technology Inc.
- Address: 8F., No. 13, Ln. 120, Sec. 1, Neihu Rd., Neihu Dist., Taipei City 11493, Taiwan (R.O.C.)
- Sales Phone: +886-2-27975852 ext. 286
- E-Mail: smd@atrack.com.tw
- Technical support Phone: +886-2-27975852
- E-Mail: tsd@atrack.com.tw
Product Usage Instructions
Installation
- Package Content
Check the package for the sensor unit and any included accessories. - Optional Accessories
If you have optional accessories, refer to the user manual for installation instructions. - Activating the sensor
To activate the sensor, follow the steps outlined in the user manual provided with the product. - LED Indicator
Understand the different LED indicators and their meanings as described in the user manual. - Battery replacement (BL1/BL1-TH)
When replacing the battery for BL1/BL1-TH models, carefully follow the instructions provided to ensure proper replacement. - Mounting recommendations
Follow the mounting recommendations in the user manual to ensure secure installation of the sensor.
Notification
Disclaimer
- This document, and all other related products, including device, firmware, and software, are exclusively developed by ATrack Technology Inc.
- Due to the continuous developments and improvements of device functionalities, changes in the protocol, specification, and firmware functions are subjects to change without notice. ATrack Technology Inc. reserves the right to modify all documentation based on its own timelines. Document modification notices will be released to ATrack Technology Inc.’s customers upon completion.
- ATrack Technology Inc. products are not intended to be used as life support or rescue equipment. ATrack Technology Inc. is not liable for any loss or injury caused by using or referencing to any of its products. Any possible means of using or integrating
- ATrack Technology Inc. products shall be avoided in such applications.
Copyright
- ATrack Technology Inc. All Rights Reserved
- ATrack Technology Inc. holds all parts of intellectual rights applicable in the copyright laws in all the countries. Any and all contents of this document shall not be exposed, delivered, and/or disclosed to non-authorized 3rd party without any form of approval and consent from ATrack Technology Inc. Any form of, including but not limited to, verbal, duplicate, or internet sharing, of releasing or exposing information to an unauthorized party shall be prohibited. ATrack Technology Inc. reserves the rights of litigation in the violation of copyright laws.
Warning
- While doing any operation without cover, please wear anti-static gloves/rings to avoid the damage of Electrical Static Discharge.
- Do not mix with other battery. This battery cannot mix with deposal or twice- recycled batteries in use. Otherwise, for its abnormal charge and discharge, it will cause over-heated, distort, smoke or burning.
- Keep the battery out of children’s reach and prevent them biting or swallowing the battery.
- Do not insert the battery onto the charger for a long time. If charging beyond the normal time, the battery is still in the charger, please stop charging. The abnormal charging will cause battery over-heated, distort, smoke or burning.
- Do not put into microwave stove or any other pressure apparatus. Take the battery away from the cellular phone or the charger if it is instant heated or leak-out (or odors) and depose it. The bad battery will causes over-heated, smoke or burning.
Product name and Model name
- Product name Rugged Bluetooth
- Model name Sensor BL1/BL1-T
Contact Manufacturer
- Company name: ATrack Technology Inc.
- Address: 8F., No. 13, Ln. 120, Sec. 1, Neihu Rd., Neihu Dist., Taipei City 11493, Taiwan (R.O.C.) Sales
- Phone: +886-2-27975852 ext. 286
- E-Mail: smd@atrack.com.tw
Technical support
- Phone: +886-2-27975852
- E-Mail: tsd@atrack.com.tw
CE Representatives (CE Cert. have been processing)
The following followings are authorized to represent ATrack Technology, in compliance to CE regulation.

- Company: APEX CE SPECIALISTS GMBH
- Address: Habichtweg 1 41468 Neuss Germany
- E-Mail: Info@apexapex-ce.com

- Company: APEX CE SPECIALISTS LIMITED
- Address: 89 Princess Street, Manchester, M1 4HT, UK
- E-Mail: Info@apexapex-ce.com
Regulatory s tatement and RF exposure statement. Federal Communications Commission (FCC) Statement
This device complies with part 15 of the FCC Rules. Operation is subject to the following two conditions:
- This device may not cause harmful interference, and
- this device must accept any interference received, including interference that may cause undesired operation.
Caution! Changes or modifications not expressly approved by the party responsible for compliance could void the user’s authority to operate the equipment.
Note:
This equipment has been tested and found to comply with the limits for a Class B digital device, pursuant to part 15 of the FCC Rules. These limits are designed to provide reasonable protection against harmful interference in a residential installation. This equipment generates, uses and can radiate radio frequency energy and, if not installed and used in accordance with the instructions, may cause harmful interference to radio communications. However, there is no guarantee that interference will not occur in a particular installation. If this equipment does cause harmful interference to radio or television reception, which can be determined by turning the equipment off and on, the user is encouraged to try to correct the interference by one or more of the following measures:
- Reorient or relocate the receiving antenna.
- Increase the separation between the equipment and receiver.
- Connect the equipment into an outlet on a circuit different from that to which the receiver is connected.
- Consult the dealer or an experienced radio/TV technician for help.
- This equipment complies with FCC RF radiation exposure limits set forth for an uncontrolled environment.
- This device and its antenna(s) must not be co-located or operating in conjunction with any other antenna or transmitter except in accordance with FCC multi transmitter product procedures.
- This product should be installed and operated with minimum distance 20 cm between the radiator and your body.
Innovation, Science and Economic Development Canada (ISED) Statement CAN ICES (B) / NMB (B)
This product complies with ISED radiation exposure limits set forth for an uncontrolled environment. This device and its antenna(s) must not be co-located or operating in conjunction with any other antenna or transmitter.
This product should be installed and operated with minimum distance 20 cm between the radiator and your body. This device contains licence-exempt transmitter(s)/receiver(s) that comply with Innovation, Science and Economic Development Canada’s licence-exempt RSS(s).
Operation is subject to the following two conditions:
- This device may not cause interference.
- This device must accept any interference, including interference that may cause undesiredoperation of the device.
Document Amendments
| Rev. | Pub. Date | Comments | F/W Version |
| V01 | July 5 2024 | • Initial release | N/A |
Note: For the F/W Version column with specific firmware number, it means the modification(s) on the Comments column is done on this corresponding firmware version (and the versions thereafter). Please make sure you upgrade the firmware to the specified version before applying any changes made in this protocol.
Product Specification
| General Specifications | ||
| Model Name | BL1 | BL1-T |
| Frequency | BLE v5.1, Class 2 (Support Long Range) | |
| Sensitivity | -103 dBm/125Kbps, -96dBm/1Mbps | |
| Coded PHY | 125K /1Mbps (Configurable) | |
| Transmit Interval | 1 to 10seconds (Configurable) | |
| Transmit Power | Default +3 dBm
(From -20 dBm to +8 dBm in 4 dB steps) |
|
| Transmit Range | Up to 600M in open area (Base on +3dBm TX power) | |
| Transmit Protocols | Default: iBeacon,
Eddystone, ATrack Proprietary |
|
| Internal Temp. Range | N/A | −20°C to +70 °C |
| Internal Temp. Resolution | N/A | 0.1°C |
| Internal Temp. Accuracy | N/A | ±0.3°C maximum (-25°C to +70°C)
±0.4°C maximum (-40°C to +70°C) |
| Operating Voltage | 3V | |
| Battery | Replaceable CR2450 Battery 900mAh | |
| Battery Capacity | 620mAh | |
| Battery Life | 10 years (Every 5sec report interval base on +0dBm TX power) | 3 years (Every 5sec report interval base on +0dBm TX power) |
| LED Indicator | 1 (Power/Operating) | |
| Device Activation* | Magnet trigger | |
| General Specifications | |
| Internal Flash Memory | 16Mbits (130,000 logs) |
| Operating Temperature | −20°C to +70 °C |
| Humidity | 95%RH @ 50° C non-condensing |
| Vibration/Shock | MIL-STD-810H |
| Salt Fog | MIL-STD-810H |
| Unit Drop Test | MIL-STD-810H |
| Thermal Shock | MIL-STD-810H |
| Chemical Resistant | MIL-STD-810H |
| Temperature Recorders | EN12830 (have been processing) |
| Impact Resistance | IEC 62262 test (IK10) |
| IP Rating | IP69K, IP68 |
| Dimension | L76 mm XΦ60 mm X H21 mm (3.0” x Φ2.36” x 0.82”) |
| Weight | 54g (0.12lb) |
| Enclosure | PC |
| Mounting Method | Screw Mount, Magnet Mount, Zip Tie |
| Certificates | FCC (On going) IC (On going) CE (On going) RoHS |
Installation
Package Content
Verify that you received the following items in the package:

Optional A ccessories
The optional accessories are:

Activating the sensor
Before the BL1 can be shipped to customers, the BL1 needs to be in the “Shipping mode”.
To properly use the Pushpin magnet to activate your BL1 device, follow these steps:
- Locate the Sensing Position
Identify the correct sensing position on your BL1 device as shown in the diagram.
- First Sensing
- Take the Pushpin magnet and place it near the specified sensing position on the BL1 device. Hold the magnet in place for 2 seconds until the LED on the device begins to flash.
- Important: After the LED starts flashing, immediately remove the magnet. Do not bring the magnet close to the sensing position again until the LED has finished flashing.
- Wait for LED Flashing to Complete
- Allow the LED to finish its flashing sequence. This indicates that the first sensing process is complete.
- Ensure that the Pushpin magnet is kept away from the sensing position during this time.
- Second Sensing (Power-On Activation)
- Once the LED has stopped flashing (about 1 second), bring the Pushpin magnet back to the same sensing position.
- Important: As the LED starts flashing again during this second sensing, immediately remove the magnet, ensuring it is kept away from the BL1 device.
- Confirmation
- After the second sensing, the device should be successfully powered on. Verify by checking for any indication of normal operation.
LED Indicator
The following figure shows the LED location of BL1.

| LED | Color | Indication | Description |
| Power | Amber | LED Flash 3 times 0.5 second duty cycle | The BL1 is activated |
Battery replacement (BL1/BL1 TH)
To replace the CR2450 battery in your device, follow these steps carefully:
- Insert the Grinder Wrench
Locate the two round holes on the back cover of the device. Insert the grinder wrench securely into each hole.
- Open the Back Cover
Rotate the grinder wrench counterclockwise, turning the arrow on the device from the “I” mark to the “O” mark. This will unlock and release the back cover. Once the back cover is loose, gently remove it.
- Remove the Depleted Battery
Refer to the diagram below for the correct method to remove the old battery. Carefully take out the depleted battery from its compartment by lifting it from the right side.
- Insert the New CR2450 Battery
Place a new CR2450 battery into the compartment, ensuring it is positioned correctly according to the polarity location. Ensure that the positive terminal clip of the battery holder is above the battery, as shown in the diagram.
- Check the Black Waterproof Rubber Gasket
Before closing the back cover, check that the black waterproof rubber gasket is correctly positioned around the edge of the cover. This ensures the device remains sealed and waterproof.
- Close the Back Cover
Align the “O” mark on the back cover with the arrow on the device. Once aligned, press the cover down gently to fit it back into place.
- Secure the Back Cover
Insert the grinder wrench back into the round hole. This time, rotate the wrench clockwise, turning the arrow on the device from the “O” mark to the “I” mark. This will lock the back cover securely.
- Power On the Device
After closing the back cover, power on the device to ensure it is functioning properly with the new battery.
Mounting recommendations
- Magnet on the Back Cover: Use the magnet on the back cover to attach the device securely to a metal surface.

- Screw Mounting: Use two screws to firmly attach the device to the desired location.

- Ziptie: Secure the device using a ziptie, threading it through the designated holes and around an object you want device secured to.
FAQ
Q: What should I do if the LED indicator does not light up?
A: Check the battery connection and ensure it is properly inserted. If the issue persists, contact technical support for assistance.
Q: Can I use the sensor as a life support device?
A: No, the sensor is not intended for use as life support equipment. Avoid using it for critical applications.
Documents / Resources
 |
ATrack BL1 Series Rugged Bluetooth Sensor [pdf] User Manual BL1 Series, BL1 Series Rugged Bluetooth Sensor, Rugged Bluetooth Sensor, Bluetooth Sensor, Sensor |