1. Nhanganyaya
The SCULPFUN C1 Mini Laser Engraver is a compact and portable 3W diode laser machine designed for high-precision engraving on a wide variety of materials. Its ultra-fine 0.04mm laser spot allows for detailed imaging, making it suitable for DIY enthusiasts and beginners. This manual provides essential information for safe and effective use, including setup, operation, maintenance, and troubleshooting.
2. Safety Information
WARNING: This product contains a Class IV laser. Direct exposure to the laser beam can cause severe eye damage and skin burns. Always wear protective eyewear when operating the machine. Never look directly into the laser beam.
- Laser Class: IV
- Laser Output: 3000mW
- Ensure proper ventilation when operating, as engraving can produce fumes. Use in a well-ventilated area or with an exhaust system.
- Do not engrave highly reflective materials without proper precautions.
- Chengetedza kure nevana nemhuka dzinovaraidza.
- The machine is not recommended for cutting tasks or engraving bare metals due to limited power.
- The protective cover (if used) helps meet Class 1 laser engraving machine standards and enhances safety by stopping operation when opened.
3. Package Zviri mukati
Ona kuti zvinhu zvese zviripo mupasuru yako:
- C1 Machine Body
- Laser Head
- Metal Protective Plate
- Acrylic Focusing Sheet
- Mushandisi Chinyorwa (gwaro iri)
- Power Adapter
- Repair Tools (Allen wrenches, wrench)
- Data Cable (USB-A to USB-C)
- Dziviriro Magirazi
- Metal Business Card (sampLe)
- Kraft Paper (sampLe)
- Plywood (sampLe)
- Kuchenesa Mucheka

Image: All components included in the SCULPFUN C1 Mini Laser Engraver package.
4. Setup uye Kuiswa
The SCULPFUN C1 is designed for easy, one-step installation. Follow these steps to set up your engraver:
- Unboxing: Carefully remove all components from the packaging. The main machine body comes pre-assembled.
- Install Laser Head: Remove the magnetic protective cover from the laser head. Insert the laser head into its designated slot on the gantry. Secure it with the provided screw using the appropriate repair tool.
- Batanidza Cables:
- Connect the laser head cable to the port on the gantry.
- Connect the power adapter to the power port on the machine and plug it into a wall outlet.
- Connect the data cable (USB-A to USB-C) from the machine's data port to your computer.
- Kuiswa kweSoftware:
The SCULPFUN C1 is compatible with professional laser engraving software such as LightBurn (additional purchase) and LaserGRBL (free and open-source). For Windows 7 systems, it may be necessary to install a driver. For Windows 10/11 and MacOS, the machine is typically driver-free.
Refer to the user manual (PDF) or scan the QR code provided in the physical manual for direct download links and detailed instructions for software setup and driver installation.
- Initial Power On & Homing: Double-click the power button on the machine to initiate the homing sequence. The laser head will move to its home position, indicating it's ready for operation.
Video: Detailed installation tutorial for the SCULPFUN C1 Mini Laser Engraver, covering unboxing, laser head attachment, cable connections, and initial setup.
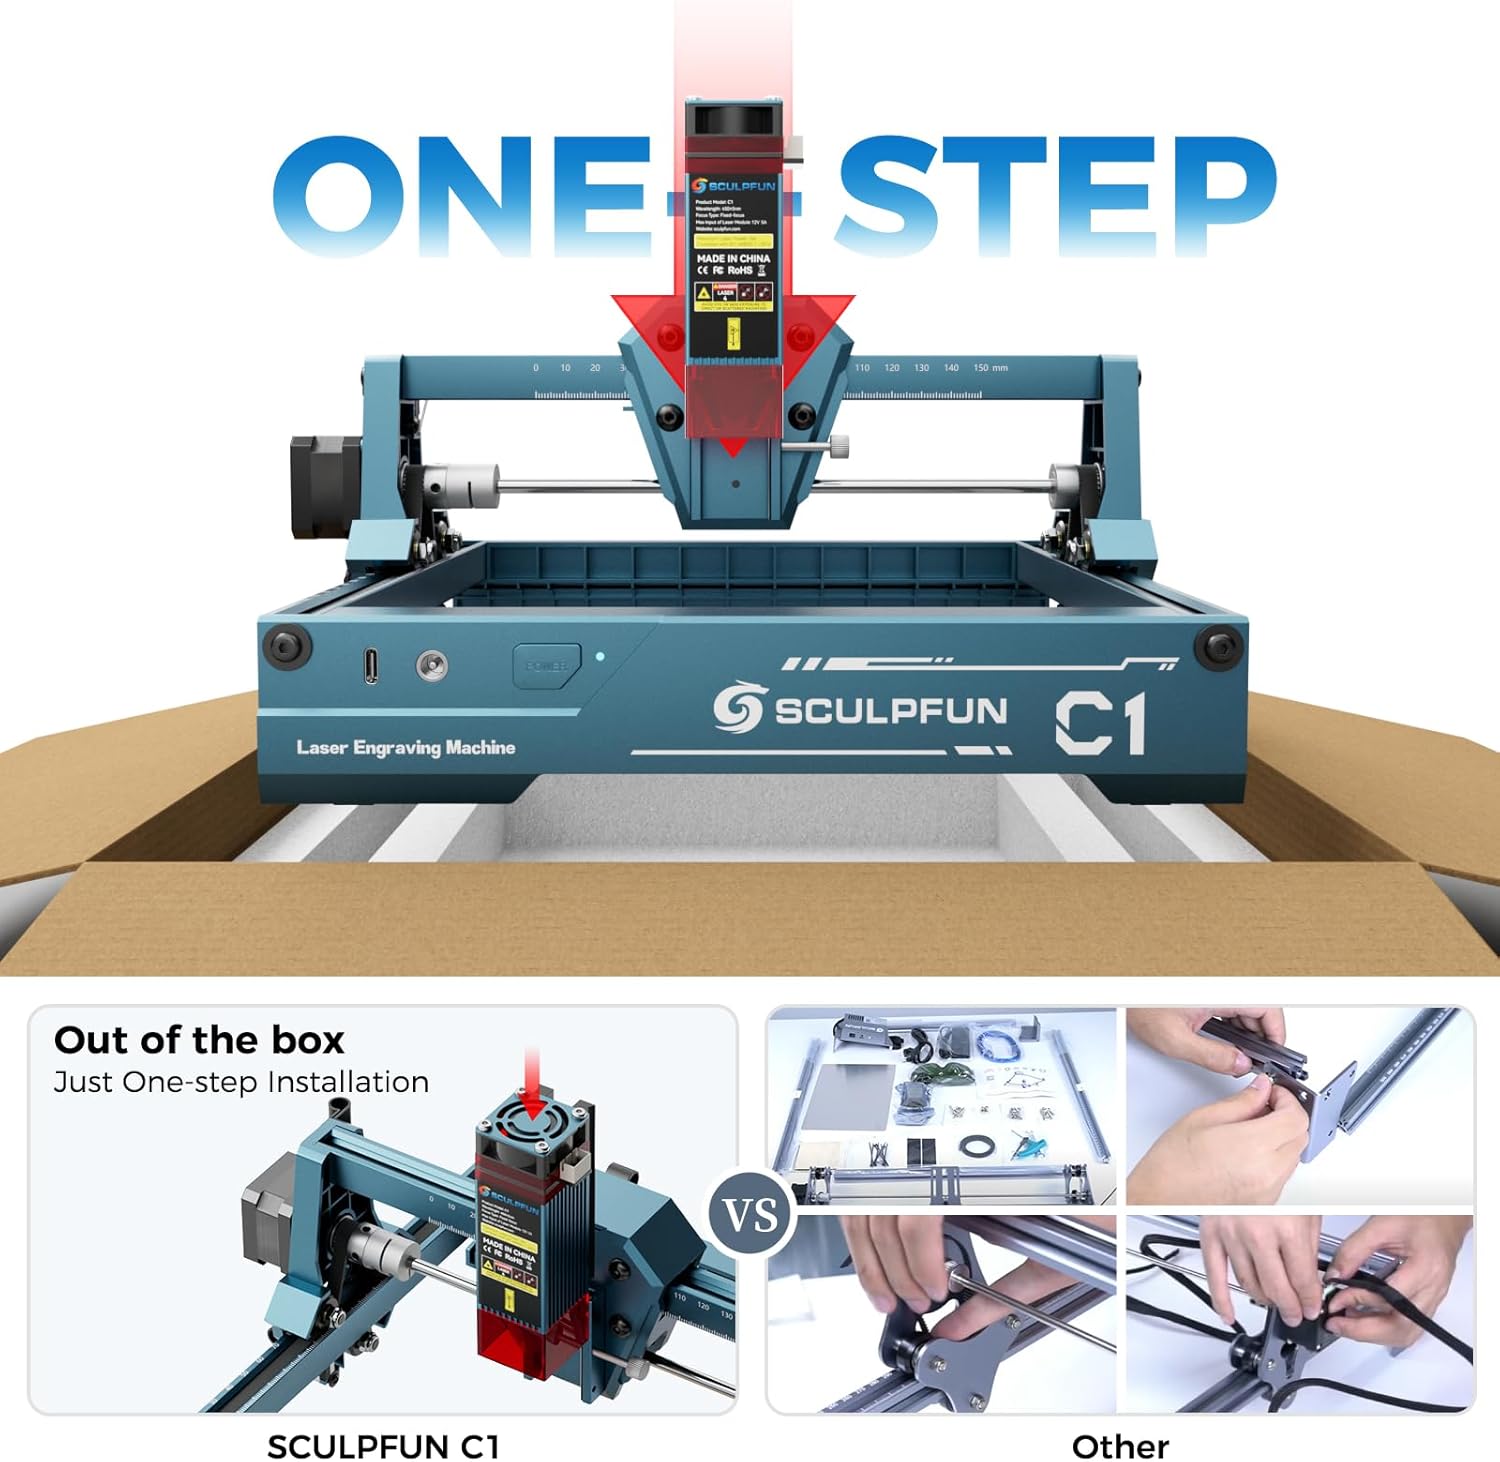
Image: Close-up of the SCULPFUN C1 showing the laser head being inserted into the gantry.
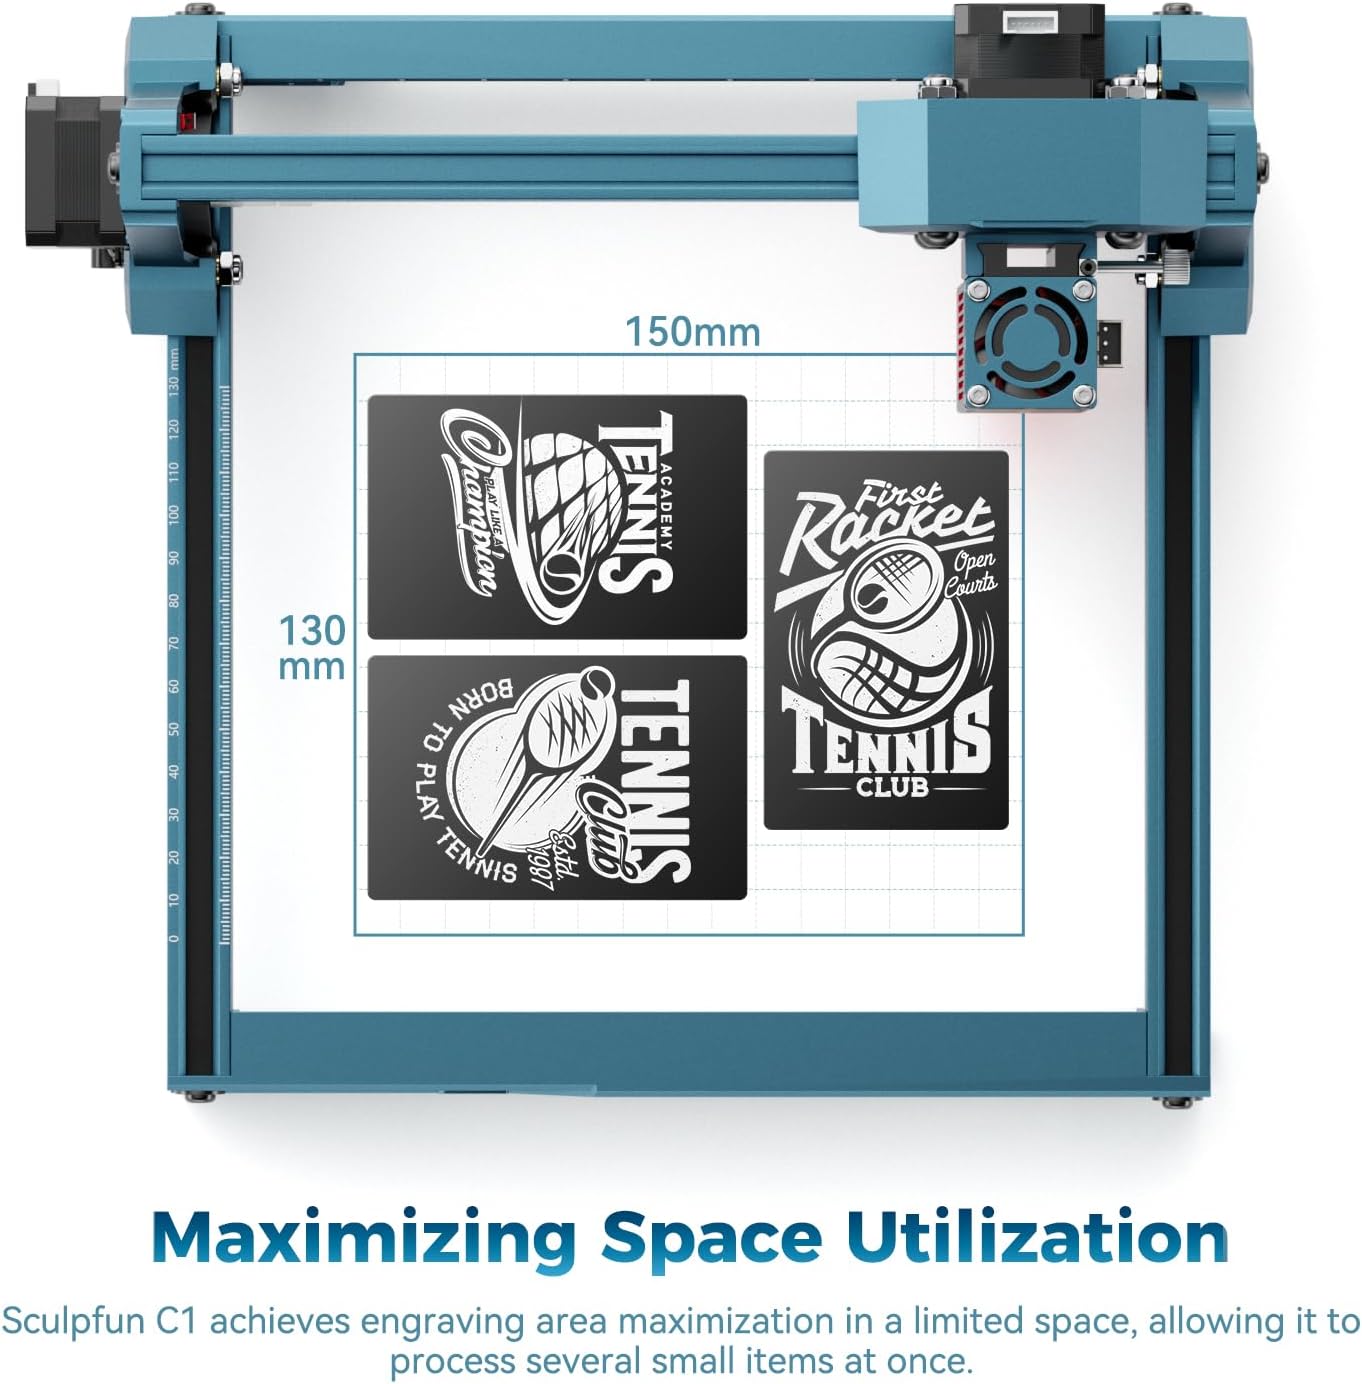
Image: SCULPFUN C1 with power and data cables connected, ready for software interface.
5. Operating Instructions
Once set up, the SCULPFUN C1 is ready for engraving. Ensure your material is placed flat on the working area.
- Kuiswa kwezvinhu: Place the material to be engraved within the 150x130mm working area.
- Kutarisa: Use the provided acrylic focusing sheet to set the correct focal distance for the laser. Place the sheet under the laser head and adjust the laser head's height until the laser spot is at its finest point on the material. Secure the laser head.
- Software Interface: Open your chosen software (LightBurn or LaserGRBL). Import your desired image (supports JPG, PNG, BMP, GIF, SVG, AI, etc.).
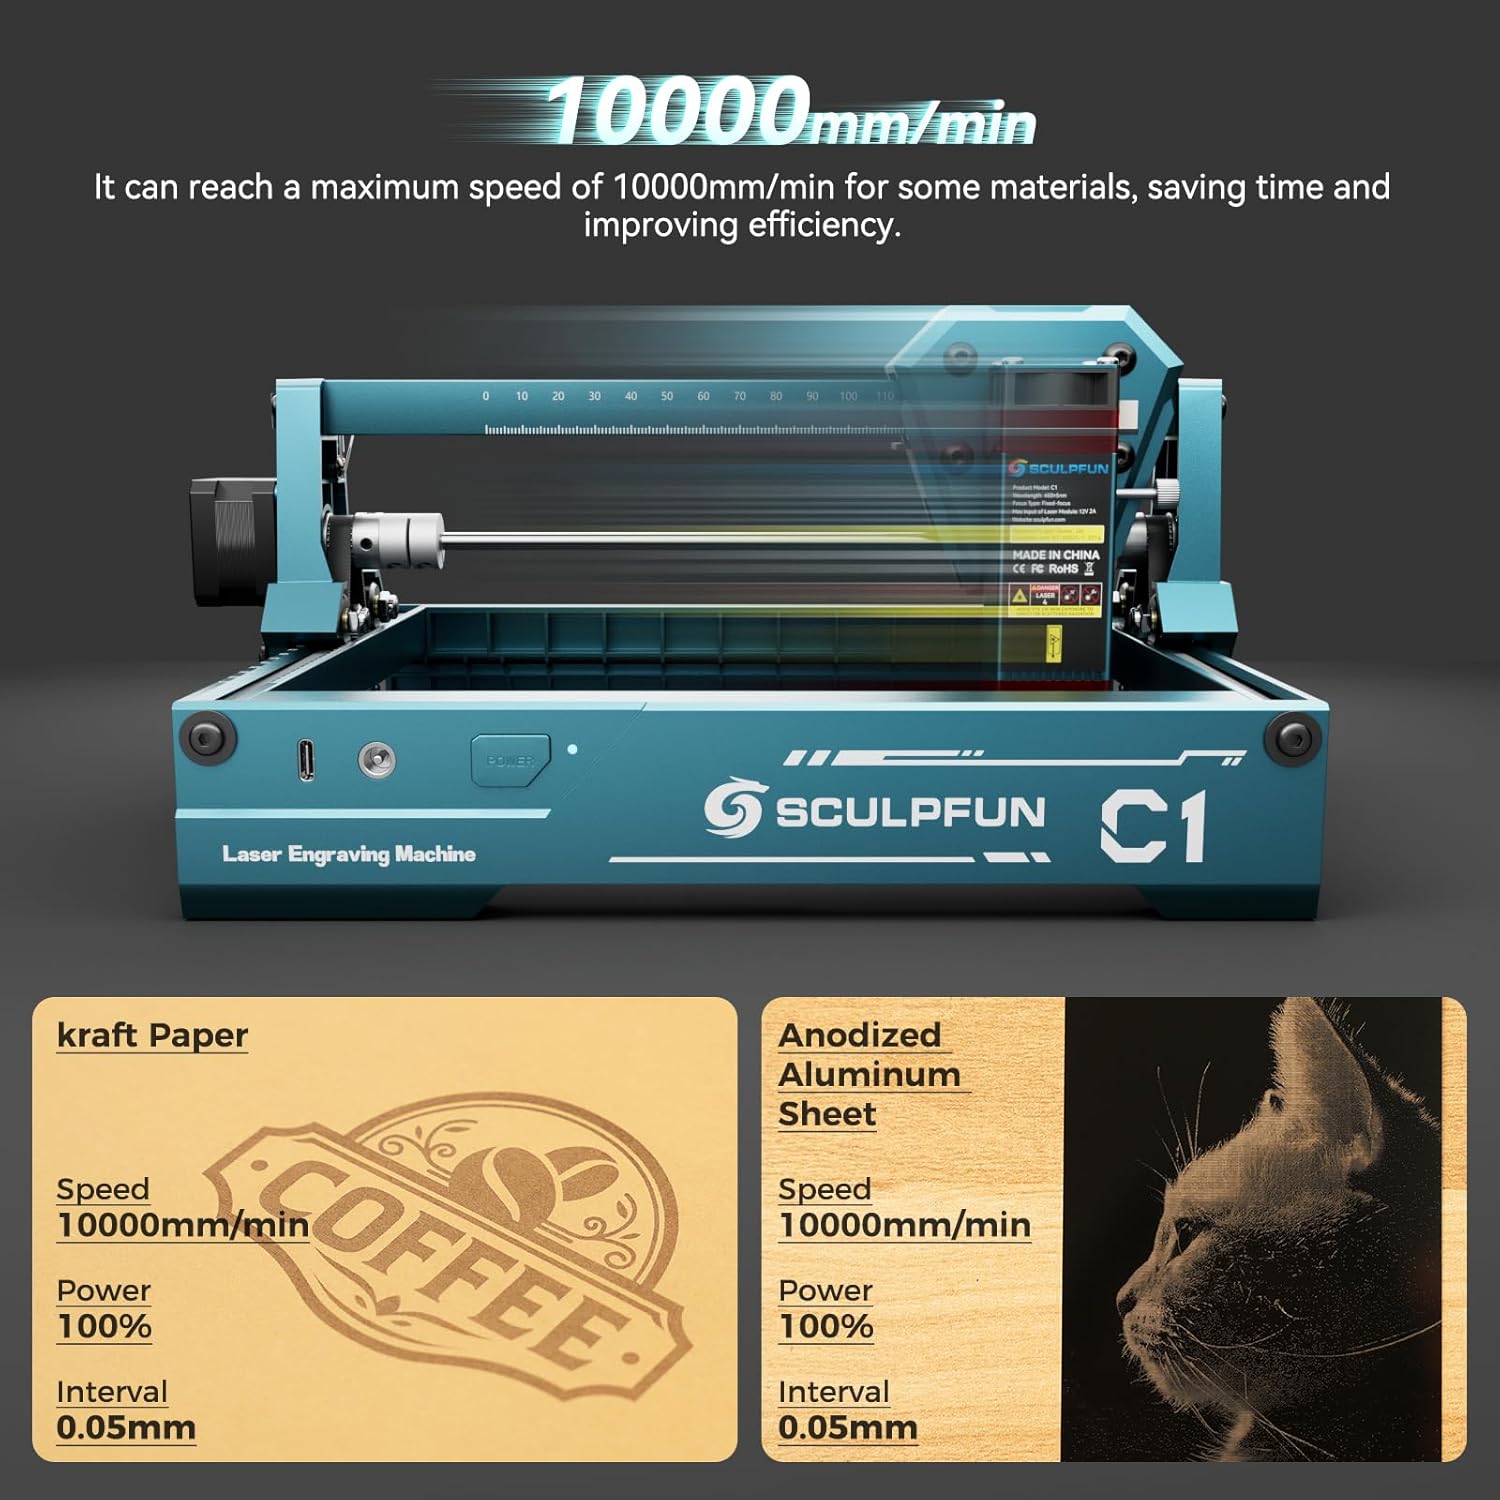
- Parameter Settings: Adjust engraving parameters such as speed, power, and interval based on your material and desired effect. The C1 can reach a maximum speed of 10000mm/min for some materials.
- Kugadzira: Use the "Frame" function in the software to preview the engraving area on your material. This helps ensure correct positioning.
- Tanga Engraving: Once satisfied with the settings and framing, initiate the engraving process from the software.
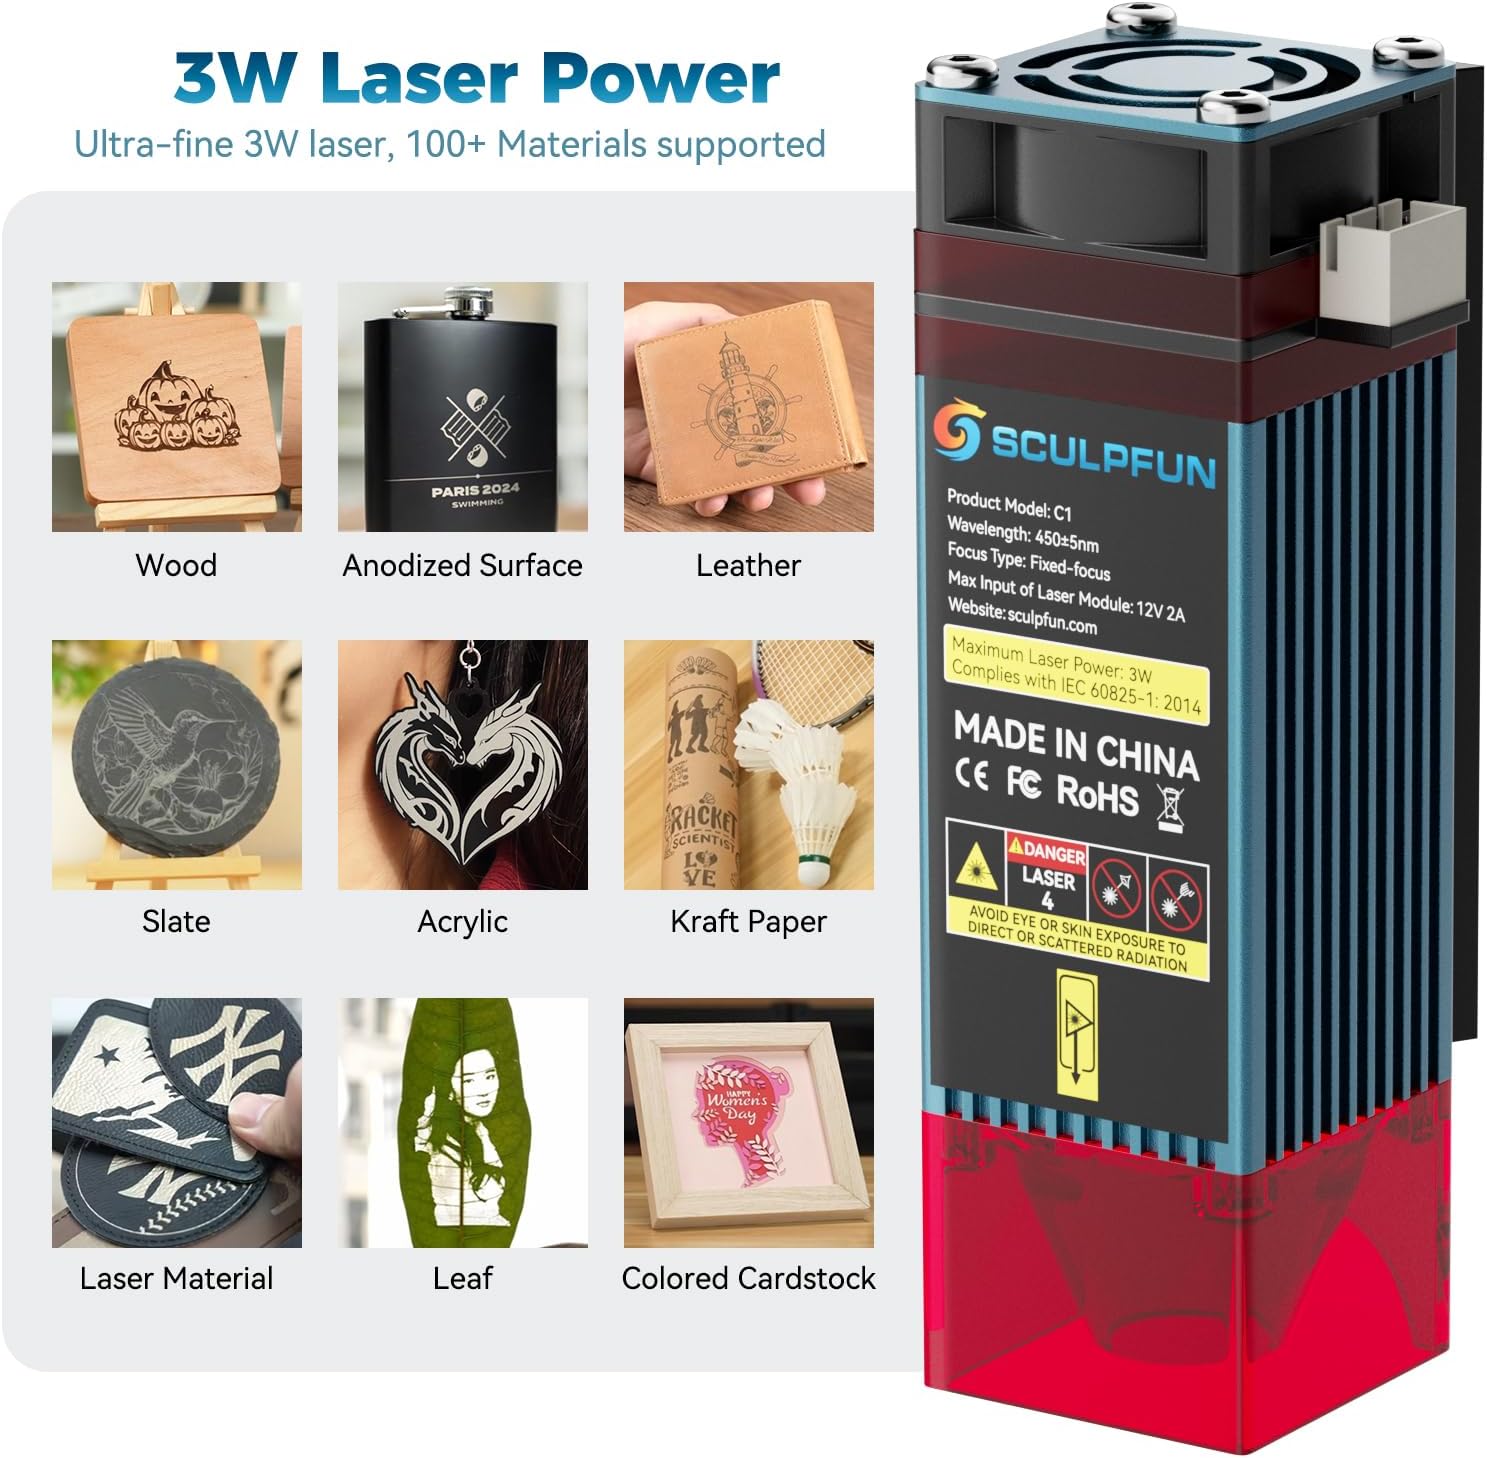
Mufananidzo: Eksamples of materials that can be engraved with the SCULPFUN C1, including wood, anodized surfaces, leather, slate, acrylic, kraft paper, leaves, and colored cardstock.

Image: Illustration of the 0.04mm ultra-fine laser spot, highlighting its precision for detailed engraving.
Vhidhiyo: Pamusoroview of the SCULPFUN C1 Mini Laser Engraving Machine in operation, demonstrating its compact size and engraving capabilities.
Video: Demonstration of customizing leather wallets using the SCULPFUN C1 laser engraver.
6. Kuchengeta
Regular maintenance ensures optimal performance and extends the lifespan of your SCULPFUN C1.
6.1. Laser Lens Cleaning
Dust and debris can accumulate on the laser lens, affecting engraving quality. Clean the lens regularly:
- Kudzima uye sunungura muchina.
- Carefully remove the magnetic protective cover from the laser head.
- Unscrew and remove the black lens cap from the bottom of the laser head.
- Use a clean cotton swab lightly dampened with lens cleaning solution (or isopropyl alcohol) to gently wipe the lens. Avoid excessive pressure.
- Allow the lens to dry completely before reassembling the lens cap and protective cover.
6.2. Kugadziriswa kweBhandi
Ensure the belts are properly tensioned for accurate movement of the laser head.
- Inspect the belts for any looseness or wear.
- If a belt is loose, use the provided repair tools to adjust the tensioning screws on the belt mechanism until the belt is taut but not overly tight.
- For balance adjustment, loosen the screws on the coupling, push the gantry fully against the frame, and then re-tighten the screws. This ensures both sides of the gantry are aligned.
Vhidhiyo: Nguva pfupi yapfuuraview video demonstrating lens cleaning and belt adjustment procedures for the SCULPFUN C1.
7. Kugadzirisa matambudziko
- Muchina usina kubatana nekombuta:
- Ensure the data cable is securely connected to both the machine and the computer.
- Verify the machine is powered on (green light should be steady or flashing).
- For Windows 7, check if the necessary drivers are installed. Refer to the software installation section.
- Try a different USB port or data cable.
- Engraving quality is poor/faint:
- Check the laser focus. Re-focus the laser using the acrylic focusing sheet.
- Chenesa lenzi yelaser sezvakatsanangurwa muchikamu cheMaintenance.
- Adjust software parameters (increase laser power, decrease speed, or reduce interval).
- Ensure the material is suitable for laser engraving and is placed flat.
- Machine not moving correctly/making grinding noises:
- Check for any obstructions in the gantry's path.
- Inspect and adjust the belts for proper tension as described in the Maintenance section.
- Ensure the machine is on a stable, level surface.
- Strong fumes/smell during engraving:
- This is normal for many materials. Ensure adequate ventilation. Operate in a well-ventilated room, near an open window, or use an external fume extractor.
8. Zvinotsanangurwa
| Feature | Detail |
|---|---|
| Product Dimensions | 12.99 x 11.81 x 7.09 inches |
| Item Model Number | xxl-C1 |
| ASIN | B0F845GHPS |
| Item Weight | 2.31 makirogiramu |
| Mugadziri | SCULPFUN |
| Nyika Yekwakabva | China |
| Laser Output Simba | 3000mW (3W) |
| Laser Spot Size | 0.04mm |
| Engraving Area | 150 x 130mm |
| Max Engraving Speed | 10000mm/min |
| Software Kuenderana | LightBurn, LaserGRBL |
| Kugarisana Kwehurongwa | Windows, MacOS |
| Akatsigirwa Mifananidzo Formats | JPG, PNG, BMP, GIF, SVG, AI, etc. |
Mufananidzo: Zvakadzama view of the SCULPFUN C1 showing product dimensions and port locations.
9. Warranty uye Tsigiro
For detailed warranty information and technical support, please refer to the official SCULPFUN websaiti kana iyo yakazara Mushandisi Yekushandisa PDF yakapihwa nechigadzirwa chako.
Unogona kudhawunirodha gwaro repamutemo rekushandisa PDF here.