Smartposti Prestashop Module
Specifications
- Compatible with PHP versions 7.0 and higher
- Parcel delivery service to Smartposti parcel shop pickup points in Finland, Lithuania, Latvia, Estonia
- Parcel delivery by a courier within the European Union
- Parcel collection from Smartposti parcel shops in Lithuania
- Possibility to print parcel labels and manifest from the e-shop’s administrative environment
- Ability to call a courier for parcel collection from the administrative e-shop environment
- COD (cash on delivery service) support
Smartposti Prestashop module installation instructions
Module implementation in PrestaShop administrative environment
Module functionality
- Parcel delivery service to Smartposti parcel shop pickup points (hereinafter referred to as “parcel shop“) located in Finland, Lithuania, Latvia, Estonia;
- Parcel delivery by a courier within the European Union;
- Parcel collection from Smartposti parcel shops in Lithuania;
- It is possible to print out either parcel labels and manifest from the e-shop’s administrative environment;
- It is possible, from the administrative e-shop environment, to call a courier for parcel collection;
- COD (cash on delivery service).
Server requirements
The module is compatible with 7.0 and higher PHP versions. Before installing the module it is important to find out whether 7.0 or higher PHP version is installed in the server.
Installation procedure
Before installing the Smartposti module make sure you have the login credentials (username and password) for the Smartposti API.
Installing the Smartposti Shipping module
Before installing the Smartposti Shipping module you need to download and unzip the previously mentioned module ZIP folder containing the directory named itellashipping.zip.
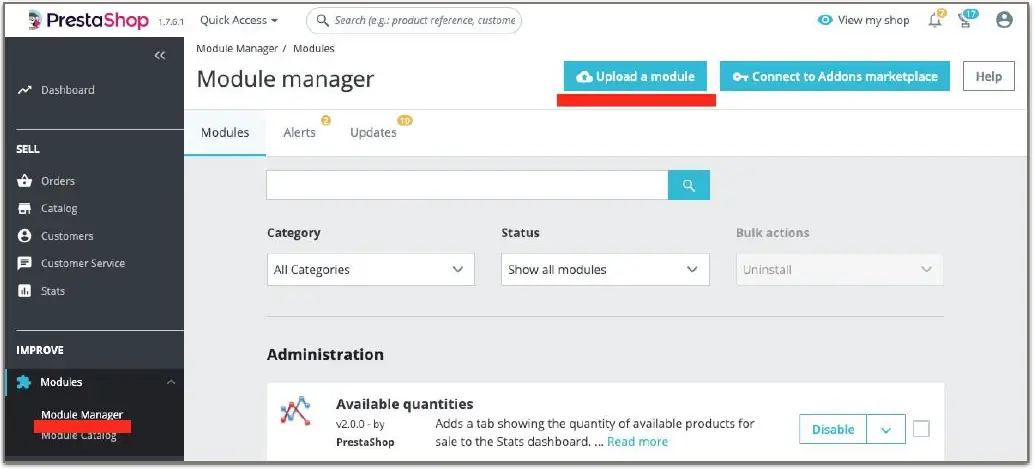
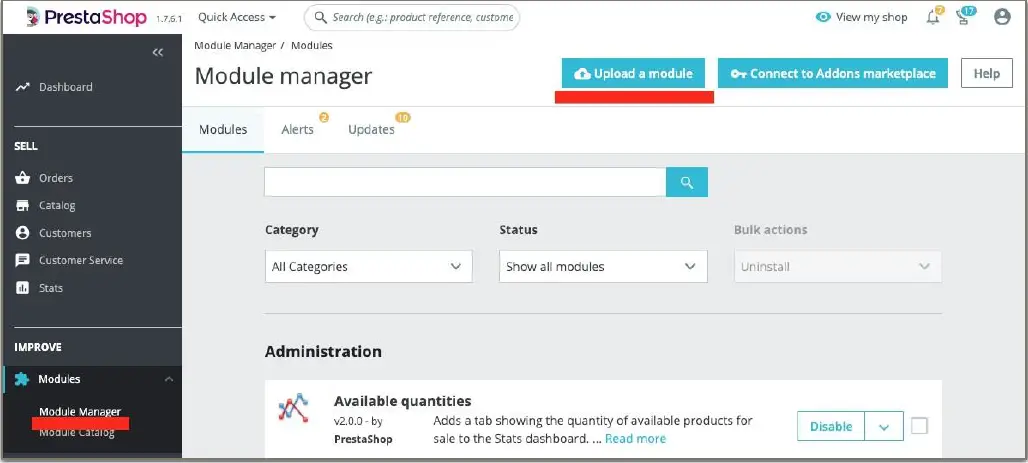
- After logging in to the website administrative environment in the menu bar, on the left side of the page, in its’ Modules section Module manager should be selected
- At the top-right corner of the page click the button named Upload a module
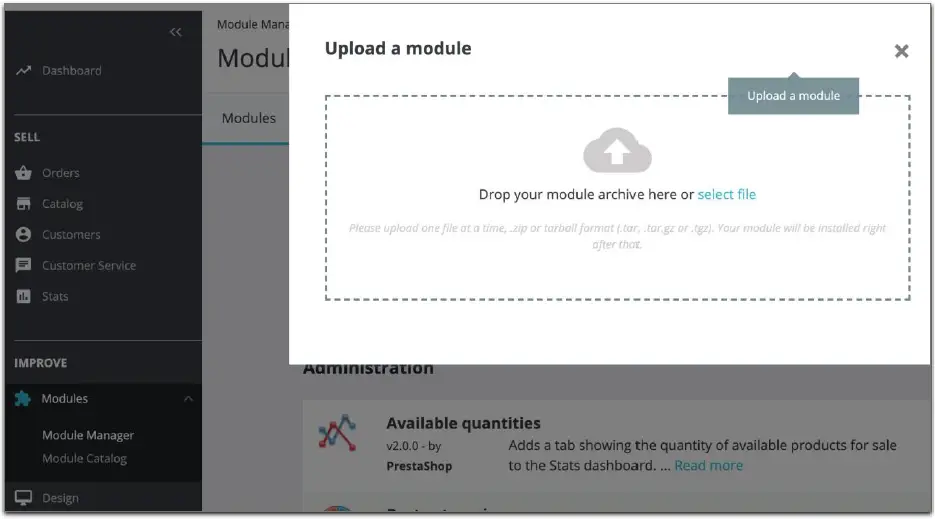
- When the window for module uploading is opened you need to upload the itellashipping.zip archive into the previously mentioned window or to click “select file” then navigate it to the mentioned ZIP archive and select it.
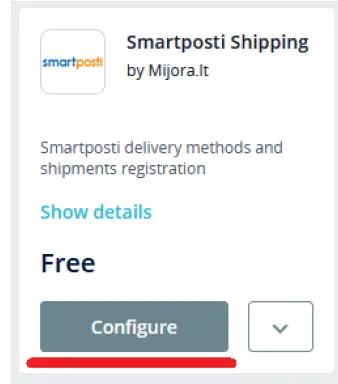
- After successfully uploading the Smartposti Shipping module it will appear in the list of modules. Then click the Install button on the right side of the window. After installing the module click the button named Configure. After successful module configuration the module settings window will be opened which will hold shop and login information.

The explanation of settings window value and functionality 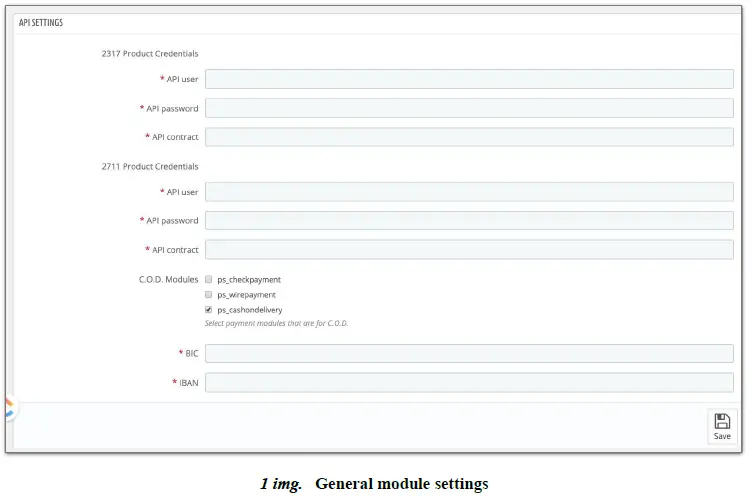
Module settings – module settings requires you to enter information that will be applied to the entire module.
| API user | Username |
| API password | Login password |
| C.O.D modules | This section is for using the Smartposti Shipping module with the C.O.D module. In this case, you must tick which of the provided modules for payment will belong to C.O.D settlement. |
Will see two fields with separate Product credentials. 2711 products are associated with parcel shops/pickup points whereas 2371 products with a courier.
Note: After filling all the required information be sure to click the Save button in the bottom right corner.  The sender settings window holds the information that will be displayed on the label in order to distinguish a specific sender:
| Name | the name of the store |
| Street | the address of the store |
| Postcode | the shop location postal code |
| City | the city of the store location |
| Country code | The code of the country. |
| Mob. Phone | the cell phone of the store |
| the email of the store |
Note: After filling in the required information, be sure to click the Save button in the lower right corner. 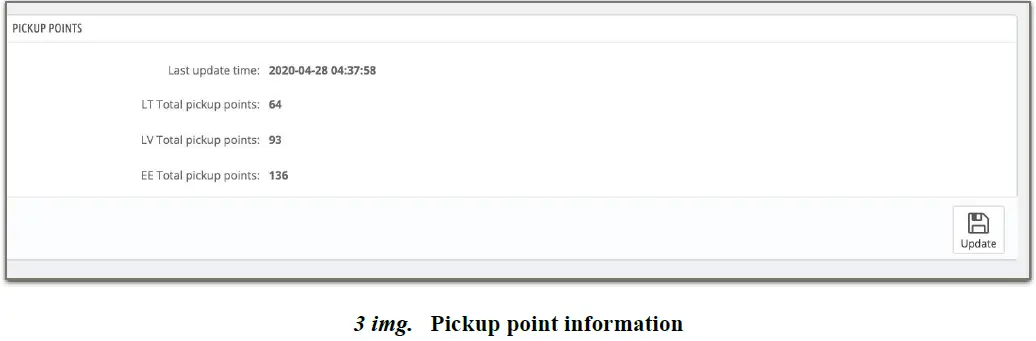
- The pickup points window provides information indicating when the information was updated and how many pickup points are in each country (LT, LV, EE, FI).
- By clicking the Update button, can update the list of pickup points. Pickup points are automatically updated every 24 hours.
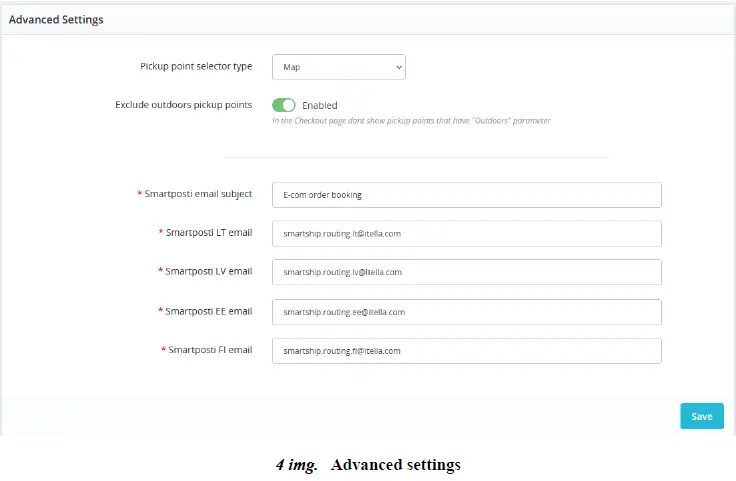 The Advanced settings window contains other module parameters.
| Pickup point selector type | specifies how the pickup point will be selected on the Checkout page. The Map value allows to select a pickup point on the map, and the
Select with search value allows to select a pickup point from a dropdown list. |
| Exclude outdoors pickup points | does not show pickup points that have the Outdoors parameter |
Note: After filling in the required information, be sure to click the Save button in the lower right corner. 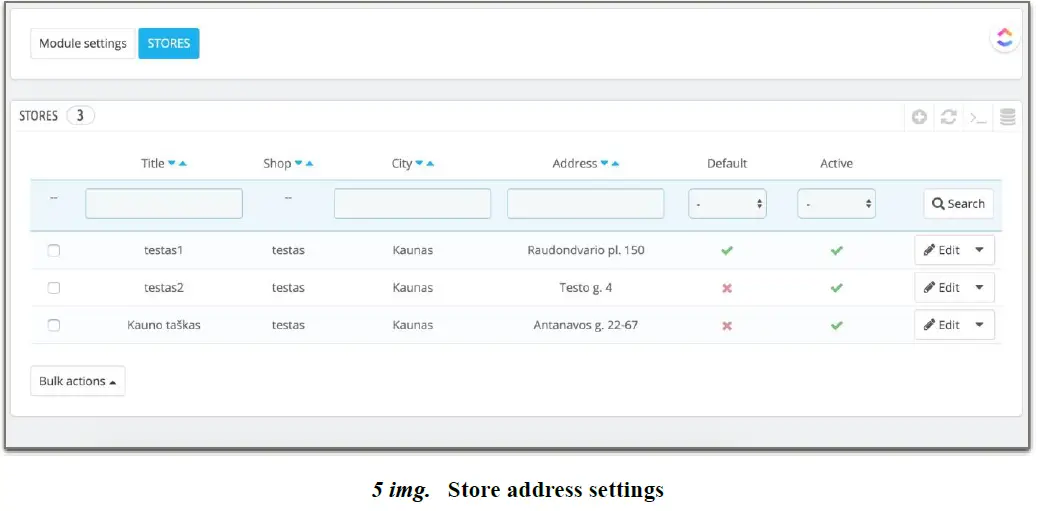
Stores – after selecting store settings, you need to enter store address information. It will be used to send the required orders so it is important to enter at least one address. To add the store, click the + button in the top right row. A bar with specific values will appear for entering store information:
| Title | a name is used to identify the store or the retail store network |
| Shop | the specific name of the store |
| City | the city of the store |
| Address | the street and number of the shop |
| Default | the address that will be used to form the order label. In case of multi-stores the default value is assigned to only one store. |
| Active | intended for assigning a specific stores list and to refer at which address the courier should arrive to pick up the required shipment. If the value is assigned to inactive then the store will not be listed as a point from which the courier can pick up the required order. |
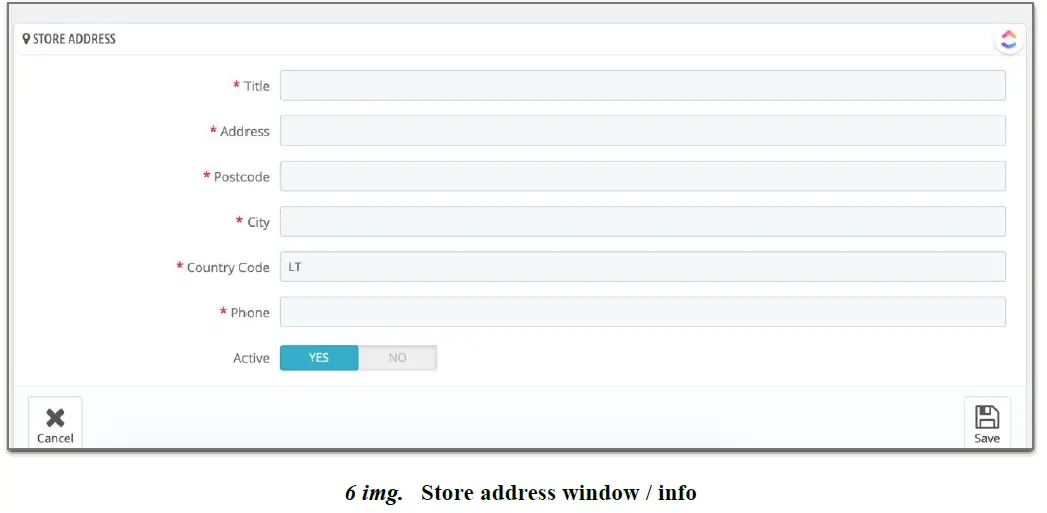 Setup window where the details / identification of the store address is entered. The information will be used for store address settings window explained above.
| Title | the name of the store |
| Address | store address |
| Postcode | the shop location postal code |
| City | the city of the store |
| Country Code | the code of the country. Note: The country code is written in two letters such as LT, EE, LV, FI, etc. |
| Phone | phone number of the store |
| Active | store status. By default YES |
Note: After filling in the required information, be sure to click the Save button in the lower right corner.
Module installation using FTP access
- In order to successfully install the Smartposti Shipping module you need to unzip the ZIP folder of the previously mentioned module. It will have a directory named itellashipping.
- Connect to your e-shop server;
- In the e-shop root directory the above-mentioned directory of the Smartposti Shipping module, named
“itellashipping”, must be loaded into the directory named Modules in the root directory of the e-shop. - In the administration environment entering the word Smartposti into the search box in the Marketplace will bring up the Smartposti Shipping module which can be downloaded by clicking the Install button.

- After completing the step above you will see the Smartposti Shipping module window at the bottom of which you need to click the button called Configure. After completing the step above, you will be taken to the settings window.
Part of the settings
Successful installation of the Smartposti Shipping module automatically creates two types of couriers (for configuring delivery methods and pricing), which can be found through the standard PrestaShop interface Delivery -> Couriers. One of them, Smartposti pickup point, is intended to display pickup points. It is displayed in the product billing section (a map is used for the display). Another type of courier, Smartposti courier, is Smartposti courier. 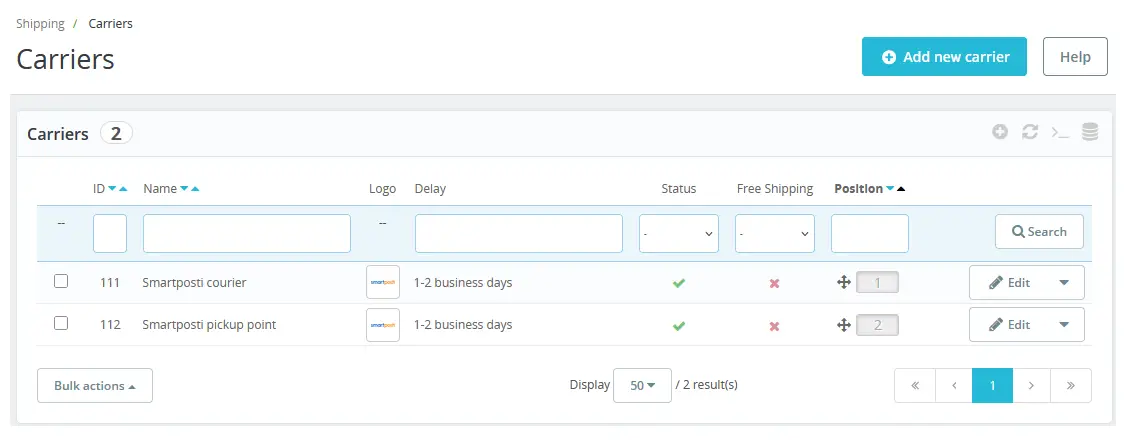
The two types of courier created by the Smartposti Shipping module are otherwise known as delivery options:
- Smartposti pickup point – delivery to the parcel shop;
- Smartposti courier – delivery is made through courier services.
All service settings are performed according to the usual PrestaShop manner related to the creation and adjustment of delivery methods.
Note: the above mentioned delivery methods cannot be deleted otherwise Smartposti Shipping services will not be available.
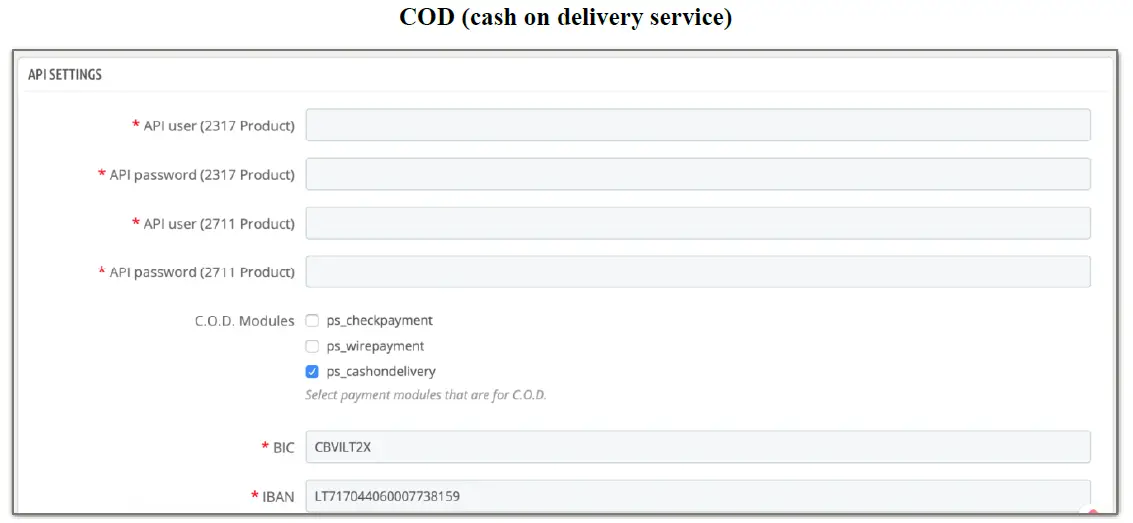
In the API settings window in order to use Smartposti Shipping modules with C.O.D. the last ones that appear in the list of modules must be marked with a tick. Based on the fact that the ticked modules will be a part of the C.O.D billing process you need to enter:
| BIC | Bank Identifier Code |
| IBAN | International Bank Account Number |
Module instructions for use
Shipment registration and label download are available in the Smartposti Shipping block in the order view page.
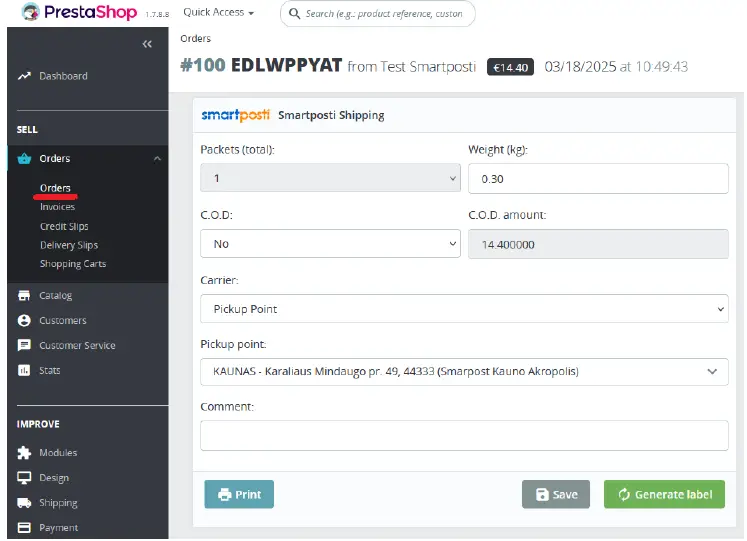 The following information is filled in this block:
| Packets | select how many packages are per order |
| Weight | the weight of the package |
| C.O.D | selected if cash on delivery service will be used |
| C.O.D amount | the amount of C.O.D is written |
| Carrier | allows to select the shipping type of the order (Pickup Point or Courier) |
| Pickup point | if a pickup point is selected then the specific address of the pickup point is selected as well |
| Comment | shipment comment |
- After entering the required order information be sure to press the Save button.
- The Generate label button is intended for generating an order label.
Note: In the Smartposti Shipping order editing section the Print button in the lower left corner is only active when a label has been generated. - It should be emphasised that in the Packets section if the selected value is more than one then the order is automatically assigned to the multi parcel category. In this case, in the additional services section, a multiparcel field will appear which cannot be unchecked.
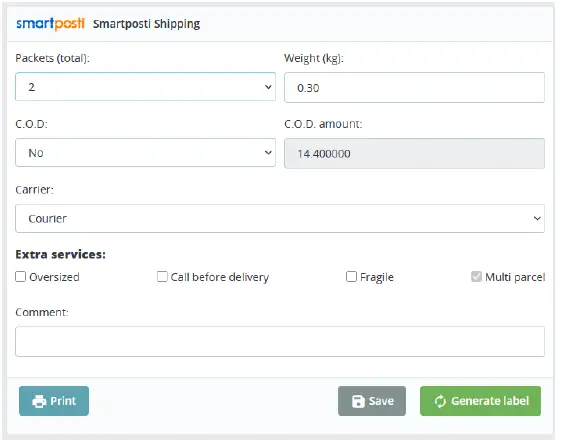
In the Carrier section selecting the Courier as value opens additional service fields that are optional (all additional services have their own prices):
- Oversized
- Call before delivery
- Fragile
Manifest generation part
Selecting Shipping → Smartposti opens a manifest generation window where all Smartposti orders can be viewed. Each is assigned to the specific shipment tracking number. 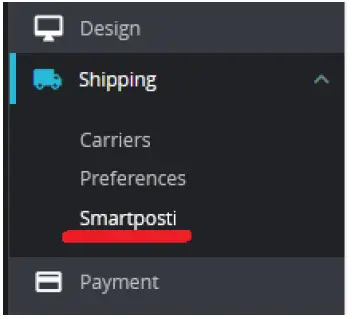
In order to assign a shipment tracking number to a specific order it must be successfully registered in Smartposti servers. In order to make sure that the order is successfully registered in the system it is necessary to ensure that the process of generating the label goes smoothly. You can check it by clicking the Generate label button (no error should occur in the process). If the process described above went smoothly an image of the Smartposti manifest generation window with the ready orders will be seen. 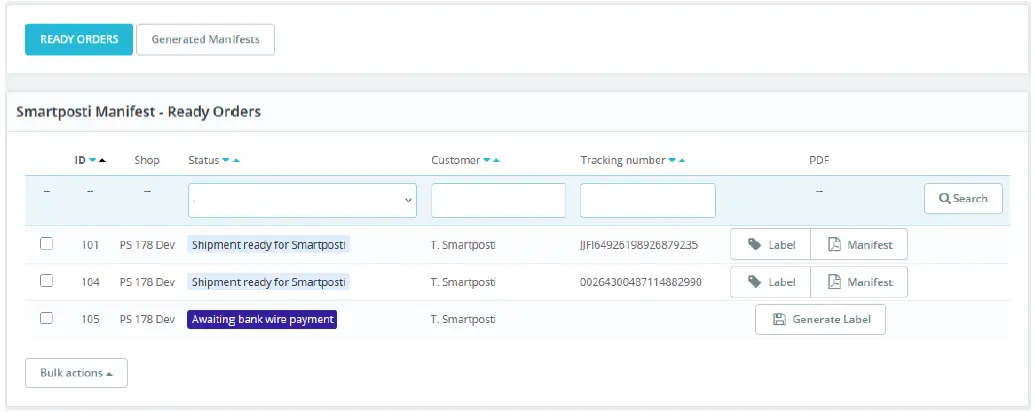
The Smartposti manifest generation window contains the following information:
| ID | an unique order id that is assigned when the new order is saved for the first time. |
| Shop | the name of the shop |
| Status | order status |
| Customer | the ordering customer who formed the order |
| Tracking number | tracking number received after registration of the shipment (obtained when the Generate label button was pressed in the order part) |
| Generate manifest | button which is visible in the presence of a single order in the Smartposti manifest generation table intended to print the generated order manifest |
The manifest printing process is manipulated through the Bulk actions filter button which is intended for filtering. 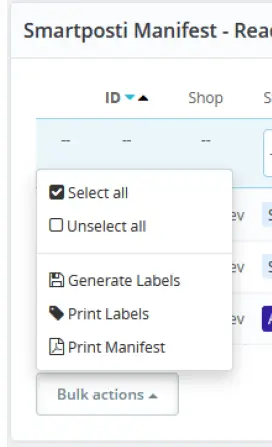
After successfully generating the prepared orders will see in the Smartposti generated manifest window. 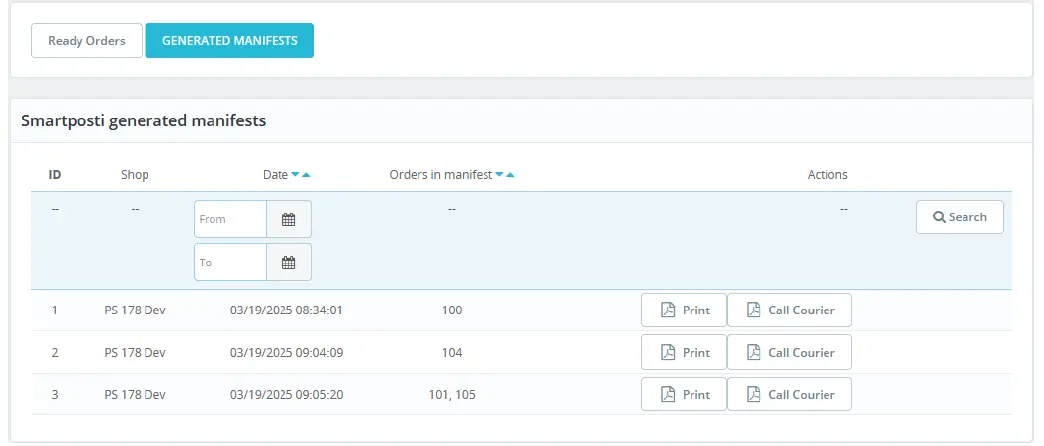
This window contains the following information:
| ID | manifest id |
| Shop | the name of the shop |
| Date | the date when the manifest was generated |
| Orders in manifest | list of orders in the manifest |
| Actions | buttons for printing the manifest and calling the courier |
- If you print the label of the selected order which doesn’t have a tracking number an error will be displayed:
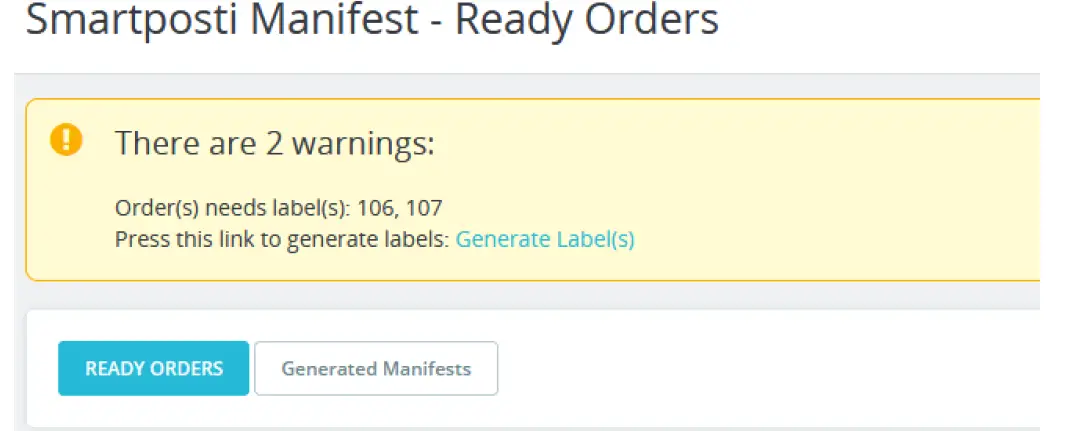
- The same message will be seen while printing manifest with the chosen order which do not have a tracking number as well.
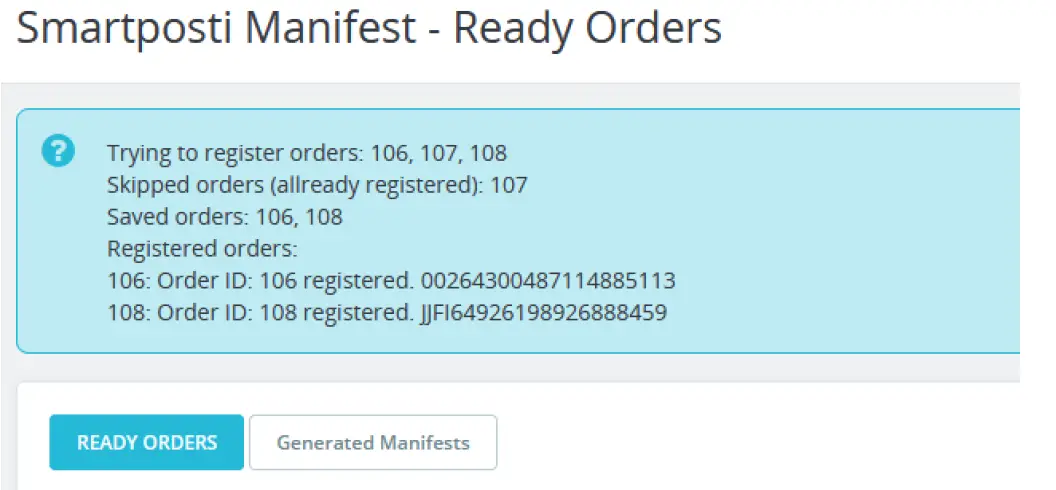
- When choosing Generate labels from bulk actions filtering button it will try to register only those orders who doesn’t have tracking number. Orders, who have, will go through automatically. The message is informative:
 Note: after transferring the orders to the manifest (print manifest) the only way to print the label is to open each order separately.
- When all the steps listed above are completed it is possible to call a courier for parcel collection. This can be done by clicking on the button named Call Courier. In an opened window select the store from which In. When selection is made the information of the specific store name, address, postal code, city, start and end time of the shipment, phone number will be seen.
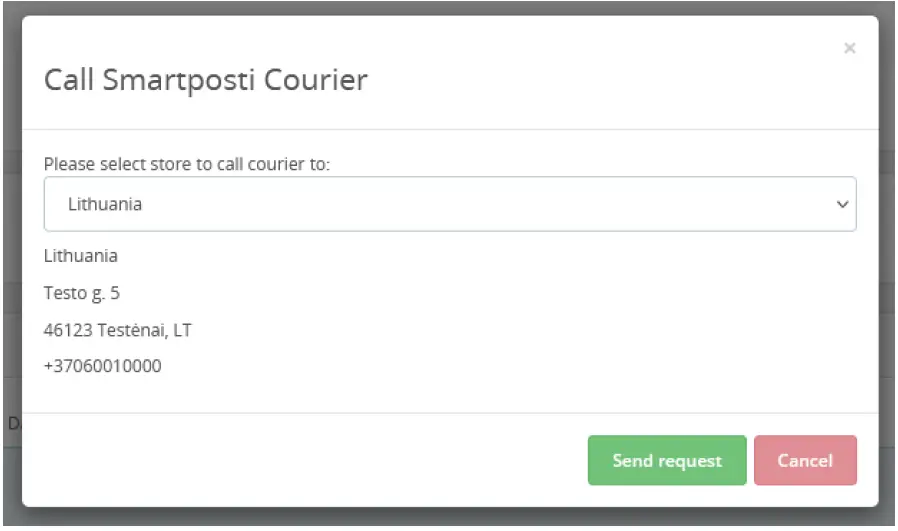
- If displayed information is correct click Send request button to confirm the courier call.
- When you successfully call the courier the confirmation message will be seen. Otherwise, you will be notified of the error.
FAQ
- Q: What are the server requirements for the Smartposti module?
- A: The module is compatible with PHP versions 7.0 and higher.
- Q: What functionalities does the module offer?
- A: The module provides parcel delivery services to Smartposti parcel shop pickup points in several countries, parcel delivery by a courier within the EU, parcel collection from Smartposti parcel shops, printing of parcel labels and manifest, calling a courier for parcel collection, and COD support.
Documents / Resources
 |
Smartposti Prestashop Module [pdf] Installation Guide Prestashop Module, Prestashop, Module |