RunCam WiFiLink Based on OpenIPC
Product Specifications
- Model: WiFiLink
- Sensor: 1919mm/M12 Lens/MIPI
- FOV: 9-30V (3S-6S)
- Resolution: –
- Power Supply: 9-30V (3S-6S)
- Lens Module Specs: M12 Lens/MIPI
- Hole Distance: 200mm
- PCB Size: Main Board: 30mm*30mm, WiFi Board: 32mm*32mm
- Weight: 30g
- Antenna Power Amplifier: IPEX15G, 29dBm
Product Usage Instructions
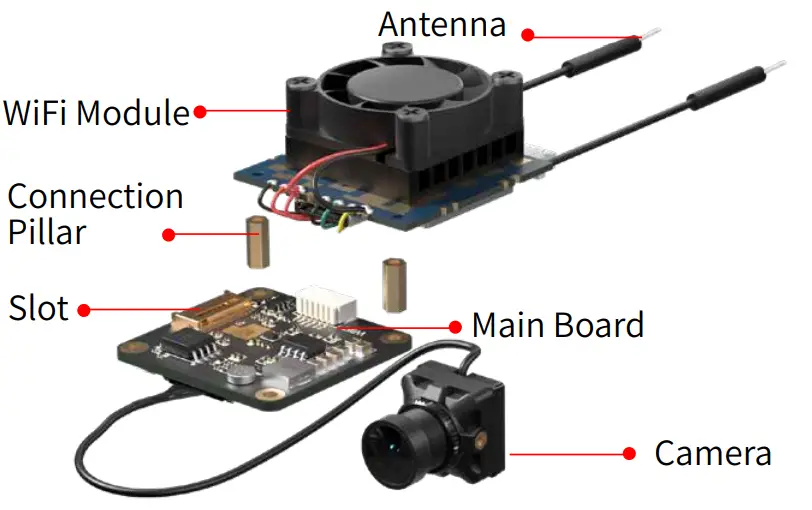
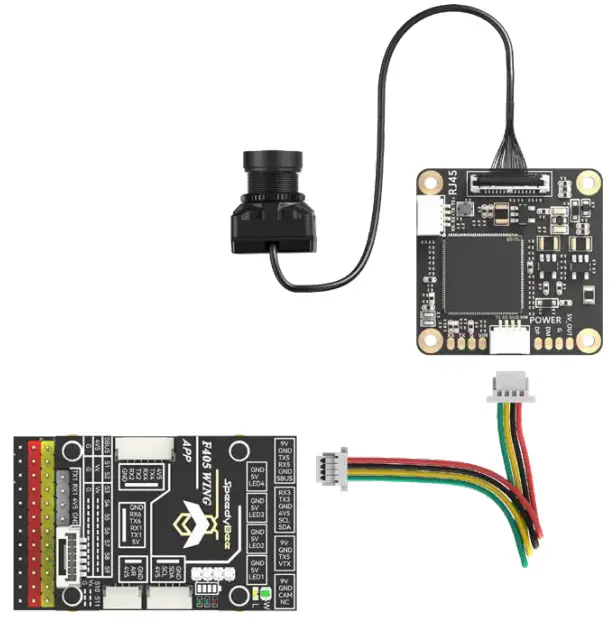
Component Overview
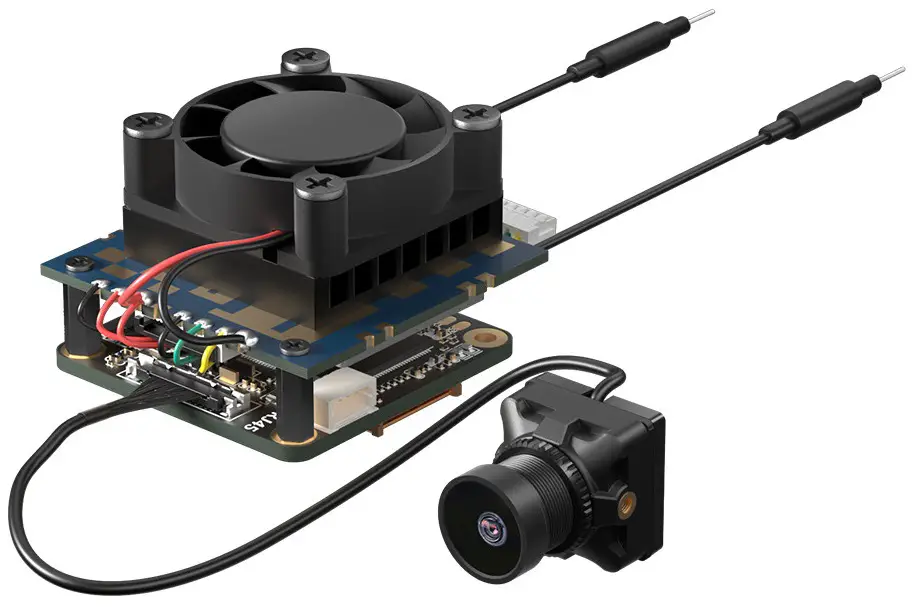
The WiFiLink consists of the following components: WiFi Module, Connection Pillar, Slot, Antenna Main Board, and Camera.
Setting Parameters
To set the parameters, ensure the Channel is set to 173 and the Video Codec is set to H.265.
Installation
Metal pillars must be used to connect the main board with the WiFi module for effective heat transfer. Two installation methods are available: Direct Stacking and Offset Stacking.
Flashing WiFiLink
To flash WiFiLink, follow the card flashing steps provided in the manual. Remember to prepare the required files and follow the upgrade steps accordingly.
Obtaining WiFiLink Keys and Configuration Files
Insert an empty SD card into the camera to generate the necessary configuration files.
Antenna Layout
Ensure antennas are spread apart to avoid entanglement and adjust them to point upwards for optimal signal transmission.
Setting WiFiLink Parameters
Edit the user file using Notepad++ to modify parameters such as Channel, Resolution, Bitrate, Contrast, etc.
Using the Ethernet Port
The default settings for the Ethernet port are IP Address: 192.168.1.10, Username: root, Password: 12345.
Pairing with Ground Station
Follow the provided illustration for installation and pairing instructions.
Frequently Asked Questions (FAQ)
- How do I pair WiFiLink with a different ground station?
Copy the WiFiLink’s gs.key to the corresponding location on the new ground station. - What are the default settings for the Ethernet port?
The default settings are IP Address: 192.168.1.10, Username: root, Password: 12345.
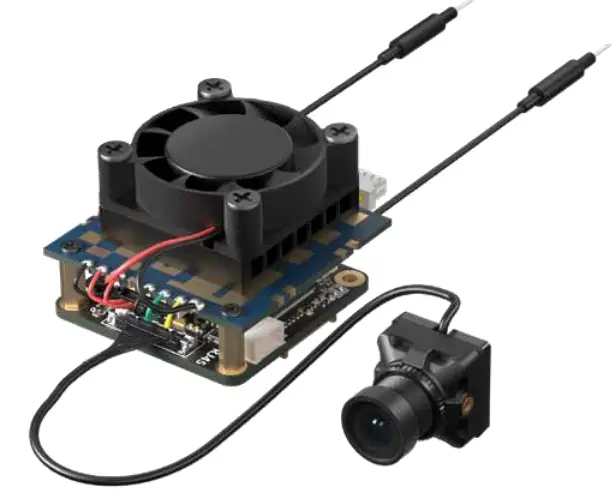
Component
Installation
Metal pillars must be used to connect the main board with the WiFi module to ensure effective heat transfer from the main board to the WiFi module.
Installation Method 1 Direct Stacking
Installation Method 2 Offset Stacking

Other Precautions
Antenna Layout
- Antenna Installation:
Ensure the two tail antennas are sufficiently spread apart to avoid entanglement, which could reduce signal interference. - Antenna Direction:
Adjust the antennas to point upwards whenever possible to avoid obstruction by the drone or battery, ensuring the best signal transmission.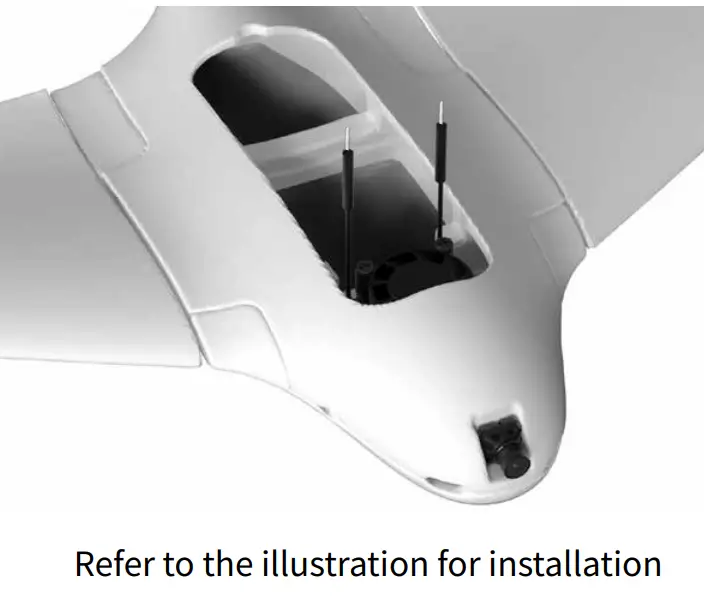
4PIN Power Cable Connection
The wiring sequence of the two ends of the 4PIN power cable is opposite. Confirm the direction before connecting to ensure correct insertion and avoid damaging the device.
Specifications
| Model | WiFiLink |
| Sensor | IMX415 |
| FOV | 160° |
| Resolution | 1702800PP@@1620FPS 1080P@90FPS/ |
| Power Supply | 9-30V(3S-6S) |
| LSepnescsModule | 1Le9n19gmthm20/M0m12mLens/MIPI Cable |
| Hole Distance | 25.5*25.5mm |
| PCB Size | 32mm*302mm (WaiFini BBooaarrdd)) |
| Weight | 30g |
| Antenna | IPEX1(5G) |
| Power Amplifier | 29dBm |
How to Use WiFiLink
WiFiLink requires no configuration. Simply follow the steps below to use it:
Install the APP
Install the FPVue APP or PixelPilot on an Android phone.
- FPVue APP Download:
https://github.com/gehee/FPVue_android/releases - PixelPilot Download:
https://github.com/OpenIPC/PixelPilot/releases
Copy and Replace the Key
Copy the“ gs.key key” file generated by WiFiLink into the phone’s storage.

Set Parameters
Set the Channel to 173, and the Video Codec to H.265.

Auxiliary Tool Links
- OTG Cable Reference to: https://item.jd.com/10087520840342.html#crumb-wrap
- 8812AU Wireless Network Adapter Reference to: https://item.taobao.com/item.htm?id=597898122636
How to Flash WiFiLink
Card Flashing Steps:
Prepare Files
Copy the“ WiFiLink-part0.bin” and“ WiFiLink-part1.bin” card flashing files to the root directory of an empty SD card.
Upgrade Steps
- Insert the SD card into the camera’s main board and power it on. The camera will automatically enter upgrade mode (about 15 seconds).
- Once the upgrade is complete (about 1 minute), the green light will stay on and the SD card content will be cleared. After re-powering, a new configuration file “( gs.key” and“ user”) will be generated on the SD card.
Card flashing file: https://www.runcam.com/download/runcamwifilink
How to Obtain WiFiLink Keys and Configuration Files
Insert the empty SD card into the camera and power it on. The camera will automatically generate the required configuration files upon startup.
How to Set WiFiLink Parameters
It is recommended to use Notepad++ to edit the user file, which only supports modifying the parameters listed under Available Values, including:
| Channel | Codec |
| ResolutionRatio | Bitrate |
| Mirror | Flip |
| Rotate | Contrast |
| Hue | Saturation |
| Luminance | … |
How to Use the Ethernet Port
Default Settings:
- IP Address:192.168.1.10
- Username:root
- Password:12345
How to Pair with Ground Station
WiFiLink is paired with the FPVue APP by default. If you need to pair it with another ground station, copy the WiFiLink’s“gs.key” key to the corresponding location on the ground station.
What Other Ground Stations Are Compatible
Computer and Radxa ZERO 3W Development Board
How to Use with a PC Ground Station
Download: https://github.com/OpenIPC/fpv4win/releases
Follow the steps below:
- Step 1
Insert the 8812AU wireless network adapter into the computer and reconfigure the driver using the Zadig program.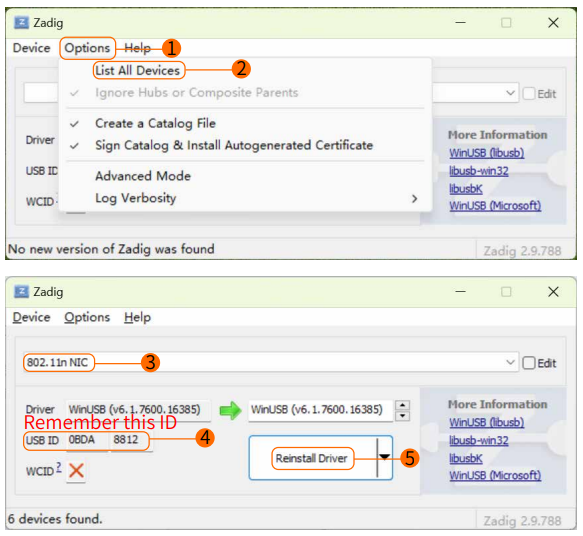
- Step 2
Replace the WiFiLink key file (gs.key) in the computer’s program folder. Double-click to open the“fpv4win” program, select the correct network adapter, Channel, and Codec, then click START to begin use.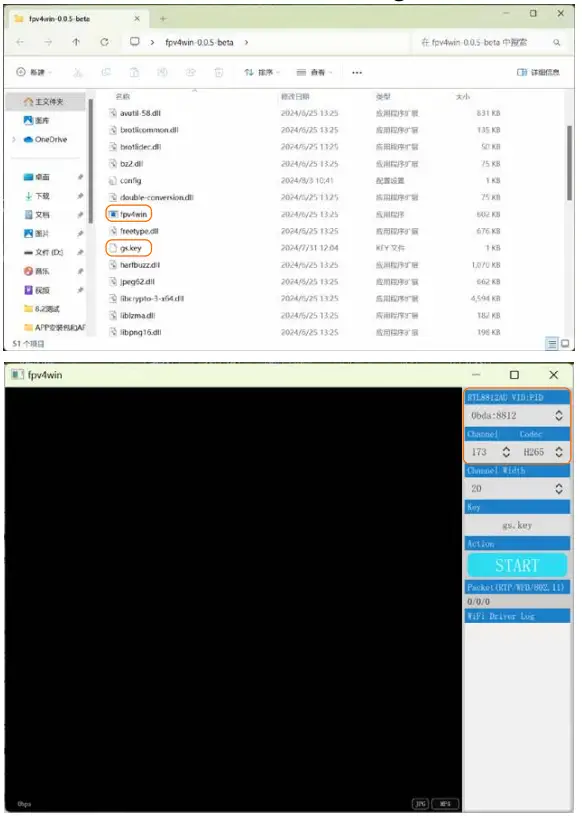
How to Use with Radxa ZERO 3W
Visit:
https://support.runcam.com/hc/en-us
Contact our technical support for detailed guidance.
Troubleshooting: What to Do If There Is No Video
Check Power Supply: Ensure the power supply is normal and verify that the Channel, Codec, and Key are correctly matched.
Troubleshooting: No FC OSD Information on Screen
Check Configuration
Ensure that the configuration settings are correct. The three parameters should be: 115 (corresponding to 115200), 0, 1, or 2 (corresponding to Mavlink1 or 2).
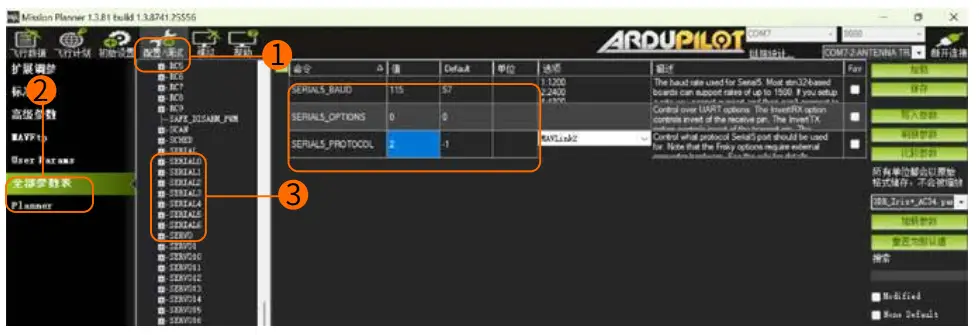
Check Serial Port
Confirm that the flight controller serial port data is normal and available, and ensure that the serial port wiring is correct. Note that TX and RX must be cross-connected.
Documents / Resources
 |
RunCam WiFiLink Based on OpenIPC [pdf] Installation Guide WiFiLink Based on OpenIPC, WiFiLink, Based on OpenIPC, OpenIPC |


