1. Введение
This manual provides essential information for the installation, operation, and maintenance of the Genuine Lenovo Motherboard, part number 5B20U54553. This motherboard is designed for Lenovo IdeaCentre Gaming 5-14IOB6 and Creator 5-14IOB6 desktop computers. Please read these instructions carefully before proceeding with installation to ensure proper function and to prevent damage to the component or your system.
2. Информация по технике безопасности
Всегда соблюдайте следующие меры предосторожности при работе с компонентами компьютера:
- Предотвращение электростатического разряда (ЭСР): Always wear an anti-static wrist strap or frequently touch a grounded metal object (like the computer chassis) before handling the motherboard. ESD can severely damage electronic components.
- Отключение питания: Ensure the computer is completely powered off and disconnected from the main power outlet before opening the chassis or installing any components.
- Обращаться с осторожностью: Hold the motherboard by its edges. Avoid touching components, pins, or circuit traces directly.
- Вентиляция: Ensure adequate ventilation around the computer to prevent overheating.
- Профессиональная установка: Если вы не уверены в каком-либо шаге, обратитесь за помощью к квалифицированному специалисту.
3. Содержимое упаковки
Убедитесь, что ваш пакет содержит следующие предметы:
- Lenovo IdeaCentre Gaming 5-14IOB6 / Creator 5-14IOB6 Motherboard (Part No. 5B20U54553)
- Note: Additional accessories such as SATA cables, I/O shields, or driver CDs may not be included with a replacement part and might need to be reused from your original system or purchased separately.
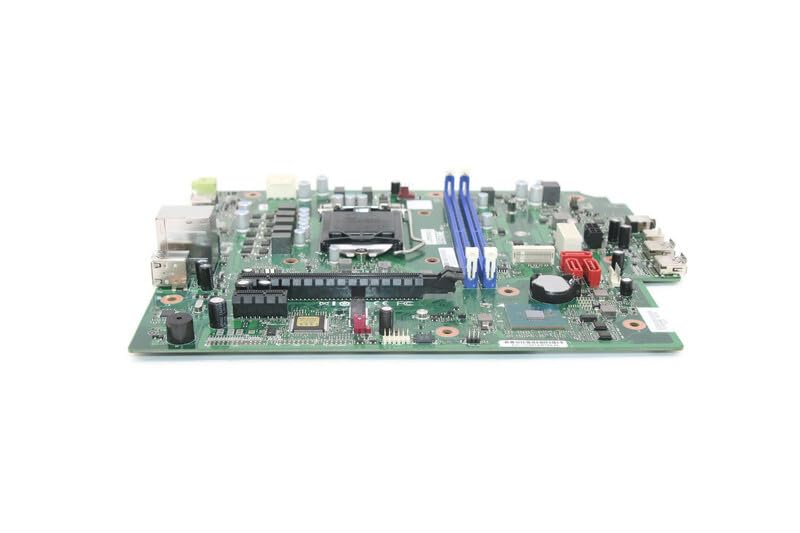
Image 1: Genuine Lenovo IdeaCentre Gaming 5-14IOB6 Motherboard (Part No. 5B20U54553). This image displays the motherboard with various ports, slots, and components visible, including the CPU socket, RAM slots, and PCIe slots.
4. Настройка и установка
Follow these steps for proper installation of the motherboard:
- Подготовьте свое рабочее место: Ensure a clean, well-lit, and static-free environment. Gather necessary tools such as a Phillips head screwdriver, anti-static wrist strap, and thermal paste (if reusing CPU).
- Выключить и отключить: Shut down your computer, unplug the power cord, and disconnect all peripheral cables.
- Откройте корпус: Для доступа к внутренним компонентам снимите боковую(ые) панель(и) корпуса компьютера.
- Удалите старую материнскую плату (если применимо): Disconnect all cables connected to the old motherboard (power, SATA, front panel, USB, audio, etc.). Unscrew the motherboard from the standoffs and carefully remove it. Remove CPU, RAM, and any expansion cards from the old motherboard if they are to be transferred.
- Установка процессора и кулера: If not pre-installed, carefully open the CPU socket lever, align the CPU with the socket (matching the triangle/arrow indicators), gently place it in, and close the lever. Apply thermal paste and install the CPU cooler.
- Установка оперативной памяти: Open the clips on the RAM slots, align the RAM modules with the notches, and press firmly until the clips snap into place.
- Установите новую материнскую плату: Carefully place the new motherboard into the chassis, aligning it with the standoffs. Secure it with screws.
- Соединительные кабели: Подключите заново все необходимые кабели:
- Main Power (24-pin ATX): Connect the large power connector from the power supply.
- CPU Power (4/8-pin EPS): Connect the smaller power connector near the CPU.
- Кабели SATA: Connect storage drives (HDD/SSD) to the SATA ports.
- Разъемы на передней панели: Connect power button, reset button, HDD LED, power LED, and front USB/audio headers. Refer to your chassis manual for specific pin layouts if needed.
- Заголовки вентиляторов: Connect case fans and CPU fan to the appropriate headers.
- Карты расширения: Install any graphics cards or other PCIe cards into their respective slots and secure them.
- Закрытое шасси: Once all components are connected and secured, replace the side panel(s).
- Первоначальная загрузка: Reconnect the power cord and peripherals. Power on the computer. The system should boot to the BIOS/UEFI or operating system.
5. Эксплуатация материнской платы
The motherboard functions as the central hub of your computer, facilitating communication between all components. Once installed correctly, its operation is largely automatic, managed by the BIOS/UEFI firmware and the operating system.
- Настройки BIOS/UEFI: To access the BIOS/UEFI setup, press the designated key (often Дель, F2, Ф10, или Ф12) during startup. Here you can configure boot order, system time, hardware settings, and monitor system status.
- Установка драйвера: Ensure all necessary drivers for the motherboard's chipsets, integrated graphics (if applicable), network, and audio are installed. These are typically provided by Lenovo or can be downloaded from their official support webсайт.
- Обновления системы: Регулярно обновляйте операционную систему и драйверы для обеспечения оптимальной производительности и безопасности.
6. Техническое обслуживание
Proper maintenance helps prolong the life of your motherboard and overall system:
- Удаление пыли: Regularly clean the interior of your computer case to prevent dust buildup on components, which can impede airflow and cause overheating. Use compressed air or a soft brush.
- Мониторинг температуры: Use software tools to monitor CPU and chipset temperatures. Ensure they remain within safe operating limits.
- Обновления прошивки: Периодически проверяйте поддержку Lenovo. website for BIOS/UEFI updates. Only update if necessary and follow the instructions precisely.
- Управление кабелями: Убедитесь, что кабели аккуратно проложены, чтобы улучшить циркуляцию воздуха и предотвратить помехи.
7. Поиск Неисправностей
Если после установки у вас возникли проблемы, обратите внимание на следующее:
- Нет питания: Double-check all power connections (24-pin ATX, 4/8-pin EPS). Ensure the power supply is switched on and the wall outlet is functional.
- Нет дисплея: Verify that the monitor is connected to the correct graphics output (either integrated or dedicated GPU). Reseat the graphics card and RAM modules.
- Система не загружается / Ошибки POST: Listen for beep codes (if your system has a speaker) or check for diagnostic LEDs on the motherboard. Consult the Lenovo documentation for beep code meanings. Reseat RAM, CPU, and expansion cards.
- Периферийные проблемы: If USB ports or other peripherals are not working, check their connections and ensure drivers are installed.
- Проблемы с операционной системой: If the OS fails to load, try booting into safe mode or using recovery options. A fresh installation of the operating system might be necessary after a motherboard replacement.
8. Технические характеристики
Key specifications for the Lenovo IdeaCentre Gaming 5-14IOB6 Motherboard (Part No. 5B20U54553):
| Особенность | Деталь |
|---|---|
| Производитель | Леново |
| Название модели | IdeaCentre Gaming 5-14IOB6 |
| Номер детали | 5B20U54553 |
| Сокет ЦП | BGA 437 |
| Совместимые устройства | Персональный компьютер |
| Технология оперативной памяти | DDR4 |
| Доступные слоты памяти | 2 |
| Тип чипсета | Intel B75 Экспресс |
| Платформа | Виндовс 10 |
| Вес товара | 3 фунта |
9. Гарантия и поддержка
This motherboard is a genuine replacement part for Lenovo systems. For warranty information, please refer to the terms and conditions provided by your seller or the original Lenovo product warranty documentation for your IdeaCentre Gaming 5-14IOB6 or Creator 5-14IOB6 system.
For technical support, driver downloads, and further documentation, please visit the official Lenovo support website and search for your specific system model (IdeaCentre Gaming 5-14IOB6 or Creator 5-14IOB6) or the motherboard part number (5B20U54553).
Поддержка Lenovo Webсайт: https://support.lenovo.com


