1. Introducere
The Machenike G3V2 Bluetooth Controller is a versatile gaming peripheral designed for multi-platform compatibility, including Switch, iOS, Android, and Windows PC. It features Hall Effect joysticks and triggers, customizable buttons, RGB lighting, and a dedicated charging station for an enhanced gaming experience.
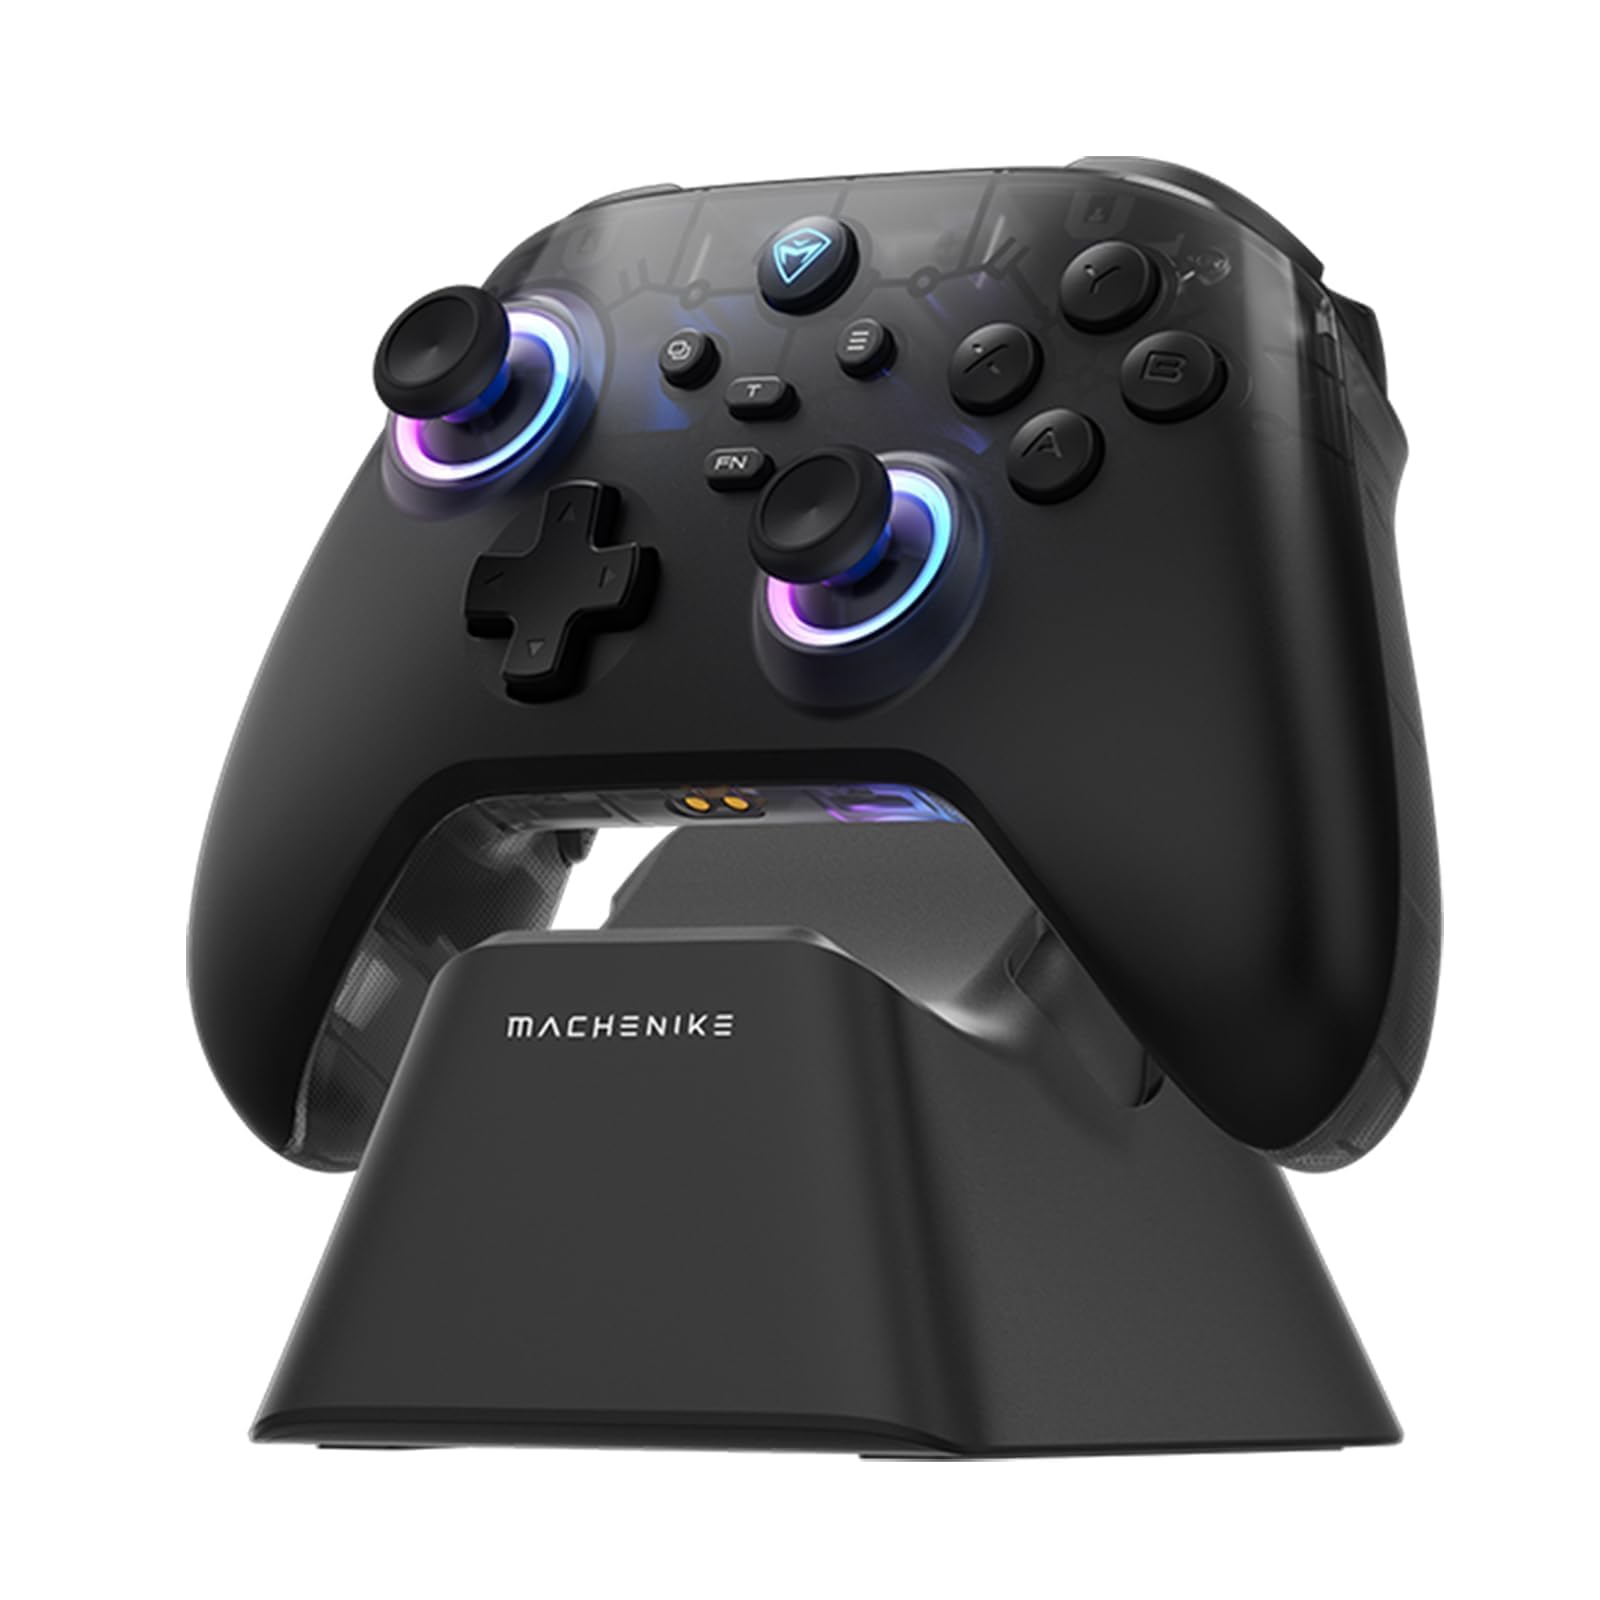
Image: The Machenike G3V2 Bluetooth Controller, showcasing its ergonomic design and vibrant RGB lighting around the joysticks.
2. Caracteristici cheie
- Lightning-Fast 1000Hz Responsiveness: Equipped with ultra-high gaming responsiveness for instant command capture and millisecond-level feedback.
- Convenient Charging Dock: Includes a dedicated charging dock for efficient and fast recharging via USB-C, protecting the controller and ensuring optimal performance.
- Dual Hall-Effect Joysticks and Triggers: Features newly upgraded Hall-Effect sensing joysticks and high-precision trigger buttons for superior control and durability, eliminating drift.
- Customizable Force Adjustable Stick Tension: Unique force adjustment feature allows customization of joystick feedback from lightweight to precise, adapting to various game needs.
- Fast Charging & Extended Playtime: Built-in 1000mAh high-capacity battery provides extended playtime with fast-charging technology.
- Suport multi-platformă: Compatible with Switch/Switch 2, iOS, Android, and Windows PC.
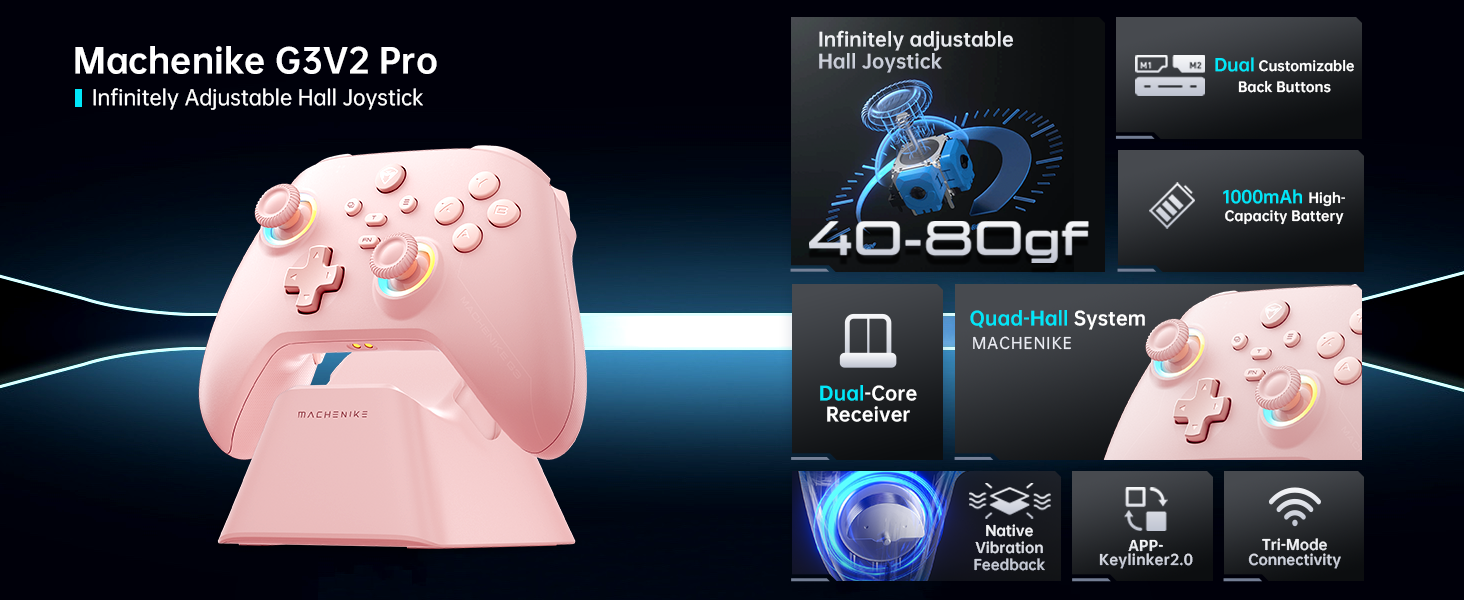
Imagine: Un pesteview of the Machenike G3V2 controller's key features, including its Hall Effect joysticks, customizable back buttons, and connectivity options.
3. Configurare și conectare
3.1 Connecting to Nintendo Switch (Bluetooth Mode)
- Ensure your controller is charged.
- Pe controler, apăsați și mențineți apăsat butonul Y + Home buttons simultaneously until the indicator light flashes rapidly, changing from slow to fast flashing. This puts the controller into Switch pairing mode.
- Pe Nintendo Switch, navighează la meniul HOME.
- Select the 'Controllers' icon, then choose 'Change Grip/Order'.
- Wait for the controller to connect automatically. Once connected, the controller will vibrate, and its icon will appear on the Switch screen.
- Apăsați tasta A butonul de pe controler pentru a confirma.
- To toggle between Switch and Xbox button layouts (A/B, X/Y swap), press FN + A.
Video: A tutorial demonstrating how to connect the Machenike G3V2 controller to a Nintendo Switch console via Bluetooth mode, including button presses and on-screen confirmation.
3.2 Connecting to PC/iOS/Android (Bluetooth/Wired/2.4G)
The Machenike G3V2 controller supports multiple connection modes for various platforms:
- Bluetooth: For iOS, Android, and some PC setups. Activate Bluetooth on your device and search for 'Machenike G3V2' to pair.
- Wireless 2.4G: Use the included USB dongle for PC and other compatible devices. Plug the dongle into your device, then power on the controller.
- Cu fir: Connect the controller directly to your PC or compatible device using a USB-C cable.
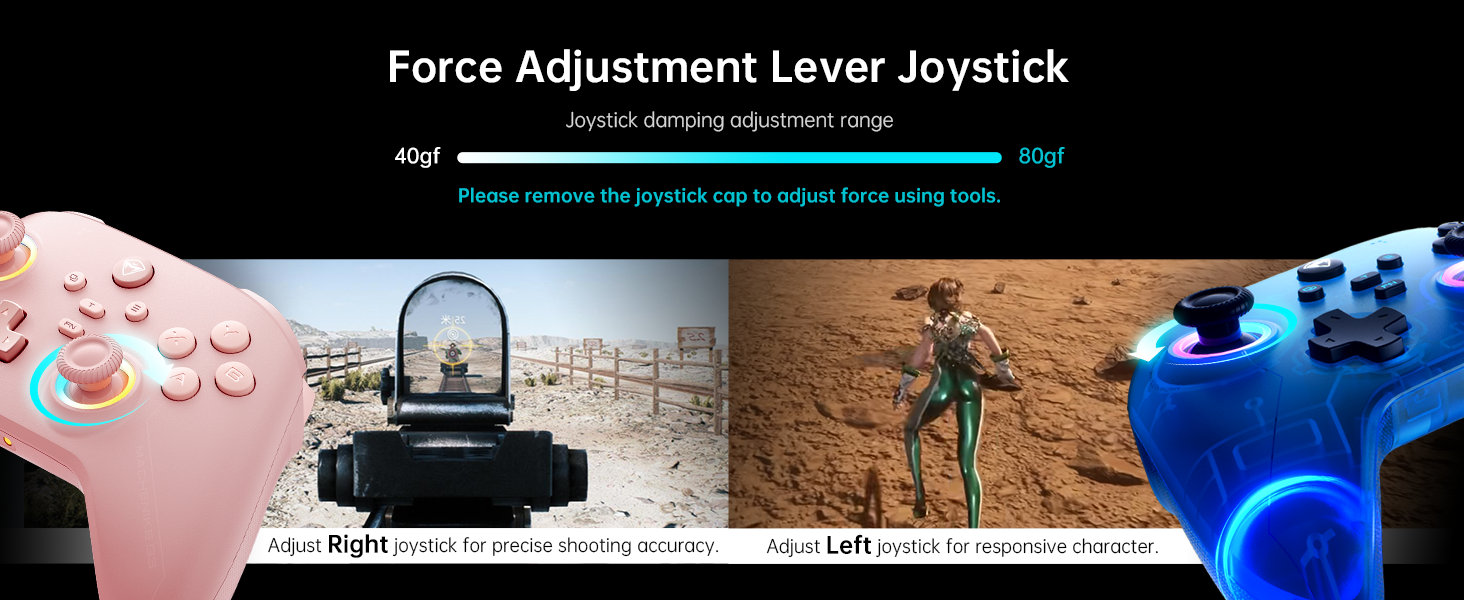
Image: The Machenike G3V2 controller highlighting its ergonomic design, anti-slip grip, and responsive triggers for comfortable and precise control.
4. Operare și personalizare
4.1 Programmable Back Buttons (M1/M2)
The controller features two customizable back buttons (M1 and M2) that can be assigned to single keys or complex macros. This is particularly useful for games requiring quick actions or combos.
- To Assign a Single Key:
A. apasa si tine apasat FN + M1 (or M2) simultaneously until the joystick light ring glows with a soft blue breathing effect, indicating recording mode.
b. Press the desired button you wish to assign (e.g., 'A' button).
c. presa M1 (or M2) once to save the assignment. The light ring will flash three times, confirming successful saving. - To Clear an Assignment:
A. apasa si tine apasat FN + M1 (or M2) simultaneously to enter recording mode.
b. Without pressing any other button, press M1 (or M2) again to save a blank input. The light ring will flash three times, clearing the previous assignment. - To Record a Macro (Multiple Keys):
A. apasa si tine apasat FN + M1 (or M2) simultaneously to enter recording mode.
b. Press the sequence of keys you want to record (e.g., A, B, X, Y, RB, LB). The timing between key presses will be recorded.
c. presa M1 (or M2) once to save the macro. The light ring will flash three times.
Video: A detailed guide on how to set up and record keystroke macros using the programmable back buttons (M1/M2) on the Machenike G3V2 controller.
4.2 Joystick and Trigger Calibration
Calibration helps maintain accuracy and prevent drift in joysticks and triggers. This can be done whether the controller is off or connected.
- Calibrare joystick:
A. Apăsați și mențineți apăsat B + Back + Home buttons simultaneously until the blue LED starts flashing.
b. Move both joysticks in full circles (about three rotations) slowly and steadily.
c. Apăsați tasta Început button to save. The controller will power off, indicating successful calibration. - Calibrarea declanșatorului:
A. Apăsați și mențineți apăsat Y + Back + Home buttons simultaneously until the red LED starts flashing.
b. Press both triggers normally all the way down three times. Ensure gentle but full pressure.
c. Apăsați tasta Început button to save. The controller will power off, indicating successful calibration.
After calibration, reconnect the controller to your device to test the new settings. Always use normal, gentle pressure during calibration for accurate results.
Video: A guide on how to calibrate the joysticks and triggers of the Machenike G3V2 controller to ensure optimal performance and accuracy.
4.3 Iluminare RGB
The controller features dynamic RGB lighting around the joysticks. Specific controls for changing lighting modes or colors can often be found in the Keylinker 2.0 mobile application or through dedicated button combinations (refer to the app for advanced customization).
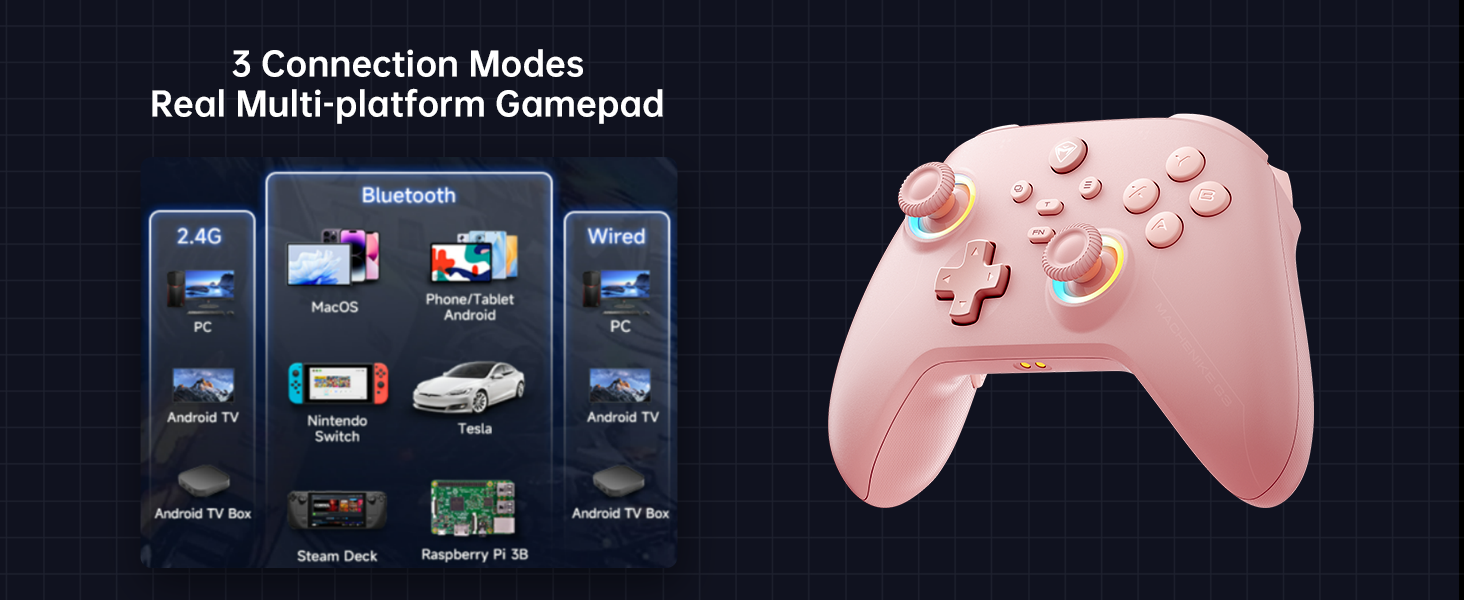
Image: The Machenike G3V2 controller illustrating its 4-level native vibration feedback, providing immersive experiences for various game genres.
5. Încărcare
The Machenike G3V2 controller comes with a 1000mAh high-capacity battery and a dedicated charging dock.
- Utilizarea stației de încărcare: Simply place the controller onto the dedicated charging dock. The built-in USB-C port on the dock facilitates quick recharging.
- Încărcare directă prin USB-C: You can also charge the controller directly using a USB-C cable connected to a power source.
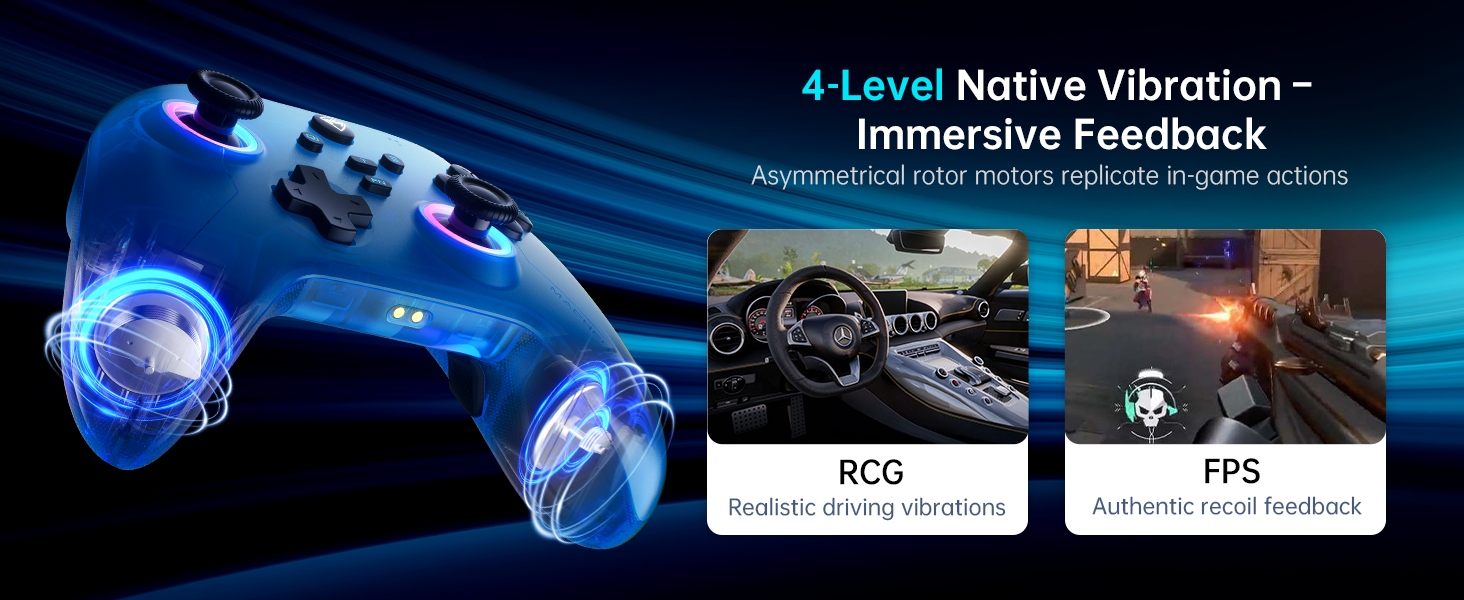
Image: The Machenike G3V2 controller resting on its dedicated charging dock, ready for an instant power boost.
6. Compatibilitate
- Platforme acceptate: Nintendo Switch, Switch 2, iOS, Android, Windows PC.
- Nu este compatibil cu: Xbox, PlayStation, or GeForce Now.
- For other game platforms not explicitly mentioned, please consult customer service before purchase.
7. Întreținere
- curatenie: Folosiți o cârpă moale și uscată pentru a curăța controlerul. Evitați utilizarea substanțelor chimice dure sau a materialelor abrazive.
- Depozitare: Depozitați controlerul într-un loc răcoros și uscat, ferit de lumina directă a soarelui și de temperaturi extreme.
- Îngrijirea bateriei: Pentru a prelungi durata de viață a bateriei, evitați descărcarea completă frecventă a controlerului. Încărcați-l regulat, chiar dacă nu îl utilizați pentru perioade lungi de timp.
8. Depanare
- Controlerul nu se conectează:
- Ensure the controller is fully charged.
- Verify the correct pairing mode is activated for your device (e.g., Y+Home for Switch).
- On your device, try forgetting the controller from Bluetooth settings and re-pairing.
- For PC, try connecting via the 2.4G dongle or wired connection. - Joystick Drift or Inaccuracy:
- Perform joystick calibration as described in Section 4.2. - Trigger Issues:
- Perform trigger calibration as described in Section 4.2. - Butoanele care nu răspund:
- Ensure the controller is properly connected.
- Check if any programmable back buttons (M1/M2) have unintended assignments (clear them if necessary).
- Reconnect the controller. - Probleme de încărcare:
- Ensure the charging dock or USB-C cable is properly connected.
- Încercați un alt cablu USB-C sau adaptor de alimentare.
9. Specificații
| Caracteristică | Detaliu |
|---|---|
| Numărul de model | PE-Upgrade |
| ASIN | B0F93RPT5H |
| Producător | Machenike |
| Greutatea articolului | 0.529 uncii |
| Dimensiuni pachet | 6.93 x 6.46 x 3.23 inci |
| baterii | 1 baterie cu litiu polimer (inclusă) |
| Conectivitate | Bluetooth, Wireless 2.4G, Cu fir (USB-C) |
| Rata de sondare | 1000 Hz |
| Joystick-uri | Hall Effect, Adjustable Tension (40-80gf) |
| Declanșatoare | Hall Effect, 255 Levels, Millimeter Precision |
| Butoane programabile | 2 Back Buttons (M1, M2) |
| Vibrație | 4-Level Native Vibration Feedback |
10. Garanție și asistență
Machenike products are designed for durability and performance. For warranty information, technical support, or service inquiries, please refer to the official Machenike website-ul lor web sau contactați direct serviciul lor de asistență pentru clienți. Păstrați bonul fiscal pentru reclamații în garanție.
Resurse online și întrebări frecvente pot fi disponibile și pe Machenike Store on Amazon.


