Rapsodo
Pitching 2.0 Conversion Kit
Quickstart Guide
Ver. 1.0
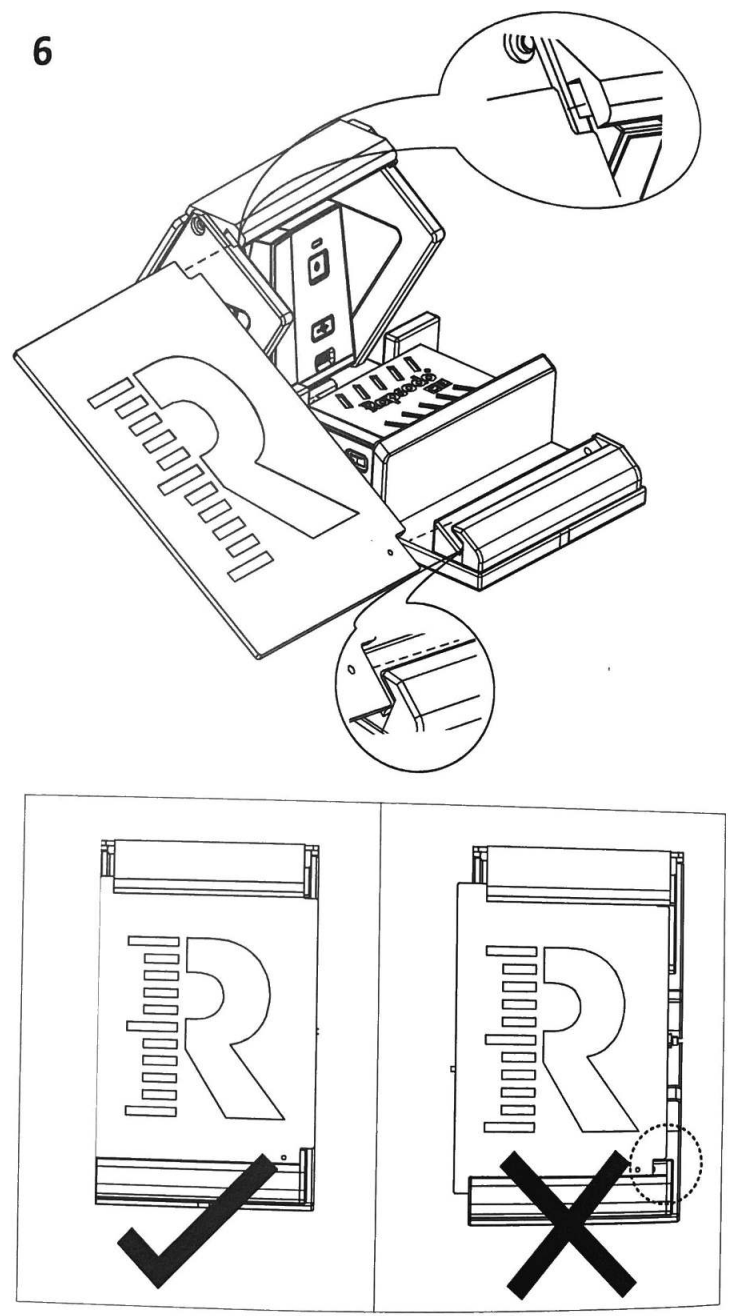
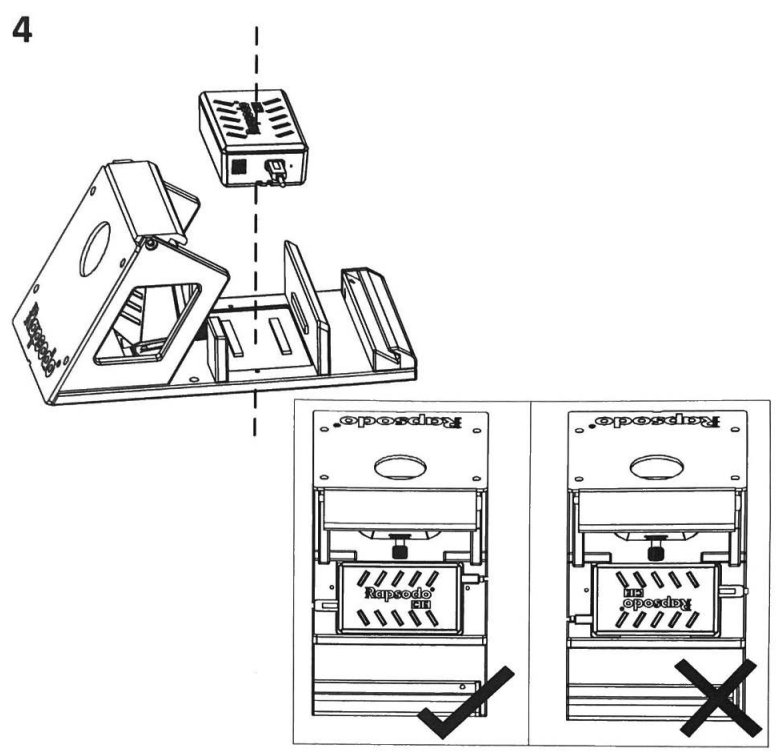
Package Contents
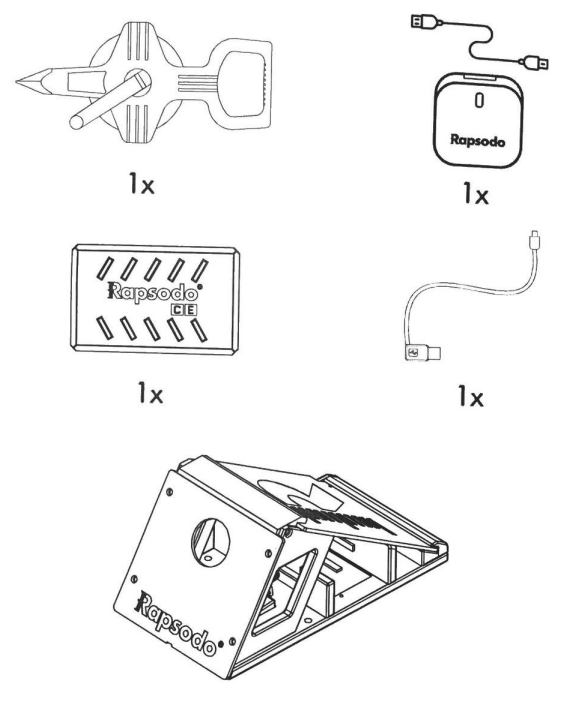
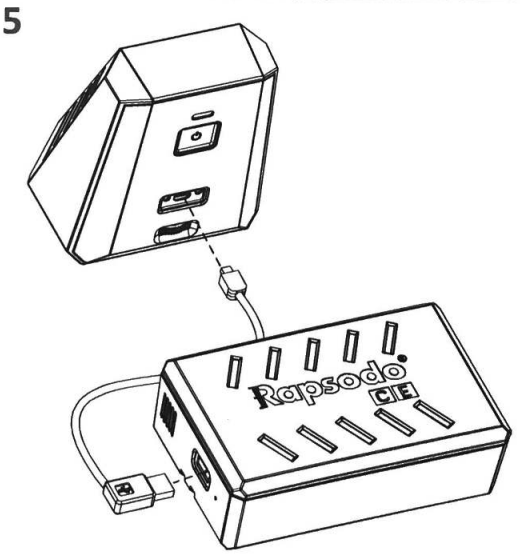
1X
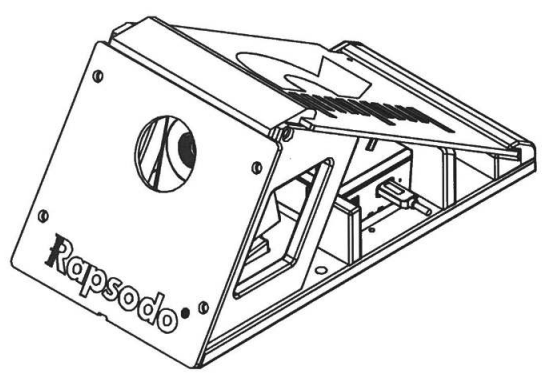
NOTE: Rapsodo Monitor is not included in the package. For illustration purposes only

- Upgrade Back Pitching Monitor firmware to the latest Back Pitching Firmware
Ensure that upgraded firmware is version 0.5 and above
use the software provided to upgrade the monitor to ground pitching.
Contact support@rapsodo.com for more details
![]() upgrading of Back Pitching Monitor is irreversible
upgrading of Back Pitching Monitor is irreversible
 |
 |
 |
 |
 |
Calibrating Your Monitor
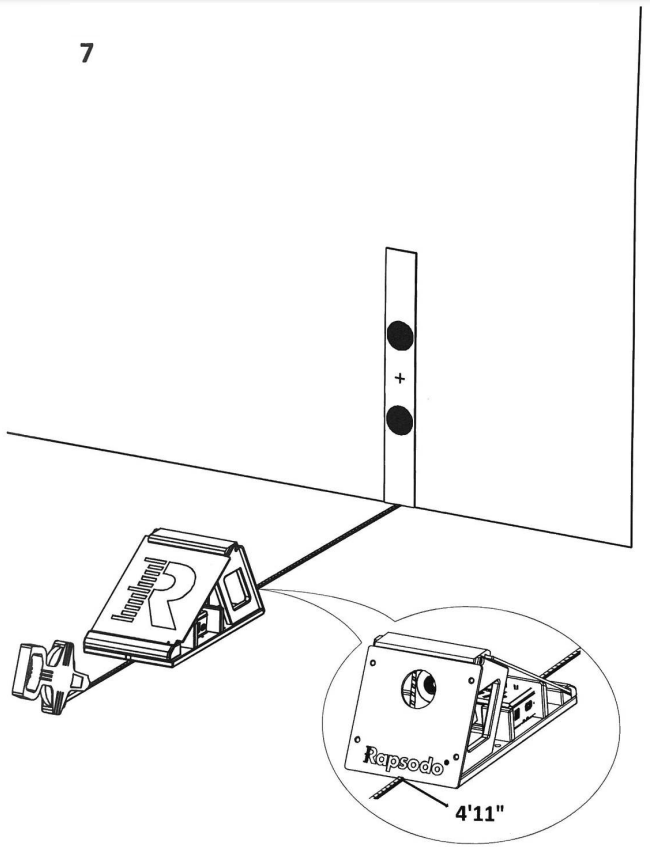
- Place calibration ruler against the wall
- Place the Tank 4’11” away from the ruler
* Take the thickness of the ruler into consideration when measuring the distance from ruler to tank - Connect iPad to Monitor to continue calibration
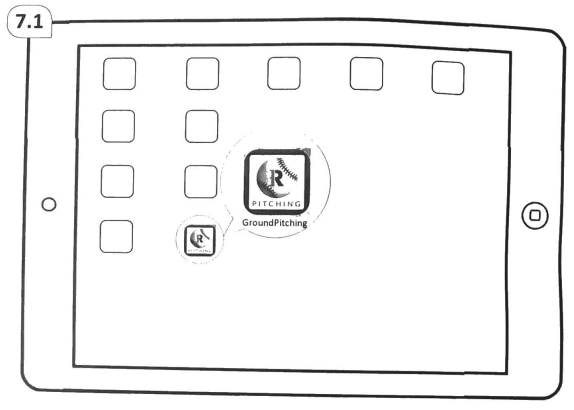 Open the “Rapsodo Ground Pitching” App on your iPad
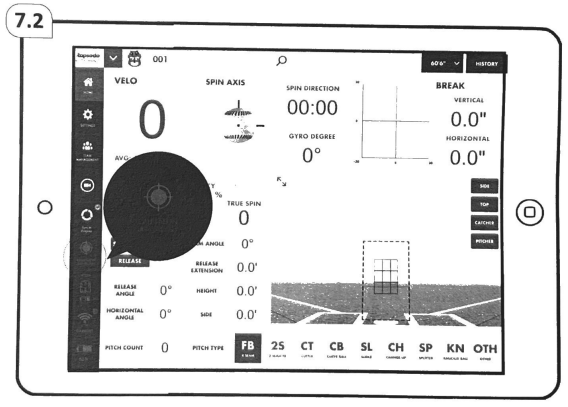
The ‘HOME’ screen will appear. Tap the ‘Calibration’ button.
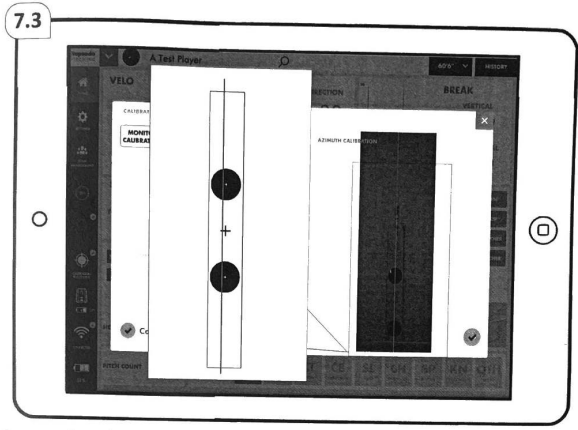
Ensure that the red line is aligned so that it cuts through both circles

Tap on the ‘MONITOR CALIBRATION button
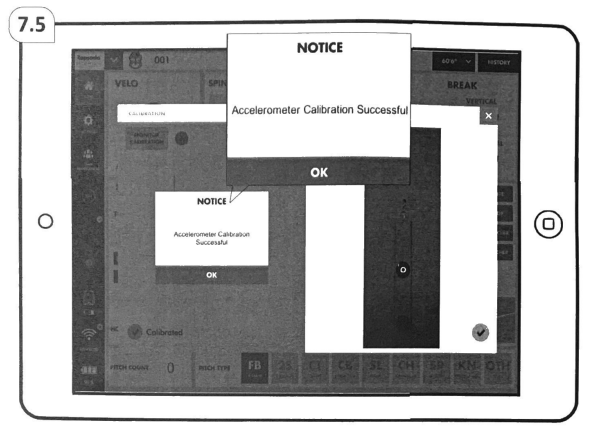
Once calibrated, a ‘NOTICE’ will appear followed by a ‘Green circle’ indicating the center of the circle. Tap ‘OK’ to continue
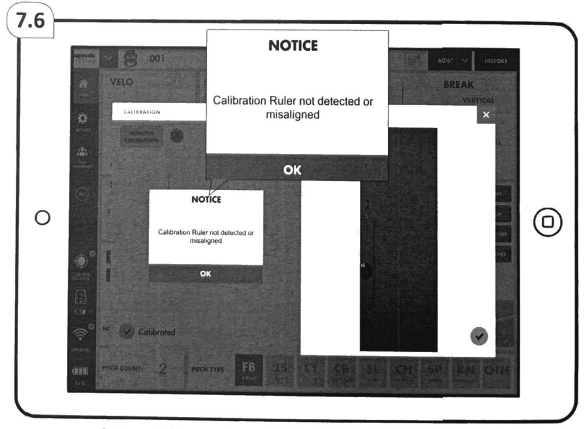
If calibration fails, a ‘NOTICE’ will appear to alert you. Tap ‘OK’ and align the ruler again to continue calibration.
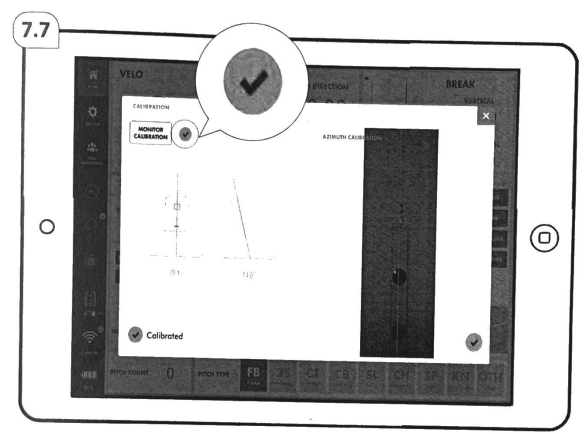
Once successfully calibrated, a ‘green tick’ will be shown
NOTE: You can always hit on the ‘Calibration’ button again to re-calibrate if you feel that the data collected is inaccurate
Tank Placement
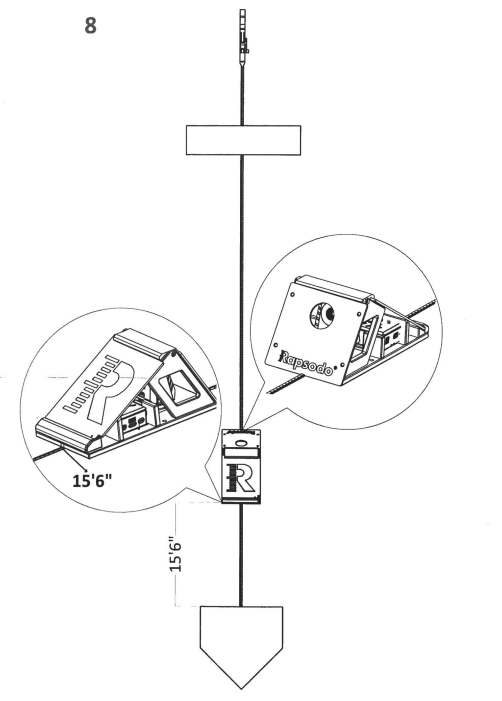
TIP: Extend the measuring tape so that it cuts across both the pitcher’s plate and home plate before placing the tank in position. So to ensure that all three components are aligned in the center
Documents / Resources
 |
Rapsodo Pitching 2.0 Conversion Kit [pdf] User Guide Pitching 2.0 Conversion Kit, Pitching 2.0, Conversion Kit |