1. Introdução
This manual provides essential information for the proper use and maintenance of your Longer Honeycomb Laser Bed and Aluminum Working Table. This accessory is designed to enhance the performance and safety of your laser engraver machine.
The Longer double-layer protection system integrates a honeycomb laser bed for efficient smoke evacuation and an aluminum working table to prevent heat damage. This design ensures cleaner cuts and extends the lifespan of various engraving materials such as wood, acrylic, and leather.

Figura 1.1: Overview of the Longer Honeycomb Laser Bed and Aluminum Working Table.
Principais características:
- Double-Layer Protection: Combines a honeycomb structure for smoke exhaust and an aluminum panel for heat resistance.
- Efficient Smoke Evacuation: The honeycomb design allows smoke to pass through, reducing residue and improving engraving quality.
- Proteção para computador: The aluminum panel shields your work surface from laser damage and heat.
- Compatibilidade versátil: Suitable for various laser engraver machines and materials.
2. Configuração e montagem
The Longer Honeycomb Laser Bed and Aluminum Working Table is designed for ease of use, arriving largely pre-assembled. No complicated installation process is required for the bed itself.
2.1 Desembalagem e inspeção
Carefully remove all components from the packaging. Inspect for any signs of damage during transit. Ensure all listed items are present.
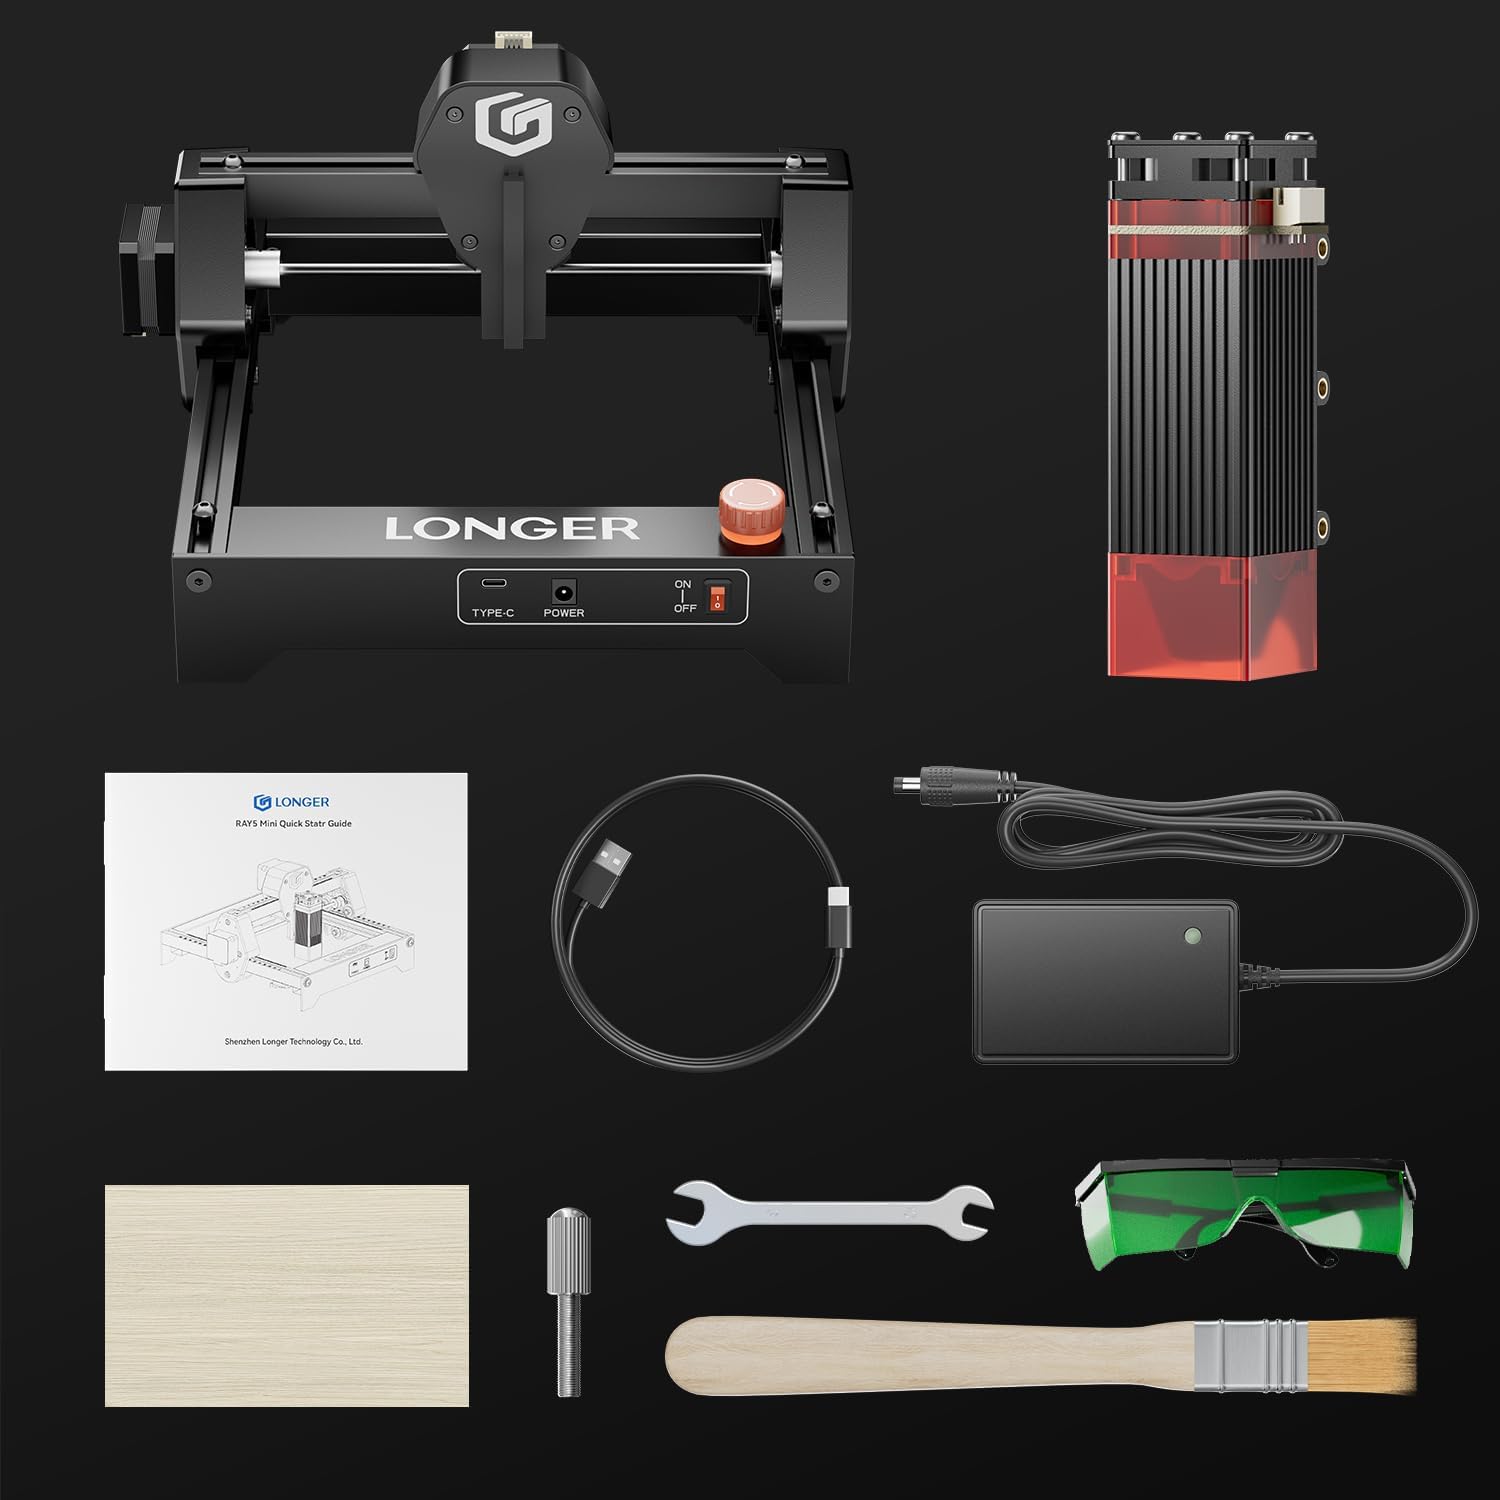
Figure 2.1: The package includes the pre-assembled laser bed, manual, goggles, power adapter, wrench, wooden brush, focus block, and data cable.
2.2 Posicionamento
Place the honeycomb laser bed on a stable, level, and heat-resistant surface. Ensure there is adequate ventilation around the setup to allow for proper smoke and fume extraction during operation.

Figure 2.2: The pre-assembled frame and laser engraver module are ready for use.
3. Instruções de operação
This section outlines the general steps for using the Longer Honeycomb Laser Bed with your laser engraver. Always refer to your specific laser engraver's manual for detailed operational procedures.
3.1 Material Placement
Place the material to be engraved or cut directly onto the honeycomb surface. Ensure the material lies flat and is securely positioned to prevent movement during the engraving process.
3.2 Processo de gravação
The honeycomb structure facilitates efficient smoke removal, leading to cleaner engraving results and reduced charring on the underside of materials. The aluminum panel beneath protects your desktop from heat and stray laser beams.
Video 3.1: Demonstration of a laser engraver operating on a honeycomb bed, showing material placement and the engraving process.
3.3 Compatible Materials and Software
The laser bed supports engraving and cutting on a wide range of materials, including wood, acrylic, leather, paper, and more. The engraver itself is compatible with various operating systems (macOS, Windows, Linux) and software like LightBurn and LaserGRBL.

Figura 3.1: Examples of various materials that can be engraved, including leather, metallic paint, wood, painted metal, food, rubber, paper, ceramic, and glass.

Figure 3.2: The laser engraver supports macOS, Windows, and Linux operating systems, and is compatible with LightBurn and LaserGRBL software, offering both WiFi and USB connectivity.
3.4 Precision and Speed
The design of the laser bed contributes to high-speed engraving capabilities and fine detail. The engraver can achieve a spot size of 0.04x0.04mm, allowing for intricate designs.

Figure 3.3: The laser engraver demonstrates high-speed engraving at 12000 mm/min, showing a significant speed advantage over other models.

Figure 3.4: A comparison highlighting the outstanding performance and finer detail achieved with a 0.04*0.04 mm spot size compared to 0.15*0.15 mm.
4. Informações de segurança
Operating laser equipment requires strict adherence to safety protocols. This honeycomb laser bed is designed with features to enhance safety, but user vigilance is paramount.
4.1 Segurança do Laser
Always wear appropriate laser safety goggles when operating the laser engraver. The laser module includes an anti-laser protective cover, but direct exposure to the laser beam can cause severe eye damage.

Figure 4.1: The laser module features an anti-laser protective cover, and premium laser filter glasses are provided for eye protection.
4.2 Emergency Stop and Limit Switches
The laser engraver is equipped with an emergency stop button for immediate shutdown in case of an unexpected event. X and Y axis limit switches provide homing and positioning functions, preventing the laser head from exceeding its operational boundaries.

Figure 4.2: The control panel includes an emergency stop button and a user-friendly ON/OFF switch for enhanced safety.

Figure 4.3: The laser engraver is equipped with X and Y axis limit switches to ensure precise homing and positioning, preventing movement beyond the working area.
5. Manutenção
Regular maintenance ensures the longevity and optimal performance of your honeycomb laser bed.
5.1 Cleaning the Honeycomb
Over time, debris and residue from engraving can accumulate in the honeycomb cells. Periodically clean the honeycomb structure using a brush or compressed air to maintain efficient smoke evacuation. Ensure the laser engraver is powered off and disconnected before cleaning.
5.2 Cleaning the Aluminum Panel
Wipe the aluminum working table with a soft, damp cloth to remove any dust or residue. Avoid abrasive cleaners that could scratch the surface.
6. Solução De Problemas
This section addresses common issues you might encounter. For more complex problems, please refer to your laser engraver's manual or contact customer support.
6.1 Uneven Engraving/Cutting
- Check Material Flatness: Ensure the material is perfectly flat on the honeycomb bed. Warped materials can lead to inconsistent focus and results.
- Clean Honeycomb: Accumulated debris can obstruct the laser path or cause uneven support. Clean the honeycomb as described in the Maintenance section.
6.2 Excessive Smoke/Residue
- Verificar ventilação: Ensure your workspace has adequate ventilation and that any exhaust systems are functioning correctly.
- Clean Honeycomb: A clogged honeycomb will hinder smoke evacuation.
7. Especificações
| Recurso | Especificação |
|---|---|
| Dimensões do produto | 18.78 x 18.9 x 2.68 polegadas |
| Número do modelo do item | Favo de mel |
| Peso do item | 8.8 libras |
| Fabricante | LONGER3d |
| Material | Honeycomb structure with Aluminum Panel |
8. Garantia e Suporte
For warranty information and technical support, please refer to the documentation provided with your original laser engraver machine or contact Longer customer service directly. Keep your purchase receipt for warranty claims.
Normalmente, você encontra as informações de contato do suporte no site oficial do fabricante. website ou através do revendedor onde o produto foi adquirido.


