1. Introdução
This manual provides essential instructions for the installation, operation, and maintenance of your Lorex 1080p 8-Channel 1TB Wired DVR Security System. Please read this manual thoroughly before using the product to ensure proper setup and functionality.

Imagem 1.1: Terminadoview of the Lorex 1080p 8-Channel 1TB Wired DVR Security System components.
1.1 O que vem na caixa
- 1080p Full HD 8-Channel Security System with 1 TB DVR
- Four 1080p Night Vision Dome Cameras
- Power adapters for DVR and cameras
- Video cables for camera connection
- Mouse USB
- Cabo Ethernet
- Hardware de montagem
2. Configuração
2.1 Conexão DVR
- Conectar a um monitor: Use an HDMI or VGA cable to connect the DVR to a compatible monitor.
- Conectar mouse USB: Plug the included USB mouse into an available USB port on the DVR.
- Conexão de rede (opcional): Para controle remoto viewEm seguida, conecte um cabo Ethernet da porta LAN do DVR ao seu roteador.
- Conexão de energia: Connect the DVR's power adapter to the DVR and then to a power outlet.

Image 2.1: Rear panel of the DVR with connection ports.
2.2 Instalação da câmera
The included dome cameras are designed for both indoor and outdoor use, featuring IP67 weatherproof rating and durable metal housing.
- Selecione o local de montagem: Escolha um local que ofereça o desejado viewing angle and is within reach of the video and power cables. Consider areas that offer optimal coverage and minimize blind spots.
- Instale as câmeras: Use the provided mounting hardware to securely attach the cameras to a wall or ceiling. Ensure the camera is positioned correctly for the desired field of view.
- Connect Video and Power: Connect the camera's video cable to an available BNC input on the DVR. Connect the camera's power cable to the power adapter and then to a power source.

Image 2.2: Dome camera mounted on an exterior wall.

Image 2.3: Dome camera mounted under eaves for subtle security.
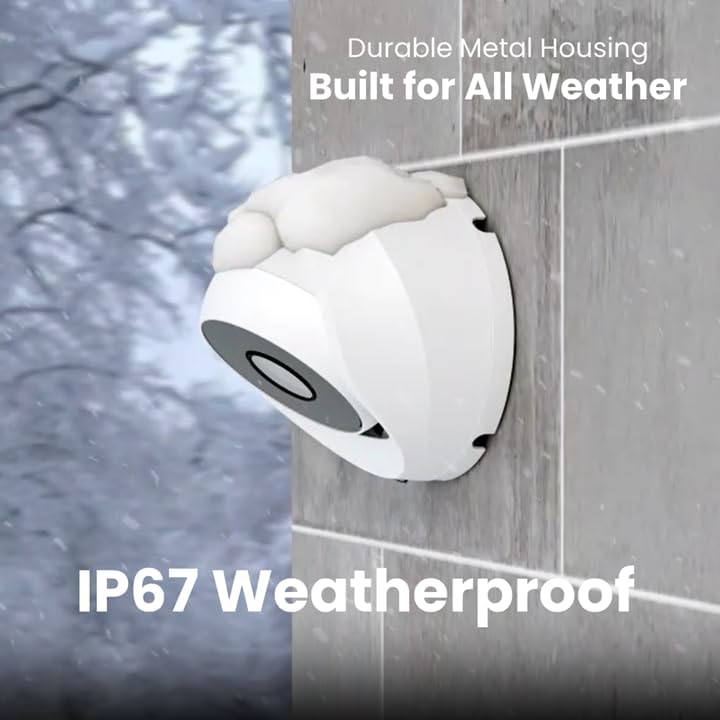
Image 2.4: Camera demonstrating IP67 weatherproof durability.
2.3 Configuração Inicial
After powering on the DVR, follow the on-screen prompts to complete the initial setup, which typically includes:
- Seleção de idioma
- Configurações de data e hora
- Password creation
- Network settings (if connected)
3. Operando o Sistema
3.1 Ao vivo View e Gravação
Depois que o sistema estiver configurado, você poderá view live feeds from all connected cameras on your monitor. The DVR is configured for 24/7 continuous recording to the internal 1TB hard drive.
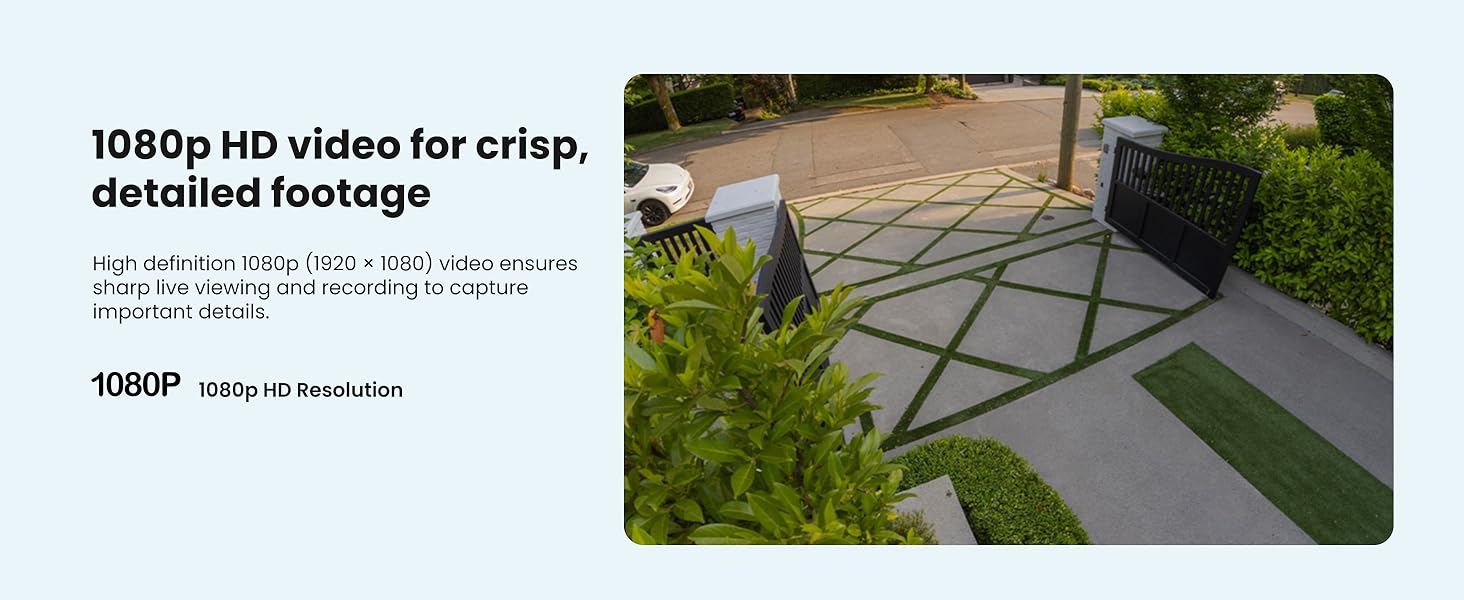
Imagem 3.1: Example of 1080p HD video resolution.
3.2 Detecção Inteligente de Movimento
The system features Smart Motion Detection, which can differentiate between people and vehicles. This helps reduce false alarms and ensures you receive relevant alerts.
- Configuração: Access the DVR's menu to configure motion detection zones and sensitivity for each camera.
- Alertas: Enable push notifications through the Lorex App for real-time alerts on your smartphone when person or vehicle motion is detected.
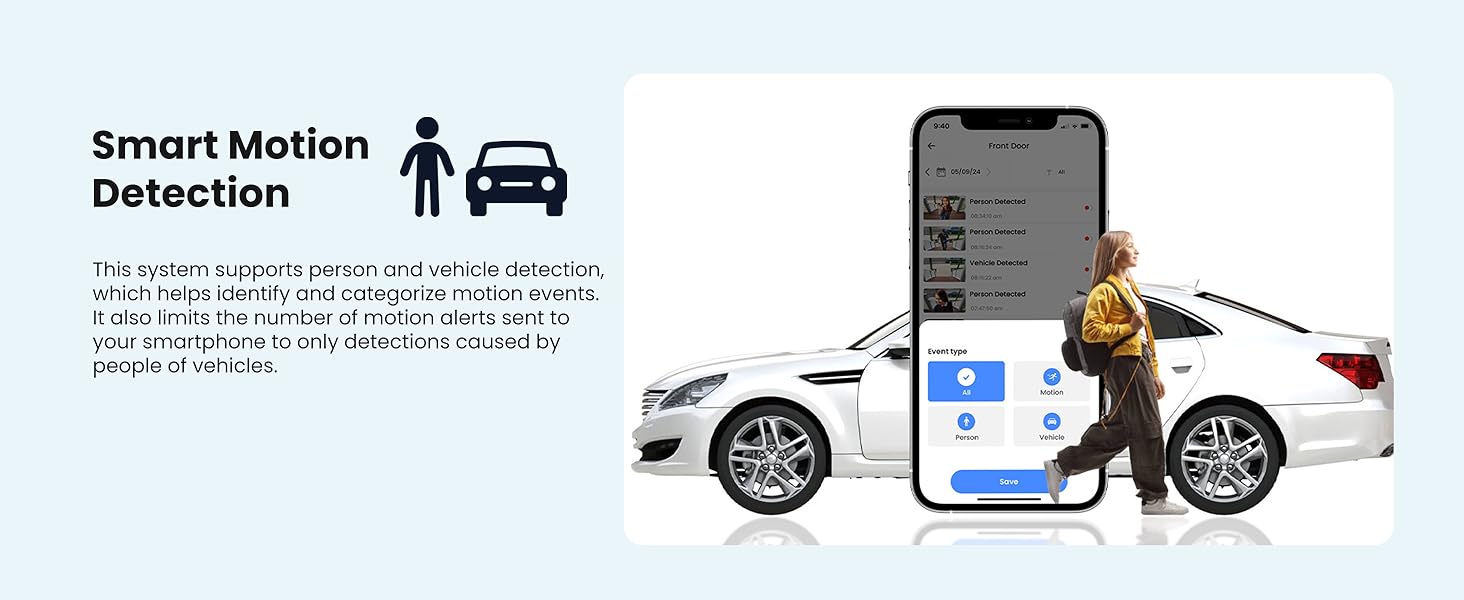
Image 3.2: Smart Motion Detection identifying a person and vehicle.
3.3 Visão noturna
The cameras are equipped with Smart Infrared (IR) night vision, providing clear black and white video footage up to 65 feet in low-light conditions. The IR mode activates automatically.
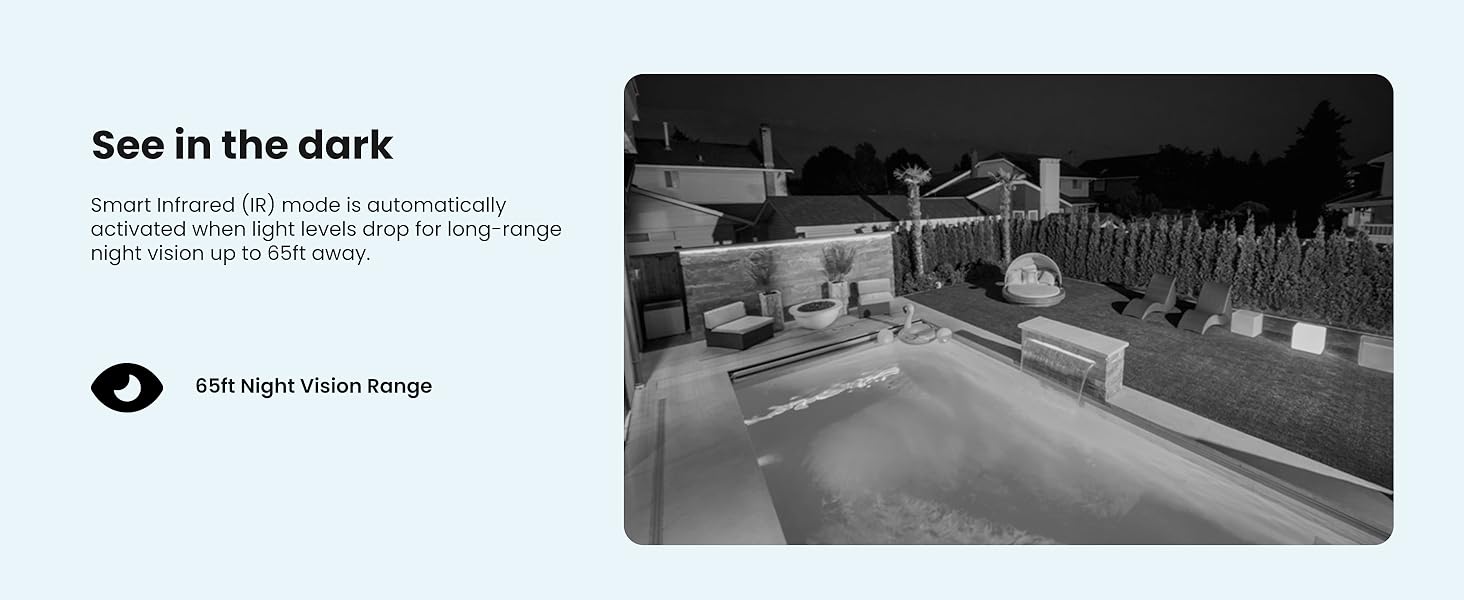
Image 3.3: Comparison of daytime and infrared night vision.
3.4 Reprodução e Zoom Digital
Review foo gravadotage directly from the DVR. The system also supports digital zoom on both live and recorded video for closer inspection of details.

Image 3.4: Digital zoom functionality on recorded video.
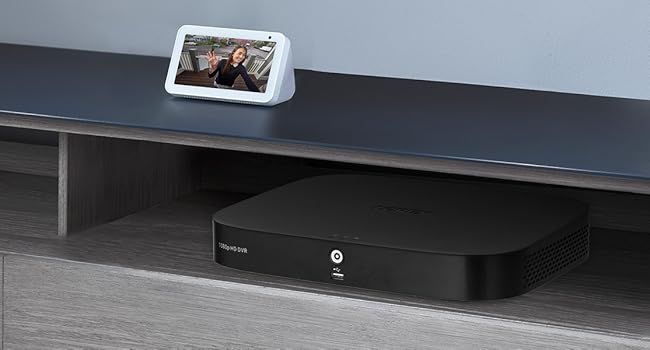
Image 3.5: Quick search feature for reviewing footage.
3.5 Remote Access (Lorex App)
Download the Lorex App on your smartphone or tablet to access live views, playback recordings, and receive alerts remotely. Ensure your DVR is connected to the internet for this feature.
4. Manutenção
4.1 Gerenciamento de Disco Rígido
The 1TB internal hard drive provides ample storage for continuous recording without the need for monthly fees or subscriptions. The system automatically overwrites the oldest footage when the hard drive is full.

Image 4.1: 1TB hard drive for local storage.
4.2 Limpeza
- Lentes de câmera: Limpe periodicamente as lentes da câmera com um pano macio e sem fiapos para garantir imagens nítidas. Evite produtos de limpeza abrasivos.
- DVR Unit: Keep the DVR unit free from dust and ensure proper ventilation to prevent overheating.
4.3 atualizações de firmware
Check the Lorex support website periodically for firmware updates. Keeping your DVR's firmware updated ensures optimal performance and access to the latest features and security enhancements.
5. Solução De Problemas
If you encounter issues with your Lorex security system, refer to the following common troubleshooting steps:
- Sem exibição de vídeo: Ensure all cables (power, video, monitor) are securely connected. Verify the monitor input source is correct.
- Sem gravação: Check if the hard drive is properly installed and initialized. Verify recording schedules and motion detection settings.
- Problemas de acesso remoto: Confirm the DVR is connected to the internet and has a stable network connection. Ensure the Lorex App is updated and configured correctly.
- Má qualidade de imagem: Clean camera lenses. Check cable connections for damage. Adjust camera position if glare or obstructions are present.
For more detailed troubleshooting guides and technical support, visit the official Lorex support website.
6. Especificações
| Recurso | Especificação |
|---|---|
| Marca | Lorex |
| Número do modelo | AZT-D24281-2ND4-1 |
| Tecnologia de Conectividade | Com fio |
| Resolução de captura de vídeo | 1080p (1920x1080) |
| Número de canais | 8 |
| Capacidade de armazenamento de memória | 1 TB |
| Características especiais | App Control, Night Vision, Vehicle Detection, Weatherproof |
| Alcance de visão noturna | Até 65 pés |
| Classificação à prova de intempéries | IP67 |
| Temperatura de operação | 140°F/60°C Heat Rating and -40°F/-40°C Cold Rating |
| Viewângulo de engate | 94 graus |
| Fonte de energia | Elétrico com fio |
| Dimensões do item (C x L x A) | 19.7 x 19.2 x 10.3 polegadas |
| Peso do item | 21.7 libras |
| UPC | 695529022086 |
7. Garantia e Suporte
7.1 Informações de garantia
For detailed warranty information regarding your Lorex 1080p 8-Channel 1TB Wired DVR Security System, please refer to the warranty card included with your product or visit the official Lorex webOs termos e condições da garantia podem variar.
7.2 Suporte ao cliente
If you require further assistance, technical support, or have questions not covered in this manual, please contact Lorex customer support through their official website. Online resources, FAQs, and contact information are available to help you.
Lorex Oficial Website: www.lorex.com


