Introdução
This manual provides instructions for setting up, operating, and maintaining your Mercury MW3030R Dual Band Wireless Router. Please read this manual carefully before use to ensure proper installation and optimal performance.
Informações de segurança
- Não exponha o dispositivo à água ou umidade excessiva.
- Não tente desmontar ou reparar o dispositivo por conta própria.
- Use apenas o adaptador de energia fornecido com o dispositivo.
- Garanta uma ventilação adequada ao redor do roteador para evitar superaquecimento.
Conteúdo da embalagem
Verifique se seu pacote contém os seguintes itens:
- Mercury MW3030R Wireless Router
- Adaptador de energia
- Cabo Ethernet
- Quick Installation Guide (this manual serves as a detailed guide)
Produto acimaview
Familiarize-se com os componentes e indicadores do roteador.

Figura 1: Traseira view of the Mercury MW3030R router. This image displays the four external antennas, the WAN port (typically blue), multiple LAN ports (typically yellow), and the power input jack. The reset button and WPS button are also usually located on the rear panel.
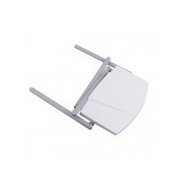
Figura 2: Careca view of the Mercury MW3030R router with its antennas folded. This perspective highlights the router's sleek, white casing and its overall compact form factor, suitable for various placements.
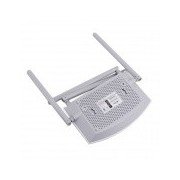
Figura 3: Fundo view of the Mercury MW3030R router. This image shows the ventilation holes designed for heat dissipation and the product label, which typically contains important information such as the default Wi-Fi name (SSID), password, and web management address.
Indicadores LED:
- LED de energia: Indica o estado de energia do roteador.
- Indicador de Internet: Indica o estado da conexão com a internet.
- LED WLAN: Indica atividade sem fio.
- LEDs LAN: Indicate connection status for each LAN port.
Configurar
1. Conexão de Hardware
- Ligar: Connect the power adapter to the router's power port and plug it into a wall outlet. Wait for the Power LED to become stable.
- Conectar à Internet (WAN): Connect one end of an Ethernet cable to your modem's LAN port and the other end to the router's WAN port (usually distinctively colored, e.g., blue).
- Conectar dispositivos (LAN): For wired connections, connect your computer or other devices to the router's LAN ports (usually yellow) using Ethernet cables.
- Antenas: Adjust the four antennas for optimal signal coverage.
2. Configuração Inicial (Web interface)
- Conectar ao roteador: Connect your computer to the router either via an Ethernet cable to a LAN port or wirelessly using the default Wi-Fi SSID and password printed on the router's label (refer to Figure 3).
- Acesso Web Navegador: Abra um web browser (e.g., Chrome, Firefox) and type the default access address (e.g., http://192.168.1.1 or http://tplinkwifi.netDigite ) na barra de endereços e pressione Enter.
- Conecte-se: Digite o nome de usuário e a senha padrão (normalmente administrador para ambos, ou conforme especificado na etiqueta do roteador).
- Executar Configuração Rápida: Follow the on-screen instructions of the Quick Setup Wizard to configure your internet connection type (e.g., PPPoE, Dynamic IP, Static IP) and wireless settings (SSID, password).
- Alterar senha padrão: For security, it is highly recommended to change the default login password for the router's web interface de gerenciamento.
Instruções de operação
Conectando ao Wi-Fi
- On your wireless device (smartphone, laptop), search for available Wi-Fi networks.
- Select your router's Wi-Fi network name (SSID) that you configured during setup.
- Enter the Wi-Fi password you set.
- Seu dispositivo agora deve estar conectado à internet.
Operação de banda dupla
The MW3030R supports both 2.4GHz and 5.0GHz wireless bands. The 2.4GHz band offers wider coverage, while the 5.0GHz band provides faster speeds with less interference over shorter distances. You can connect your devices to either band based on your needs.
Rede de Convidados
Acesse o roteador web interface to enable and configure a separate guest network. This allows guests to access the internet without accessing your main network resources.
Manutenção
- Atualizações de firmware: Verifique regularmente as instruções do fabricante. webSite para atualizações de firmware. A atualização do firmware pode melhorar o desempenho, adicionar novos recursos e corrigir vulnerabilidades de segurança.
- Reiniciar o roteador: If you experience network issues, try restarting the router by unplugging the power adapter, waiting 10 seconds, and then plugging it back in.
- Limpeza: Mantenha o roteador limpo e livre de poeira. Use um pano macio e seco. Não use produtos de limpeza líquidos.
- Colocação: Coloque o roteador em um local central, longe de obstruções e dispositivos que possam causar interferência (por exemplo, micro-ondas, telefones sem fio).
Solução de problemas
Sem acesso à Internet
- Check if the Internet LED on the router is lit or blinking correctly.
- Certifique-se de que o cabo Ethernet do seu modem esteja conectado firmemente à porta WAN do roteador.
- Reinicie seu modem e roteador.
- Verifique as configurações de sua conexão com a internet no roteador. web interface.
Velocidade lenta da rede sem fio
- Ensure your device is connected to the 5.0GHz band if it supports it, for faster speeds.
- Move closer to the router or adjust antenna positions.
- Verifique se há interferência de outros dispositivos eletrônicos.
- Reduce the number of devices connected to the network or bandwidth-intensive activities.
Não consigo acessar o roteador. Web Interface
- Certifique-se de que seu dispositivo esteja conectado ao roteador (com fio ou sem fio).
- Verify the IP address you are typing in the browser is correct (e.g., http://192.168.1.1).
- Tente limpar o cache do seu navegador ou usar um navegador diferente.
- If you forgot the login password, you may need to perform a factory reset (Warning: This will erase all your settings).
Especificações
| Recurso | Descrição |
|---|---|
| Modelo | MW3030R |
| Padrões sem fio | IEEE 802.11ac/n/g/b/a |
| Freqüência | 2.4 GHz e 5.0 GHz (banda dupla) |
| Velocidade sem fio | Up to 600Mbps (combined) |
| Antenas | 4 Antenas Externas |
| Interfaces | 1x WAN Port, Multiple LAN Ports (typically 3 or 4) |
| Fonte de energia | External Power Adapter (provided) |
Garantia e Suporte
The Mercury MW3030R router comes with a standard manufacturer's warranty. For detailed warranty information, technical support, or service inquiries, please refer to the official Mercury webou entre em contato com o suporte ao cliente. Guarde o comprovante de compra para eventuais solicitações de garantia.


