1. پیژندنه
This manual provides detailed instructions for the safe and effective use of your BRESSER BRM-300AM Studio Flash Kit. This kit includes two powerful 300W studio flash units, designed for product and portrait photography. Please read this manual thoroughly before operating the equipment and retain it for future reference.
2. د خوندیتوب معلومات
د تجهیزاتو د ټپي کیدو یا زیان څخه د مخنیوي لپاره تل لاندې خوندیتوب احتیاطي تدابیر په پام کې ونیسئ:
- Do not expose the flash units to rain, moisture, or extreme temperatures.
- ډاډ ترلاسه کړئ چې د بریښنا رسولو حجم سره سمون لريtagپه واحد کې مشخص شوي اړتیاوې.
- Always disconnect the power cable before cleaning or performing any maintenance.
- Avoid touching the flash tube or modeling lamp د کارولو وروسته سمدلاسه، ځکه چې دوی خورا ګرم کیدی شي.
- Do not operate the flash unit if it has been dropped or damaged.
- د ماشومانو د لاسرسي څخه لرې وساتئ.
- Use only BRESSER approved accessories and replacement parts.
3. د بسته محتويات
ډاډ ترلاسه کړئ چې لاندې ټول لیست شوي توکي ستاسو په کڅوړه کې شتون لري:
- 2 x BRESSER BRM-300AM Studio Flash Units
- 2 x Light Stands (200 cm)
- 2 x Softboxes (60 x 90 cm)
- 1 x Sync Flash Cable
- 2 x 150W Modeling Lamps
- 2 x 300W Flash Tubes
- 2 د بریښنا کیبلونه
- 2 x Spare Fuses

شکل 3.1: اوورview of the BRESSER BRM-300AM Studio Flash Kit components, including two flash heads, two softboxes, and two light stands.
4. محصول ختم شوview
The BRESSER BRM-300AM is a compact and powerful studio flash unit. It features a Bowens-S bayonet mount for compatibility with various light modifiers.
4.1 Flash Unit Components

شکل 4.1: تفصيلي view of the BRM-300AM flash unit, showing the flash tube, modeling lamp, and Bowens-S mount.
- فلش ټیوب: Provides the main light output.
- ماډلینګ Lamp: A 150W halogen lamp مخکې لپارهviewد رڼا اغیزې.
- Bowens-S Mount: For attaching softboxes, reflectors, and other light modifiers.
- د نصب کولو بریکٹ: For attaching the flash unit to a light stand.
4.2 د کنټرول پینل

شکل 4.2: The control panel of the BRM-300AM flash unit in an off state.

شکل 4.3: The control panel of the BRM-300AM flash unit in an operational state, showing the digital display and various buttons.
- ډیجیټل ډیزاین: Shows flash power level (1.0 to 6.0).
- د بریښنا سویچ: Main on/off switch for the unit.
- LAMP تڼۍ: Toggles the modeling lamp آن/بند
- CELL Button: Activates/deactivates the optical slave cell for wireless triggering.
- د غږ تڼۍ: د اورېدو وړ فلش چمتو شاخص بدلوي.
- د ازموینې تڼۍ: د ازموینې فلش اوروي.
- +/- تڼۍ: د فلش بریښنا تولید تنظیم کړئ.
- د SYNC پورټ: 3.5mm jack for wired sync connection.
۴. د تنظیم لارښوونې
5.1 Assembling the Light Stands
- د رڼا سټینډ پښې پراخې کړئ ترڅو یو مستحکم اساس جوړ کړي.
- Tighten the locking knob at the base to secure the legs.
- Extend the telescopic sections of the stand to the desired height and secure each section with its locking knob.
5.2 Installing the Flash Tube and Modeling Lamp
- Ensure the flash unit is powered off and unplugged.
- Carefully insert the 300W flash tube into its socket, aligning the pins. Do not force it.
- Screw the 150W modeling lamp into its socket. Avoid touching the glass part of the lamp directly with bare hands.
5.3 Attaching the Softbox
شکل 5.1: Illustration of a softbox being attached to the flash unit via the Bowens-S mount.
- Assemble the softbox rods into the speedring, forming the softbox shape.
- Align the speedring of the softbox with the Bowens-S mount on the flash unit.
- Insert the speedring into the mount and rotate it clockwise until it locks securely into place.
- Attach the inner and outer diffusers to the softbox using the Velcro fasteners.
۳.۲ د فلش واحد نصبول

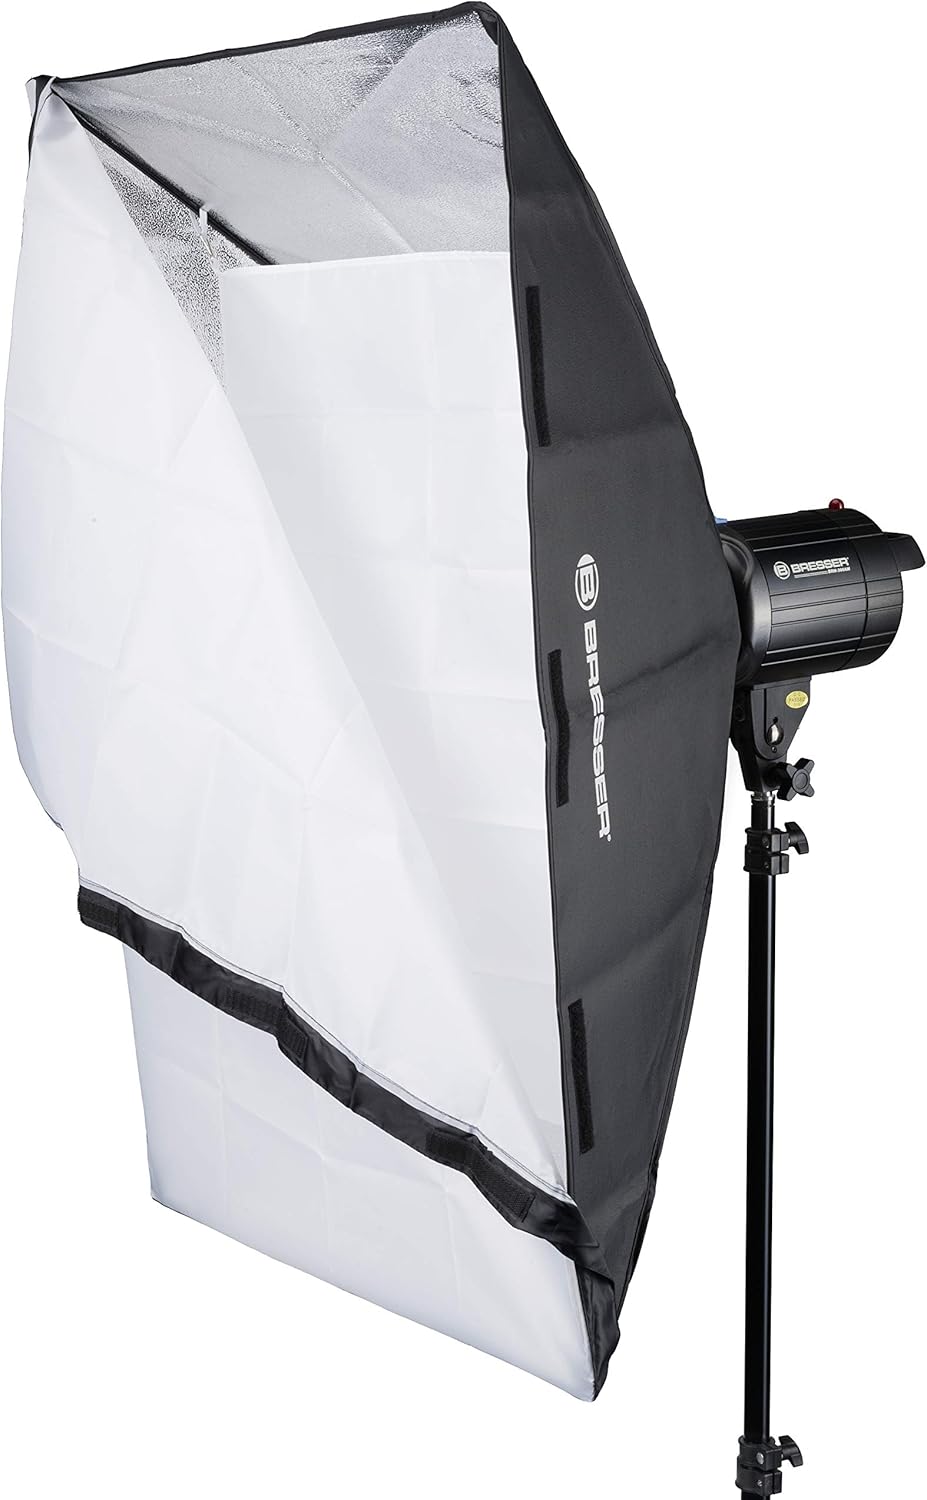
شکل 5.2: Two BRM-300AM flash units with softboxes mounted on light stands, ready for use.
- Place the flash unit's mounting bracket onto the top spigot of the light stand.
- Tighten the locking knob on the flash unit's bracket to secure it to the stand.
- Adjust the angle of the flash unit using the tilt adjustment knob on the bracket.
6. عملیاتي لارښوونې
6.1 بریښنا کول او بندول
- Connect the power cable to the flash unit and then to a suitable power outlet.
- Flip the main پاور switch on the control panel to the "ON" position. The digital display will illuminate.
- د بریښنا بندولو لپاره، فلپ کړئ پاور switch to the "OFF" position and disconnect the power cable.
۴.۳ د فلش بریښنا تنظیمول
The flash power is adjustable from 1/32 to full power (300W). The digital display shows the power level from 1.0 to 6.0.
- فشار ورکړئ + button to increase flash power.
- فشار ورکړئ - button to decrease flash power.
6.3 ماډلینګ Lamp عملیات
د ۱۵۰ واټ ماډلینګ lamp helps visualize the lighting effect before taking a picture.
- فشار ورکړئ LAMP button to toggle the modeling lamp آن یا بند.
6.4 Triggering the Flash
The BRM-300AM offers multiple triggering options:
- د همغږۍ کیبل: Connect your camera's PC sync port to the flash unit's SYNC port using the provided sync cable.
- نظری غلام: The built-in optical slave cell can trigger the flash when it detects another flash firing. Press the CELL button to activate/deactivate this function.
- د ازموینې تڼۍ: فشار ورکړئ ټیسټ button on the control panel to manually fire a flash.
The flash unit has a fast recycling time of 0.5 to 1.0 seconds, indicated by the audible sound (if enabled) and the display.
6.5 Audible Ready Indicator
The flash unit can emit an audible beep when it has recycled and is ready to fire again.
- فشار ورکړئ غږ button to toggle the audible indicator on or off.
7. ساتنه
7.1 پاکول
- تل د پاکولو دمخه واحد خلاص کړئ.
- د فلش واحد بهرنۍ برخه د پاکولو لپاره نرم، وچ ټوکر وکاروئ.
- د فلش ټیوب او ماډلینګ لپاره lamp, use a clean, lint-free cloth. Avoid abrasive cleaners.
7.2 Flash Tube and Modeling Lamp بدلول
که چیرې د فلش ټیوب یا ماډلینګ lamp needs replacement:
- Ensure the unit is powered off and unplugged, and allow sufficient time for the lampد یخولو لپاره.
- Carefully remove the old flash tube or modeling lamp.
- Install the new replacement part as described in Section 5.2.
- Use only genuine BRESSER replacement parts to ensure compatibility and safety.
8. ستونزه حل کول
| ستونزه | احتمالي لامل | د حل لاره |
|---|---|---|
| Flash unit does not power on. | No power supply; faulty power cable; blown fuse. | Check power connection; try a different outlet; replace fuse (refer to Section 7.2). |
| فلش نه غږېږي. | Flash not fully recycled; sync cable not connected; optical slave not activated or blocked; flash tube faulty. | Wait for ready indicator; check sync cable connection; ensure CELL is active and sensor is clear; replace flash tube. |
| ماډلینګ lamp نه روښانه کیږي | LAMP button off; modeling lamp ناقص | L پریس کړئAMP button; replace modeling lamp. |
| واحد ډیر ګرمیږي. | Excessive continuous use. | The unit has overheat protection. Allow it to cool down before resuming operation. Reduce frequency of flashes. |
9. مشخصات
| فیچر | تفصیل |
|---|---|
| فلش ځواک | 300 Ws (Watt-seconds) |
| د بریښنا سمول | 1/32 to Full Power |
| د لارښود شمېره (GN) | GN56 |
| د ریسایکل کولو وخت | ۱ - ۹۹۹ ثانیې |
| د رنګ د حرارت درجه | 5300-5600 K |
| ماډلینګ Lamp | 150W Halogen, On/Off switchable |
| د غره ډول | Bowens-S Bayonet |
| د محرک کولو طریقې | Sync Cable, Optical Slave, Test Button |
| د ډیر تودوخې محافظت | هو |
| وزن (په هر واحد) | Approximately 11.6 kg (for the kit) |
| د ماډل شمیره | F003215 |
| ASIN | B0744GJVYR |
10. تضمین او ملاتړ
For warranty information and technical support, please refer to the documentation provided with your purchase or visit the official BRESSER webسایټ. د هر ډول تضمین ادعا لپاره د پیرود ثبوت وساتئ.


