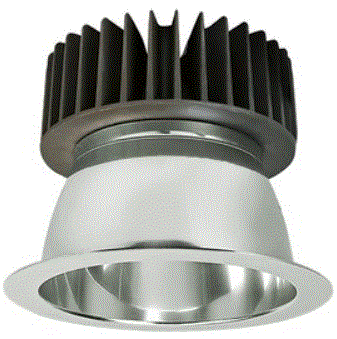
 COLOR/WATTAGE SELECTABLE LED DOWNLIGHT ENGINES & TRIMS
WARNING, CAUTION, SAFETY AND INSTALLATION INSTRUCTIONS
WARNING
- Installation, service, and maintenance of luminaries should be performed by a qualified licensed electrician.
- Please read these instructions to fully understand and safely use this product.
CAUTION
- Check that all fixture connections have been properly made and the fixture is grounded to avoid potential electrical shock.
- Designed for use in AC 120-347V, 50/60Hz, 1-10V dimming (PL T-90288), 1-10V dimming (PL T-90287), and in AC120-277V, 50/60Hz, 0~10V dimming (PLT-90536) protected circuits.
NOTICE
- Suitable for damp locations.
- Access above ceiling required. Suitable for suspended ceilings.

Installation Instructions
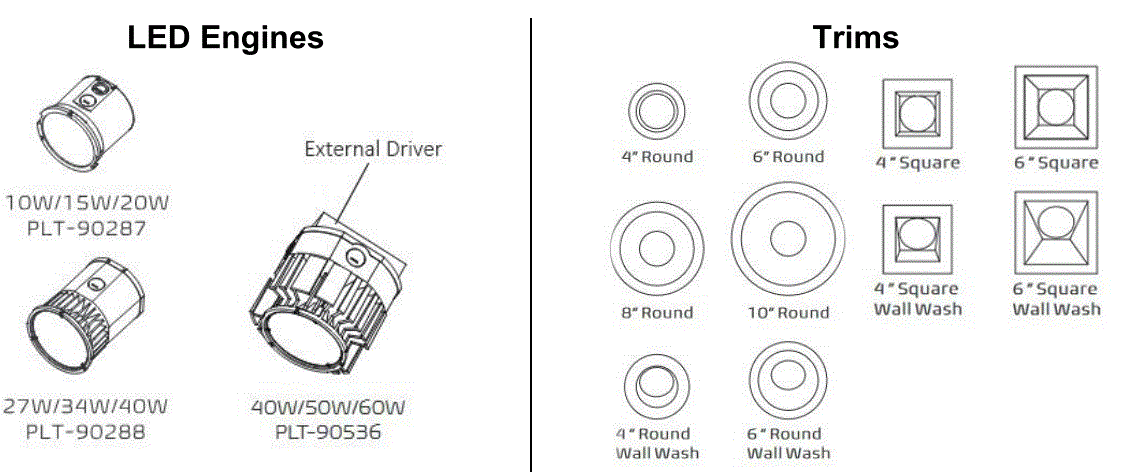
- PLT-90287 & PL T-90288 light engines are designed to be used with PL T-90289 to PL T-90292 round trims, PLT-90337 & PLT-90338 round wall wash trims, PLT-90333 & PLT-90334 square trims, PL T-90335 & PL T-90336 square wall wash trims, and PLT-90337 & PLT-90338 round wall wash trims.
- PLT-90536 light engine is designed to be used with PLT-90537 & PLT-90538 & PLT-90292 round trims.
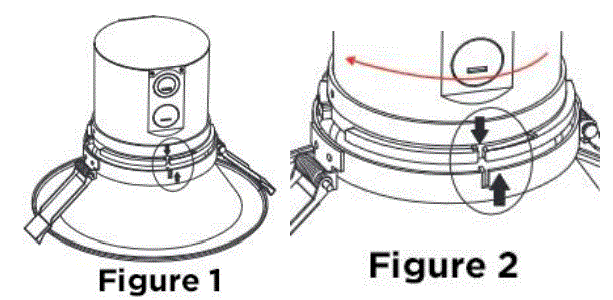
- Match the slot of the (PL T-90287 or PL T-90288 or PL T-90536) LED engine and trim according to the direction of arrows as shown. (Figure 1)
- Turn clockwise until it is tightened. Figure 2

Installation
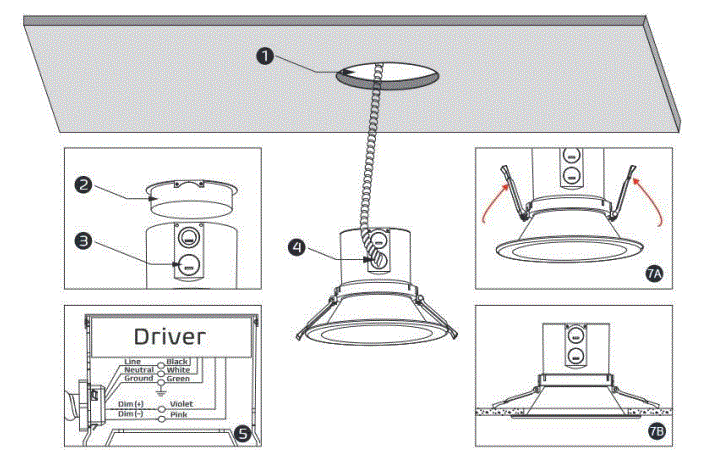
- Step 1. Drill a hole in the ceiling according to the trim size (See Trim Size section)
- Step 2. Open the cover of the LED engine according to the direction of the arrow.
- Step 3. Remove the appropriate knockout(s) for power supply wiring.
- Step 4. Bring the power supply wires into the junction box using a conduit fitting.
- Step 5. Connect the line to the black wire, neutral to the white wire, and ground wire to the green wire with the supplied quick disconnect
- NOTE: Compatible with 0-10V and 1-10V dimmers. Connect the driver PURPLE (D+) to the dimmer PURPLE (D+), and the driver PINK (D-) to the dimmer PINK (D-) with the supplied wire nuts.
- Tuck all wires and wire nuts into the fixture junction box.
- Close the cover according to the direction of the arrow.
- Step 6. Use the wattage and CCT dip-switch to adjust the fixture to the desired wattage level and CCT. Refer to the label on top of the driver for each setting.
- Step 7. Push both torsion springs close to the fixture body and push the fixture into the hole. Relax the springs once in the ceiling cavity. Your fixture will now fit snugly against the ceiling.
 Trim Size

WARNING
- Before installing, servicing, or performing routine maintenance upon this equipment, follow these general precautions.
- To reduce the risk of death, personal injury, or property damage from fire, electric shock, falling parts, cuts/abrasions, and other hazards, read all warnings and instructions included with and on the fixture box and all fixture labels.
- Proper grounding is required to ensure safety.
- Power must be turned off at the breaker before installation or maintenance.
- This product must be installed in accordance with the applicable installation code by a person familiar with the construction and operation of the product and the hazards involved.
- Wear gloves and eye protection at all times while installing, servicing, or performing maintenance on the luminaire, and avoid direct eye exposure to the light source while it is on.
- To prevent wiring damage or abrasion, do not expose wiring to edges of sheet metal or other sharp objects.
- Do not install damaged product. Inspect luminaire for damage that may have occurred during transit. If damaged, contact the manufacturer immediately.
- These instructions do not purport to cover all details or variations in equipment nor to provide every possible contingency to meet in connection with installation, operation, or maintenance. Should further information be desired or should particular problems arise which are not covered sufficiently for the purchaser’s or owner’s purposes, contact the manufacturer.
- 972-535-0926
- pltsolutions.com
- ver 022525
Documents / Resources
 |
PLT PremiumSpec Selectable LED Light Engine and Trims [pdf] Instruction Manual PremiumSpec Selectable LED Light Engine and Trims, Selectable LED Light Engine and Trims, LED Light Engine and Trims, Light Engine and Trims, Engine and Trims |