Wstęp
This manual provides comprehensive instructions for the KERUI 3K/5MP Lite 8-Channel 6-in-1 Digital Video Recorder (DVR). This DVR is designed for security camera systems, offering compatibility with various camera types including Analog, XVI, AHD, TVI, CVBS, CVI, and IP cameras. Please read this manual carefully before installation and operation to ensure proper use and optimal performance of your surveillance system.
Co jest w pudełku
Sprawdź, czy w opakowaniu znajdują się wszystkie komponenty:
- 1 x 8-Channel DVR Unit
- 1 x 2TB Surveillance Hard Drive (Pre-installed)
- 1 x zasilacz DVR
- Mysz 1 x USB
- 1 x naklejek ostrzegawczych
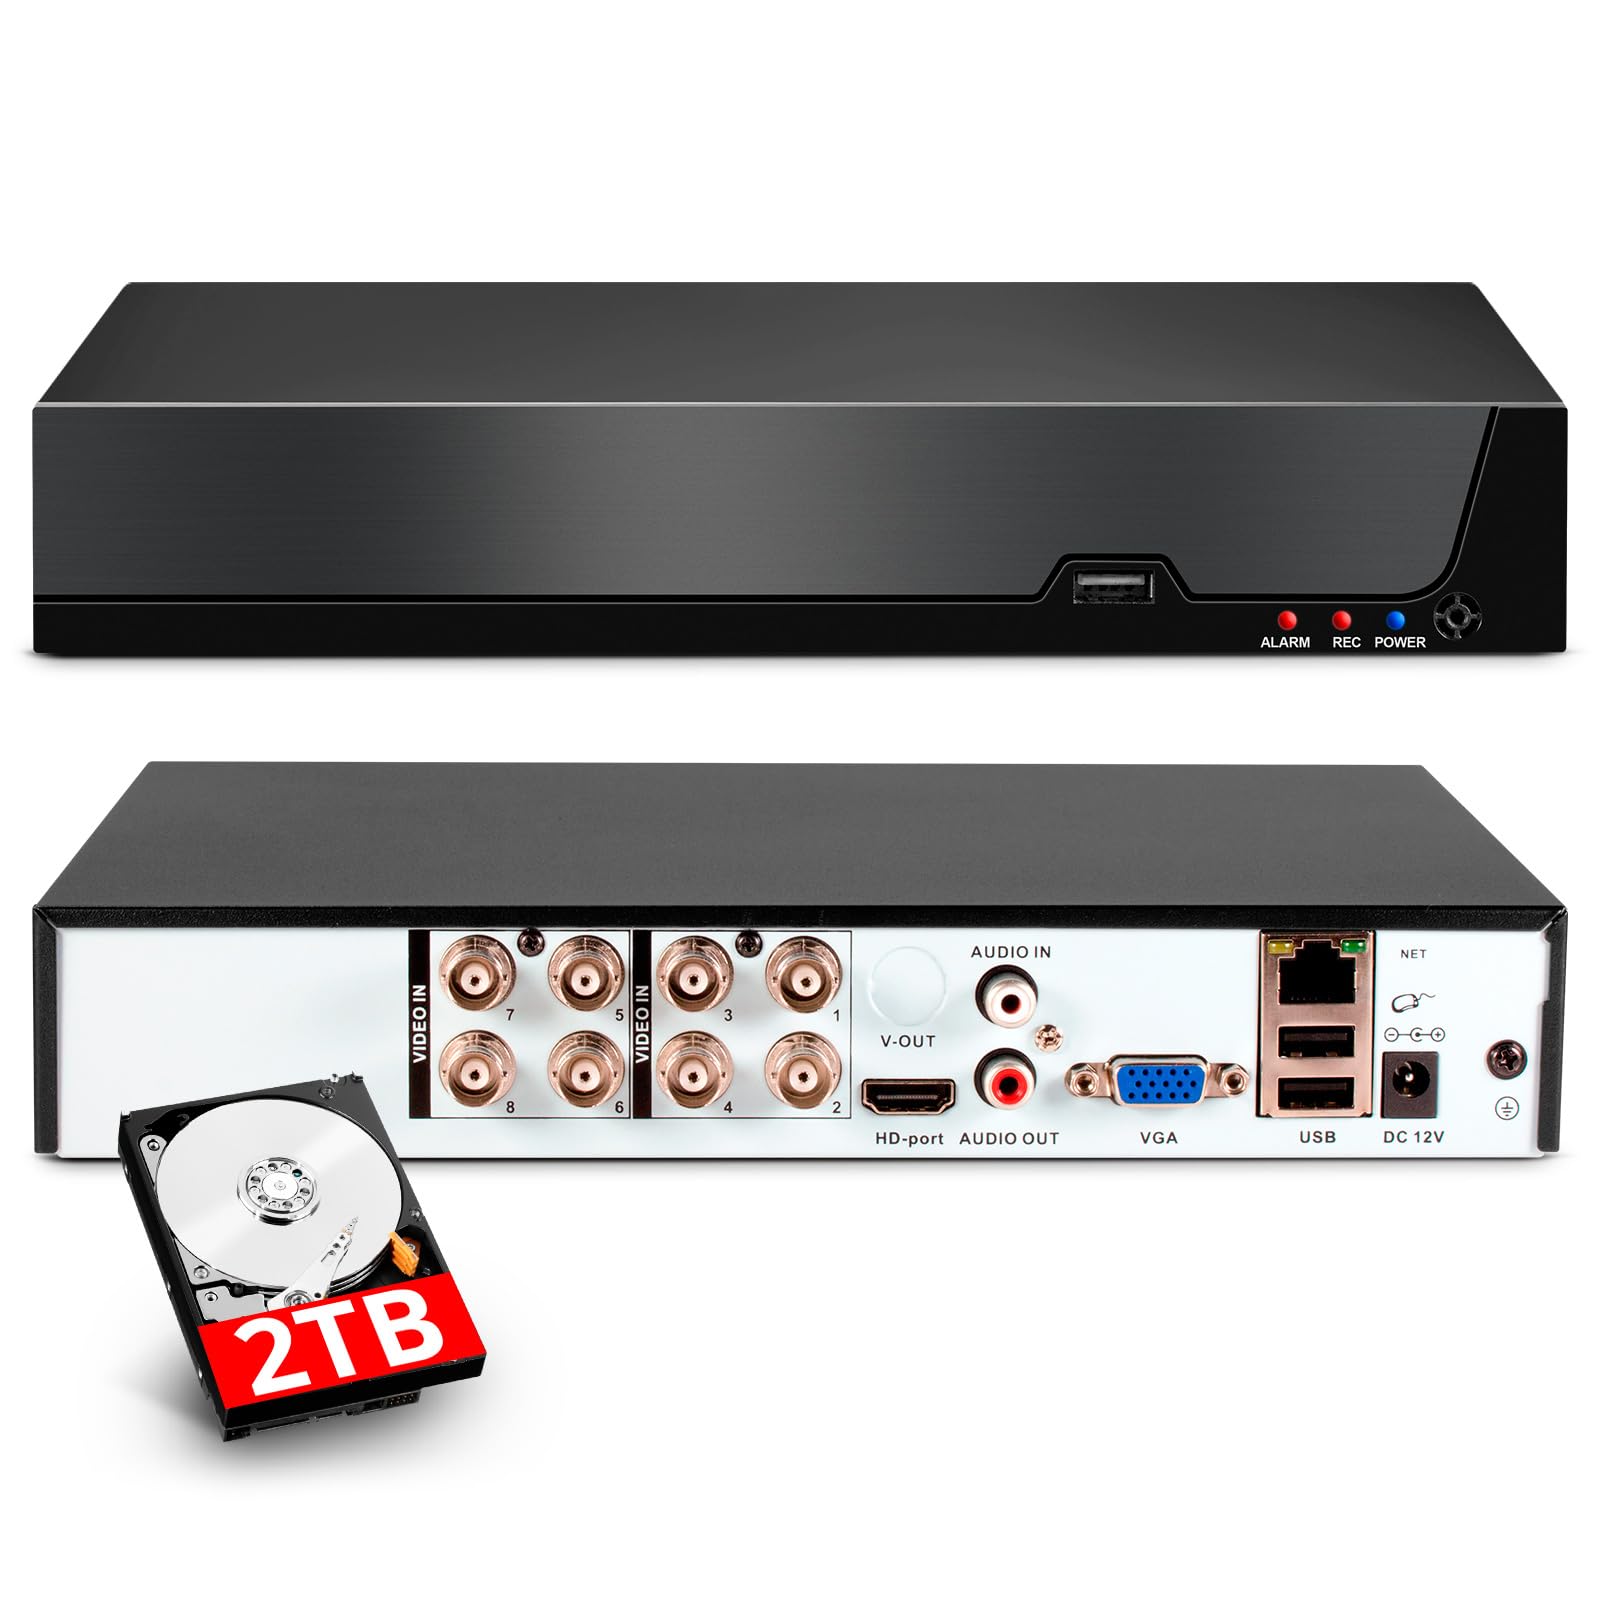
Image: Contents of the KERUI 8-Channel DVR box, showing the DVR unit with dimensions, a 1TB surveillance HDD, DVR power supply, USB mouse, and warning stickers.
Organizować coś
1. Połączenia początkowe
Before powering on the DVR, ensure all necessary connections are made.
- Podłącz kamery: Connect your security cameras to the appropriate video input ports (BNC connectors for Analog/AHD/TVI/CVI/XVI cameras, Ethernet for IP cameras). The DVR supports up to 8 channels for local cameras and additional IP channels depending on the configuration.
- Podłącz monitor: Use an HDMI or VGA cable to connect a monitor to the DVR's corresponding output port.
- Podłącz mysz: Podłącz dołączoną mysz USB do jednego z portów USB w rejestratorze DVR.
- Połączenie sieciowe (opcjonalnie): For remote access and network features, connect an Ethernet cable from the DVR's LAN port to your router or network switch.
- Podłączenie zasilania: Connect the DVR power supply to the DC 12V input port on the DVR, then plug the power supply into an electrical outlet.

Image: Rear panel connections of the DVR, illustrating video inputs (AHD, CVI, XVI, CVBS, TVI, IP camera compatibility), HDMI output, audio input/output, VGA input, USB input, network input, and power input.
2. Pierwsze włączenie i konfiguracja
Once all connections are secure, power on the DVR. The system will boot up and display the live view on the connected monitor. Follow the on-screen prompts for initial setup, which may include setting a password, date/time, and network settings.
Instrukcja obsługi
1. Video Compression (H.265+)
The DVR utilizes advanced H.265+ video compression technology. This standard significantly improves compression ratios compared to H.264, resulting in longer recording times and up to 80% storage savings. It also enhances image quality and provides a smoother viewzdobywania doświadczenia.

Image: Visual comparison demonstrating the efficiency of H.265+ compression, showing reduced storage space and improved bandwidth compared to H.264.
2. Smart Motion Detection and Alerts
The DVR features intelligent motion detection and human/face detection capabilities. When abnormal activity is detected, the system can automatically trigger an alarm and send real-time notifications via email or mobile app. This allows you to monitor your property's security immediately, regardless of your location.

Obraz: Ponadview of AI Human & Face Detection, showing real-time alerts via app push and email, with remote viewing options on mobile phones and computers.
3. Zdalny dostęp i odtwarzanie
The DVR supports remote access, allowing you to view live surveillance footage and play back recorded videos from anywhere with an internet connection. This can be done through mobile phones, computers, and other devices using the dedicated application (XMEye and Icsee) or PC software (VMS).

Image: Remote access and playback feature, showing live and recorded footage accessible via the internet, even without a constant internet connection for local recording.
4. Switching DVR Mode
The DVR supports various channel configurations to accommodate different camera types and quantities. You can switch the DVR mode through the system settings to match your camera setup.
Video: This video demonstrates how to switch the DVR mode to support different camera configurations (e.g., 8 XVI, AHD, TVI, CVI, CVBS, 4 1080P, or 16 5MP IP cameras).
5. Disabling Hard Disk Storage Reminder
If you wish to disable the hard disk storage reminder, follow the steps shown in the video below. This can be useful in specific scenarios where continuous reminders are not desired.
Video: This video illustrates the process of canceling the hard disk storage reminder on the DVR interface.
Konserwacja
To ensure the longevity and optimal performance of your KERUI DVR, consider the following maintenance tips:
- Regularne czyszczenie: Utrzymuj urządzenie DVR w czystości, bez kurzu i zanieczyszczeń. Do czyszczenia używaj miękkiej, suchej ściereczki. Upewnij się, że otwory wentylacyjne nie są zablokowane.
- Aktualizacje oprogramowania układowego: Okresowo sprawdzaj producenta webWitryna z aktualizacjami oprogramowania sprzętowego. Aktualizacje mogą poprawić wydajność, dodać nowe funkcje i zwiększyć bezpieczeństwo.
- Kopia zapasowa danych: Regularnie twórz kopie zapasowe ważnych nagrańtage na zewnętrzne urządzenie pamięci masowej, aby zapobiec utracie danych.
- Warunki środowiskowe: Operate the DVR within recommended temperature and humidity ranges to prevent damage.
Rozwiązywanie problemów
Jeśli napotkasz problemy z rejestratorem DVR, zapoznaj się z poniższymi typowymi procedurami rozwiązywania problemów:
- Brak wyjścia wideo: Check HDMI/VGA cable connections to the monitor and DVR. Ensure the monitor is set to the correct input source.
- Kamery nie wyświetlają: Verify that cameras are properly connected and powered. Check camera compatibility with the DVR's current mode (refer to 'Switching DVR Mode' section).
- Nie wolno robić nagrań: Ensure the hard drive is correctly installed and initialized. Check recording schedules and settings.
- Problemy ze zdalnym dostępem: Verify network cable connection and router settings. Ensure the mobile app or PC software is correctly configured and the DVR has internet access.
- System zawiesza się/nie odpowiada: Try restarting the DVR. If the issue persists, consider performing a factory reset (note: this will erase settings).
W przypadku bardziej złożonych problemów skontaktuj się z obsługą klienta.
Specyfikacje
| Funkcja | Specyfikacja |
|---|---|
| Marka | KERUI |
| Numer modelu | A6208 |
| Wymiary produktu | 19 x 4 x 19 cm; waga 1.1 kg |
| Rozdzielczość przechwytywania wideo | 1080p (supports up to 5MP Lite) |
| Liczba kanałów | 8 |
| Pojemność pamięci masowej | 2 TB (Integrated Hard Drive) |
| Technologia łączności | HDMI, USB, VGA |
| Cechy specjalne | Two-way audio, High-efficiency video encoding (H.265+), App control, Video recording, Smart playback, Motion detection, Human detection |
| Kompatybilne urządzenia | Supports 4* 5M-N@20fps, 4* 4MN@30fps, 4* 1080P@25fps cameras. Compatible with XVI, AHD, TVI, CVI, CVBS, IP cameras. |
| Zalecane zastosowania | Na zewnątrz, Wewnątrz |
Gwarancja i wsparcie
For warranty information, please refer to the product packaging or contact your retailer. For technical support, product inquiries, or further assistance, please visit the official KERUI webOdwiedź witrynę lub skontaktuj się z działem obsługi klienta. Zachowaj paragon zakupu na wypadek reklamacji.


