1. Wprowadzenie
This manual provides detailed instructions for the installation, operation, and maintenance of your TOWODE 4CH 5MP Hybrid 5-in-1 DVR Security Camera System. Please read this manual thoroughly before using the product to ensure proper setup and functionality. This system is designed to provide comprehensive surveillance for your property.
2. Informacje dotyczące bezpieczeństwa
- Upewnij się, że wszystkie połączenia zasilania są bezpieczne i mają odpowiednią moc dla danego urządzenia.
- Do not expose the DVR to liquids or extreme temperatures.
- Handle the hard drive with care to prevent data loss or damage.
- Jeśli nie masz pewności co do instalacji elektrycznej, instalację powinien wykonać wykwalifikowany personel.
- Keep cameras and cables out of reach of children.
- Use only manufacturer-approved accessories and power adapters.
3. Zawartość opakowania
Sprawdź, czy w przesyłce znajdują się wszystkie elementy wymienione poniżej:
- 1x 4CH DVR recorder
- 2x 5MP HD Cameras
- 1x 1TB HDD (wstępnie zainstalowany)
- 2x 15 meters integrated line (Video/Power cables)
- 2x 12V2A power supply
4. Koniec produktuview
The TOWODE 4CH 5MP Hybrid 5-in-1 DVR Security Camera System provides robust surveillance capabilities with high-definition video recording and advanced features.
4.1 Komponenty systemu

This image displays the main components of the security system: the 4-channel DVR unit, two 5MP bullet-style security cameras, and an icon representing the pre-installed 1TB hard drive. The DVR features various input/output ports on its rear panel, including video inputs, audio inputs/outputs, VGA, HDMI, USB, and network ports.
4.2 DVR Rear Panel and Camera Connections

Na tym obrazie przedstawiono szczegółowo view of the DVR's rear panel, highlighting various connection ports such as BNC video inputs (VIDEO IN), audio input/output (AUDIO IN/OUT), VGA, HD-port (HDMI), USB, network (NET), and DC 12V power input. The image also shows a 5MP camera with its power and video output cables, indicating its IP66 weatherproof rating, 3.6mm lens, and up to 80 ft IR night vision capability.
5. Konfiguracja
5.1 połączenie fizyczne
- Podłącz kamery: Connect the BNC video cable from each 5MP camera to the 'VIDEO IN' ports on the rear of the DVR. Connect the camera's power cable to the provided 12V power supply.
- Podłącz monitor: Connect a monitor to the DVR using either the 'HD-port' (HDMI) or 'VGA' port.
- Podłącz mysz: Plug the USB mouse into one of the 'USB' ports on the DVR.
- Połączenie sieciowe (opcjonalnie): Dla pilota viewing, connect an Ethernet cable from the 'NET' port on the DVR to your router.
- Włączanie: Connect the DVR's power adapter to the 'DC 12V' input and then to a power outlet. The system will power on automatically.
5.2 Konfiguracja początkowa
Upon first boot, the system will guide you through an initial setup wizard. This typically includes:
- Ustawianie hasła administratora.
- Configuring date and time settings.
- Network settings (DHCP or static IP).
- Hard drive initialization (if prompted).
6. Instrukcja obsługi
6.1 Tryby nagrywania
Rejestrator DVR obsługuje różne tryby nagrywania:
- Nagrywanie ciągłe 24/7: The system records continuously. This mode ensures no moment is missed.
- Nagrywanie z wykrywaniem ruchu: Recording starts only when motion is detected, saving storage space.
- Zaplanowane nagrywanie: Ustaw konkretne godziny nagrywania.

This image illustrates the 24/7 non-stop recording feature, showing a monitor displaying a 4-channel live view from various surveillance points, including a home, a warehouse, and a family playing. The DVR unit is visible below the monitor, emphasizing continuous security coverage.
6.2 Dostęp zdalny
You can access your security system remotely via mobile app or PC software.
- Aplikacja mobilna: Download the recommended app (e.g., XMeye) from your smartphone's app store. Register an account, add your DVR by scanning the QR code or entering its ID, and view live feeds or playback.
- Oprogramowanie komputerowe: Install the VMS software on your computer. Add the DVR using its IP address or cloud ID for remote monitoring.
6.3 Odtwarzanie
Aby ponownieview nagrano footage:
- Access the 'Playback' menu on the DVR interface.
- Wybierz interesującą Cię datę i kanał kamery.
- Use the timeline to navigate and play back recordings.

This image illustrates the 'Advanced Smart Playback' feature, showing a timeline at the bottom with markers indicating recorded events. Above the timeline, various snapshots from different times are displayed, such as a person entering a door, a family walking, and a delivery. This feature allows users to quickly review konkretnych momentach.
6.4 Inteligentny system alarmowy
The system features intelligent human detection and alarm functions:

This image demonstrates the AI Motion Face Detection feature. It shows a smartphone displaying a live video feed with a 'Motion Detection Alarm' notification from the XMeye app. In the background, two individuals are highlighted with detection boxes, indicating that the system has identified human presence and triggered an alert, which can be pushed to the app or sent via email.
When human motion is detected, the system can:
- Uruchom alarm.
- Wysyłaj powiadomienia push na swój telefon komórkowy.
- Wyślij powiadomienia e-mailem.
7. Zaawansowane funkcje
7.1 5-in-1 Hybrid DVR Compatibility
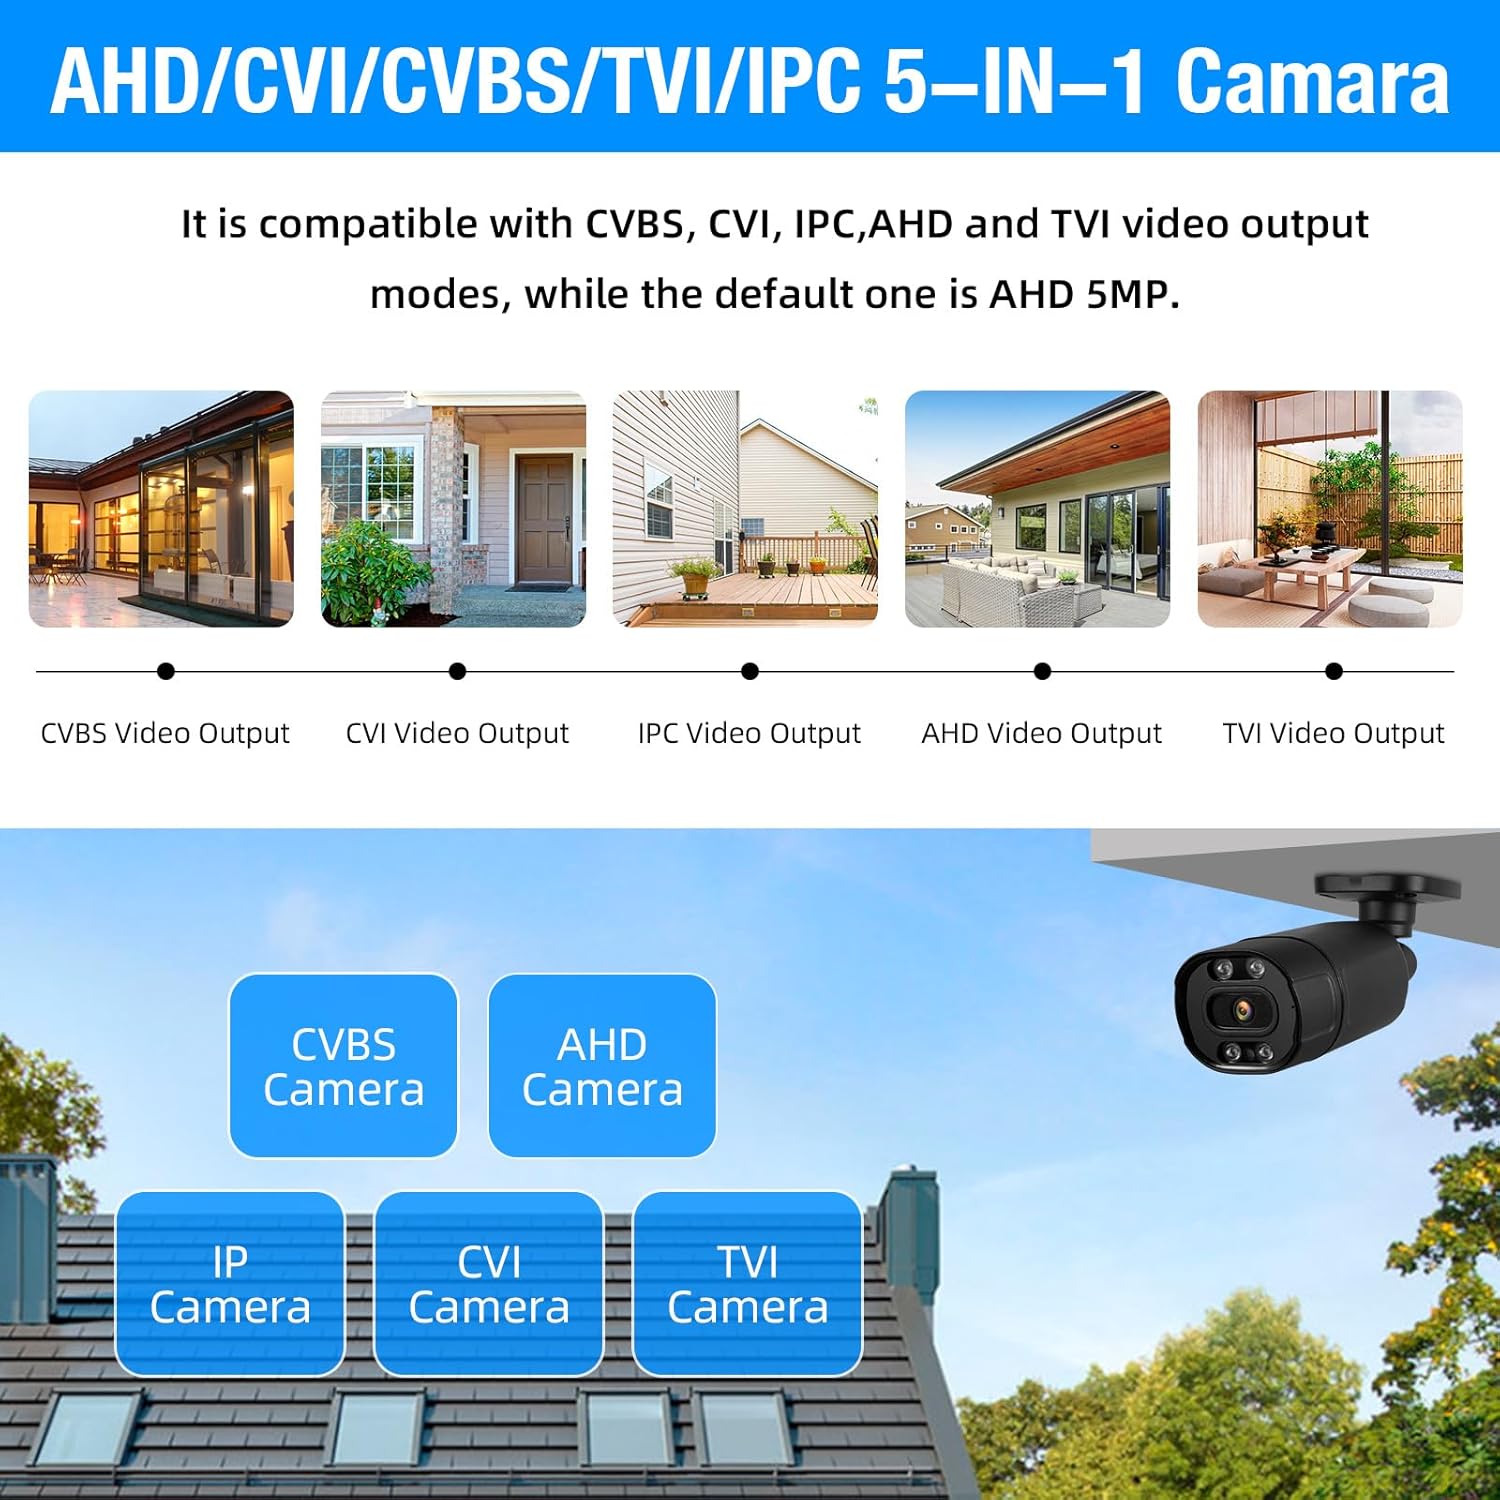
This image highlights the 5-in-1 Hybrid DVR's compatibility with multiple video output modes: CVBS, CVI, IPC (IP Camera), AHD, and TVI. It visually represents different camera types (CVBS, AHD, IP, CVI, TVI) that can be connected to the DVR, demonstrating its versatility. The default mode is AHD 5MP.
The DVR supports AHD/TVI/CVI/CVBS/IP camera 5-in-1 access mode, allowing flexibility in camera selection and integration with existing systems.
7.2 IP66 Weatherproof Cameras

This image showcases the IP66 Weatherproof and Dustproof rating of the security camera. It depicts a camera being hit by rain, with icons indicating its ability to withstand hot temperatures (up to 131°F/55°C) and cold temperatures (down to 14°F/-10°C), ensuring reliable outdoor performance in various weather conditions.
The included cameras are constructed from high-quality metal aluminum material with an IP66 rating, making them suitable for both indoor and outdoor use in various weather conditions.
7.3 H.265+ Efficient Video Compression

This image compares H.265+ and H.264 video compression technologies. It highlights that H.265+ offers smoother viewing and reduced memory space. Bar graphs illustrate that H.265+ provides 100% fluency and 100% storage space efficiency compared to H.264, which shows reduced fluency and higher storage consumption, demonstrating the superior efficiency of H.265+.
The DVR utilizes advanced H.265+ video compression technology, which significantly improves the compression ratio compared to H.264. This results in longer recording times and up to 80% storage savings, while maintaining high image quality and providing a smooth viewzdobywania doświadczenia.
7.4 Rozszerzalna pamięć masowa

This image shows the DVR unit with a visual representation of a pre-installed 1TB HDD. Text overlays indicate 'Expandable Capacity' and 'Worry-Free Backup,' along with 'Up to 14TB External HDD,' signifying that the system's storage can be significantly expanded beyond the initial 1TB.
The system comes with a pre-installed 1TB hard drive. For extended recording needs, the DVR supports expandable storage up to 14TB via an external HDD.
8. Konserwacja
8.1 Czyszczenie
- Kamery: Periodically clean camera lenses with a soft, dry cloth to ensure clear image quality. For outdoor cameras, remove any dirt or debris from the housing.
- DVR: Keep the DVR free from dust. Use a soft brush or compressed air to clean ventilation openings. Do not use liquid cleaners directly on the unit.
8.2 Zarządzanie dyskiem twardym
- The 1TB HDD is pre-installed and configured for continuous recording, overwriting the oldest footage gdy jest pełny.
- Regularnie twórz kopie zapasowe ważnych plikówtage to an external storage device (e.g., USB drive) if needed.
- Check the hard drive status in the DVR's system settings periodically to ensure proper functioning.
9. Rozwiązywanie Problemów
9.1 Brak wyjścia wideo na monitorze
- Check if the DVR is powered on.
- Verify that the monitor is powered on and set to the correct input source (HDMI/VGA).
- Ensure the HDMI/VGA cable is securely connected to both the DVR and the monitor.
9.2 Cameras Not Displaying Image
- Check if the camera's power adapter is connected and receiving power.
- Ensure the BNC video cable is securely connected to both the camera and the DVR.
- Verify the camera type is compatible with the DVR's current channel settings (AHD, TVI, CVI, CVBS, IP).
9.3 Dostęp zdalny nie działa
- Upewnij się, że dekoder DVR jest podłączony do Internetu za pomocą kabla Ethernet.
- Sprawdź połączenie internetowe routera.
- Verify network settings on the DVR (DHCP enabled or correct static IP).
- Confirm that the mobile app or PC software is correctly configured with the DVR's ID/IP address.
9.4 Dysk twardy nie nagrywa
- Check the hard drive status in the DVR's system settings. It may need to be initialized or formatted.
- Ensure recording schedules are properly set up.
- Verify that motion detection settings are correctly configured if using that mode.
10. Specyfikacje
| Funkcja | Szczegół |
|---|---|
| Marka | TOWODY |
| Numer modelu | A6504L2 |
| Technologia łączności | Przewodowy |
| Rozdzielczość przechwytywania wideo | 1944p (5 MP) |
| Cechy specjalne | App Control, Audio Recording, Human Detection, Motion Sensor |
| Liczba kanałów | 4 |
| Pojemność pamięci masowej | 1 TB (Pre-installed) |
| Źródło zasilania | Elektryczny przewodowy |
| Pozycja Wymiary (dł. x szer. x wys.) | 9.84 x 7.87 x 1.96 cala |
| Kompatybilne urządzenia | Cameras, Personal Computers, Smartphones, Tablets |
| Zakres noktowizora | 80 stóp |
| Szybkość klatek | 25 klatek na sekundę |
| Tryb nagrywania | Ciągły, wykrywanie ruchu |
| Typ soczewki | Stały (3.6 mm) |
| Wejście wideo | BNC (AHD/TVI/CVI/CVBS/IP 5-in-1) |
| Waga przedmiotu | 7.3 funta |
| Ocena odporności na warunki atmosferyczne | IP66 |
11. Gwarancja i wsparcie
For technical support, troubleshooting assistance, or warranty inquiries, please refer to the contact information provided with your product packaging or visit the official TOWODE webZachowaj paragon jako dowód zakupu na wypadek reklamacji.


