1. Wprowadzenie i informacje dotyczące bezpieczeństwa
Thank you for choosing the NETTA 10000 BTU Portable Air Conditioner. This manual provides essential information for the safe and efficient operation of your appliance. Please read it thoroughly before use and retain it for future reference.
Ważne instrukcje bezpieczeństwa:
- Zawsze należy ustawiać urządzenie na płaskiej i stabilnej powierzchni.
- Upewnij się, że zasilanie jest zgodne z objtage podano na tabliczce znamionowej.
- Nie blokuj wlotów ani wylotów powietrza. Zachowaj co najmniej 30 cm wolnej przestrzeni wokół urządzenia.
- Nie wkładaj żadnych przedmiotów do otworów wentylacyjnych.
- Odłącz urządzenie od prądu przed czyszczeniem lub konserwacją.
- Trzymaj urządzenie z dala od źródeł ciepła, bezpośredniego światła słonecznego i wody.
- W tym urządzeniu zastosowano czynnik chłodniczy R290, który jest łatwopalny. Należy obchodzić się z nim ostrożnie i zapewnić odpowiednią wentylację.
2. Koniec produktuview
The NETTA 10000 BTU Portable Air Conditioner is a versatile 3-in-1 unit offering cooling, fan, and dehumidification functions. It is designed for efficient cooling in rooms up to 20 square meters (215 sq ft).
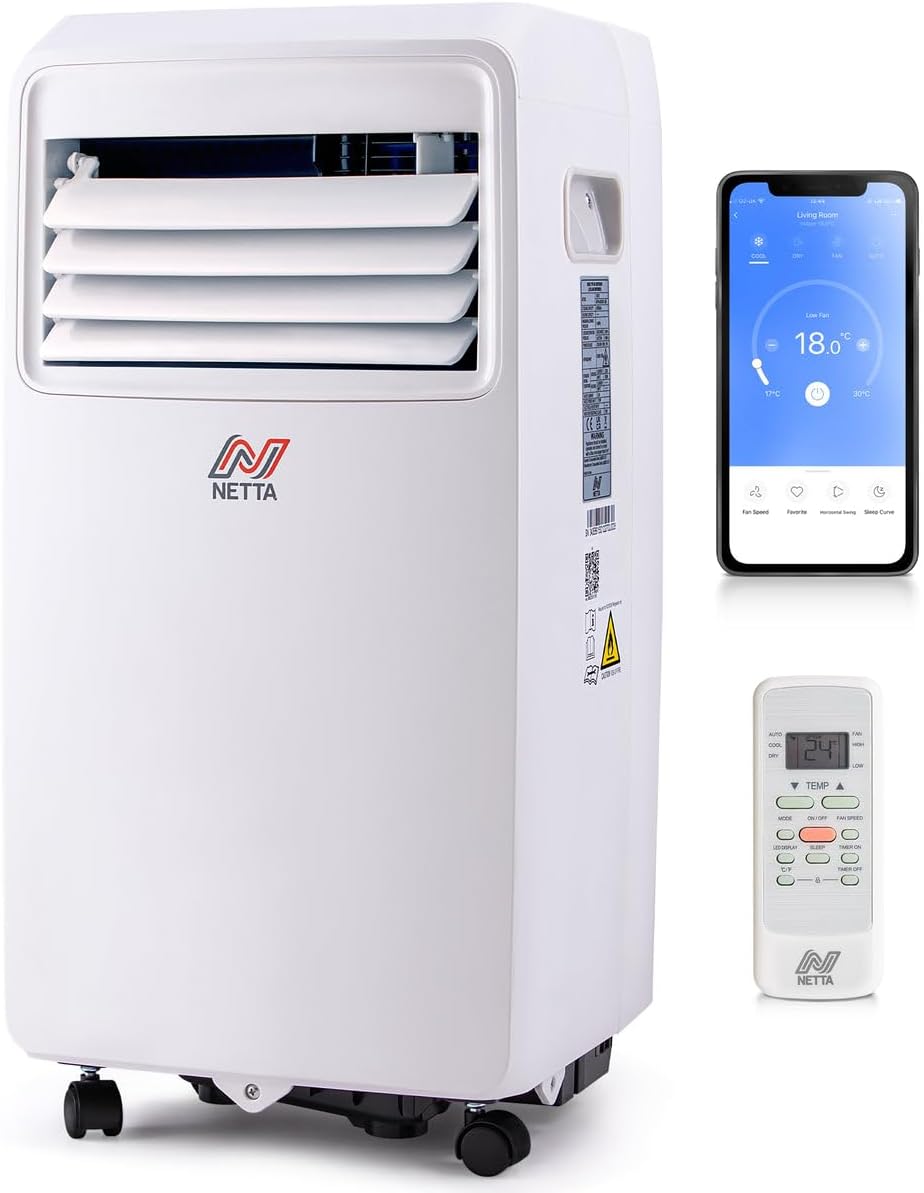
Image: The NETTA portable air conditioner shown with its remote control and a smartphone displaying the control app.
Główne cechy:
- Mocne chłodzenie: 10,000 BTU cooling capacity, effective for areas up to 20m², achieving temperatures as low as 16°C.
- Osuszanie: Extracts up to 24 liters of moisture per day.
- Wentylator wielobiegowy: Three fan speed options (High, Low, Sleep).
- Timer 24-godzinny: Programmable timer for automatic operation.
- Inteligentne sterowanie: Wi-Fi enabled for control via the Smart Life app, compatible with Amazon Alexa and Google Home.
- Ruchliwość: Equipped with castor wheels for easy movement.
- Energooszczędny: Class A energy rating with R290 eco-friendly refrigerant.

Image: A visual representation of the unit's three operational modes: cooling, fan, and dehumidifier.
3. Konfiguracja i instalacja
3.1 Rozpakowanie
Carefully remove the air conditioner from its packaging. Check for any damage. Retain the packaging for future storage or transport.
3.2 Montaż przewodu wydechowego
The unit requires an exhaust hose to vent hot air outside. A 150cm hose kit is included.
- Podłącz złącze węża do jednego końca węża wydechowego.
- Podłącz adapter do zestawu okiennego do drugiego końca węża wydechowego.
- Connect the hose connector to the exhaust outlet on the back of the air conditioner.
- Extend the exhaust hose and place the window kit adapter in a window opening, ensuring hot air is expelled outdoors.
3.3 Konfiguracja drenażu
For continuous dehumidification or cooling in high humidity, connect the continuous drainage pipe.
- Zlokalizuj otwór odprowadzający wodę z tyłu urządzenia.
- Connect the provided drainage hose to this outlet.
- Direct the other end of the hose to a suitable drain or container, ensuring it is lower than the unit's outlet for gravity drainage.
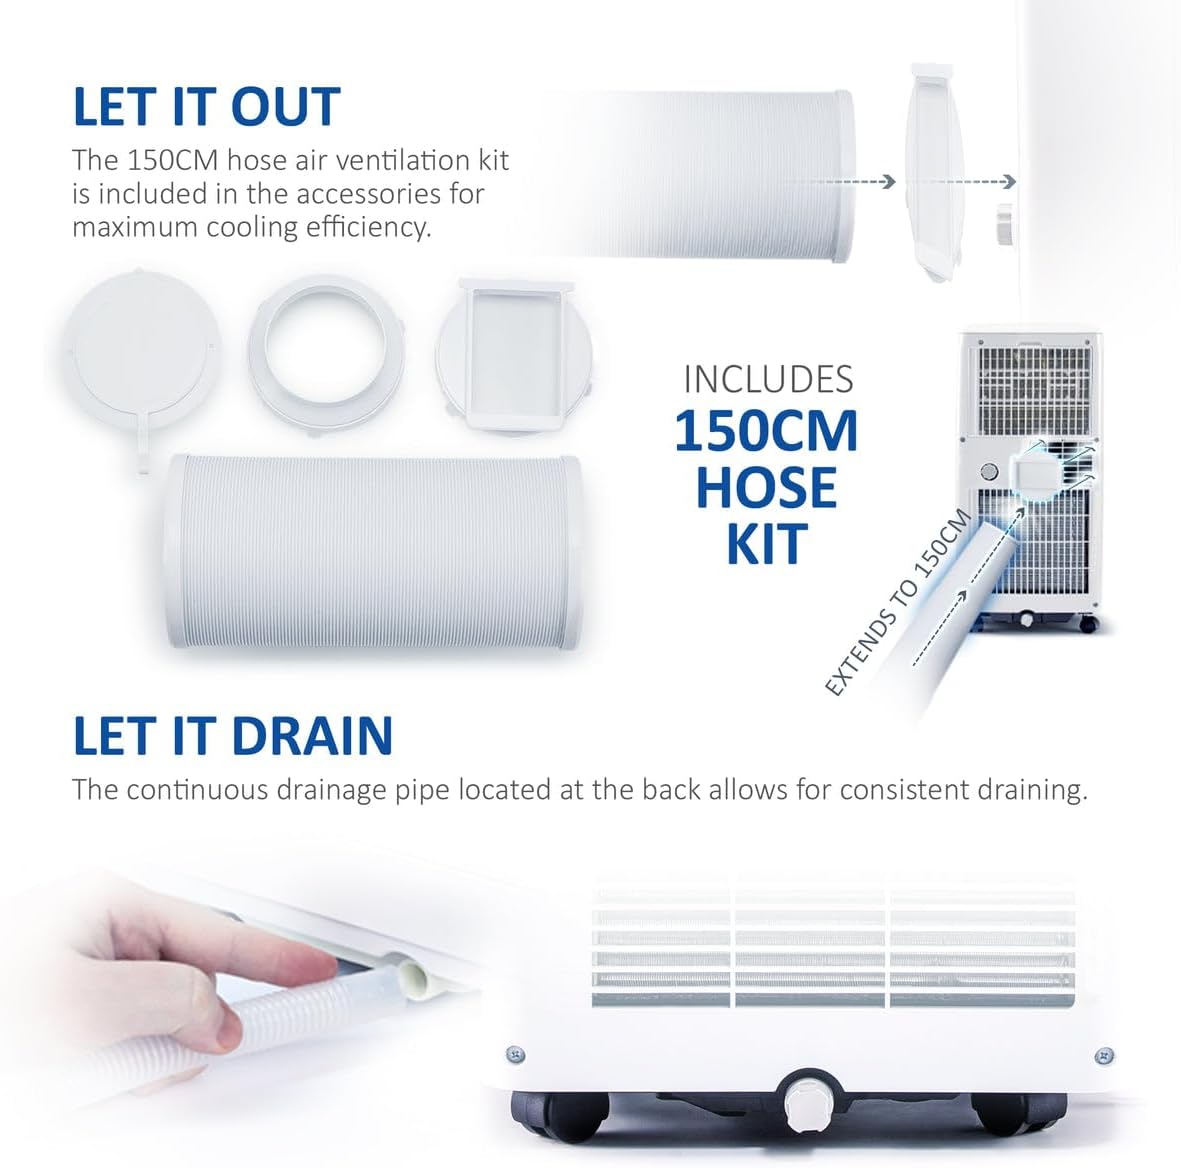
Image: The exhaust hose kit components and the continuous drainage pipe connection point on the unit.
3.4 Rozmieszczenie jednostek
Position the air conditioner on a firm, level surface. Ensure there is adequate space around the unit for proper airflow. The integrated castor wheels allow for easy repositioning.
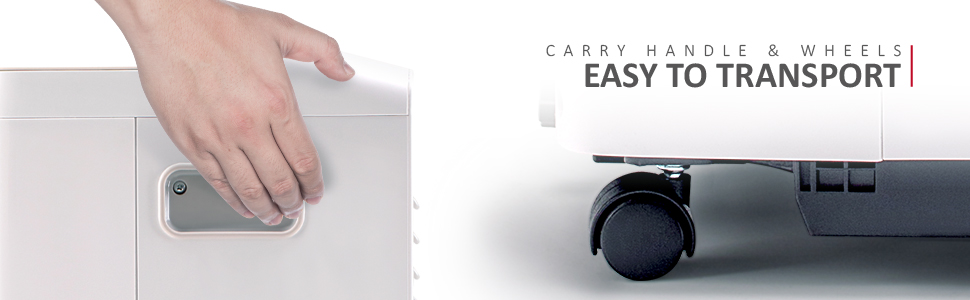
Image: Detail of the unit's carry handle and castor wheels, highlighting its portability.
4. Instrukcja obsługi
4.1 Panel sterowania i pilot zdalnego sterowania
The unit can be operated via the integrated LED control panel or the included remote control.

Image: The air conditioner, remote control, and smartphone app interface, demonstrating various control options including Wi-Fi.
4.2 tryby pracy
Press the 'Mode' button to cycle through the available functions:
- Tryb chłodzenia: Sets the desired room temperature between 16°C and 32°C.
- Tryb wentylatora: Operates as a fan with three speed settings (Low, Medium, High) without cooling.
- Tryb osuszacza: Usuwa nadmiar wilgoci z powietrza.
4.3 Temperature and Fan Speed Adjustment
- Use the 'Temperature Up' and 'Temperature Down' buttons to set the desired temperature in Cooling Mode.
- Use the 'Fan Speed' button to select Low, Medium, or High fan speed in Cooling or Fan Mode.
4.4 Funkcja timera
24-godzinny timer umożliwia zaprogramowanie automatycznego włączania i wyłączania urządzenia.
- Press the 'Timer' button.
- Use the temperature adjustment buttons to set the desired delay in hours (1-24).
- The unit will turn on/off after the set time.

Image: The 24-hour timer feature, allowing scheduled operation for comfort day and night.
4.5 Wi-Fi i inteligentne sterowanie aplikacją
Connect your air conditioner to the Smart Life app for remote control and advanced scheduling.
- Pobierz aplikację „Smart Life” ze sklepu z aplikacjami na swoim smartfonie.
- Postępuj zgodnie z instrukcjami w aplikacji, aby sparować urządzenie.
- Once connected, you can control temperature, modes, fan speed, and set schedules from your phone.
- The unit is also compatible with Amazon Alexa and Google Home for voice control (power and temperature settings only).
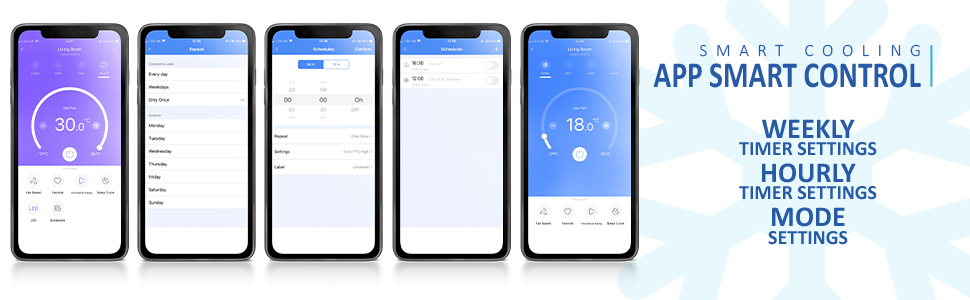
Image: Multiple screenshots of the Smart Life application, demonstrating its various control and scheduling features.
5. Konserwacja
Regularna konserwacja zapewnia optymalną wydajność i długowieczność klimatyzatora.
5.1 Czyszczenie filtra powietrza
Filtr powietrza należy czyścić co dwa tygodnie lub częściej, w zależności od intensywności użytkowania.
- Odłącz klimatyzator od gniazdka elektrycznego.
- Wyjmij filtr z tyłu urządzenia.
- Umyj filtr ciepłą wodą z mydłem. Dokładnie wypłucz i pozostaw do całkowitego wyschnięcia przed ponownym włożeniem.
5.2 Odprowadzanie nagromadzonej wody
When the internal water tank is full, the unit will stop operating and display an error code. Drain the water as follows:
- Odłącz klimatyzator.
- Podstaw płytką miskę lub tackę pod odpływ.
- Wyjmij gumową zatyczkę z otworu spustowego.
- Pozostaw całą wodę do odcieknięcia.
- Dokładnie załóż gumowy korek.
5.3 Przechowywanie
W przypadku przechowywania urządzenia przez dłuższy okres:
- Upewnij się, że cała woda została odprowadzona z urządzenia.
- Wyczyść filtr powietrza.
- Run the unit in fan mode for a few hours to dry the interior.
- Store the unit upright in a dry, cool place, preferably in its original packaging.
6. Rozwiązywanie Problemów
Przed skontaktowaniem się z obsługą klienta zapoznaj się z poniższymi typowymi problemami i rozwiązaniami:
| Problem | Możliwa przyczyna | Rozwiązanie |
|---|---|---|
| Jednostka się nie włącza | Brak zasilania; Przewód zasilający nie jest podłączony; Pełny zbiornik na wodę. | Check power connection; Plug in securely; Drain water tank. |
| Niewystarczające chłodzenie | Windows/doors open; Exhaust hose not properly installed; Air filter dirty; Room size too large. | Close all openings; Ensure hose is sealed; Clean air filter; Verify room size is within unit's capacity. |
| Urządzenie jest głośne | Jednostka nie stoi na równej powierzchni; filtr powietrza jest brudny. | Połóż na płaskiej powierzchni. Wyczyść filtr powietrza. |
| Wyciek wody | Drain plug loose; Continuous drainage hose blocked or improperly connected. | Secure drain plug; Check and clear drainage hose. |
| Problemy z połączeniem Wi-Fi | Nieprawidłowe hasło Wi-Fi; Router jest za daleko; Aplikacja nie została zaktualizowana. | Verify password; Move unit closer to router; Update Smart Life app. |
7. Specyfikacje
| Funkcja | Specyfikacja |
|---|---|
| Marka | NETTA |
| Numer modelu | 103973 |
| Wydajność chłodzenia | 10,000 BTU |
| Wydajność osuszania | Do 24 l/dzień |
| Wymiary (dł. x szer. x wys.) | Wymiary 33.5 x 32.5 x 70 cm |
| Waga | 25 kilogramów |
| Poziom hałasu | 48.2dB |
| Klasa efektywności energetycznej | A |
| Chłodziwo | R290 |
| Tomtage | 230 V |
| Moc | 1100 watów |
| Cechy specjalne | Wi-Fi, Remote Control, 24-Hour Timer, Alexa & Google Assistant Compatible |

Image: A visual comparison of the unit's operating noise level (48.2dB) against common sounds.

Image: The unit highlighting its 'A' energy efficiency rating and use of R290 eco-friendly refrigerant.
8. Gwarancja i wsparcie
For warranty information or technical support, please refer to the documentation provided with your purchase or contact NETTA customer service. Keep your proof of purchase for warranty claims.


