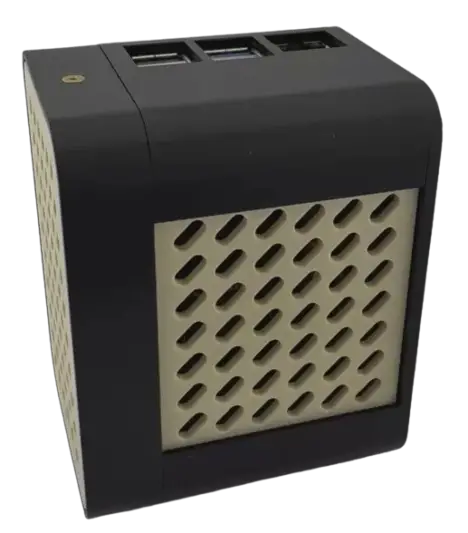
Origin Millwork Raspberry PI 5 plus Noctua Fan Compatible Case
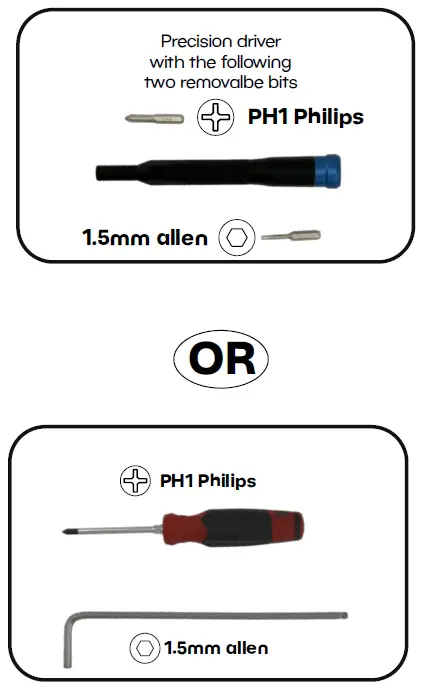
Required Tools
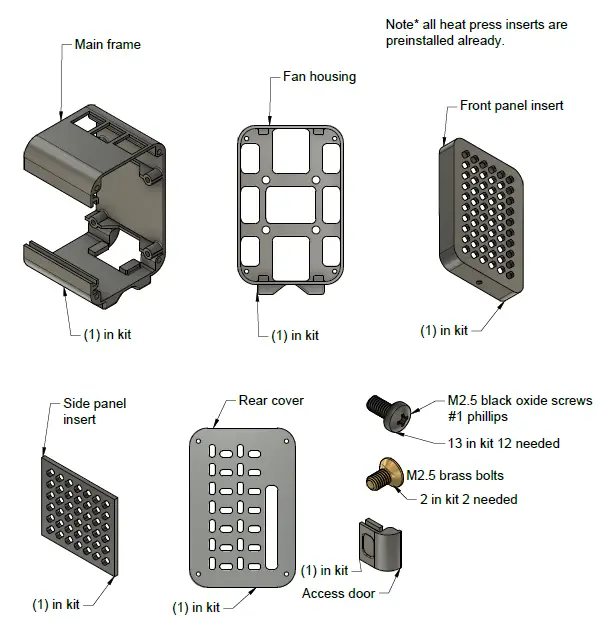
PARTS
Assembly Instructions
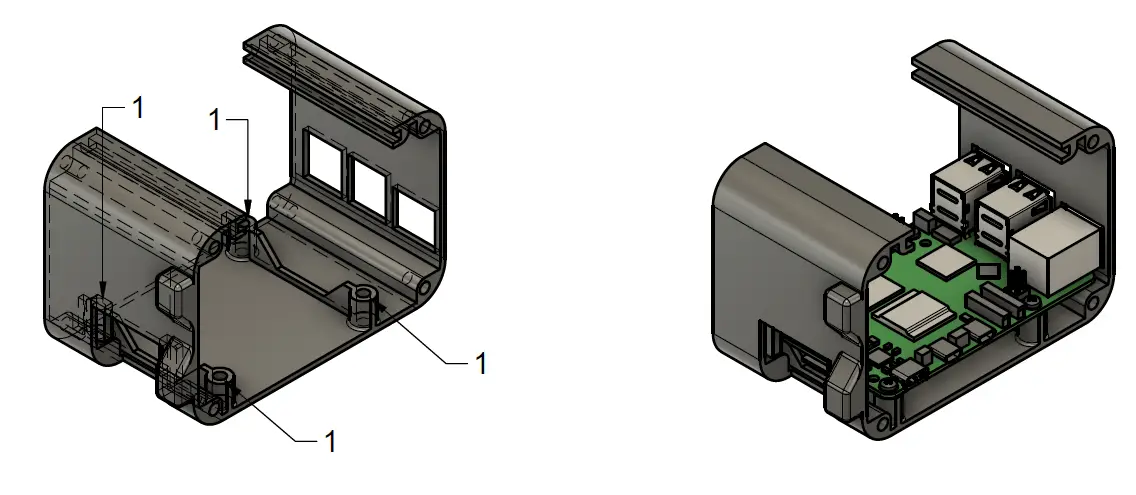
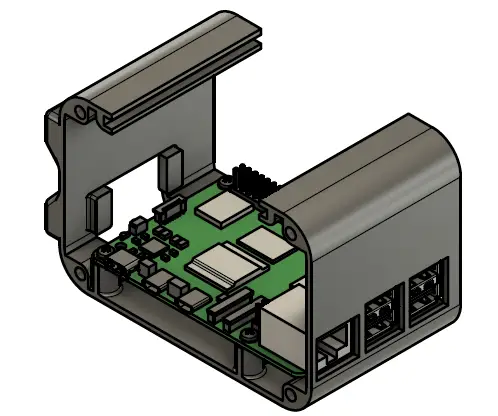
- Remove the access door from the main frame and place the frame on a flat surface.
- Position the Raspberry Pi 5 as shown in the diagram.
- Secure the Pi using four (4) M2.5 black Phillips head screws in the locations marked with a #1.
Tip: The screws near the access door can be tricky to reach. Use a long #1 Phillips screwdriver or removable #1 bit for easier installation. - Need more help? Check out our assembly video for additional guidance and tips.

Disclaimer:
Modifying the fan wiring for functionality requires advanced knowledge of electronics and carries the risk of damaging the fan or Raspberry Pi if done incorrectly. I do not provide specific instructions for this modification due to the variety of methods available and the potential for errors. Proceed at your own risk—I am not liable for any damage resulting from the fan installation or wiring modifications. Only attempt this modification if you are comfortable with the process. If you’re interested in how I modified my fan, you can watch my video (QR code in the reference section), which is for entertainment purposes only.
Please note, the Noctua fan is not required—the case is fully compatible with the standard Raspberry Pi fan.

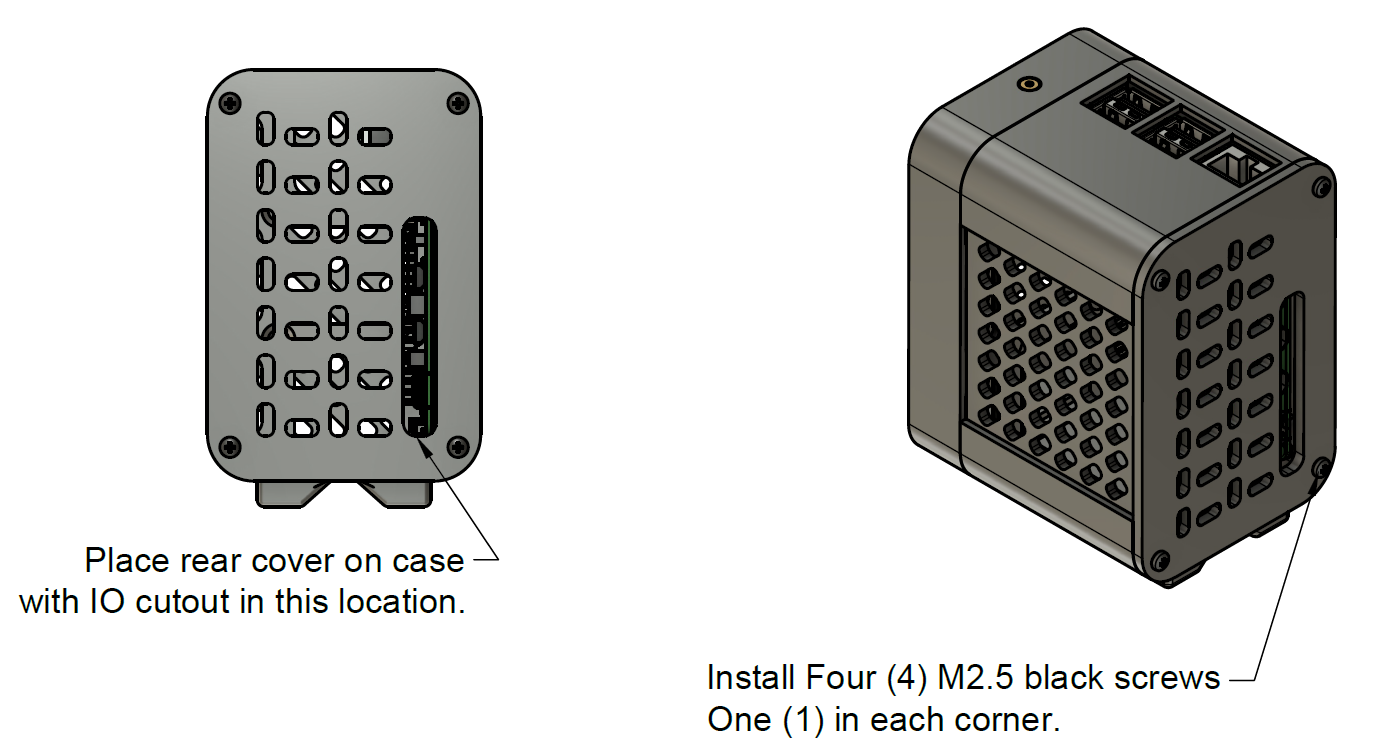
- Align the front fan housing with the main frame, ensuring that the feet on both parts are oriented the same way.
- Once aligned, start all of the M2.5 black screws into the brass inserts, but do not fully tighten them yet.
- After all screws are in place, hold the two parts flush with your hand, then begin tightening each screw.
- Tip: Start tightening in one corner and work diagonally for even pressure. Snug the screws, but be careful not to overtighten.


Documents / Resources
 |
Origin Millwork Raspberry PI 5 plus Noctua Fan Compatible Case [pdf] User Guide Raspberry PI 5 plus Noctua Fan Compatible Case, Raspberry PI 5, plus Noctua Fan Compatible Case, Fan Compatible Case, Compatible Case, Case |


