1. Introduksjon
Thank you for choosing the Olvy Electric Tire Inflator. This 12V air compressor is designed for efficient and convenient inflation of various items, including car tires, bicycle tires, motorcycle tires, sports balls, and airbeds. Its compact design, digital display, and automatic shut-off feature ensure ease of use and precise inflation. Please read this manual thoroughly before operating the device to ensure safe and optimal performance.
2. Sikkerhetsinstruksjoner
- Sørg alltid for at bilmotoren går når du bruker kompressoren for å unngå å tømme bilbatteriet.
- Ikke la kompressoren være uten tilsyn mens den er i drift.
- Oppbevares utilgjengelig for barn.
- Avoid over-inflating. Always refer to the recommended pressure for the item being inflated.
- Do not operate the compressor continuously for more than 10-15 minutes. Allow it to cool down for at least 10 minutes before resuming use.
- Ensure the power cable and air hose are not damaged before use.
- Do not expose the compressor to rain or extreme temperatures.
- Disconnect the power supply when not in use or before cleaning.
3. Pakkens innhold
Vennligst sjekk pakken for følgende varer:
- 1x Olvy Electric Tire Inflator (Air Compressor)
- 1x brukerveiledning
- 4x Valve Adapters (for various inflation needs)
4. Produktet er overview
The Olvy Electric Tire Inflator features a compact design with a digital LCD display for clear pressure readings and an LED light for emergency use in low-light conditions. It operates on a 12V power supply, typically from a car's cigarette lighter socket. The device includes an integrated air hose and a 3-meter power cable for extended reach.

Image: The Olvy Electric Tire Inflator shown with its included nozzle adapters, highlighting its versatility for different inflation tasks.

Image: The Olvy Electric Tire Inflator demonstrating its compatibility with a wide range of items, including car tires, bicycle tires, motorcycle tires, sports balls, kayaks, and airbeds.
5. Oppsett
- Start the Vehicle Engine: For optimal performance and to prevent draining your car battery, ensure your vehicle's engine is running before connecting the tire inflator.
- Connect to 12V Power Outlet: Plug the compressor's 12V power cable into your vehicle's cigarette lighter socket.
- Attach Air Hose to Valve: Screw the air hose connector onto the valve stem of the item you wish to inflate. Ensure a tight seal to prevent air leakage.

Image: A visual guide illustrating the initial steps of using the Olvy Electric Tire Inflator, including starting the car engine, connecting the 12V plug, and attaching the hose to the tire valve.
6. Bruksanvisning
- Still inn ønsket trykk: Use the digital display and control buttons to set your desired pressure (e.g., in PSI, BAR, KPA, or KG/CM²). Refer to the item's manufacturer recommendations for correct pressure.
- Start inflasjon: Press the power button to begin inflation. The compressor will start pumping air.
- Automatisk avstenging: The Olvy Electric Tire Inflator will automatically stop once the preset pressure is reached, preventing over-inflation.
- Frakople: Once inflation is complete, turn off the compressor, disconnect the air hose from the valve, and then unplug the 12V power cable from your vehicle.
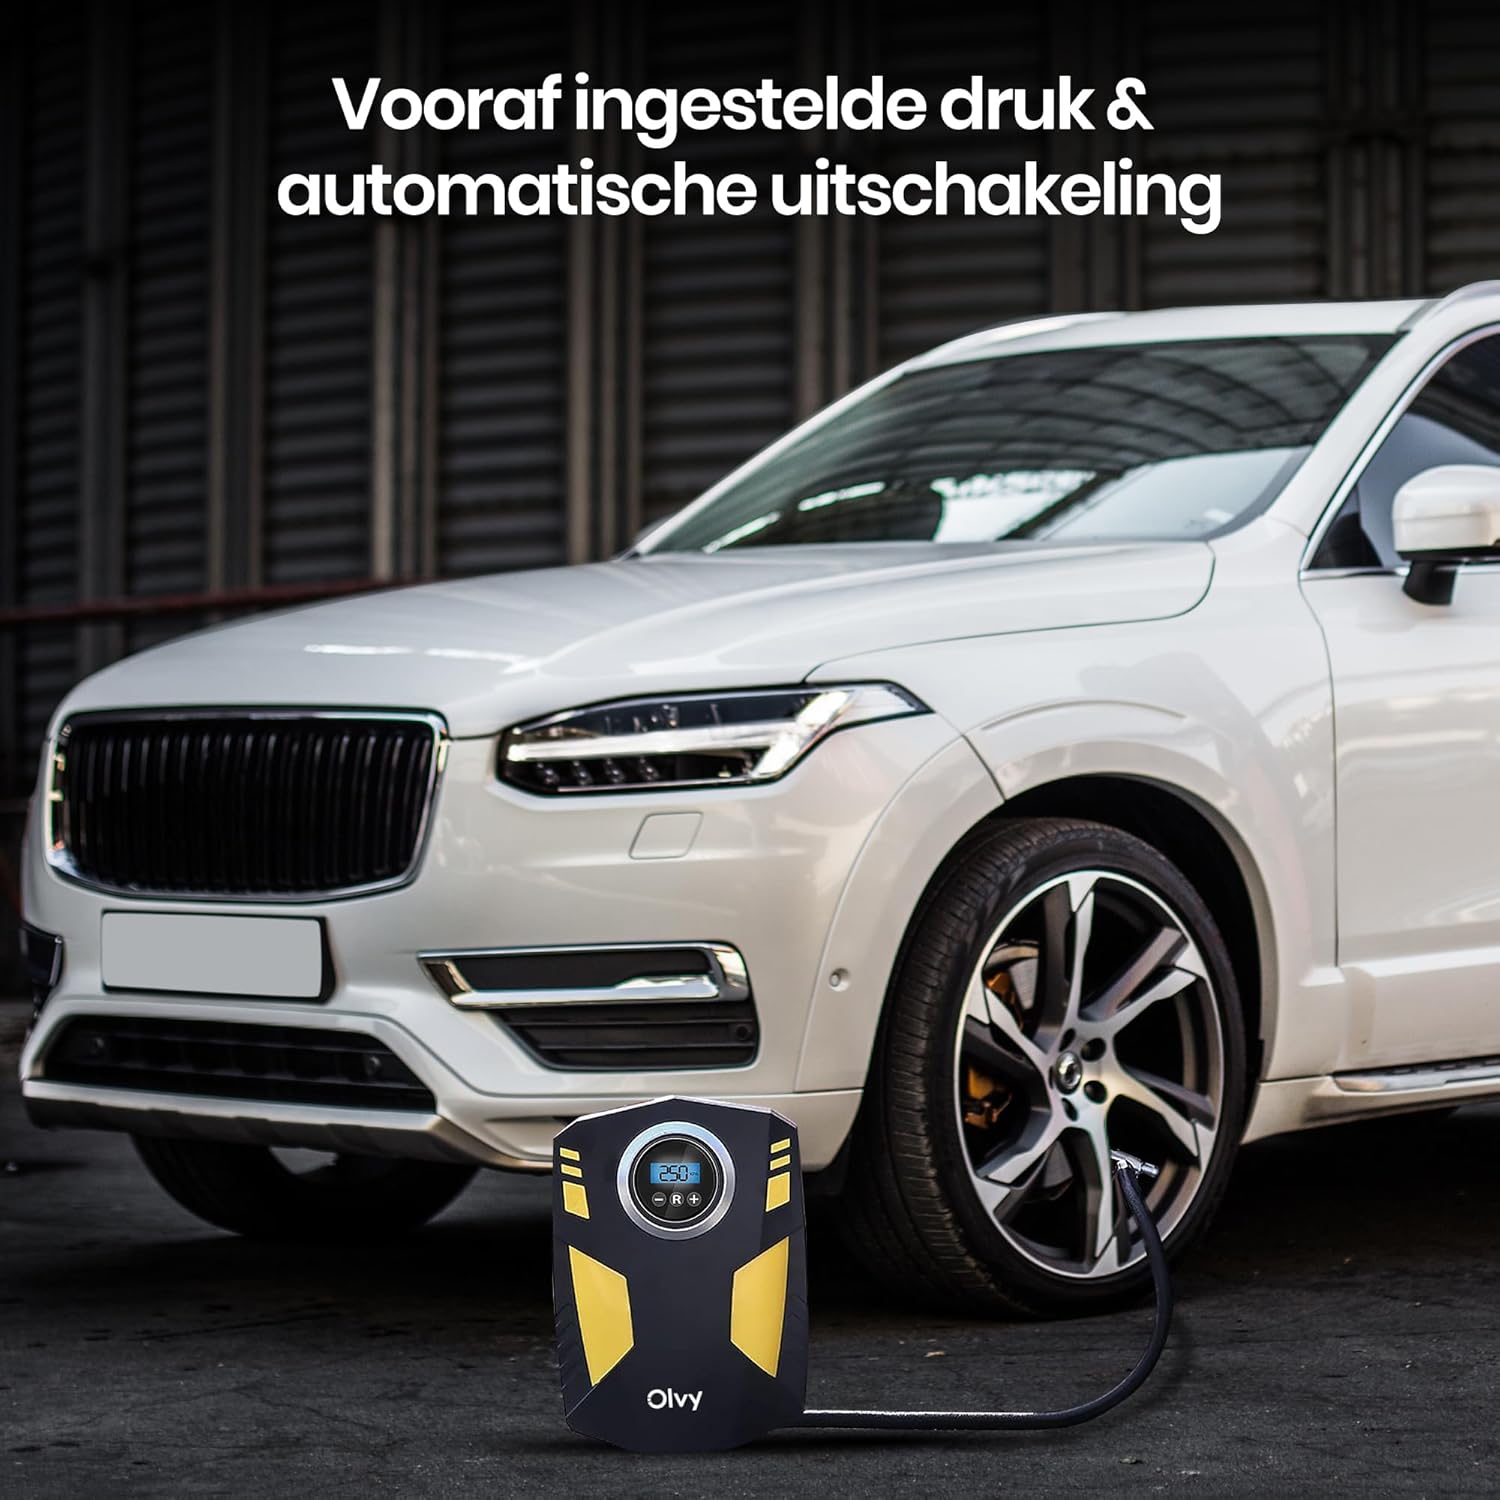
Image: The Olvy Electric Tire Inflator actively inflating a car tire, showcasing its digital display and the convenience of its automatic shut-off function once the target pressure is achieved.
7. Vedlikehold
- Rengjøring: Tørk av utsiden av kompressoren med en myk klutamp klut. Ikke bruk sterke kjemikalier eller skurende rengjøringsmidler.
- Lagring: Store the compressor in a cool, dry place, away from direct sunlight and extreme temperatures. Ensure the air hose and power cable are neatly coiled to prevent damage.
- Sjekk tilkoblinger: Periodically inspect the air hose and power cable for any signs of wear or damage. Replace if necessary.
8. Feilsøking
| Problem | Mulig årsak | Løsning |
|---|---|---|
| Kompressoren slår seg ikke på. | No power from 12V socket; Blown fuse in car or compressor; Loose connection. | Ensure car engine is running. Check 12V socket for power. Check car's fuse box and compressor's fuse. Ensure plug is fully inserted. |
| Kompressoren går, men blåses ikke opp. | Air hose not securely attached; Leak in hose or valve; Incorrect adapter used. | Ensure air hose is tightly screwed onto valve. Check hose for damage. Use appropriate valve adapter. |
| Langsom inflasjon. | Lav voltage; Small leak. | Ensure car engine is running. Check for minor leaks at connections. |
| Kompressoren overopphetes og slår seg av. | Kontinuerlig drift for lenge. | Allow the compressor to cool down for at least 10 minutes before resuming use. Avoid continuous operation exceeding 10-15 minutes. |
9. Spesifikasjoner
- Modell: 1.1
- Merke: Olvy
- Strømkilde: 12V DC (Car Cigarette Lighter)
- Voltage: 12 volt
- Maksimalt trykk: 10.3 BAR (approximately 150 PSI)
- Strømkabellengde: 3 meter
- Inkluderte komponenter: 1x Air Compressor, 1x Manual, 4x Valve Adapters
- Dimensjoner: Approximately 20.6 cm (Height) x 14.5 cm (Width)
10. Garanti og støtte
The Olvy Electric Tire Inflator comes with a 1 års produsentgaranti fra kjøpsdatoen. Denne garantien dekker defekter i materialer og utførelse ved normal bruk.
For warranty claims, technical support, or any questions regarding your product, please contact Olvy customer service through the retailer where you purchased the product or visit the official Olvy webnettsted for kontaktinformasjon.


