1. Inleiding
This manual provides detailed instructions for the assembly, operation, and maintenance of your AmScope ME508 Series Compact Trinocular Metallurgical Upright Compound Microscope. This advanced microscopy system is designed for observing metals, plastics, and biological samples, featuring dual illumination (transmitted and incident) and simple polarization capabilities. It includes a high-resolution 18MP USB 3.0 camera for digital imaging.
2. Veiligheidsinstructies
- Ga altijd voorzichtig om met de microscoop. Vermijd abrupte bewegingen of stoten.
- Ensure the microscope is placed on a stable, level surface to prevent tipping.
- Stel de microscoop niet bloot aan direct zonlicht, hoge temperaturen of een hoge luchtvochtigheid.
- Haal de stekker uit het stopcontact voordat u gaat schoonmaken of onderhoudswerkzaamheden uitvoert.
- Use only the specified power adapter and bulbs.
- Keep the optical components clean and free from dust. Use lens tissues for cleaning.
- Do not attempt to disassemble the microscope's internal components. Refer servicing to qualified personnel.
3. Paklijst
Controleer de inhoud van uw pakket aan de hand van onderstaande lijst:
- One ME580-2L microscope with trinocular Siedentopf head
- One photo tube
- Three LM Plan achromatic objectives (5X, 10X, 50X)
- Three achromatic objectives (4X, 10X, 40X)
- One pair of PL10X18 eyepieces
- One Pair of WF16X eyepieces
- One sub-stage condenser
- One Halogen episcopic illuminator module
- One 6V 30W G4 halogen bulb
- One 6V 20W G4 halogen bulb
- Six filters (polarizer, analyzer, green, blue, yellow, diffuser)
- One AC cord
- One pack of lens tissues
- One dust cover
- One tension wrench
- One 18MP USB3.0 digital camera
- One reduction lens
- Two camera mounting adapters
- Eén USB-kabel
- One software CD
4. Componenten voorbijview
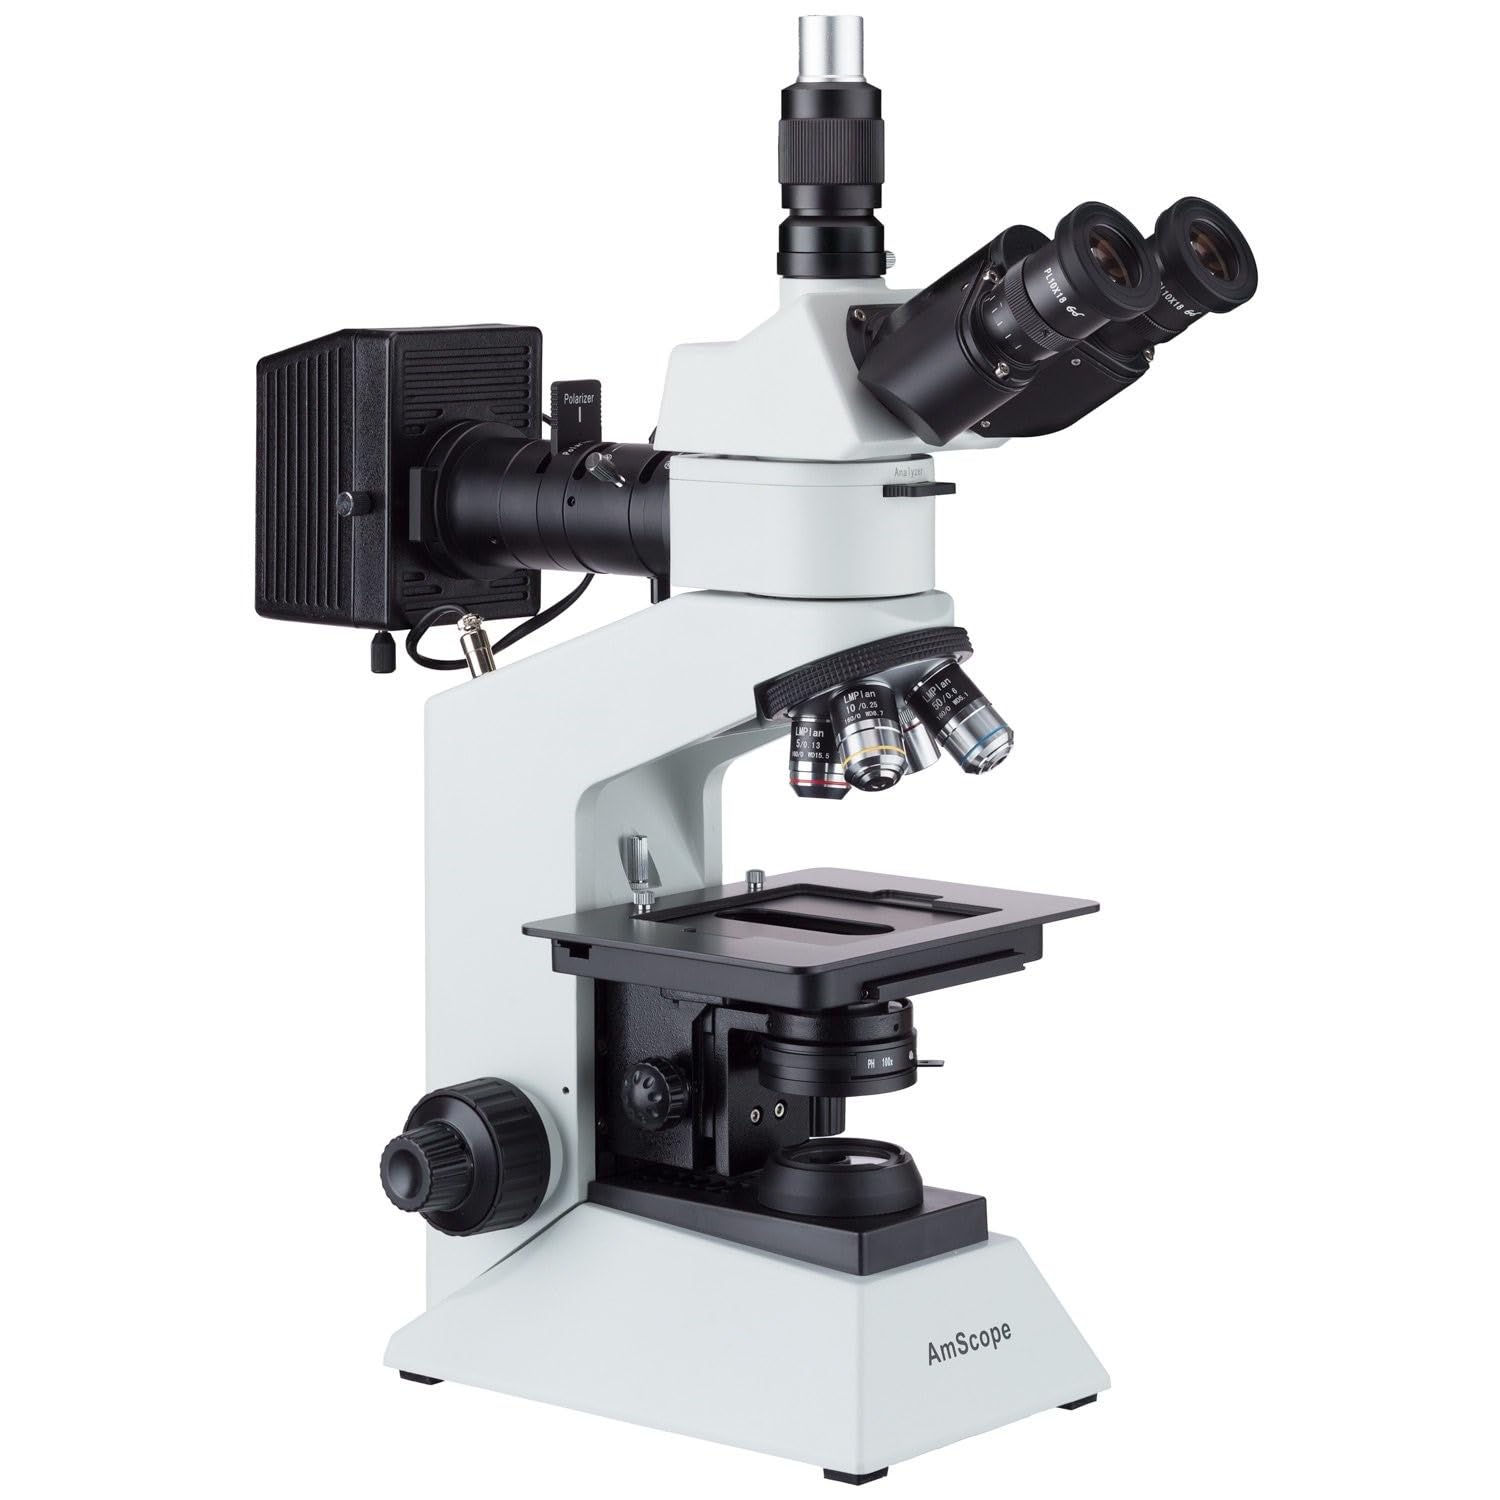
Familiarize yourself with the main components of your AmScope ME508 Series microscope.

Figuur 1: The AmScope ME508 Series Trinocular Metallurgical Microscope, shown with the 18MP USB 3.0 C-Mount camera attached to the trinocular port. This view highlights the overall structure, including the base, stage, objective turret, trinocular head with eyepieces, and the incident illuminator on the right side.
Figuur 2: Een kant view of the AmScope ME508 Series Microscope, illustrating the main body without the digital camera. This image provides a clearer view of the trinocular head, the objective lenses mounted on the revolving nosepiece, the mechanical stage, and the coarse and fine focus knobs.

Figuur 3: Van dichtbij view of the Siedentopf trinocular head and eyepieces. The two ocular tubes for binocular viewing are visible, along with the dedicated photo port (trinocular port) at the top, designed for attaching a camera. The PL10X18 eyepieces are inserted into the ocular tubes.

Figuur 4: Gedetailleerd view of the revolving nosepiece holding the objective lenses and the mechanical stage. The metallurgical plan achromatic objectives (5X, 10X, 50X) are visible, along with the bright-field achromatic objectives (4X, 10X, 40X) below the stage. de stage features X-Y movement controls for precise sample positionering.
5. Opstelling en montage
- Uitpakken: Haal alle onderdelen voorzichtig uit de verpakking. Bewaar de originele verpakking voor toekomstig transport of opslag.
- Plaatsing: Place the microscope body on a stable, level, and vibration-free surface.
- Hoofdmontage: Loosen the head locking screw on the microscope body. Gently insert the trinocular Siedentopf head into the top port, ensuring it is fully seated. Tighten the locking screw.
- Installatie van het oculair: Insert the PL10X18 eyepieces into the ocular tubes of the trinocular head. For higher magnification, the WF16X eyepieces can be used.
- Objectieve installatie: Carefully screw each objective lens (5X, 10X, 50X metallurgical; 4X, 10X, 40X bright-field) into the revolving nosepiece. Start with the lowest magnification objective and proceed to higher ones.
- Illuminator Module: Attach the Halogen episcopic illuminator module to its designated port on the microscope body. Ensure the bulb is correctly installed.
- Sub-stage Condenser: Install the sub-stage condenser for transmitted illumination.
- Camera Setup (Optional):
- Attach the reduction lens to the 18MP USB3.0 digital camera.
- Insert the camera with the reduction lens into the photo tube.
- Insert the photo tube assembly into the trinocular port on the microscope head.
- Sluit de camera aan op uw computer met behulp van de meegeleverde USB-kabel.
- Install the software from the included CD onto your computer (Windows, Mac, or Linux compatible).
- Stroomaansluiting: Connect the AC cord to the microscope and then to a suitable power outlet.
6. Bediening
6.1 Powering On and Illumination
- Turn on the microscope using the power switch located on the base.
- Adjust the brightness of both the reflected (incident) and transmitted illumination using their respective controls.
- For metallurgical observation, primarily use the incident illuminator. For transparent samples, use the transmitted illuminator.
- The episcopic illuminator includes removable polarizer and analyzer filters for polarized light observation. Insert these into their slots for structural analysis.
6.2 Sample Placement and Focusing
- Plaats uw sample op de mechanische stage. Use the stage clips to secure it if necessary.
- Rotate the revolving nosepiece to select the lowest power objective (e.g., 4X or 5X).
- Use the X-Y movement controls on the mechanical stage to position the desired area of your sample directly under the objective lens.
- While looking through the eyepieces, use the coarse focus knob to bring the sample into approximate focus.
- Use the fine focus knob for precise focusing and to achieve a sharp image.
- Adjust the interpupillary distance by moving the ocular tubes until a single, clear field of view wordt waargenomen.
- Adjust the diopter on both eye tubes to compensate for differences in vision between your eyes.
6.3 Magnification Settings
The microscope offers various magnification settings depending on the eyepieces and objectives used:
- Metallurgical Magnifications (with 10X eyepieces): 50X, 100X, 500X (using 5X, 10X, 50X LM Plan achromatic objectives)
- Metallurgical Magnifications (with 16X eyepieces): 80X, 160X, 800X (using 5X, 10X, 50X LM Plan achromatic objectives)
- Bright-field Magnifications (with 10X eyepieces): 40X, 100X, 400X (using 4X, 10X, 40X achromatic objectives)
- Bright-field Magnifications (with 16X eyepieces): 64X, 160X, 640X (using 4X, 10X, 40X achromatic objectives)
6.4 Digital Camera Operation
After installing the camera and software:
- Launch the microscopy software on your computer.
- Select the 18MP USB 3.0 camera as the input device.
- Adjust camera settings (exposure, white balance, gain) within the software for optimal image quality.
- Gebruik de software om view a live stream, capture still images, record videos, and perform measurements or image processing.
- The software supports advanced features like image-stitching and extended-depth-of-focus on Windows.
7. Onderhoud
- Reinigen van optiek: Use a soft brush to remove dust from lenses. For smudges, use lens tissue lightly moistened with lens cleaning solution. Never use abrasive materials.
- Reiniging Lichaam: Veeg de behuizing van de microscoop af met een zachte, droge doek.amp cloth. Avoid using organic solvents.
- Opslag: Bescherm de microscoop tegen stof en vuil door de meegeleverde stofkap te gebruiken wanneer deze niet in gebruik is. Bewaar de microscoop op een koele, droge plaats.
- Lamp vervangen: Disconnect power before replacing halogen bulbs. Allow bulbs to cool completely. Handle new bulbs with a clean cloth to avoid leaving fingerprints.
8. Probleemoplossing
| Probleem | Mogelijke oorzaak | Oplossing |
|---|---|---|
| Geen verlichting | Power cord disconnected, bulb burnt out, brightness control set to minimum. | Check power connection, replace bulb, adjust brightness control. |
| Image unclear/blurry | Improper focusing, objective lens dirty, eyepiece diopter not adjusted. | Adjust fine focus, clean objective/eyepiece, adjust diopter. |
| Dust spots in field of view | Dust on eyepiece, objective, or camera sensor. | Clean eyepieces and objectives. For camera sensor, refer to camera manual or professional cleaning. |
| Camera not detected by computer | USB cable loose, drivers not installed, software issue. | Ensure USB cable is securely connected, reinstall camera drivers/software, try a different USB port. |
9. Specificaties
| Hoofd | 30 degree inclined trinocular, 360 degree rotatable |
| Oculairen | High-eyepoint WF10X/18, WF16X |
| Interpupillaire aanpassing | Siedentopf |
| Neusstuk | Forward quadruple RMS thread |
| Buislengte | 160 mm |
| Metallurgical Objectives | 5X/0.13, 10X/0.25, 50X/0.6 long-working-distance plan achromatic DIN |
| Bright-field Objectives | 4X/0.1, 10X/0.25, 40X/0.65 achromatic DIN |
| Polarization System | Removable analyzer/polarizer filters for episcopic lighting with +/- 25° adjustment |
| Focus systeem | Coaxial coarse/fine focus |
| Focus reisbereik | 28 mm |
| Fine-focus Precision | 0.002 mm |
| Stage | 140x132mm double layer mechanical stage |
| Stage X-Y Movement | 75x50mm |
| Verlichting | 30W reflected (incident), 20W transmitted (Halogen) |
| Camerasensor | Aptina CMOS (color) |
| Cameraresolutie | 18.0MP |
| Framesnelheid van de camera | Up to 32.2fps @ 1228x922 |
| Camera-interface | USB 3.0 |
| Softwarecompatibiliteit | Windows (32/64 bit) XP/Vista/7/8/10, Mac OS 10.8+, Linux kernel 3.13+ |
| Productafmetingen | 10.25 x 19.1 x 30.4 inch |
| Artikelgewicht | 29.66 pond |
10. Garantie en ondersteuning
Your AmScope ME508 Series Microscope comes with an excellent five (5) year factory warranty, ensuring peace of mind regarding manufacturing defects and performance. For technical support, service, or warranty claims, please contact AmScope customer service directly. Refer to the AmScope webVoor contactgegevens kunt u terecht op onze website of in uw aankoopdocumentatie.
Fabrikant: United Scope, LLC


