1. Inleiding
This manual provides detailed instructions for the installation, operation, and maintenance of your Reolink RLC-410WS 4MP Super HD Dual-Band Wi-Fi Wireless Security IP Camera. Please read this manual thoroughly before using the product to ensure correct usage and optimal performance.
2. Product voorbijview
2.1 Cameracomponenten
Familiarize yourself with the main components of your RLC-410WS camera:

Afbeelding 2.1: Reolink RLC-410WS Camera Component Diagram. This image illustrates the various parts of the camera including the antenna, lens, IR LEDs, daylight sensor, and connection ports for power, network, and the reset button.
- Antenne: Voor Wi-Fi-connectiviteit.
- Metalen aluminium behuizing: Durable housing for outdoor use.
- High Definition F=4.0mm Lens: Captures 4MP Super HD video.
- 36 PCS IR LEDs: Provides infrared illumination for night vision up to 100ft.
- Daglicht sensor: Detecteert omgevingslicht om te schakelen tussen dag- en nachtmodus.
- Resetknop: Wordt gebruikt om de fabrieksinstellingen te herstellen.
- Voedingspoort: For connecting the 12V DC power adapter.
- Netwerkkabelpoort: For initial setup and optional wired Ethernet connection.
2.2 Belangrijkste kenmerken
- 4MP Super HD-video: Records clear video at 1440p resolution, supporting 1080p and 720p.
- 100ft nachtzicht: Equipped with IR LEDs for clear surveillance in low-light conditions.
- Dual-band wifi: Supports 2.4GHz and 5GHz Wi-Fi for flexible and stable wireless connection.
- Bewegingsdetectiewaarschuwingen: Sends real-time email alerts with photos or 30-second video clips, and push notifications to mobile phones.
- Lokale opslag: Built-in 16GB Micro SD card for recording and storing up to 400 motion-activated events.
- Op afstand toegang: Monitor your home from anywhere using the Reolink Client software (PC/Mac) or Reolink App (iPhone/Android).
- 80 graden Viewhoek: Biedt een breed scala aan view.
- IP67 Weerbestendig: Ontworpen voor gebruik buitenshuis in diverse weersomstandigheden.
3. Wat zit er in de doos?
Controleer of alle artikelen in uw pakket aanwezig zijn:

Afbeelding 3.1: Package Contents. This image displays the camera, antenna, power adapter, extension cable, network cable, software CD, quick start guide, surveillance sign, mounting template, and screws.
- Reolink RLC-410WS Camera
- Stroomadapter
- Power verlengkabel
- Network Cable (1 meter)
- Antenne
- Snelstartgids
- Sjabloon voor montagegaten
- Schroeven en pluggen
- Bewakingsbord
- CD (Manual/Software)
4. Installatie en installatie
4.1 Eerste configuratie
- Connect Power and Ethernet: Connect the camera to the power adapter and then to your router using the provided Ethernet cable.
- Download Reolink App/Client: Download the Reolink App from the App Store or Google Play, or the Reolink Client software from the official Reolink website for PC/Mac.
- Camera toevoegen: Open the app/client, click the "+" icon to add the camera. The app/client should automatically detect the camera on your local network.
- Stel een wachtwoord in: Maak een sterk wachtwoord aan voor je camera.
- Wi-Fi configureren: Once connected via Ethernet, navigate to the camera settings in the app/client to configure Wi-Fi. Select your 2.4GHz or 5GHz network and enter the password. Ensure a strong Wi-Fi signal at the installation location. Note: Wi-Fi settings can typically only be changed while the camera is connected via Ethernet.
- Test verbinding: After configuring Wi-Fi, test the connection. Once successful, you can disconnect the Ethernet cable.
4.2 De camera monteren
Consider the following when mounting your camera:
- Locatie: Kies een locatie die de gewenste viewhoek en binnen het bereik van uw Wi-Fi-netwerk.
- Kabelgeleiding voor stroomvoorziening: The power cable requires a hole of approximately 3/4 inch (19mm) to pass through a wall due to the Ethernet socket and reset switch on the breakout cable. Plan your cable routing carefully.
- Beugelaanpassing: The mounting bracket allows for three-dimensional adjustment. Loosen the small Allen screws to adjust the camera angle, then tighten them securely.
- Waterbescherming: For outdoor installations, ensure the breakout cable connections (power, network, reset button) are protected from water. Consider using a waterproof junction box.

Afbeelding 4.1: Camera Dimensions. This image provides the physical measurements of the RLC-410WS camera, useful for planning installation.
5. De camera bedienen
5.1 Toegang tot de camera
You can access your Reolink RLC-410WS camera using various platforms:

Afbeelding 5.1: Reolink Software Platform. This image illustrates how the Reolink camera can be accessed and managed from various devices, including Mac, Windows, iPhone, and Android.
- Reolink App: Available for iOS (iPhone/iPad) and Android devices. Provides live view, afspelen en instellingenbeheer.
- Reolink Client: Desktop software for Windows and macOS. Offers comprehensive control, multi-camera viewing, and recording options.
- Web Browser: Access the camera directly via its IP address using a web browser (features may be limited compared to the app/client).
5.2 Bewegingsdetectie en -registratie
The RLC-410WS camera features customizable motion detection:
- Gevoeligheidsaanpassing: Pas de gevoeligheid van de bewegingsdetectie aan om valse alarmen te minimaliseren.
- Detectiezones: Definieer specifieke gebieden binnen de camera view to monitor for motion, ignoring irrelevant areas.
- Privacymasker: Mask out sensitive areas from being recorded or viewred.
- Waarschuwingen: Receive instant push notifications on your phone, email alerts with snapshots or video clips, and upload recordings to an FTP server.
- Lokale opslag: Motion-activated events are recorded to the built-in 16GB Micro SD card for later playback.
5.3 Videokwaliteit en nachtzicht
The camera provides high-quality video day and night:
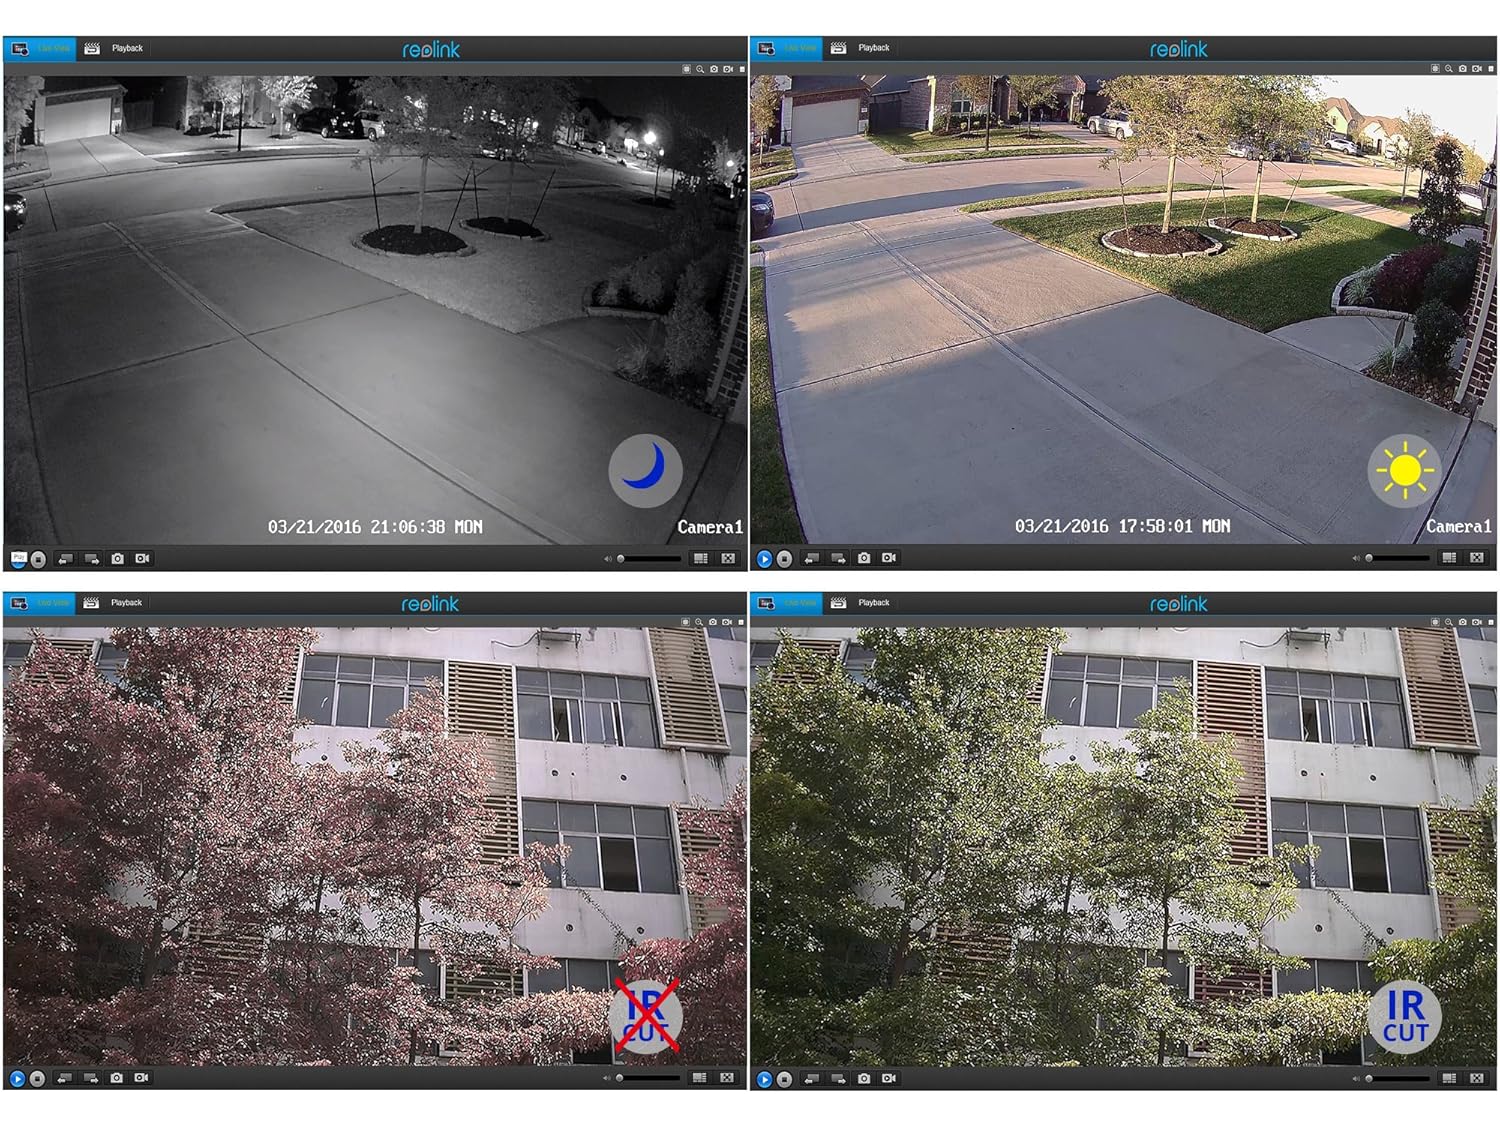
Afbeelding 5.2: Day and Night Vision Comparison. This image demonstrates the camera's ability to capture clear video in both daylight and low-light conditions using its infrared capabilities.
- 4MP Super HD: Delivers crisp and clear video footage.
- Infrarood Night Vision: Automatically switches to night mode in low light, providing clear black and white video up to 100 feet.
- IR Cut Filter: Ensures accurate color reproduction during the day and enhanced infrared sensitivity at night.
6. Specificaties
Detailed technical specifications for the Reolink RLC-410WS camera:
| Functie | Specificatie |
|---|---|
| Model | RLC-410WS |
| Effectieve videoresolutie | 4 MP (1440p) |
| Viewhoek: | 80 graden |
| Nachtzichtbereik | 100 voet |
| Framesnelheid | 25 beelden per seconde |
| Draadloze communicatie | Wi-Fi (2.4/5Ghz Dual Band) |
| Opslag | Ingebouwde 16GB Micro SD-kaart |
| Energiebron | 12 Volt DC |
| Internationale Beschermingsgraad | IP67 |
| Afmetingen (L x B x H) | 18.8 x 6.6 x 6.6 centimeter |
| Artikelgewicht | 454 g (1 pond) |
| Controlemethode | Toepassing |
| Montagetype | Muurbevestiging |

Afbeelding 6.1: Reolink Model Feature Comparison. This table highlights the features available across various Reolink camera models, including PoE, Wi-Fi, Micro SD storage, optical zoom, and pan/tilt capabilities.
7. Probleemoplossing
This section addresses common issues you might encounter with your RLC-410WS camera.
7.1 Problemen met de wifi-verbinding
- Geen wifi-verbinding:
- Ensure the camera is initially configured via Ethernet before setting up Wi-Fi.
- Controleer of uw Wi-Fi-wachtwoord correct is.
- Perform a firmware update. Outdated firmware can cause connectivity problems.
- Ensure the camera is within range of your Wi-Fi router and has a strong signal. Signal strength can drop quickly with distance.
- If changing Wi-Fi settings, ensure the camera is connected via Ethernet, run a connection test, and save changes.
- Frequent Disconnects:
- Check Wi-Fi signal strength at the camera's location. Consider using a Wi-Fi extender if the signal is weak.
- Ensure your router's 2.4GHz and 5GHz channels are not overly congested.
- Update camera firmware to the latest version.
7.2 Camera Not Responding After Settings Change/Firmware Update
- If the camera becomes unresponsive after a settings change or firmware update, try power cycling the camera (unplug and re-plug the power adapter).
- If power cycling does not work, reconnect the camera via Ethernet. This often restores connectivity and allows further troubleshooting or re-configuration.
- If the issue persists, perform a factory reset using the reset button on the breakout cable. Note: This will erase all settings.
7.3 Valse bewegingsdetectie-meldingen
- Pas de gevoeligheid van de bewegingsdetectie aan in de camera-instellingen.
- Define specific motion detection zones to exclude areas with frequent irrelevant movement (e.g., trees swaying, busy roads).
- In night vision mode, insects flying close to the IR illuminators can trigger alerts. Consider adjusting sensitivity or, if possible, using an external IR illuminator placed away from the camera.
8. Onderhoud
- Schoonmaak: Maak de cameralens en behuizing regelmatig schoon met een zachte, damp doek om een heldere beeldkwaliteit te garanderen. Vermijd schurende reinigingsmiddelen.
- Firmware-updates: Periodically check the official Reolink webDeze website biedt firmware-updates aan. Door de firmware van uw camera up-to-date te houden, bent u verzekerd van optimale prestaties, beveiliging en toegang tot nieuwe functies.
- Kabelinspectie: Periodically inspect all cables and connections for wear or damage, especially in outdoor installations. Ensure waterproof seals are intact.
- SD-kaartbeheer: While the camera manages the 16GB SD card, it's good practice to occasionally check its status via the app/client.
9. Garantie en ondersteuning
For warranty information, please refer to the warranty card included in your product package or visit the official Reolink website. Reolink provides dedicated customer support.
- Technische ondersteuning: For technical assistance, troubleshooting, or any product-related queries, please contact Reolink support via their official website. Email support is typically provided with responses within 24 hours.
- Firmware-downloads: Latest firmware versions and software clients can be downloaded from the Reolink support page.