pengenalan
This manual provides comprehensive instructions for the installation, operation, and maintenance of your Lorex Solar Panel, designed exclusively for U471AA 2K Wire-Free cameras. This solar panel offers an environmentally-friendly solution to continuously power your camera, extending battery life and ensuring uninterrupted surveillance.
Maklumat Keselamatan
- Ensure all connections are secure and waterproof to prevent damage from moisture.
- Do not attempt to disassemble or modify the solar panel. This may void the warranty and cause damage.
- Install the solar panel in a location where it is not easily accessible to unauthorized individuals.
- Avoid placing the solar panel near flammable materials or in areas with extreme temperatures outside its operating range.
- Use only the provided mounting hardware to ensure secure installation.
Kandungan Pakej
Sahkan bahawa semua item terdapat dalam pakej anda:
- Lorex Solar Panel (Model: ACSOL2B)
- Pendakap Pemasangan
- Skru Pemasangan dan Palam Dinding
- USB Charging Cable (integrated with solar panel)
Produk Selesaiview
The Lorex Solar Panel is designed to provide continuous power to your compatible Lorex U471AA 2K Wire-Free cameras. It features a durable, weather-resistant design suitable for outdoor use.

Rajah 1: Depan view of the Lorex Solar Panel, showing the photovoltaic cells and the integrated mounting base.

Rajah 2: bersudut view of the Lorex Solar Panel, highlighting the adjustable mounting bracket for versatile positioning.
- Photovoltaic Cells: Convert sunlight into electrical energy.
- Pendakap Pelekap: Allows for flexible positioning and angle adjustment.
- Kabel Pengecas USB: Connects the solar panel to the camera.
- Penunjuk LED: Provides status information (e.g., charging status).
- Penilaian IP66: Ensures the panel is weather-resistant against dust and powerful water jets.
Persediaan
1. Memilih Lokasi Pemasangan
Optimal performance of the solar panel depends on its placement. Select a location that receives direct sunlight for the majority of the day, ideally 4-6 hours of direct sunlight. Avoid areas with significant shade from trees, buildings, or other obstructions.
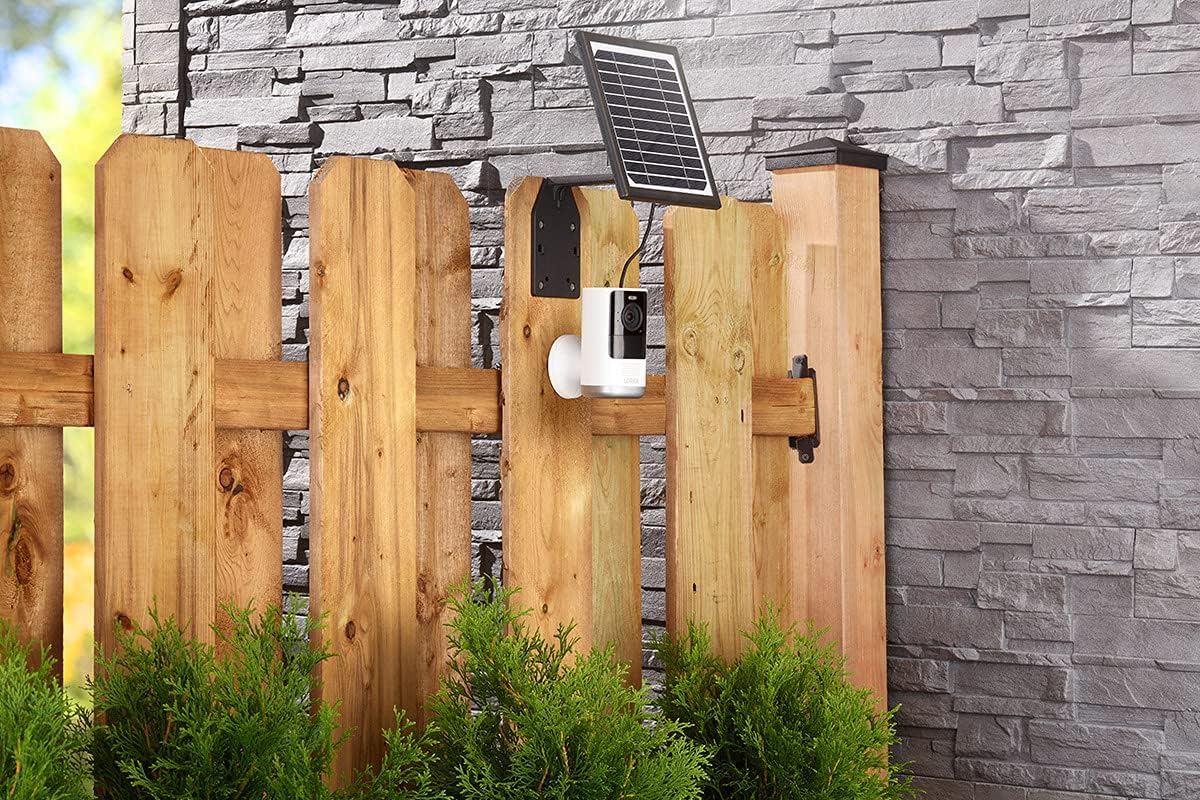
Rajah 3: Example installation on a wooden fence, demonstrating outdoor placement.

Rajah 4: Example installation on a stone wall, showing a common mounting surface.
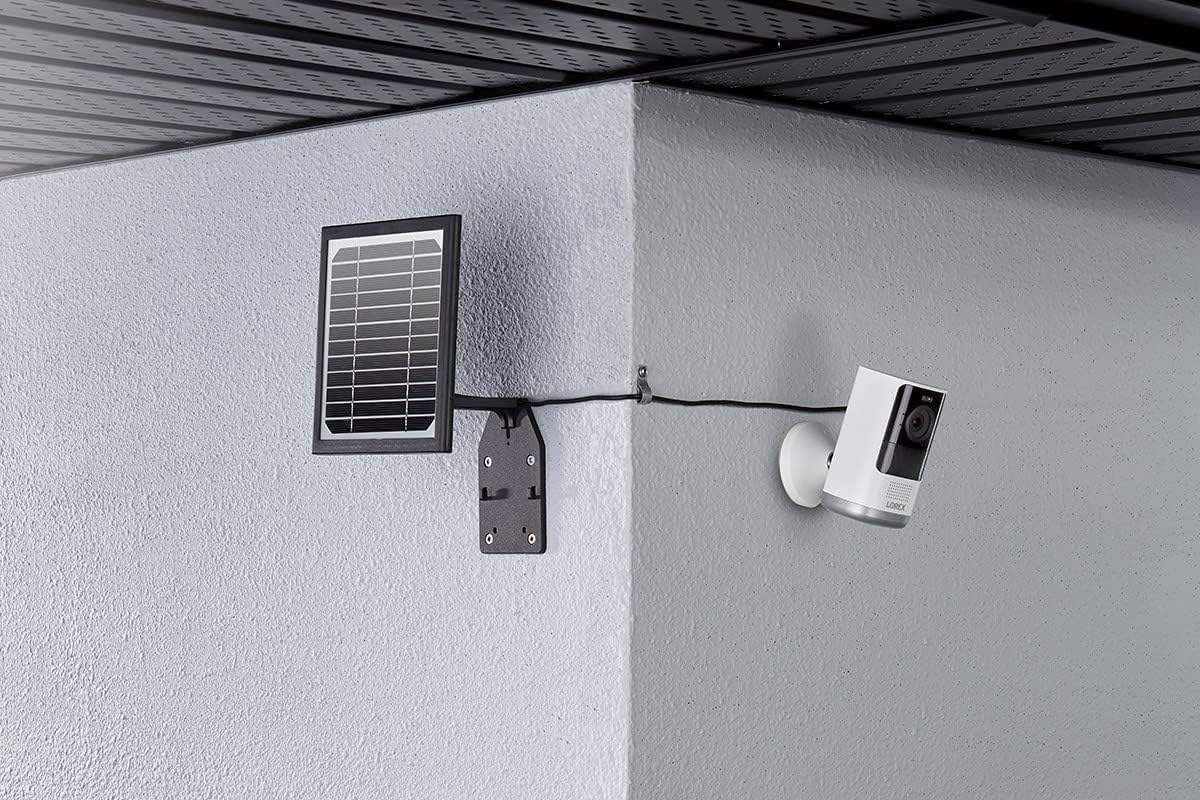
Rajah 5: Example installation in a corner, illustrating flexible mounting options.
2. Memasang Panel Suria
- Position the mounting bracket against the chosen surface. Use a pencil to mark the drill holes.
- Drill pilot holes at the marked locations. If mounting on masonry or stucco, insert the wall plugs.
- Pasangkan pendakap pelekap pada permukaan menggunakan skru yang disediakan.
- Attach the solar panel to the mounting bracket. Adjust the angle of the solar panel to maximize sun exposure. The panel should face the direction that receives the most direct sunlight throughout the day.
3. Menyambung ke Kamera
The solar panel comes with an integrated USB charging cable. Connect this cable to the charging port on your Lorex U471AA 2K Wire-Free camera.

Rajah 6: sebelah view illustrating the connection of the solar panel to the camera via the charging cable.
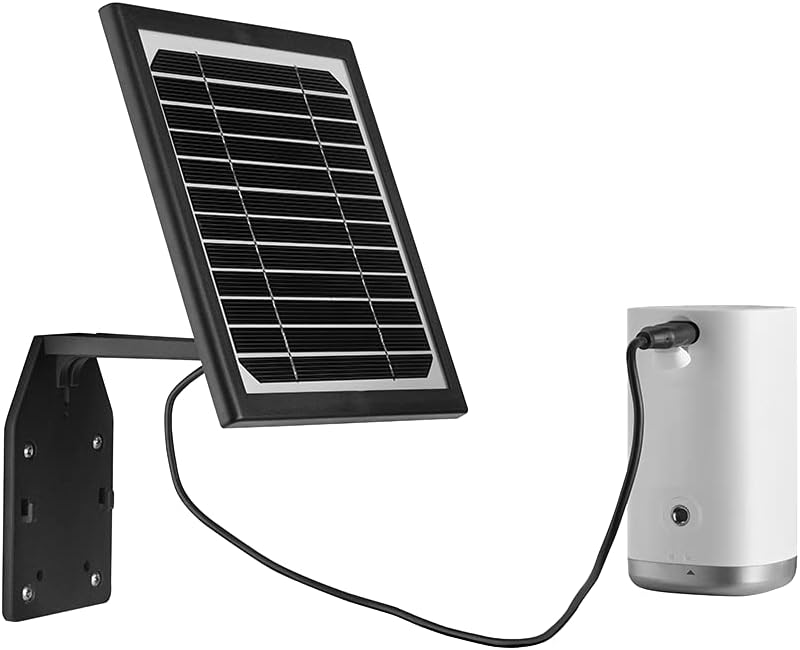
Rajah 7: Depan view of the solar panel connected to the camera, showing the cable routing.
Ensure the connection is snug to maintain weather resistance. Once connected, the solar panel will begin charging the camera's battery when exposed to sufficient sunlight. The LED indicator on the solar panel will illuminate to confirm charging status.
Beroperasi
The Lorex Solar Panel operates automatically. When exposed to sunlight, it converts solar energy into electrical energy, which is then used to charge the connected U471AA 2K Wire-Free camera's internal battery. The panel is designed to provide a trickle charge, maintaining the camera's battery level and reducing the need for manual recharging.
- Penunjuk Pengecasan: Refer to your camera's user manual for specific battery status indicators. The solar panel itself may have an LED that indicates charging activity.
- Kecekapan Tenaga: The panel is designed for high efficiency, even in less than ideal sunlight conditions, though direct sunlight is always preferred for optimal performance.
Penyelenggaraan
Penyelenggaraan berkala memastikan ketahanan dan kecekapan panel solar anda.
- Pembersihan: Bersihkan permukaan panel solar secara berkala dengan lembut, damp kain untuk menanggalkan habuk, kotoran atau serpihan yang mungkin terkumpul dan mengurangkan kecekapan. Jangan gunakan pembersih yang melelas atau bahan kimia yang keras.
- Pemeriksaan halangan: Regularly check for any new obstructions (e.g., growing tree branches, new constructions) that might cast shadows on the panel and reduce its sun exposure.
- Pemeriksaan Kabel: Inspect the charging cable and connections for any signs of wear, damage, or corrosion. Ensure the connection to the camera remains secure and waterproof.
- Keselamatan Pemasangan: Periodically check that the mounting screws and bracket are still securely fastened, especially after strong winds or storms.
Menyelesaikan masalah
| Masalah | Kemungkinan Punca | Penyelesaian |
|---|---|---|
| Camera battery not charging. | Cahaya matahari tidak mencukupi. Panel surface is dirty. Cable connection is loose or damaged. Camera battery issue. | Relocate panel to an area with more direct sunlight. Bersihkan permukaan panel. Check and secure the USB cable connection. Inspect for damage. Test camera with a standard USB charger to rule out camera battery issues. |
| Solar panel LED not illuminating. | No sunlight. Panel is faulty. Cable not connected. | Ensure panel is exposed to direct sunlight. Contact Lorex support if problem persists after ensuring sunlight and connection. Verify the USB cable is securely connected to the camera. |
| Panel appears damaged after installation. | Pemasangan tidak betul. Environmental factors (e.g., severe weather). | Review installation steps to ensure correct mounting. Contact Lorex support for assistance if damage is significant. |
Spesifikasi
- Jenama: lorex
- Nombor Model: ACSOL2B
- Bahan: silikon
- Kecekapan: Kecekapan Tinggi
- Jenis Penyambung: USB
- Kuasa Maksimum: 3 Watt
- Berat Barang: 1.45 paun
- Dimensi Pakej: 8.78 x 7.32 x 3.82 inci
- Penilaian IP: IP66 (Weather-resistant)
- Keserasian: Lorex U471AA 2K Wire-Free Cameras
Waranti dan Sokongan
For warranty information and technical support, please refer to the official Lorex website or contact Lorex customer service directly. Keep your purchase receipt as proof of purchase for warranty claims.
Sokongan Lorex: www.lorex.com/support


