1. Nga korero haumaru
WARNING: Read all safety warnings and instructions before operating this product.
- Always use the safety lock button before starting the snow blower to prevent accidental activation.
- This product is electric and does not produce carbon monoxide.
- Tiakina nga ringa me nga waewae mai i nga waahanga neke.
- Wear appropriate safety gear, including eye protection and non-slip footwear.
- Do not operate the snow blower on slopes that are too steep.
- Ensure the area to be cleared is free of debris that could be thrown by the machine.
- Always unplug the unit before performing any maintenance or clearing clogs.
2. Hua Neke Atuview
The VEVOR SPEG09 Electric Snow Blower is a powerful and efficient tool designed for clearing snow from various surfaces. Equipped with a robust 15A, 2200W motor, it effectively handles both wet and heavy snow.
Āhuatanga matua:
- Wide Snow Clearing Path: Clears a 20-inch-wide and 12-inch-deep path in a single pass, optimizing time and effort.
- Extended Snow Throwing Distance: Capable of throwing snow up to 25 feet (7.5 meters) away, providing a broad clearing radius.
- 180° Adjustable Chute: Allows for precise control over the snow discharge direction, enabling targeted clearing.
- Pātene Haumaru Takirua: Features a two-step activation process (press safety lock button then pull trigger) to prevent accidental starts.
- Dual LED Headlights: Integrated LED lights ensure clear visibility for snow removal in low-light conditions, enhancing safety during early morning or late evening operation.
This walk-behind snowblower is ideal for maintaining sidewalks, driveways, patios, and multi-car parking areas.
3. Tatūnga me te Runanga
The VEVOR SPEG09 Electric Snow Blower requires some assembly upon arrival. The process is straightforward and typically takes approximately 20-30 minutes.
Nga Waahi Huinga:
- Āpitihanga Pae kakau: Secure the tubular metal handlebars to the main unit using the provided wing nuts.
- Tāutanga o te Hāora: Attach the adjustable snow chute to the top of the blower. Ensure it is securely fastened to allow for proper rotation and angle adjustment.
- Whakaha Uepu: Route the power cord along the handlebars and secure it with the provided clips to prevent interference with moving parts or accidental damage.
- Huihuinga wira: Attach the plastic wheels to the unit.
A screwdriver may be required for some assembly steps. Refer to the included instruction manual for detailed diagrams and specific fastener locations.
4. Nga Tohutohu Whakahaere
Te Tīmatanga o te Pūwero Hukapapa:
- Hono Hono: Plug the snow blower into a suitable outdoor extension cord (ensure the cord is rated for outdoor use and the amperage requirements of the blower).
- Activate Safety Switch: Press and hold the orange safety lock button located on the handlebar.
- Mana Whakauru: While holding the safety button, pull the main trigger lever towards the handlebar to start the motor. Release the trigger to stop the unit.
Adjusting Snow Discharge:
- Chute Direction: Use the crank mechanism on the handlebar to rotate the discharge chute 180 degrees, directing snow to the left, right, or straight ahead.
- Chute Deflector Angle: Adjust the deflector on the chute to control the height and distance of the snow throw.
Te Whakakore i te Hukapapa:
- Push the snow blower forward at a steady pace. For deep or heavy snow, make narrower passes to prevent overloading the motor.
- The dual LED headlights provide illumination for clearing in low-light conditions.
Video: Demonstrating the VEVOR Electric Snow Blower in action, showing its snow-clearing capabilities and the effective throwing distance.
5. Tiaki
- Whai muri i ia Whakamahinga: Always unplug the unit. Clean any snow or debris from the auger and chute. Inspect the auger blades for wear or damage.
- Rokiroki: Store the snow blower in a dry, protected area. The handlebars can be folded for more compact storage.
- Tirohanga taura: Regularly check the power cord and extension cord for any cuts, fraying, or damage.
- Nga Waahanga Whakakapi: While some parts like the scraper blade are listed as replaceable, availability of specific repair parts may vary.
6. Te Raru
| Raruraru | Take pea | Rongoā |
|---|---|---|
| Kaore e timata te waeine | Power cord not connected; Safety button not pressed; Trigger not pulled. | Ensure power cord is securely connected. Press safety button and pull trigger simultaneously. Check circuit breaker. |
| Snow discharge chute does not stay in position | Adjustment mechanism loose or worn. | Tighten any visible fasteners on the chute adjustment mechanism. If wear is present, contact support. |
| Motor overloads or breaker trips | Attempting to clear snow too quickly or snow is too deep/heavy. | Reduce the speed of operation. Take narrower passes. Clear snow in layers if it is very deep. |
| Te tawhiti e maka ana i te hukarere kua whakaitihia | Clogged chute; Worn auger blades. | Turn off and unplug the unit. Clear any clogs from the chute. Inspect and replace worn auger blades if necessary. |
7. Whakatakotoranga
- Waitohu: VEVOR
- Tau tauira: SPEG09
- Puna Hiko: AC
- Te Mana Whakatau: 2200W
- Mahi Naianei: 15A
- Tere Uta-kore: 3300 rpm/min
- Rahi Hua (D x W x H): 20.1" x 47.2" x 37" (510mm x 1200mm x 940mm)
- Taumaha Tūemi: 24.7 lbs (11.2 kg)
- Tae: Pango+Karaka
- Momo Mihini: Hiko
- Te Whanui Hukarere: 20 inihi (47.2 cm)
- Te Hōhonutanga Pai o te Hukarere: 12 inihi
- Snow Throw Distance: Tae atu ki te 25 ft (7.5 m)
- Roa Waea Hiko: 18 inihi (450mm)
- UPC: 197988889656
8. Hua Media
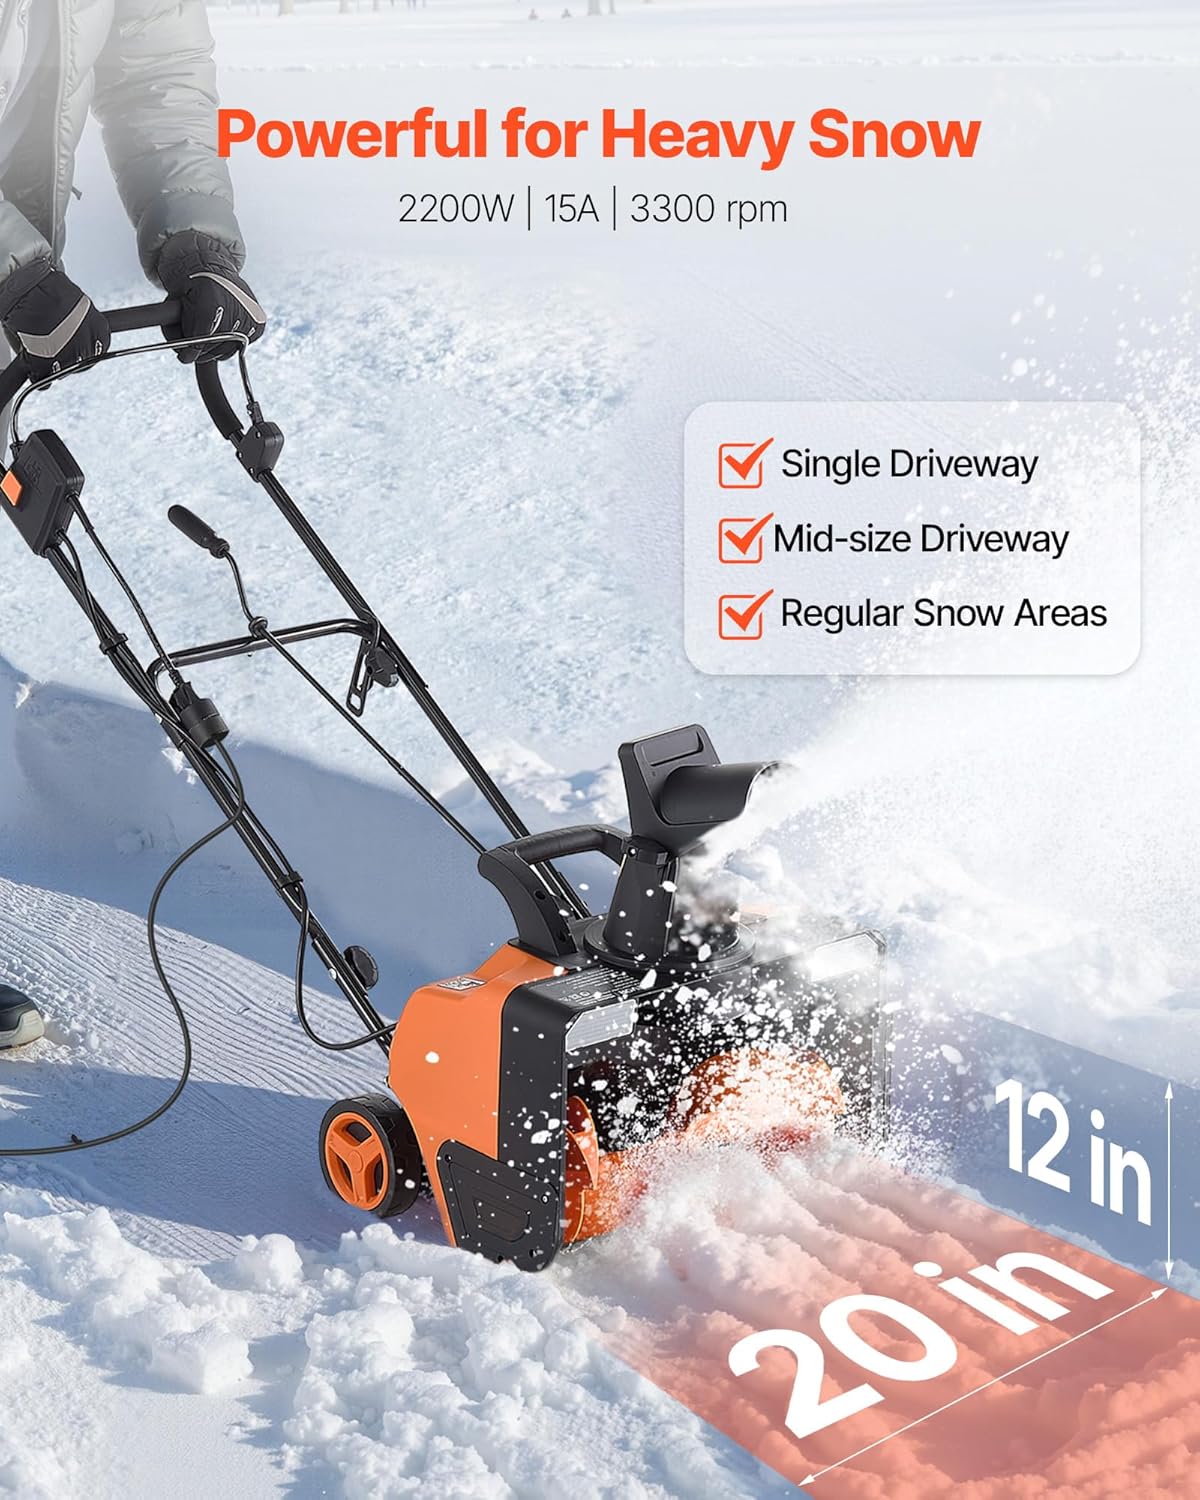
Image: The VEVOR Electric Snow Blower, showcasing its overall design and orange and black color scheme.

Image: The snow blower effectively clearing a path through heavy snow, highlighting its powerful 2200W motor.

Image: A person operating the snow blower, demonstrating its capability to throw snow up to 25 feet away.

Image: Close-up of the 180-degree adjustable chute, showing how to control the snow discharge direction.

Image: Detail of the dual safety switch on the handlebar, illustrating the two-step activation process.

Image: The snow blower operating in low light, with its dual LED headlights illuminating the path.

Image: A diagram showing the key dimensions and technical specifications of the VEVOR Electric Snow Blower.
9. Pūtāhui me te Tautoko
For warranty information, technical support, or to inquire about replacement parts, please refer to the contact details provided in your product packaging or visit the official VEVOR webpae.


