1. Kupu Whakataki
This manual provides detailed instructions for the KuWFi Type-C Audio Video Capture Card, Model HDMI26. This device is designed to capture single HDMI video signals, supporting resolutions up to 1080p at 60Hz. It is compatible with various operating systems and offers plug-and-play functionality for ease of use.

Figure 1: KuWFi Type-C Audio Video Capture Card (Model HDMI26)
2. Nga ahuatanga
- Hopu Kounga-Teitei: Captures single HDMI video signals with resolutions up to 1080p at 60Hz.
- Hototahi Whānui: Supports MJPEG and YUY2. Compatible with Windows 7, 8, 8.1, 10, Linux OS, and Mac OS operating systems.
- Tautoko Ororongo: Supports UAC&UVC protocol and 48 KHz PCM audio sampling rate. Automatically detects input audio format and converts to 48KHz PCM audio.
- Putanga Momo-C: Utilizes Type-C output with up to 300~350MB/s bandwidth.
- Mono me te Purei: Meets UVC and UAC standards, requiring no driver installation or complex settings for most systems.
- Whakatikatika Aunoa: Automatically detects input video format and adjusts output resolution and frame rate.
- Whakaputa HDMI: Features an HDMI loop-out port for zero-latency pass-through while recording.
- Pūrere Maha: Up to two capture cards can be used on a single PC.
- Kounga Pikitia Whakarei ake: Provides clearer picture quality with an RGB color range of 0~255.
- Pūmanawa Whakapai ake: Supports online firmware upgrades for improved compatibility.
3. Ihirangi mokete
Manatokohia ko nga mea katoa kei raro nei kei roto i to kete:
- 1x KuWFi HDMI to Type-C Video Capture Dongle (Model HDMI26)
- 1x Momo-C taura
- 1x Parameter Description (Document)
- 1x Operating Instruction (User Manual)
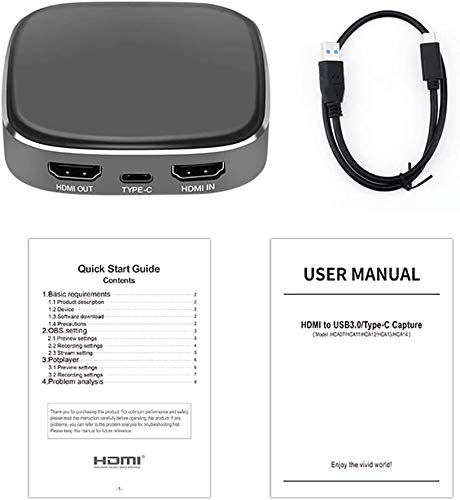
Figure 2: Included items: Capture card, Type-C cable, and documentation.
4. Tohutohu Tatūnga
Follow these steps to connect your KuWFi Type-C Audio Video Capture Card:
- Hononga Tāuru HDMI: Connect an HDMI cable from your source device (e.g., game console, camera, set-top box) to the HDMI-IN tauranga i runga i te kāri hopu.
- Connect HDMI Output (Optional): Ki te hiahia koe view the source content on a separate display without latency, connect another HDMI cable from the HDMI PUTA port on the capture card to your TV, monitor, or projector.
- Hono ki Rorohiko: Connect the provided Type-C cable from the MOMO-C port on the capture card to a USB 3.0 or Type-C port on your computer (PC or Mac).
- Whakahiko: Ensure all devices are powered on. The capture card is typically powered via the Type-C connection.

Figure 3: Connection diagram for the capture card, illustrating HDMI input, HDMI output, and Type-C connections.
5. Nga Tohutohu Whakahaere
Once the capture card is connected, you can begin capturing or streaming using compatible software.
5.1. Software Setup (Example: OBS Studio)
For capturing and streaming, third-party software like OBS Studio, VLC, or PotPlayer is required. The following steps outline a general setup using OBS Studio:
- Tāuta Pūmanawa: Download and install your preferred capture software (e.g., OBS Studio) on your computer.
- Add Video Source: Open the software. In OBS Studio, navigate to the "Sources" box, click the "+" icon, and select "Video Capture Device".
- Tīpako Pūrere: In the properties window, select "USB Video" or a similar name for your capture card from the "Device" dropdown menu.
- Configure Video: Adjust resolution, FPS, and other video settings as needed. Ensure the resolution matches or is compatible with your input source.
- Configure Audio: In the "Audio Mixer" section, ensure "USB Audio" or similar is selected and levels are adjusted. You may need to add an "Audio Input Capture" source and select "USB Audio" if not automatically detected.
- Start Recording/Streaming: Once configured, you can start recording or streaming your content.
5.2. Driver Installation (Windows 7 Specific)
While the device is generally plug-and-play, some Windows 7 systems may require a specific driver installation. Refer to the included "Operating Instruction" manual or the manufacturer's website for driver download and installation procedures if necessary.
6. Whakatakotoranga
| Āhuahira | Taipitopito |
|---|---|
| Tauira | HDMI26 |
| Waitohu | KuWFi |
| HDMI Input Resolution Support | 4K/60, 1080P/60, 59.94, 50, 30, 29.97, 25, 24, 23.98, 1080i 50/60, 720P 50/60, 480P, 576P, 1280x1024, 1280x960, 1024x768, 800x600, 640x480 |
| Hōputu Whakauru HDMI | Compatible with HDMI1.4 standard, max bandwidth 225MHz 4K/30Hz, 12bit deep color |
| Type-C Output Bandwidth | Up to 300~350MB/s |
| Preview Whakatau | 1920x1080, 1680x1050, 1280x1024, 1280x960, 1400x900, 1440x900, 1360x768, 1366x768, 1024x768, 1280x720, 800x600, 720x576, 720x480, 640x480 |
| Auau anga | 25/29.97/30/50/59.94/60 fps |
| HDMI Loop-out Resolution Support | 4K/60, 4K/30, 1080P/60, 59.94, 50, 30, 29.97, 25, 24, 23.98, 1080i 50/60, 720P 50/60, 480P, 576P, 1280x1024, 1280x960, 1024x768, 800x600, 640x480 |
| Atanga Pūmārō | USB 2.0 (backward compatible), USB 3.0 (Type-C) |
| Whakataunga Hopu Ataata | 1080p |
| Nga waahanga motuhake | Maamaa, Kawe |
| Taumaha Tūemi | 250 g |
| Ahu | 16.2 x 9.8 x 5.4 cm |
7. Whakaritenga Pūnaha
To ensure optimal performance, your computer system should meet or exceed the following specifications:
- Pūnaha Mahi: Windows 10 / Windows 8.1 / Windows 7 (SP1), Linux OS, Mac OS
- Desktop PC:
- Processor: Intel Core i5-4440 3.10 GHz or higher
- Graphics Card: NVIDIA GeForce GTX 660 or above
- Pukatuhituhi:
- Processor: Intel Core i7-4810MQ or higher
- Graphics Card: NVIDIA GeForce GTX 870M or above
- RAM: 4 GB RAM (8 GB e taunakitia ana)
8. Te Raru
If you encounter issues while using the capture card, consider the following:
- Recording Screen Blinking or Black: This issue often indicates a low computer configuration. Ensure your system meets the recommended specifications listed in Section 7.
- Nga Take Hononga:
- Avoid using USB hubs or USB extension cables, as they can interfere with data transfer and power delivery. Connect the Type-C cable directly to a native USB 3.0 or Type-C port on your computer.
- Ensure all HDMI cables are securely connected to both the source device, the capture card, and the display (if using loop-out).
- Kāore he Tohu i Kitea:
- Verify that your source device is powered on and outputting an HDMI signal.
- Check the input resolution of your source device. While the capture card supports various resolutions, ensure it's within the compatible range.
- Whakamātauria he taura HDMI rerekē.
- Ororongo Kaore i te Mahi:
- Ensure "USB Audio" is selected as the audio input device in your capture software.
- Check your computer's sound settings to ensure the capture card's audio input is enabled and not muted.
9. He Tuhipoka Nui
- For optimal performance, connect the capture card directly to a USB 3.0 or Type-C port on your computer. Avoid using USB hubs or extension cables.
- A computer with specifications below the recommended requirements may experience performance issues such as flickering or black screens during recording.
- Keep the device in a dry environment and avoid extreme temperatures.


