MERKURY SMART SK506 Smart Lightbulb Camera

Thank you for purchasing your Merkury Smart home product.
Get started using your new devices by downloading Merkury Smart, one convenient app that manages everything straight from your phone or tablet. Easily connect to your home Wi-Fi, and control multiple devices from the touch of your fingertips.
INSTRUCTIONS FOR USE
Download & Register
STEP 1
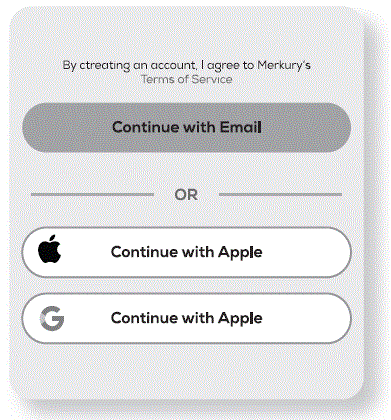
- Download the MERKURY SMART app from App Store or Google Play.

- Register an account on your Merkury Smart app
- Enter your email address.
- Enter the verification code and create a password.
- Log in to the App.
Screw In
STEP 2
- Screw In
Screw in the bulb camera and turn on the power.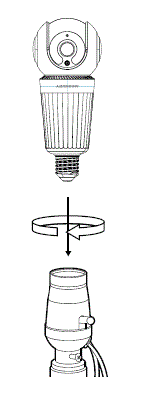
- Add device (QR Code)
- Make sure the indicator light is flashing blue, indicating it’s ready to connect.
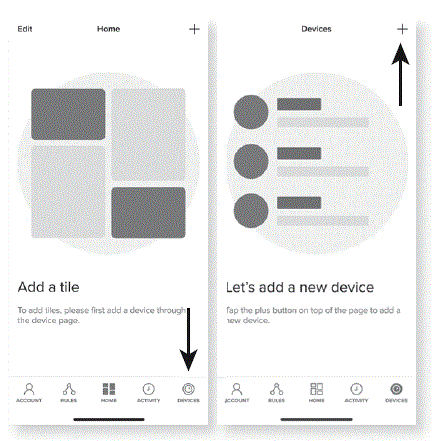
- Make sure the indicator light is flashing blue, indicating it’s ready to connect.
- Choose “Wi-Fi Camera” and enter your Wi-Fi details.
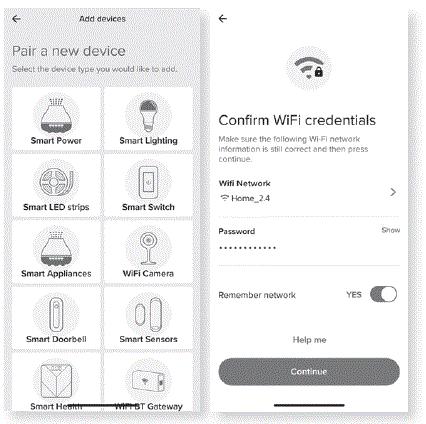
- Scan the QR code with the camera. When you hear the camera beep, select ‘I heard the sound’ and it will add your camera.
- The Merkury Smart app will attempt to connect. This may take a few moments
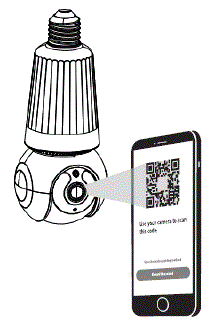
- Make sure the indicator light is flashing blue, indicating it’s ready to connect.
Reset
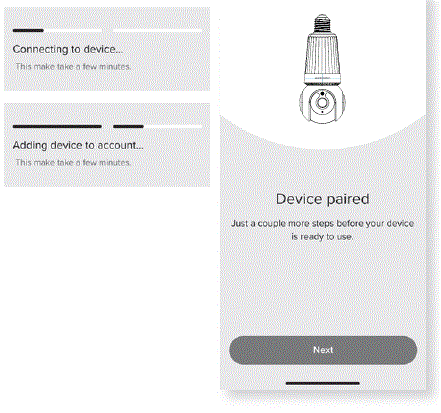 How do I reset the device?
With the bulb unplugged, press the reset key until it plays a sound. After, plug-in the bulb to power, and when it plays a sound again it is ready for pairing. 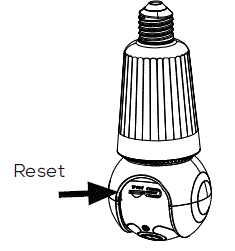
STEP 3
Add tiles: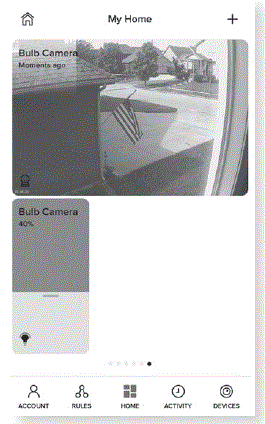
- After successfully paired, a tile for the camera and another for the smart bulb will automatically be added to the dashboard. You can add tiles with the “+” on the Home page or resize, organize, and remove tiles by tapping “Edit”.
- Press the camera tile to view a live stream from the camera. Drag the smart bulb tile to dim, tap the corner to turn off and on, and tap the tile to access the deep tile with more features.
(Optional) SD Card Installation
- Insert microSD card where shown.
- Will enable video recording and playback from your phone.

SETTINGS
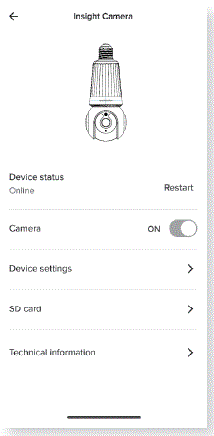
- Access Camera Settings:
From your main device list, click the camera you want to edit, then click Device Settings. - Device Name:
Device Name to rename your camera to something like “Family room” or “Back hallway”, then click Save.
- Motion Zones:
Click Motion Zones and then click on each square to deactivate or activate that zone from detecting motion, then click Save. - Rotate image:
If you mount your camera upside down, toggling this switch will rotate the image so that it’s right side up. - Remove Device:
Delete the camera from your account. Until it’s deleted, it will always be linked to your account.
 RULES
RULES
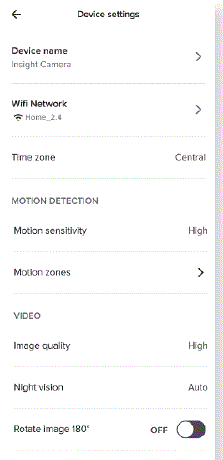
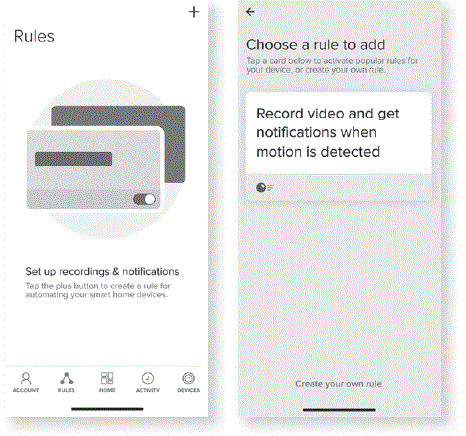
Create Motion & Sound Detection Rules
- Select the “Rules” tab on the bottom navigation bar and tap the “+” at the top corner of the screen.
- Select the “Rules” tab on the bottom navigation bar and tap the “+” at the top corner of the screen.
Technical Specifications
- Resolution: 2560 x 1440
- Frame Rate: 15 fps
- Viewing Angle: 95°
- Pan & Tilt Degrees: 355° (H) 9° (V)
- Storage: Supports up to 128GB microSD card (Not included)
- Power Input: AC 110V-240V
- Light Brightness: 800lm
- Operating Temperature: 14° – 122°F
- Not Waterproof: Indoor Use
- Wi-Fi: IEEE 802.11n, 2.4 or 5GHz
VOICE CONTROL GUIDE
Thank you for purchasing your Merkury Smart home product. Make sure your devices are already set up using the app, then follow these steps.
Name and Control Each Device by Voice
Google Home
 To control your Merkury Smart bulbs, plugs or surge protectors, just say “OK Google,“ or “Hey Google,“ and ask. Make sure your devices are already set up using the app.
- Things you can say*: “Hey Google, show me the Living Room Camera.“ “Hey Google, what’s on Kid’s Room Camera?“
- Stream to: Google Home Hub, Google Home Smart Displays, Google Nest Hub, and any Google Chromecast-enabled TV, screen, or PC
*Some commands require compatible devices.
- Open the Google Home app and go to Home Control in the menu.
- Tap the “+“ button.
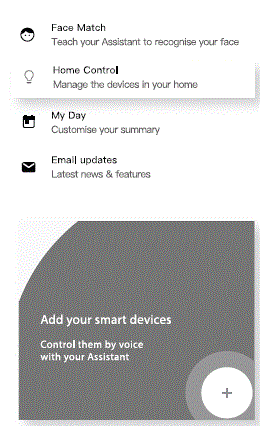
- Choose “Merkury Smart“ from the list of Home Control partners
- Authorize your account with Google Home using the username and password from your Merkury Smart app.
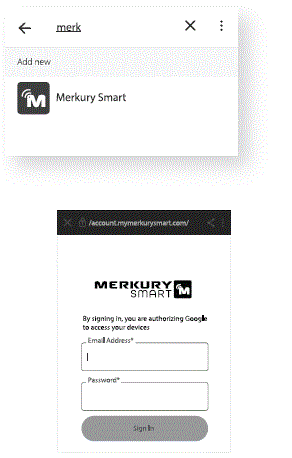
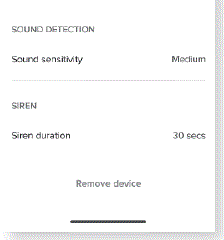
- Now your Google Home app and Merkury Smart devices are linked!
- You’re now able to say “Hey Google“ and control your Merkury Smart devices.
- At any time, go into the “Home Control“ section of the Google Home app to set nicknames and rooms for your devices. You can rename your devices in the Merkury Smart app, and Google Home will refer to them by the same name.
- So if you rename a smart bulb to “Living Room“ or a nickname like “Blossom,“ then Google Home will use that same name later on. You can always give it a nickname using the Google Home app as well. You can also assign bulbs to a specific room, like “Bedroom“ or “Kitchen.“
- Google Home will be able to control devices by room.
START GUIDE
What’s in the Box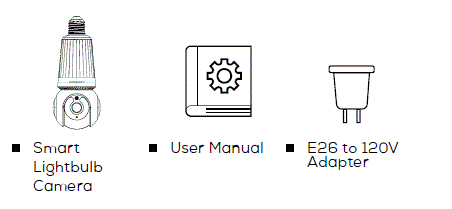
Get Ready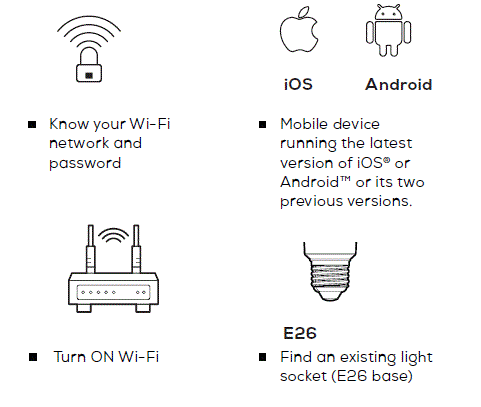
Amazon Alexa
 To control your Merkury Smart bulbs, plugs or surge protectors, just ask Alexa. Make sure your devices are already set up using the app.
- Things you can say*: “Alexa, show Living Room Camera.“ “Alexa, show me the kids room Camera.“
- Stream to: Amazon Echo Show, Amazon Fire TV, and any Alexa-enabled TV or screen.
*Some commands require compatible devices.
- Open the Alexa app and go to Skills in the menu
- Search for Merkury Smart then tap Enable.

- Authorize your account with Smart Home Skills using the username and password from your Merkury app.
- Choose “Discover Devices.“ After a few seconds your Merkury Smart devices will be displayed under Smart Home in the Alexa app.
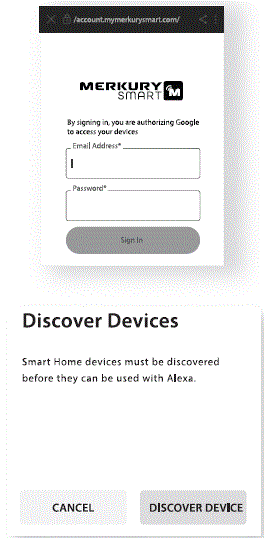
- You can rename your devices in the Merkury Smart app, and Alexa will refer to them by the same name. So if you rename a smart bulb to “Living Room“ or a nickname like “Blossom,“ then Alexa will use that same name later on.
- Alternatively, you can create an Alexa group, like “Bedroom“ or “Downstairs,“ and add the device to the group.
- Alexa will recognize the group name in the Alexa app, or the device name in the Merkury Smart app.
Troubleshooting
- Cannot connect to your Wi-Fi network.
Make sure you entered the correct Wi-Fi password during the Wi-Fi setup. Check whether there are any Internet connection problems. If the Wi-Fi signal is too weak, reset your Wi-Fi router and try again. - Reset the device
With the bulb unplugged, press the reset key until it plays a sound. After plug-in the bulb to power, and when it plays a sound again it is ready for pairing. - System Requirements
Mobile device running the latest version of iOS® or Android™ or its two previous versions. Existing light socket (E26 base) Existing Wi-Fi Network
FCC Notice
This equipment has been tested and found to comply with the limits for a Class B digital device, pursuant to part 15 of the FCC Rules. These limits are designed to provide reasonable protection against harmful interference in a residential installation. This equipment generates, uses and can radiate radio frequency energy and, if not installed and used in accordance with the instructions, may cause harmful interference to radio communications. However, there is no guarantee that interference will not occur in a particular installation. If this equipment does cause harmful interference to radio or television reception, which can be determined by turning the equipment off and on, the user is encouraged to try to correct the interference by one or more of the following measures:
- Reorient or relocate the receiving antenna.
- Increase the separation between the equipment and receiver.
- Connect the equipment into an outlet on a circuit different from that to which the receiver is connected.
- Consult the dealer or an experienced radio/TV technician for help.
Caution: Any changes or modifications to this device not explicitly approved by manufacturer could void your authority to operate this equipment.
This device complies with part 15 of the FCC Rules. Operation is subject to the following two conditions:
- This device may not cause harmful interference, and
- This device must accept any interference received, including interference that may cause undesired operation.
The device has been evaluated to meet general RF exposure requirement.
Can’t connect?
Need help?
- WE CAN HELP
- DO NOT RETURN THIS PRODUCT TO THE STORE support.merkurysmart.com or tap ‘support‘ for help in the Merkury Smart app.
- support.merkurysmart.com or tap ‘support‘ for help in the Merkury Smart app.
Frequently Asked Questions
What’s the wireless range?
The range of your home Wi-Fi is heavily dependent on your home router and the conditions of the room. Check with your router specifications for exact range data.
”Yes,
”Merkury
”From
”Check
Documents / Resources
 |
MERKURY SMART SK506 Smart Lightbulb Camera [pdf] User Guide 2BQMC-SK506, 2BQMCSK506, SK506 Smart Lightbulb Camera, SK506, Smart Lightbulb Camera, Lightbulb Camera, Camera |