MANTIS INSTA360 PRO/PRO2 Spray Enclosure

- Product: Mantis Spray Enclosure
- Compatible with: Insta360 Pro/Pro2 cameras
- Function: Protects cameras from water exposure (rain, spray)
- Features: Air vents, integrated fan for heat extraction
About the Mantis Spray Enclosure:
The Mantis Spray is designed to protect the Insta360 Pro and Pro2 cameras from exposure to water (rain, spray). It is equipped with air vents and an integrated fan to extract heat generated by the cameras during recording.
Cautions for Use:
- Do not submerge the enclosure or expose it to water on an upward angle.
- Before cleaning, remove the DC coupler or disconnect the power plug.
- Avoid using solvents for cleaning; use a soft cloth with mild dishwashing solution for domes.
- Store in a dark, cool place away from direct sunlight or heat
- Use supplied silicone grease for lubrication; avoid using other lubricants.
- Transport in a shock-proof container and do not open in wet/sandy environments.
- Avoid high humidity environments and direct sunlight for prolonged periods.
- Keep away from children to prevent injury.
Product Usage Instructions
- Installation: Mount the Insta360 Pro/Pro2 camera inside the enclosure with the provided camera tray.
- Power On/Off: Ensure the power plug is securely connected before turning on the enclosure. To power off, disconnect the power plug.
- Cleaning: Remove the DC coupler before cleaning. Use a soft cloth with mild dishwashing solution for domes if needed.
- Storage: Store the enclosure in a dark, cool place away from direct sunlight or heat buildup. Avoid storing in high humidity environments.
- Maintenance: Use supplied silicone grease for lubricating o-rings. Do not use other lubricants.
FAQ:
- Q: Can I submerge the Mantis Spray enclosure in water?
A: No, the enclosure is not watertight or dustproof; avoid submerging it or exposing it to water on an upward angle - Q: How should I clean the domes of the enclosure?
A: Use a soft cloth with fresh water or very mild dishwashing solution for cleaning the domes. - Q: What should I do if I encounter a defective product?
A: Defective products should be shipped to our factory or distributors for service to prevent malfunction or leakage due to unauthorized disassembling or modifications.
OWNER’S MANUAL
MANTIS SPRAY ENCLOSURE FOR INSTA360 PRO/PRO2
Please read these instructions carefully before using this product, and save this manual for future use. For questions, email info@mantis-sub.com or visit https://www.mantis-sub.com/
Please note that the actual controls and components, menu items, etc. of your camera and software may look somewhat different from those shown in the illustrations in this Owner’s Manual.
All rights reserved. Information and specifications may change at any time without notice. Version 1.2, 2024-06-29
ABOUT THE MANTIS SPRAY ENCLOSURE
The Mantis Spray is designed to protect the Insta360 Pro and Pro2 cameras from exposure to water (rain, spray). The Mantis Spray enclosure is not watertight or dustproof. Because the Insta360 Pro and Pro2 cameras quickly heat up during recording, the enclosure has air vents and an integrated fan that extracts heat from inside the enclosure.
CAUTIONS FOR USE
- The enclosure is not watertight or dustproof. Do not submerge it or expose it to water on an upward angle
- Before cleaning the enclosure, remove the DC coupler, or disconnect the power plug from the outlet.
- Do not use solvents such as benzine, thinner, alcohol, acetone, kitchen detergents, etc, to clean the enclosure or domes, since it may deteriorate the external case or the coating may peel off.
- If the domes require cleaning, use a soft cloth with fresh water or very mild dish wash solution.
- Store the enclosure in a dark, cool place. Do not store the enclosure in a place where it is exposed to direct sunlight or heat buildup (e.g. car interior).
- Do not leave any metal items (such as clips or hex keys) near the contact areas of the power plug or near the batteries.
- Use the supplied silicone grease to lubricate the o-rings. Do not use lubricants from other brands with the nitrile rubber O-ring on this enclosure, only use the lubricant provided by Mantis.
- Store the enclosure in a robust, shock-proof container during transportation; avoid transporting while turned on.
- Do not open the product in a wet or sandy environment. Protect the interior from moisture and debris in order to prevent malfunction or leakage.
- Do not store the product in an environment of high humidity.
- Leaving the enclosure in direct sunlight for prolonged periods may result in discoloration.
- Keep out of reach of children, failure to do so could result in injury.
- Defective products should be shipped to our factory or distributors for service. Unauthorised disassembling and/or modifications could result in malfunction or leakage.
WARRANTY AND LIMITATIONS OF LIABILITY
For warranty, limitations of liability and terms of sale see our standard terms at https://www.mantis-sub.com/terms
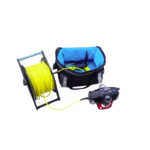
PACKAGE LIST
- 1x Waterproof transport case
- 1x Mantis Spray underwater enclosure with
- 6x domes, mounted.
- 1x extraction fan, installed.
- 1x camera tray with Mantis Spray electronics and 3x ethernet switch, installed.
- 1x 2mm hex key for domes.
- 1x O-ring kit.
- 1x O-ring grease.
- 2x 2dBi SMA stub antennas (replace Insta360 standard to fit inside housing).
- 1x Ethernet cable coupler.
- 1x Mantis Sub housing stand.
FEATURES
- Clean nadir and zenith – full 3D/360 view, no black discs/occlusions.
- 10mm port for observing Insta360 display.
- Ethernet/WiFi for control, setup, web interface to controller for remote control and log files.
- RGB Status LED
- Support for USB microphone on top
- Support for power, Ethernet and HDMI connection through base.
SPECIFICATIONS
- Housing body: Nylon PA12 glass beads.
- Dome Material: Acrylic.
- Submersible: no
- Dimensions:
- Dome: 90 x 70 x 40mm
- Enclosure w/o dome: 143 x 162 x 295mm
- Enclosure with domes: 190 x 209 x 295mm
PREPARATION BEFORE CLOSING THE ENCLOSURE

- Before inserting the camera ensure the DHCP setting of the Insta360
- Pro/Pro2 is set to “Direct” and fan is set to “On”.
- Insert the camera into enclosure and ensure the lens is centered.
- Connect the Ethernet cable to the camera.
- Connect the Power cable to the camera.
- Optional: Connect the HDMI cable (if fitted) to the camera.
- Turn on the Mantis Spray power button located inside the enclosure.
- You may leave this button in the “on” position. Then the Mantis Spray controller automatically boots when the external power is connected.
- You can now close the enclosure.
OVERVIEW
The camera inside the Mantis Spray can be controlled in three ways:
- Using the button controls on the outside of the housing
- Using the Insta360 Apps connected via WiFi or Ethernet
- Using the Mantis Spray WebApp installed inside the controller via WiFi or Ethernet

Use Mantis Spray WebApp for setup, monitoring, control Ethernet:
- Connect the Ethernet cable to your device and configure your Ethernet settings for static IP on the 192.168.1.0/24 subnet (e.g. IP: 192.168.1.111, Subnet: 255.255.255.0)
- Your device may warn you that you do not have an internet connection, ignore the warning.
- Open the browser, then navigate to http://192.168.1.101/ to access the control interface.
WiFi:
- Connect to the Insta360-Pro WiFi with password 88888888 (8 times 8), or use the ethernet cable.
- Your device may warn you that you do not have an internet connection, ignore the warning.
- Open the browser, then navigate to http://192.168.43.2/ to access the control interface, or use the QR code:
 The Insta360 Pro/Pro2 only allows one active device connection at a time. When the Insta360 App is connected, the Mantis Spray controller can’t connect and vice versa.
Please use the Mantis Spray controller WebApp to disconnect or reconnect the Mantis Spray controller from the camera.
TURNING ON
- With the enclosure open, turn on the Mantis Spray controller by pressing the button inside the enclosure. The button will light up and the fan will turn on.
- You may leave this button in the “on” position. Then the Mantis Spray controller automatically boots when the external power is connected.
- Close the enclosure using the 4x latches provided.
- Turn on the camera by pressing the mechanical button (right-hand side) all the way in and hold for 2 seconds.
- The camera boots (~20 seconds). During this time, the display will turn on, off, and on again.
- If the camera doesn’t boot, try holding the button for 10 seconds for a soft reset. Then press the button again to start the camera.
TURNING OFF
- Turn off camera by pressing the mechanical button (right-hand side) all the way in and hold for 3 seconds.
- You can now disconnect the external power.
ADJUSTING RECORDING SETTINGS
- The Mantis Spray controller includes a WebApp that allows you to view status, logs, and change settings.
- In order to open the Mantis WebApp, you need to connect your device to the Mantis controller inside the housing using WiFi or Ethernet.
WiFi:
- Connect to the Insta360-Pro WiFi with password 88888888 (8 times 8), or use the ethernet cable.
- Your device may warn you that you do not have an internet connection, ignore the warning.
- Open the browser, then navigate to http://192.168.43.2 / to access the control interface.
- Ethernet:
- Connect the Ethernet cable to your device and configure your Ethernet settings for static IP on the 192.168.1.0/24 subnet (e.g. IP: 192.168.1.111, Subnet: 255.255.255.0)
- Your device may warn you that you do not have an internet connection, ignore the warning.
- Open the browser, then navigate to http://192.168.1.101/ to access the control interface.
- After opening the WebApp, switch to the “Settings” tab and follow the on-screen instructions to change settings.
- After changing settings, press “Save”.
- The settings will be applied immediately, there is no need to reboot the controller.
- The settings take effect when using the enclosure button or WebApp to start a recording.
- The settings will remain in effect after reboot until changed again.
RECORDING VIDEO
- Ensure the camera is turned on.
- If the camera was turned off, the controller will automatically reconnect. This can take up to 10 seconds after turning on the camera due to network timeouts.
- Press the top button firmly to start recording.
- The status LED turns magenta while the Insta360 Pro/Pro2 is preparing to record.
- The status LED turns off when the Insta360 Pro/Pro2 is recording to not interfere with the recording.
- Note: The Insta360 Pro2 takes approximately 10 seconds before it starts recording.
Troubleshooting
- If the camera does not start recording, try pressing the record button again.
- If another controller (computer, phone) was connected to the camera, the Mantis Spray controller cannot connect and start a recording. In this case the status LED blinks magenta.
- If the camera still does not start recording and the display remains unchanged, reboot the camera and try again.
STOP RECORDING VIDEO
- Press lower button firmly to stop recording.
- The status LED turns magenta while the Insta360 Pro/Pro2 is saving.
- The status LED turns yellow (or white) when the Insta360 Pro/Pro2 has saved and is ready.
- Note: The Insta360 Pro2 takes approximately 7 seconds to stop recording.
LIVE STREAMING (UP TO 4K)
You can start a livestream by setting the recording mode in the Mantis WebApp to “Live”.
- Ensure the camera is turned on.
- Press the top button firmly to start streaming.
- The status LED turns magenta while the Insta360 Pro/Pro2 is preparing to stream.
- The status LED turns off when the Insta360 Pro/Pro2 is streaming to not interfere with the video.
- Note: The Insta360 Pro2 takes approximately 10 seconds before it starts streaming.
- To stop a live-stream, press the lower button.
Troubleshooting
- If the camera does not start streaming, try pressing the top button again.
- If another controller (computer, phone) was connected to the camera, the Mantis Spray controller cannot connect and start a recording. In this case the status LED blinks magenta.
- If the camera still does not start streaming and the display remains unchanged, reboot the camera and try again.
Alternatively, you can use the Insta360 Pro App to control the camera and start/stop a livestream.
LIVE STREAMING (8K)
The Insta360 Pro2 supports 8K live-streaming with firmware 1.2 and a special 8K Livestreaming software which can be purchased separately from Insta360.
https://www.insta360.com/enterprise/industries/livestreaming
The 8K livestream can only be started from Insta360’s Livestreaming software and not with the Mantis Spray enclosure controls.
Please follow the Insta360 Livestreaming instructions to start/stop the 8K livestream.
CAPTURING TIME-LAPSE PHOTOS
You can capture time-lapse photos by setting the recording mode in the Mantis WebApp to “Timelapse”.
Note: The Insta360 Pro/Pro2 needs to be configured with the Insta360 Pro App for time-lapse photo mode before entering the water.
- Ensure the camera is turned on
- Press the on/off button to enter photo mode.
- Press the on/off button again to start taking photos.
Alternatively, you can use the main on/off button to start/stop time-lapse recording without using the Mantis Spray controller buttons. This will record time-lapse photos even when the recording mode is set to a video format.
- To Stop, press the mechanical button to stop taking photos.
- The camera remains in photo mode. You can still start video recording by pressing the top Mantis Spray controller button.
SWITCHING BETWEEN INSTA360 APP AND MANTIS CONTROLLER
The Insta360 Pro/Pro2 only allows one active device connection at a time. When the Insta App is connected, the Mantis Spray controller can’t connect and vice versa. Please use the Mantis Spray controller WebApp to disconnect or reconnect the Mantis Spray controller from the camera.
Unlike the Mantis Sub, the Mantis Spray controller is configured to not automatically connect to the Insta360 Pro/Po2. This is because we anticipate that most customers will use a remote device to control and monitor the livestream.
WiFi access:
- Connect to the Insta360-Pro WiFi with password 88888888
- Navigate to http://192.168.43.2 / to open the Mantis WebApp
- Follow on-screen instructions.
Ethernet access:
- Configure your computer as described in the section “Wired connection –Direct connection mode” at https://onlinemanual.insta360.com/pro2/en-us/basic/prepare/connection
- Connect the Ethernet cable to your computer configured
- Navigate to http://192.168.1.101/ to open the Mantis WebApp
- Follow on-screen instructions.
RECOMMENDED CONFIGURATION SETTINGS FOR LIVE STREAMING

TROUBLESHOOTING
Situation: Camera doesn’t turn on when power button is pressed Reason: Camera battery is empty, or camera needs resetting Resolution:
- Force turn off camera (Hold Camera Power Button for 10s to force)
- Restart camera (Hold Camera Power Button for 1s)
- Wait for camera to start.
Situation: LED Blue (forever)
Reason: Mantis Controller failed to boot properly Resolution:
- Reinstall firmware
- Navigate to https://www.mantis-sub.com/downloads and download firmware,
- Follow online instructions for installing the firmware.
Situation: LED White or Cyan
Reason: Camera powered off Resolution:
- Turn on camera (Hold Camera Power Button for 1s)
Situation: LED White
Reason: Camera on but not connected Resolution, on surface:
- Turn off camera (Hold Camera Power Button for 3s, or 10s to force)
- Reset controller (Press Start Recording Button 5x)
- Restart camera (Hold Camera Power Button for 1s)
- Wait for connection.
Resolution: - Turn off camera (Hold Camera Power Button for 3s, or 10s to force)
- Reset controller (Press Start Recording Button 5x)
- Restart camera (Hold Camera Power Button for 1s)
- Wait for connection.
Situation: LED blinking Green/Yellow
Reason: Other controller is connected to camera (e.g. Insta App) and blocking connection by the Mantis controller.
Resolution:
- Disconnect Insta360 App
Situation: LED blinking Blue
Reason: Other controller is connected to camera (e.g. Insta App)) and blocking connection by the Mantis controller.
Resolution:
- Disconnect Insta360 App
Situation: Camera does not start recording Reason: Camera connection error. Resolution:
- Repeat Camera Power Button press
- Restart camera if problem persists
Situation: Camera does not stop recording Reason: Camera malfunction.
Resolution:
- Press Camera Power Button to stop recording
- Observe viewport and wait for camera to enter ready state
- Press Stop Recording Button (#3)
- Restart camera if problem persists
Situation: Camera connection error persists. Reason: Camera/Controller malfunction.
Resolution:
- Turn off camera (Hold Camera Power Button for 3s, or 10s to force)
- Reset controller (Press Start Recording Button 5x)
- Restart camera (Hold Camera Power Button for 1s)
- Wait for connection.
DECLARATION OF CONFORMITY

For Customers in the U.S.A.
Trade Name: MANTIS SUB
Model No.: Mantis Sub/Spray
Responsible Party: Global Dive Limited, Auckland, New Zealand
FCC STSTEMENT
This equipment has been tested and found to comply with the limits for a class B digital device, pursuant to part 15 of the FCC Rules. These limits are designed to provide reasonable protection against harmful interference in a residential installation. This equipment generates, uses and can radiate radio frequency energy and if not installed and used in accordance with the instructions, may cause harmful interference to radio communications. However, there is no guarantee that interference will not occur in a particular installation. If this equipment does cause harmful interference to radio or television reception, which can be determined by turning the equipment off and on, the user is encouraged to try to correct the interference by one or more of the following measures
- Reorient or relocate the receiving antenna
- Increase the separation between the equipment and receiver
- Connect the equipment into an outlet on a circuit different from that to which the receiver is connected
- Consult the dealer or an experienced radio/TV technician for help
This equipment has been verified to comply with the limits for a class B computing device, pursuant to FCC Rules. In order to maintain compliance with FCC regulations, shielded cables must be used with this equipment. Operation with non-approved equipment or unshielded cables is likely to result in interference to radio and TV reception. The user is cautioned that changes and modifications made to the equipment without the approval of manufacturer could void the user’s authority to operate this equipment.
Caution
You are cautioned that any changes or modifications not expressly approved in this manual could void your authority to operate this equipment.
Caution: Exposure to Radio Frequency Radiation
This device must not be co-located or operating in conjunction with any other antenna or transmitter. Contains TX FCC ID: OYR-CFWU710N
For Customers in Canada
This device complies with Industry Canada licence-exempt RSS standard(s). Operation is subject to the following two conditions: (1) this device may not cause interference, and (2) this device must accept any interference, including interference that may cause undesired operation of the device.
Caution: Exposure to Radio Frequency Radiation
The installer of this radio equipment must ensure that the antenna is located or pointed such that it does not emit RF field in excess of Health Canada limits for the general population; consult Safety Code 6, obtainable from Health Canada’s website www.hc-sc.gc.ca/ewh-semt/pubs/radiation/radio_guide-lignes_direct-eng.php#sc6
Contains TX FCC ID: OYR-CFWU710N
For Customers in Europe
Notice for the customers in the countries applying EU Directives.
Hereby, Global Dive Limited, declares that this equipment is in compliance with the essential requirements and other relevant provisions of Directive 1999/5/EC. For details, please access the following URL: https://www.mantis-sub.com/
If static electricity or electromagnetism causes data transfer to discontinue midway (fail), restart the application or disconnect and connect the communication cable
(USB, etc.) again.
This product has been tested and found compliant with the limits set out in the EMC regulation for using connection cables shorter than 3 meters (9.8 feet).
The electromagnetic fields at the specific frequencies may influence the picture and sound of this unit.
Caution: Exposure to Radio Frequency Radiation
This device must not be co-located or operating in conjunction with any other antenna or transmitter.
Contains TX FCC ID: OYR-CFWU710N
INTERFERENCE
This equipment has been tested and found to comply with the limits for a class B digital device, pursuant to part 15 of the FCC Rules. These limits are designed to provide reasonable protection against harmful interference in a residential installation. This equipment generates, uses and can radiate radio frequency energy and if not installed and used in accordance with the instructions, may cause harmful interference to radio communications. However, there is no guarantee that interference will not occur in a particular installation. If this equipment does cause harmful interference to radio or television reception, which can be determined by turning the equipment off and on, the user is encouraged to try to correct the interference by one or more of the following measures
- Reorient or relocate the receiving antenna
- Increase the separation between the equipment and receiver
- Connect the equipment into an outlet on a circuit different from that to which the receiver is connected
- Consult the dealer or an experienced radio/TV technician for help
This equipment has been verified to comply with the limits for a class B computing device, pursuant to FCC Rules. In order to maintain compliance with FCC regulations, shielded cables must be used with this equipment. Operation with non-approved equipment or unshielded cables is likely to result in interference to radio and TV reception. The user is cautioned that changes and modifications made to the equipment without the approval of manufacturer could void the user’s authority to operate this equipment.
Contains TX FCC ID: OYR-CFWU710N
TRADEMARKS
- Insta360 and Pro/Pro2 are trademarks or registered trademarks of Shenzhen ARASHI VISION INC.in the United States and/or other countries.
- NAUTICAM is a trademark of NAUTICAM HOLDINGS LIMITED.
- All product names, logos, brands, trademarks and registered trademarks are property of their respective owners. All company, product and service names used in this manual are for identification purposes only. Use of these names, trademarks and brands does not imply endorsement.
CONTACT
Global Dive Limited 52 Remuera Road Newmarket, 1050 Auckland
New Zealand
Web: https://www.mantis-sub.com/
Email: info@mantis-sub.com
Tel: +64 (0) 9 920 5200
Documents / Resources
 |
MANTIS INSTA360 PRO/PRO2 Spray Enclosure [pdf] Owner's Manual Insta360 Pro, Insta360 Pro2, INSTA360 PRO PRO2 Spray Enclosure, INSTA360 PRO PRO2, Spray Enclosure, Enclosure |