User Guide for Visel Italiana models including: MICROPRINT Lite Queue Management System, MICROPRINT, Lite Queue Management System, Queue Management System, Management System
MICROPRINT Queue management system up to 6 services User guide for device management
File Info : application/pdf, 30 Pages, 1.65MB
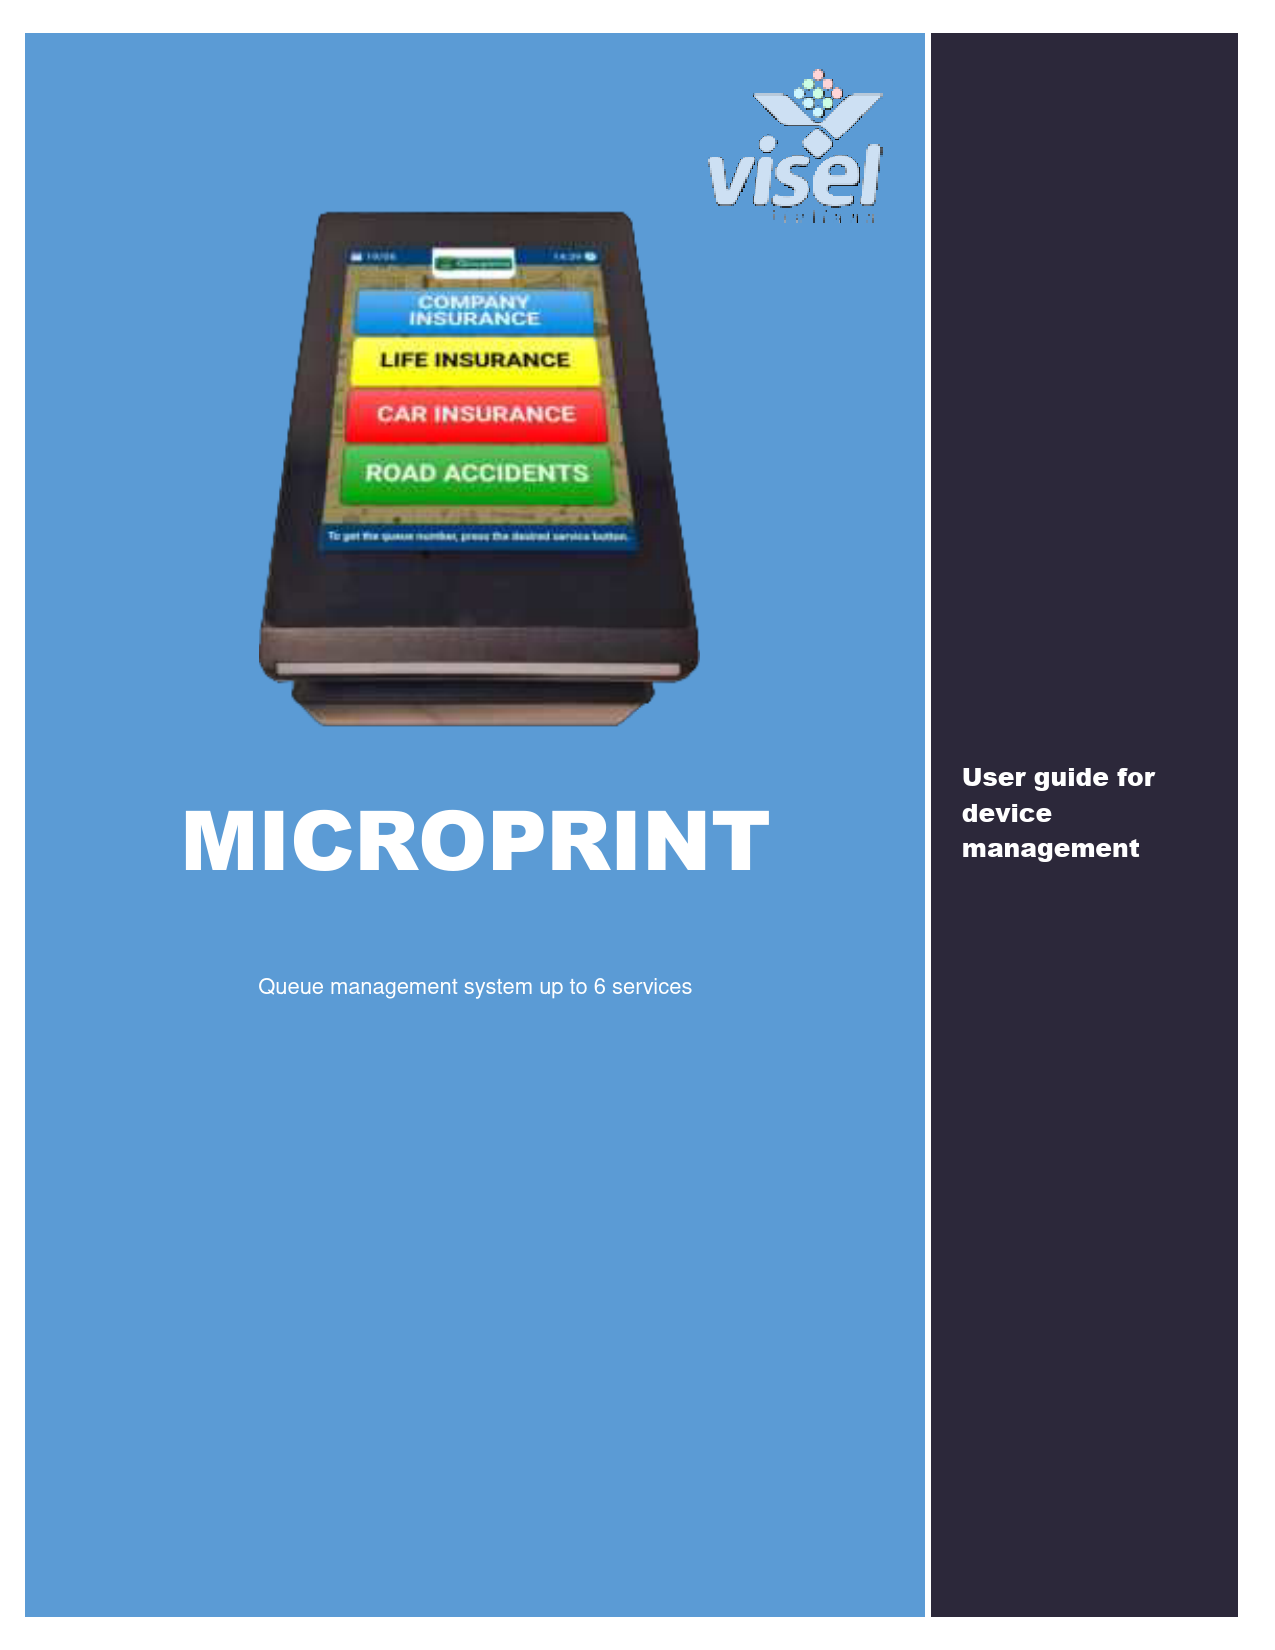
DocumentDocumentMICROPRINT Queue management system up to 6 services User guide for device management MICROPRINT Multimedia queue system up to 6 services User manual for Device management Overview Description and context of the product MICROPRINT is a smart solution for managing a discrete user stream. This device can handle up to 6 different queues and 20 call stations and has a thermal nozzle with a touch screen of 8". Figure 1 Microprint System Example Operation MICROPRINT is compatible with QS-LCDBOX (main display shown in Figure 1), QSSUMMARYBOX and other models. The communication between the server and the client is via the LAN, so it is appropriate to configure the box with a static IP address. To manage the numbering you can use The Classic Microtouch Console (virtual CLIENT for PC), The serial consoles or WiFi. 1 Visel MICROPRINT | User Manual First Installation Unpackaging The installation of MICROPRINT consists of a few simple steps: Unpackage device and connect the power supply Hold power button to switch on Connect the network cable Wait for the system to boot Setting up the System Q-Discovery Q-Discovery is the Universal Visel tool for configuring LAN devices. It consists of a PC compatible application with Windows 7 or higher operating system. Visel recommends installing Q-Discovery only on the ADMINISTRATOR's PC, in such a way as to prevent non-workers from tampering with the system configuration. Download Q-Discovery from Download section of www.visel.it Install and launch the application Click on "Search for Devices" to start the configuration MICROPRINT MICROPRINT must work with a STATIC IP address. To configure a static IP follow these steps: Connect a USB mouse to the device Click on the mouse right button to exit from the app Go to the system settings and the Other->Ethernet section and set the network parameters for Static IP. Exit the settings and go to the main menu and wait the launch of the MicroTouch Application If MICROPRINT is configured correctly, it will be possible to manage its settings through the QDiscovery application. 2 Visel MICROPRINT | User Manual Figure 2 Q-Discovery: search device Select QS-MICROPRINT and press "settings". The secondary screen will appear: This panel contains all the configurations useful for the correct functioning of the queue management server. Let's examine all accessible properties except for those that are disabled. 3 Visel MICROPRINT | User Manual General Settings General/Network Parameters Proprietà Descrizione Operating mode MicroTouch Master/Slave to install more than on ticket pickup point Master Server If Operating Mode is SLAVE, setup the Master Server IP address IP Address Sync Button Syncs the SLAVE with the MASTER, importing all services configuration. TCP/IP Client Communication port for virtual clients (MicroTouch Counter, MicroTouch Port Reception, QS-WCONS, QS-SMARTKEY) TCP/IP Display port Communication port for display (QS-LCDBOX, QS-LCD10A, etc.) Language Select the user interface language Standby Select a timeout before a screen saver appears Impostazioni generali di gestione code Proprietà Descrizione Daily queue reset If enabled, MICROPRINT must reset the numbering on all services upon detection of the date change. Show queued If enabled, MICROPRINT show the current number of queued users on the users on service buttons on the touch display service button Disable ticket If enabled, MICROPRINT disable ticket distribution temporarily. An information dispensing message will be shown on the touch display that the system is out of order. Other Settings Standby settings Indicates the maximum inactivity time beyond which to preserve the screen with a black and white animation. Theme Indicates the background image to be applied to the home screen according to your needs. Welcome message Allows you to enter and customize a welcome message. Custom Logo Allows you to choose a logo that will be shown on the home screen header in the center. The same logo will be automatically converted to black and white and used for printing. "Summary" monitor options It allows, in monitors such as QS-SUMMARYBOX, to classify the latest calls by service or by counter. 4 Visel MICROPRINT | User Manual Integration Panel Delfi Allows you to configure summary displays of the VISIO4K type. For more information on these products, contact your Delfi supplier. Telemetry It allows you to activate, upon purchase and activation of a QS-TELEMETRY license, the sending of real-time data on the services. By clicking this button, you access a secondary screen where you can configure a data target URL and a cyclical time interval. QS-TELEMETRY working At regular time intervals, MicroPrint will make an http request by posting a JSON string containing a list of objects with this information: service_name: Service's name queue_count: Amount of users on hold waiting_time_avg: Average of waiting time in seconds color: Service color id: Service ID last_ticket: Last served ticket The list will contain as many objects as there are active services and will be encrypted with a default Base64 algorithm. The name of the POST variable in which the data is located is data. QS-TELEMETRY is compatible from QS-SOFTMICRO version 4.3.0. To activate this functionality on previous models it will be necessary to update QS-SOFTMICRO to at least version 4.3.0 and Q-Discovery to at least version 4.1.6. To activate QSTELEMETRY it will be necessary to purchase a license and activate it by contacting our customer assistance. 5 Visel MICROPRINT | User Manual Serial Device Management (counter display and tabletop console) MICROPRINT is compatible with two types of serial devices: the counter Display (QS-CDS3) and the table Operator console (QS-CONS). To allow the use of this hardware on your MicroPrint system you must have also purchased the RS485-RS232 signal Converter, the CONVERTER (Figure 2a). The latter must be connected via a standard 9-pin serial cable included in the package to the serial connector on the bottom of the MICROPRINT. Figure 4a RS485-RS232 (CONVERTER) To include serial devices during MICROPRINT installation, check the enable Serial device support box and press the button that depicts a wrench: Figure 5B Managing Serial Devices 6 Visel MICROPRINT | User Manual To add a serial console, from the first table, double-click the row for the keyboard ID you want to add. The Logic Bindings window for the console will be displayed: Figure 6D Logic bindings for the console Configuring logic bindings for the console Property Description Managed Services Call on the counter display Auto-Call Indicates on which services the console will operate Indicates on which serial counter display the call from this console should be displayed. In the absence of a counter display it is a good idea not to select anything from this table. Indicates whether the console must make the automatic call on all selected services. Identity The name of the location on which the console is installed. N° Identity Number of the station on which the console is installed. To save the changes, click OK, otherwise click Cancel. 7 Visel MICROPRINT | User Manual To add a counter Display, from the second table, double-click the row for the display ID you want to add. The logical Bindings window for the display will be displayed: Figure 7e Logical associations for door displays Configuring logical bindings for the counter Display Property Description Flashes Indicates how many flashes the display will have when the new call arrives. Sound Indicates whether a beep should be played when the call arrives View calls from virtual clients Indicates whether the display should show calls from the selected MicroTouch consoles from the list. 8 Visel MICROPRINT | User Manual Service Management In This panel you can configure up to 12 different queues, the relative numbering and the color that will appear on the slave displays. To enable a service, select the checkbox for the service you want to enable To change name to a service double click on the box containing the name To change the letter double click on the box containing the letter To change the count interval double click on the box containing the number To change the color double click on the Colored box Service Menu Selecting a service from the list and clicking on it with the right mouse button will have access to a menu for advanced management, as shown in the following figure: Figure 3 Service Menu Single emission flow FROM-> to This option indicates that the service will issue a daily ticket of a limited number of tickets. A number of tickets will be printed equal to the difference between the value in column A and that in column FROM, + 1. For example, we need the butcher service to dispense only 50 tickets every day: we will set up a single emission stream on the butcher service and in the field to enter a value of 1, in the To field we will insert the value 50. Perpetual emission Stream FROM <-> to This option indicates that the service will perform a cyclic daily ticket issue. The consecutive number of tickets will start from the value in the FROM column. When the counter reaches the value set in column A, the numbering will restart from the value set in the FROM column. Manage the pronunciation of the service It may happen that the narrator does not pronounce well the name of a service, such as the acronym CUP (Single Reservation center). Narrator tends to internationalise English terms of common use and, in this case, the pronunciation will be "cap" (Cup/Trophy in English). The solution to this drawback will be to select this item from the menu and type the text "kupp" to correct the pronunciation. 9 Visel MICROPRINT | User Manual Priority on call If we need to create one or more files that have a different call priority, we must set a service priority. Placing your mouse on the "Call priority" entry will open a sub-menu with the entries: Low priority Standard High priority Graduated Priority Let's analyze the three priorities in blue, momentarily taking part in the Graduated Priority. If for example we are configuring the system in a pharmacy and we need to create a priority queue for pregnant women, just enable a service from the list, rename it "pregnant women" and set a "high priority". After the changes are applied, MICROPRINT will call the "pregnant women" service users until the ticket is exhausted, without taking into account the arrival time. In summary, the priority in MICROPRINT Systems is handled in this way: The tickets belonging to the services with different level priorities will be escaped until queue is exhausted in priority order: high priority, then Standard and finally low priority. Tickets belonging to the services with sibling priorities will be escaped chronologically. Graduated Priority The last type of priority assignable to services is the Graduated Priority. This particular condition allows to make calls according to a specific directive and helps to regularize the user flows where one or more services tend to accumulate more users queued than the others. Using the Graduated Priority, however, implies these limitations: all MICROPRINT-enabled services must be configured with a Graduated Priority, because this type of priority cannot coexist in the presence of other types (high, Standard, or low priority). The Operator console must be configured in auto-call on all active services. Figure 3rd Association of scalar Priorities Immediately after selecting Graduated Priority from the service menu, a second screen will appear from which you can configure theA Call properties: 10 Visel MICROPRINT | User Manual Figure 3b Scalar Priority Properties As can be seen from the window in Figure 3b, with this configuration we tell MICROPRINT that it will have to call 1 ticket of this service and then proceed with the call of other tickets on the next service on which the Graduated Priority is set. In short, this particular type of priority makes it possible to make calls according to a predetermined ladder, to help dispose of irregular but constant flows over time. In this way we can call 3 tickets of the first service, 2 tickets of the second, 3 of the third and 1 of the fourth. When MICROPRINT completes the call list will be cyclically returned to call 3 first service tickets and so on. If there are no conditions to comply with this ladder, the system will proceed in chronological priority. Workgroup Allows to associate a string label to the service for showing its calls only on specific displays. Disable printing when reaching... Allows to stop the ticket emission when the ticket count reach the a limit. The limit is daily. Clone the ticket layout Copy and paste the selected service's ticket layout on another service. Clone the weekly scheduling Copy and paste the selected service's weekly scheduling on another service. Ticket layout For each service you can customize the items that make up the ticket. Select a service from the list and press the ticket Style composition button: Figure 3c Composing the ticket 11 Visel MICROPRINT | User Manual Property Ticket items Up ARROW Down ARROW Trash bin Ticket Preview Horizontal Toolbar Description Shows all the items that compose the ticket layout in print order. Moves an item to the beginning of the ticket. Moves an item toward the end of the ticket. Delete selected item This pane presents a rough preview of the ticket's composition in real time. The representation of the ticket is purely illustrative. To perform a print test you must send the settings to the Micro Touch and then do a test. To confirm the changes, press the "OK" button. Serie di pulsanti per l'aggiunta di elementi nella lista. A partire dal primo pulsante a sinistra abbiamo: LOGO adds logo printing (inserted in the previous screen) SERVICE adds service name printing TICKET adds the printing of the shift number TIMESTAMP adds the ticket's print date and time TEXT adds custom text printing QUEUE adds the user count print to the queue WAITING adds the estimated wait print LINE adds the printing of a horizontal separating machine FEED adds the print of a vertical Space or Press Ok To save the style of the ticket, otherwise Cancel. 12 Visel MICROPRINT | User Manual Weekly opening hours For each service is In addition possible Configure one or more periods of activity on a weekly cyclical scale. When the service is unavailable, the button in home will display the item "CLOSED" and, clicking on it, MicroPrint will show a pop-up window with the detail of the hours of activity of that service. To configure the weekly schedule, select the service and press the button on the Schedule of activities of the Service: Figure 3d Weekly Service Schedule In This example, the "drugs" service is active H24 7 on 7. You can create multiple time bands (always within the week) where medications can be active from Monday to Saturday, from 9:00 to 13:00 and from 15:00 to 20:00. Here is an example: Figure 3e Example of multiple hourly scheduling 13 Visel MICROPRINT | User Manual Instead, we put the case in which "drugs" is active only on weekdays in the same time zone and on the weekend on a continuous basis, for example: Figure 3f Example of hourly/daily multiple scheduling Summarizing: To add a daily rule click the (+)calendar button. Then select the days from the pop-up window and press OK. To add a time slot , select the daily rule and click the (+)clock button. Then set a time interval from the pop-up window and press OK. TO CHANGE a DAILY RULE or time BAND , select the daily rule or time slot and press the gear button. Make the change from the popup window and press OK. 14 Visel MICROPRINT | User Manual Print a report MICROPRINT has a basic reporting module that allows the printing of statistics directly from the main unit. Then press the button on the Printing the Report: Figure 3g Issuing a report with time interval Select the date range and press The Statistics On Print and Then a report similar to the one shown in Figure 3h will be printed: [Date Range selected] General Report This report includes the selected time period, the total of the tickets issued, the total of the tickets served and the total of the estimated lost tickets. Service Report This report relates to the individual queues (or services) and includes the total of the tickets issued, the total of the tickets served, the total of the estimated lost tickets and the average working time of the operators who handled this service. Post Report This report is relative to the individual workstations (or operators) and includes the total of the tickets served, the average waiting time for the users, the average service time of the operators, the total working time of the operators and the time of Work longer than an operator on a user. Figure 3h Report Sample 15 Visel MICROPRINT | User Manual Report Calculation algorithm The life of each ticket is marked by three fundamental timing: The ticket'S date/Time is the time accurately at the millisecond of the time the user picks a ticket which, by convention, we call TE. The ticket'S call Date/Time is the time accurately at the millisecond of the time the operator calls the ticket which, by convention, we'll call TC. The ticket'S closing date/Time is the time accurately at the millisecond of the time the operator concludes the service on the aforementioned ticket which, by convention, we'll call TF. Given that the "average" values correspond to the arithmetic mean of the elements taken into account, let's analyze the calculation algorithm for each individual case report: Estimated lost users are taken into account all tickets whose difference between tF and tC < = 30 sec. Waiting Time Difference betweenTFandTAndof the ticket concerned with the calculation. Service Time Difference betweenTFandTCof the ticket concerned with the calculation. Each ticket (even those estimated lost) is considered for the drafting of the report so it will be appropriate, to get more refined values over time, best use the MICROPRINT console and close the service on the last ticket queued (clicking on the button With the "tick" icon in the lower right corner). You can optionally activate a license of the Advanced Reporting module for MICROPRINT (cod. prod.QS-SOFTSTAT), which allows The MicroTouch Manager software to be installed on the administrator'S PC and has many more features. For more information ON QS-SOFTSTAT And Microtouch Manager We recommend contacting our sales department. Reset... (Zeroing counters) To reset the current sequence number of the service counters simply click on "Reset Micro Touch". MICROPRINT is also able to reset in a completely autonomous way the counters of the enabled services and will do it to the data change detection. 16 Visel MICROPRINT | User Manual System Usage MicroTouch Counter 2020 (Client virtuale per PC) MicroTouch Counter is the new virtual console version for all MicroTouch core systems. This particular version, released as of April 2020, comes under a completely revamped graphic design and includes some useful features not present in the MicroTouch Console. First installation From your PC open a browser window and navigate to www.visel.it and then go to the Downloads section. From here download the MicroTouch Counter application. After downloading, locate the file and start the installation When installation completes, a shortcut will be created on your desktop, and then you will launch the application. Configuration and Preferences After installation, MicroTouch Counter will show the preferences screen, which, in this version, is divided into two parts: General and Network Parameters and Queue management, as you can see in the two figures below: Figure 8.1 Managing General and Network Parameters 17 Visel MICROPRINT | User Manual General and network parameters Property Description Installation type Select the type of server system installed: MicroTouch Standard, MicroTouch Lite or MicroTouch Entry. The console will adjust according to the selected system. IP address and Port User Interface Theme By clicking on the "gear" button you can set the IP address of MICROPRINT. To set values, follow the instructions in the subwindows that will open in succession. Changes the color of the work window. Data Refresh Timer Changes the service status data refresh timer and its queued users. Security timeout Allows you to select a wait time before the next call, to avoid data stacking on room monitors. Featured Window Enables or disables the "foreground" mode for the work window. Security password Protects seat preferences with a keyword. Language Selects the language of the application. You must close and reopen the application for the change to take effect. Figure 8.2 Queue and seat management 18 Visel MICROPRINT | User Manual Queue Management Parameters Property Description Managed services Select the services managed by the station. Check at least one of the listed services. Name and seat number Choose a name and a station for the station. For example, "Counter" 1 Keyboard shortcuts Sets the Call, Recall, and Transfer operations on the function keys (F1 F12). Automatic transfer Applies automatic transfer logic to one or more services when a user is processed. Notification sound Sets a notification sound when the console detects the entry of new users (who pick up a ticket). Click to Save button for the configuration changes to take effect. Click the close window button instead to undo the changes. Using the Console - Work Window At the end of the first configuration, the work window will be shown: Figure 8.3 Main Window of work Let's look at the main sections of the new user interface: 1. Connection LED. Blinks on a regular basis and by color it notifies you of your connection status to the server. 2. Counter identity. Shows the name and number chosen for the station. 3. Queue. Shows the number of users waiting. If auto-calling (AUTOCALL) is active, it will show the total number of users waiting on all services managed by the station. 4. Manual call. Lets you review the list of pending users and call one outside of each priority. 5. Preferences. Opens the seat preferences. 6. Service closure. It closes the service on the current ticket and marks it as fulfilled. 7. Ticket area. Shows the currently managed ticket. 8. Service area. Shows the service on which you are operating. 9. Autocall. Enables or disables automatic calling on all services managed by the station. 19 Visel MICROPRINT | User Manual Custom Call Automation (Step-Mode) It may happen to have special needs for the disposal of the flow of users, that is, to want to organize, based on the average turnout on the various services, the mechanics of the calls. A certainly interesting tool is the Step-Mode, which allows you to create a cyclical lineup of calls. To configure the Step-Mode simply enable the "Step-Mode" checkbox and click on the "gear" button to create a step-list. Property "+" button Button "wrench" "Up" button "Down" button "-" button Call Add a Call Step Description Allows you to change the selected Call Step Moves the selected Call Step to the beginning Moves the selected Call Step to the end Deletes the selected Call Step Set all step with Unitary or Priority call mode. To work in Step-Mode it will be sufficient to enable the Auto-Call on the console and call from the ticket area by clicking with the left mouse button inside it. The Step-Mode algorithm in Unitary mode will continue until there are enough users queuing on the services selected in the call steps, otherwise an error message will be shown and you will have to proceed in manual call. In Priority mode instead, the algorithm makes calls in the Priority level order (1 is the highest level). If two or more services have the same Priority level, the system advances next in time priority. The Step-Mode is available from version 2.2 of MicroTouch Counter and is compatible with all versions of QS-SOFTOUCH, QS-SOFTLITE and QS-SOFTMICRO. 20 Visel MICROPRINT | User Manual Welcome next user (Call) When the console is connected to MICROPRINT, it is ready to perform operations on customers on hold. The first thing to do is to welcome the next user waiting by making a "Call". Hover over theTicket Area and click with the left mouse button. If the service on which you are placed has users on hold, a small animation will be shown and you can accept the new ticket. The Ticket Area will then be red until the Security Timeout has expired. You can then do the next thing you can do. Figure 8.4 Next User's Call Call on other services and change of active service As mentioned earlier, the station can be configured to handle more than one service. To change the active service, left-click on the Service Area and the list of managed services will appear with the number of users waiting: Figure 8.5 Managed Services Panel To make a call on a service other than the active one, hover over the ticket area of the service you want and click with the left mouse button. After the call, the selected service will become active and you can continue with the selected service unless automatic calling is active. 21 Visel MICROPRINT | User Manual Manual call If you need to call a ticket outside of any priority, you can use the Manual Call tool. Hover over the "Users" button and click with the left mouse button, so the list of waiting users will appear. Figure 8.6 List of Pending Users To proceed with the call, select a ticket from the list and press Call. Alternatively, to cancel the process and close the list, press Cancel. Call the same ticket again You can also call the user you just welcomed again. Right-click the main Ticket area to open the operations menu. Now click Recall. Complete the service on the called ticket To refine the calculation of MICROPRINT statistics, it is a good idea to conclude the service on the accepted user. This is done automatically if: proceeds with the call of the next ticket transferred the accepted ticket to another service closes the station To manually complete the service on the called ticket you will simply press on the white check mark that will appear under the "Preferences" button after the call. 22 Visel MICROPRINT | User Manual Transferring a user In some realities there is a need to welcome a user and then transfer them to another service. In order to transfer the called ticket to another service, right-click the Main Ticket Area and choose Transfer from the operations menu. The ticket transfer options will then appear: Figure 8.7 Transfer to another service Then select the recipient service from the choice box and transfer mode by choosing from: With the arrival time: The ticket will be added to the recipient service queue with the same time it was picked up by the user. With the current time: The ticket will be added to the recipient service queue with the time recorded at the time of the transfer confirmation. With a specific time: The ticket will be added to the recipient service queue with a specific time (within the day) and will not be visible at the destination service stations until the specified time is reached. To complete the transfer click Transfer, otherwise press Cancel to close the transfer options. Closing the counter At the end of the working hours, to close the station click on the Service Area and click Close this station. The application will finish after the final steps have been completed. 23 Visel MICROPRINT | User Manual Web Counter (optional license QS-WEBKEY) MicroTouch version 4.0 introduces a new feature for operator seats, the web console. It is a revolutionary calling method that allows operators to manage the queue comfortably through any Browser (Google Chrome, Internet Explorer/Edge, Firefox...). This optional package is constrained to activate a number of licenses equal to each operator within the facility. After activating one or more QS-WEBKEY licenses, the "Web Counter Accounts" button will appear in the MICROPRINT settings window in Q-Discovery, which will allow you to manage the call station accounts: To configure a seat, simply select one from the list of available accounts, specify its title (e.g. Counter), login credentials, and finally managed services by checking the boxes. When you are finished configuring each station, press the "Save" button. Installation QS-WEBKEY does not require any operator-side installation, just create a Desktop shortcut to this address: http://IP_MICROPRINT:8080 replacing IP_MICROPRINT the real IP address of the central unit. 24 Visel MICROPRINT | User Manual Usage After opening the login page, enter your credentials in the appropriate text fields and click "Enter": Controls list Button/Icon/Area Description Menu (to the left of the station name) Opens/closes the list of services managed by the operator Phone cornet Enables/disables automatic calling Current Customer Blue Area Makes the call of the next user on hold Current customer Users icon Current customer right arrow Current customer circular arrows Calls a specific user from the list of pending tickets This button appears only after you make a call and allows you to transfer the ticket to another service This button appears only after you make a call and allows you to call the same ticket again Current customer check This button appears only after you make a call and allows you to mark mark the ticket as fulfilled To make a call from another of the managed services, simply click on the dark gray box for the service you want to advance. The new ticket you call will appear in the "Current Customer" section. 25 Visel MICROPRINT | User Manual Web display (optional license QS-QUEUEWEB) MicroTouch version 4.0 also introduces a summary display version compatible with major browsers and allows you to view a history or summary of the latest calls within a web page (obviously under the system's local LAN network). This optional package can be used after license activation for each MICROPRINT server installed in the facility. After activating the license, the "Web Queue" button will appear in the MICROPRINT settings window in Q-Discovery, which will allow you to manage the display settings of the web display: Queue Management Parameters Property Description Display mode Choose how numbers appear in History mode (last calls in chronological order) or In Summary mode (last calls for each service) Number of visible calls Choose the number of boxes containing the tickets that are called from a minimum of 1 to a maximum of 4 Flashes last call Sets the number of flashes to animate the input of the last call It also shows the number of the station Show or hide information from the calling station (e.g. SPORT 1) Uppercase texts Makes it easier to read by turning all text to uppercase Installation QS-QUEUEWEB can be reached at this address: http://IP_MICROPRINT:8080/display.html replacing IP_MICROPRINT the real IP address of the central drive. 26 Visel MICROPRINT | User Manual WiFi Console (QS-WCONS) An alternative tool to manage the numbering progress is the WiFi console (COD. prod. QSWCONS). This device looks like the traditional flush console but with the addition of a WiFi module to connect to a router or access point. However, each MICROPRINT system that includes the installation of a WiFi console is also equipped with a pre-configuredAccess Point. QS-WCONS, thanks to its advanced firmware, allows you to modify your configuration through Q-Discovery. These consoles are Pre-configured To connect To the default WiFi network Visel Which mirrors this identity: Figure 9 QS-WCONS SSID: visel_air PASSWORD: visel489553 After turning on the console and making sure it is connected under the same network as the PC running QDiscovery, you can do the search for the devices: Figure 9a Configuring a QS-WCONS Select the WiFi console from the list of devices and click on settings to access the configuration window. As you can see from the second screen, the configuration is very similar to that of MICROPRINT consoles. Then set the IP address of the MICROPRINT and press Refresh to get the list of services, then select the services managed by this console and Click Apply Changes. 27 Visel MICROPRINT | User Manual MicroTouch Smart Controller The latest news regarding the MicroTouch range is undoubtedly the MicroTouch Smart Controller (Cod. Prod. QS-SMARTKEY), which consists of an Android smartphone or tablet application capable of managing the shift numbering. MicroTouch Smart Controller is an optional product and requires the purchase of a license for any smartphone or tablet on which the software will be installed. After installing the software on the device the main screen will be shown. You will need to configure the MICROPRINT shortcut by opening the settings (top right button). Figure 10a QS-SMARTKEY Configuration Figure 10b QS-SMARTKEY properly configured Figure 10c Calling the next user After the connection, the app will present itself as in Figure 10b, ready to handle the numbering: Button Automatic Ch Service Call ticket Right Arrow Circular arrows Check mark Small arrow Action Sets the operation of the console in AUTO-CALL Move management to another service Allows you to arbitrarily call a ticket waiting on that service Allows you to call the next user waiting Allows you to call the ticket already taken in charge Signals to MICROPRINT that the ticket operations taken are terminated Allows you to transfer to another service the ticket taken in charge 28 Visel MICROPRINT | User Manual Slave Display, summary and counter MICROPRINT is compatible with range box slave devices and more, such as: QS-LITEBOX, QSLCDBOX, QS-LCD10A etc.. As regards their configuration, it is advisable to refer to the relative user manuals on our website www .visel.it, in the section: Download -> User Manuals. Troubleshooting I can't find MICROPRINT with Q-Discovery Verify that the MICROPRINT and THE PC You are running Q-Discovery are connected to the same network. If this is the case, check for firewalls on the network. Q-Discovery does not read or apply settings It's most probable that there's a problem with the bundled FTP server on port 2121 of MICROPRINT. Please contact the customer care The printer performs a continuous beep In the event that the printer emits a continuous intermittent beep, the causes may be: Dirty paper sensor. Wipe with an antistatic cloth slightly moistened with alcohol. Paper compartment not closed properly. Hardware problem in the print logic. If other types of problems arise, we advise you to contact our telephone support before performing any type of intervention that could create further anomalies. Visel Italiana Srl Via Maira snc 04100 Latina (LT) Tel: +39 0773 416058 Email: sviluppo@visel.it Document written on 06/04/2023 Updated on 13/07/2023. 29 Visel MICROPRINT | User Manual